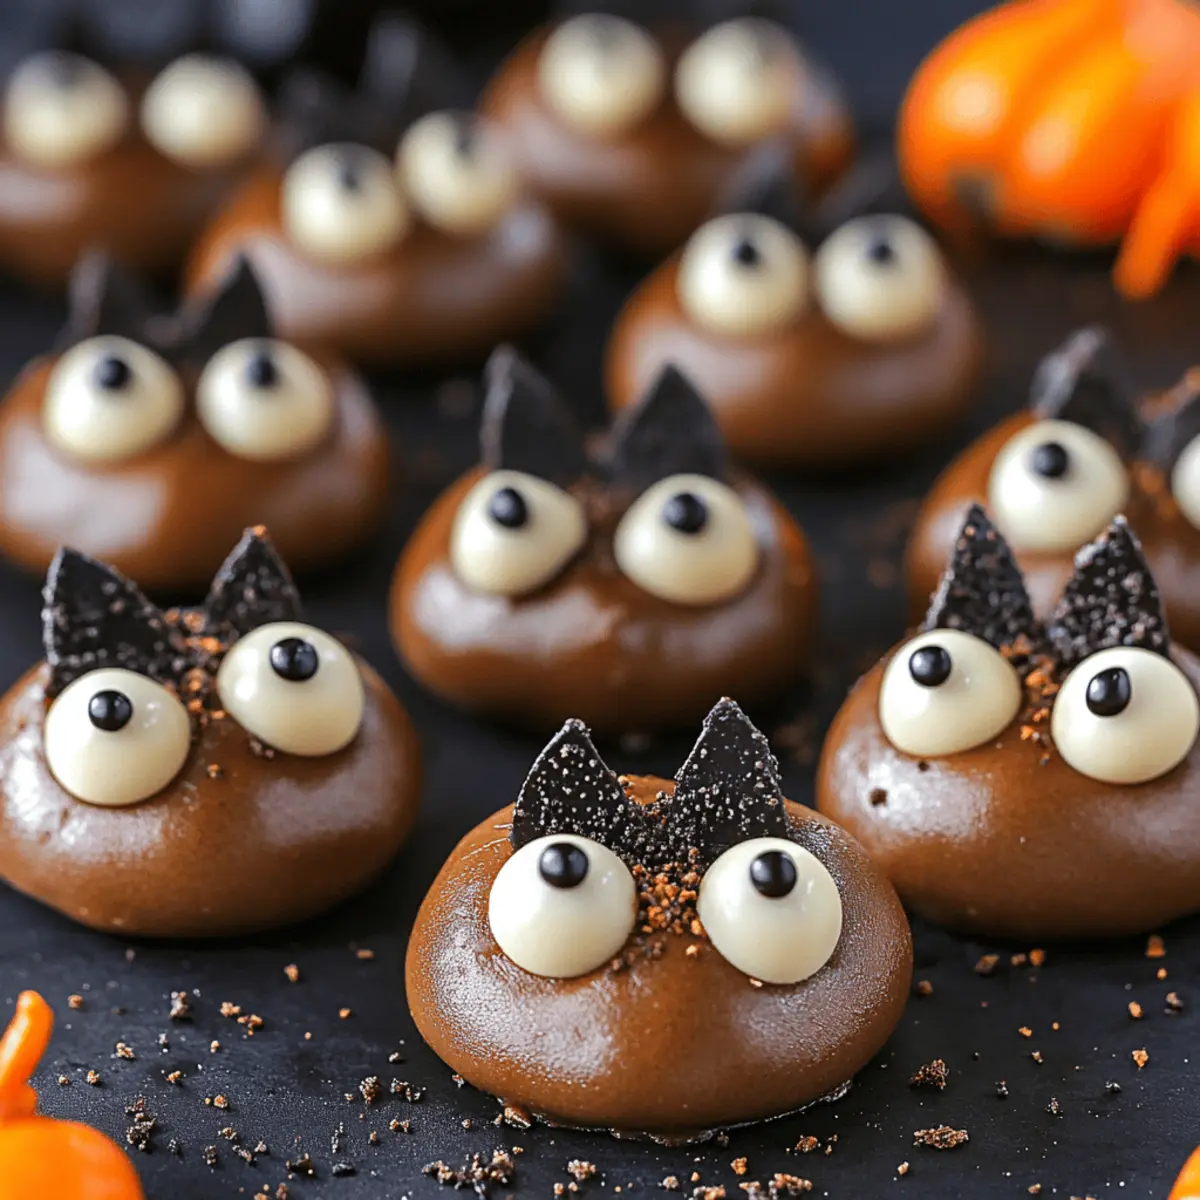
While rummaging through my pantry for a sweet escape from the usual, I stumbled upon a treasure: Oreo Cookie Balls. Combining the nostalgia of a classic cookie with a playful twist, these Bat Oreo Cookie Balls are sure to charm everyone from kids to adults. Not only are they quick to prepare, but they also make a fantastic treat for gatherings or cozy nights in. With just a few simple ingredients and no baking required, you can whip up these delightful bites in no time. Picture a deliciously creamy center, coated in chocolate and adorned with mini chocolate chip eyes and wings—it’s the perfect indulgence to satisfy any sweet tooth. Are you ready to impress your friends and family with these tempting little treats?
Why Are These Oreo Cookie Balls a Hit?
Irresistible Tradition: Combine the classic flavor of Oreos with a delightful twist that everyone loves.
Easy Prep: Minimal ingredients and no baking involved—perfect for busy chefs!
Kid-Friendly Fun: Get the whole family involved in creating these charming bat treats.
Versatile Treat: Ideal for Halloween parties, cozy movie nights, or any festive gathering. For more sweet inspirations, check out our homemade dessert ideas to keep the fun going!
Crowd-Pleaser: With a creamy center and chocolatey exterior, these bites will vanish from the plate in no time.
Oreo Cookie Balls Ingredients
For the Batter
- Chocolate sandwich cookies (Oreo) – 14.3 oz – The star of our treats, providing that familiar, sweet flavor.
- Cream cheese – 8 oz – Adds a rich, creamy texture that perfectly complements the cookie crumbs.
For the Coating
- Chocolate candy coating – 10 oz – Choose Ghirardelli melting wafers, Wilton Candy Melts, or Almond Bark for a smooth finish.
For the Decorative Touch
- Mini chocolate chips – A fun and easy way to create eyes and ears for your adorable cookie bats!
This simple yet delightful combination is all you need to create these fun Oreo Cookie Balls that everyone will adore!
Step‑by‑Step Instructions for Oreo Cookie Balls
Step 1: Crush the Cookies
Begin by placing your chocolate sandwich cookies (Oreo) into a food processor or blender. Pulse the cookies until they are finely crushed into crumbs, resembling sand. This should take about 1-2 minutes. If you prefer a chunkier texture, pulse just a few times for larger pieces. Make sure there are no large chunks left; evenly crushed cookies will create a smooth batter for your Oreo Cookie Balls.
Step 2: Combine Ingredients
In a mixing bowl, combine the cream cheese with the crushed Oreo cookie crumbs. Use a spatula or electric mixer to blend the mixture until it’s completely smooth and well incorporated. This process should take about 2-3 minutes. You want a thick, cohesive mixture that you can easily mold into balls. The creamy texture complements the chocolate cookie flavor beautifully, setting the stage for your tasty Oreo Cookie Balls.
Step 3: Form the Balls
Using about one tablespoon of the mixture per ball, roll the creamy Oreo mixture into 1-inch balls using your hands. Place each ball onto a parchment-lined baking sheet, ensuring they are evenly spaced. Aim for about 28-30 balls for the perfect serving. Once shaped, these balls should look smooth and round, ready to chill to firm up the texture, making them easier to coat in chocolate later.
Step 4: Chill the Balls
Transfer the baking sheet with the formed balls into the refrigerator and chill them for about 1 hour. This step is crucial, as it allows the Oreo Cookie Balls to firm up, making the coating process smoother. While chilling, you’ll notice they will become slightly firmer and hold their shape better, ensuring a delightful bite.
Step 5: Prepare the Wings
While the Oreo Cookie Balls chill, carefully remove the filling from the remaining Oreo cookie halves. Using a sharp knife, slice the cookie parts into halves to create little wings. Aim for about 30 pairs of wings to match the number of cookie balls you created, setting them aside for the next assembly step. This adds a playful, decorative touch to your Oreo Cookie Balls.
Step 6: Melt the Chocolate
In a microwave-safe bowl, melt the chocolate candy coating of your choice (such as Ghirardelli melting wafers or Wilton Candy Melts) in 30-second intervals. Stir between each interval until the chocolate is smooth and completely melted, which should take about 1-2 minutes total. Make sure the chocolate is fluid and not too hot to ensure a nice, even coating on your Oreo Cookie Balls.
Step 7: Coat the Balls
Once your Oreo Cookie Balls are chilled and the chocolate is melted, dip each ball into the warm chocolate, allowing any excess to drip off. Place the coated balls back onto the parchment paper after dipping. Make sure each Oreo Cookie Ball is fully covered for that delicious chocolate exterior. Continue this process until all are beautifully coated and ready for decoration.
Step 8: Attach the Wings
While the chocolate coating is still soft, quickly attach the sliced cookie halves as wings on each Oreo Cookie Ball. Hold them in place for a few seconds until the chocolate sets slightly. This is where your cookie balls transform into adorable bats. The key is to work promptly to ensure the wings adhere well to each ball before the chocolate hardens completely.
Step 9: Add Final Touches
To complete your Oreo Cookie Balls, add mini chocolate chips for the eyes and ears. Gently press them into the warm chocolate to secure them, using a dab of leftover melted chocolate if needed for extra stickiness. This fun decoration is what makes these treats irresistibly cute and perfect for any party or gathering.
Step 10: Store and Enjoy
Finally, store your delightful Oreo Cookie Balls in the refrigerator. They will remain fresh for about 1 week, making them a great make-ahead treat for gatherings. When serving, simply take them out of the fridge, and enjoy these whimsical bat-inspired treats whenever you're ready for a bite of joy.
How to Store and Freeze Oreo Cookie Balls
Fridge: Store your Oreo Cookie Balls in an airtight container in the fridge for up to 1 week. They’ll stay fresh and tasty, ready for whenever you crave a delightful treat.
Freezer: For longer storage, you can freeze the cookie balls. Place them in a single layer on a baking sheet to freeze for 1-2 hours, then transfer to an airtight container or freezer bag. They can last for up to 3 months!
Thawing: When you're ready to enjoy frozen Oreo Cookie Balls, simply transfer them to the fridge for a few hours or let them sit at room temperature for about 30 minutes to soften.
Reheating: These treats are best enjoyed chilled or at room temperature—no reheating needed, just savor that creamy, chocolaty goodness!
Oreo Cookie Balls Variations
Feel free to get creative and add your personal touch to these delightful treats, making them uniquely yours!
- Gluten-Free: Use gluten-free chocolate sandwich cookies for a totally guilt-free treat that everyone can enjoy.
- Nutty Addition: Add finely chopped nuts or nut butter to the mixture for a delightful crunch and flavor boost. The richness of the nutty essence perfectly complements the chocolatey goodness.
- Minty Fresh: Incorporate a few drops of mint extract into your cream cheese mixture for a refreshing mint-chocolate twist! It brings a delightful zing that elevates these treats to a whole new level.
- Spicy Heat: Stir in a pinch of cayenne pepper or chili powder for a bit of unexpected heat. This surprising twist will surely intrigue and tantalize your taste buds.
- Dairy-Free Delight: Substitute the cream cheese with a dairy-free alternative and use dairy-free chocolate coating for a vegan-friendly option. You can still achieve that rich, creamy texture with delicious results!
- Fruit Fusion: Fold in some chopped dried fruits like cherries or cranberries for a chewy texture and fruity flavor. This will add layers of taste that pleasantly surprise in every bite.
- Caramel Coating: Drizzle melted caramel on top of your coated balls before adding the chocolate wings for an indulgent upgrade. Who can resist the combination of caramel and chocolate?
- Seasonal Sprinkles: Decorate with themed sprinkles or colored chocolate for different occasions, like red and green for Christmas or pastel colors for Easter. It’s a fun way to dress them up for any celebration!
With these variations, your Oreo Cookie Balls will become even more irresistible, ensuring everyone leaves with a happy heart and a satisfied smile! For more tasty treats, don’t miss our collection on homemade dessert ideas.
What to Serve with Bat Oreo Cookie Balls
Pairing the delightful sweetness of Bat Oreo Cookie Balls with complementary sides and treats will elevate your dessert experience. Let’s dive into some irresistible accompaniments!
-
Creamy Vanilla Ice Cream: A scoop of rich vanilla ice cream offers a cool contrast to the chocolatey goodness of the cookie balls. It’s a match made in dessert heaven.
-
Fresh Berries: Bright, tart berries add a refreshing burst of flavor, balancing the sweetness with a hint of acidity. Think strawberries or raspberries for a vibrant touch.
-
Chocolate Dipped Pretzels: Crunchy, salty pretzels coated in chocolate provide a delightful textural contrast that enhances the overall snacking experience. It’s sweet meets salty perfection!
-
Caramel Sauce Drizzle: A drizzle of warm caramel sauce can bring a luscious richness, making each bite an indulgent experience. Your guests will love this extra layer of flavor!
-
Flavored Sparkling Water: A bubbly drink infused with lemon or berry flavors will cleanse the palate between bites, ensuring those delicious cookie balls remain the star of the show.
-
Mini Cupcakes: Whipped up in various flavors, mini cupcakes pair beautifully with the bat cookie balls for a whimsical dessert tray. The cuteness factor is off the charts!
-
Espresso or Coffee: A well-brewed cup of espresso or coffee balances the chocolatey sweetness perfectly, creating a delightful coffee and dessert experience that is sure to impress.
Make Ahead Options
These delightful Bat Oreo Cookie Balls are perfect for meal prep enthusiasts! You can easily prepare the base mixture (cookie crumbs and cream cheese) up to 24 hours in advance, storing it in an airtight container in the fridge to keep it fresh and prevent drying out. Additionally, you can form them into balls and chill for about 1 hour ahead, which will save you time during party prep. When you're ready to serve, simply melt the chocolate coating, dip the balls, attach the wings, and add the mini chocolate chips for eyes and ears. They’ll taste just as delicious after being prepped in advance, making your gatherings oh-so-easy!
Tips for the Best Oreo Cookie Balls
Chill Thoroughly: Ensure the cookie balls are well-chilled for at least 1 hour to prevent them from falling apart when coated in chocolate.
Work Quickly: Attach wings and add eyes while the chocolate is still soft; this helps them stick properly before the chocolate hardens.
Use Quality Chocolate: Opt for a good quality candy coating like Ghirardelli melting wafers for a smooth, glossy finish on your Oreo Cookie Balls.
Avoid Overmixing: When combining the cream cheese and cookie crumbs, mix just until combined to maintain a creamy texture and prevent a dense mixture.
Perfectly Proportioned: Aim for even-sized cookie balls (about 1-inch) to ensure consistent taste and appearance; using a tablespoon helps with this.
Decorative Ideas: Feel free to get creative! You can use colored chocolate or sprinkles for different themes or occasions in your Oreo Cookie Balls.
Bat Oreo Cookie Balls Recipe FAQs
What is the best way to select ripe ingredients for the Oreo Cookie Balls?
Absolutely! When picking out your cream cheese, opt for full-fat varieties for the richest flavor and smoothest texture. As for the chocolate sandwich cookies, aim for packages without dark spots or damage; fresh Oreos will make for a tastier treat. Always check the ‘best by’ date to ensure you’re using the freshest ingredients possible.
How should I store my Oreo Cookie Balls, and how long do they last?
You can store your Oreo Cookie Balls in an airtight container in the fridge for up to 1 week. Make sure they’re kept chilled to maintain their delicious texture. If you’re planning to savor them longer, consider freezing them instead!
What’s the best method to freeze Oreo Cookie Balls?
To freeze your Oreo Cookie Balls, first, place them in a single layer on a baking sheet and freeze them for 1-2 hours until they’re firm. Then, transfer the balls into an airtight container or freezer bag, separating layers with parchment paper if necessary. They can stay fresh in the freezer for up to 3 months!
What can I do if my cookie balls don’t hold their shape?
No worries here! If this happens, make sure your cookie balls chill for the full hour to firm up properly before dipping in chocolate. If they still seem too soft, you can chill them longer or use a tad more crushed Oreo to help bind them together. The key is to maintain that delightful texture!
Are there any dietary considerations for Oreo Cookie Balls?
Very! Keep in mind that these treats contain cream cheese and chocolate, which are not safe for pets like dogs. Also, check for allergies to any of the ingredients, especially those who might be sensitive to dairy or gluten. Alternative cream cheese options like vegan cream cheese can be used for those with dietary restrictions.
Can I use different coatings for my Oreo Cookie Balls?
The more the merrier! While melting chocolate is classic, feel free to experiment with colored candy melts for festive occasions or even sprinkle toppings for fun! Just ensure you follow melting instructions, and enjoy creating unique variations of your delicious Oreo Cookie Balls!
Deliciously Fun Oreo Cookie Balls for Your Next Treat!
Ingredients
Equipment
Method
- Crush the cookies: Place Oreos in a food processor and pulse until finely crushed, about 1-2 minutes.
- Combine ingredients: Mix the cream cheese with Oreo crumbs in a bowl until smooth, about 2-3 minutes.
- Form the balls: Roll tablespoon-sized portions into 1-inch balls and place on a parchment-lined baking sheet.
- Chill the balls: Refrigerate the balls for about 1 hour to firm up.
- Prepare the wings: Remove the filling from Oreo halves and cut them into wing shapes.
- Melt the chocolate: Microwave candy coating in 30-second increments until smooth, about 1-2 minutes.
- Coat the balls: Dip each ball in the melted chocolate and place back on parchment.
- Attach the wings: Secure wing pieces to the balls while the chocolate is still soft.
- Add final touches: Press mini chocolate chips into the chocolate coating for eyes and ears.
- Store and enjoy: Keep in the refrigerator for up to 1 week.


Leave a Reply