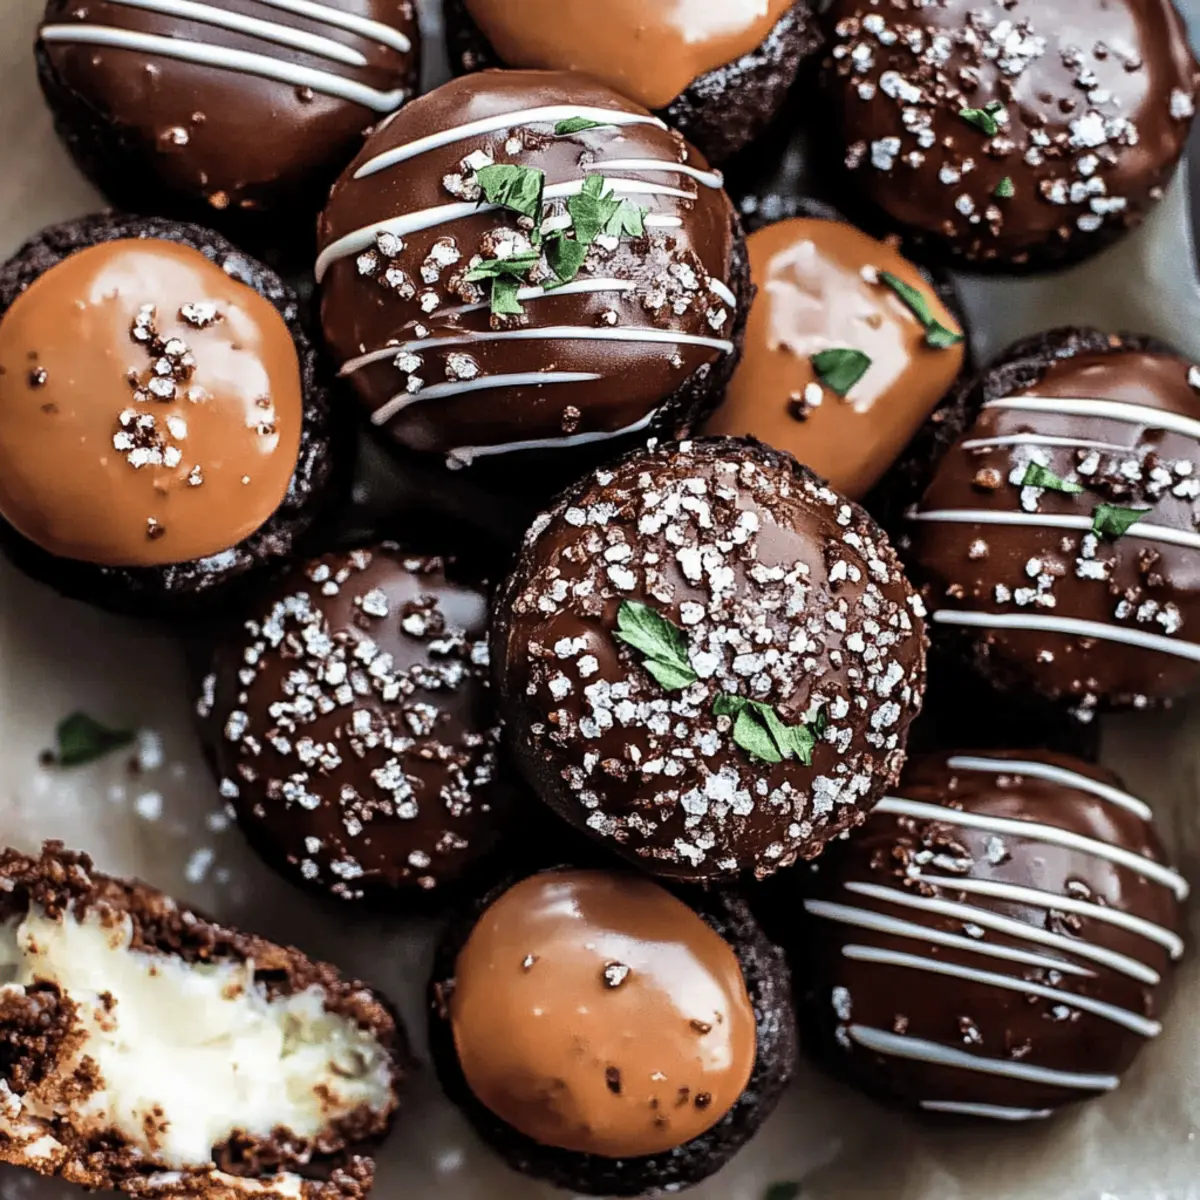
"Did you know that just four ingredients can create a lavish dessert that looks as good as it tastes? That’s exactly what you'll get with these Creamy 4-Ingredient No-Bake Oreo Balls! These delightful treats are not only effortless to whip up but also give you a decadent dessert that’s perfect for any occasion, whether it's a holiday gathering or a cozy afternoon snack. With options for gluten-free and dairy-free versions, everyone can join in on the fun without any guilt! Imagine serving up these fudgy little bites that are perfectly coated in chocolate, all while knowing you've spent minimal time in the kitchen. Curious about how to make them? Let's dive into this simple yet impressive recipe together!"

Why Are Oreo Balls a Must-Try?
Simplicity: You’ll love that this recipe requires only four ingredients! No complicated techniques are involved.
Rich Flavor: The combination of Oreo cookies and chocolate creates an indulgent treat that's hard to resist.
Versatile: Easily adapt it to be gluten-free or dairy-free; just swap out a few ingredients.
Crowd-Pleaser: Perfect for parties or gatherings, these Oreo balls are sure to impress guests.
Time-Saving: With just a few minutes of prep, you can whip up an elegant dessert without the hassle of baking. Enjoy your new favorite treat anytime!
Oreo Balls Ingredients
• Here’s what you need for your delectable Oreo Balls.
For the Base
- Oreo Cookies – The essential flavor source; swap with graham crackers for a different twist.
- Unsalted Butter – Binds the mixture and adds richness; for a dairy-free version, use melted coconut oil.
- Milk – Moistens the mix; any dairy-free milk works for a vegan option—go for a mild flavor.
For the Coating
- Chocolate (for coating) – Provides a luscious outer layer; choose high-quality melting chocolate for the best finish.
Step‑by‑Step Instructions for Oreo Balls
Step 1: Prepare Oreo Crumbs
Begin by crushing the Oreo cookies to create fine crumbs, which will serve as the flavorful base for your Oreo balls. Use a food processor for speed, or place the cookies in a sealed plastic bag and crush them with a rolling pin. Aim for a uniform texture with no large pieces remaining, which should take about 2–3 minutes.
Step 2: Mix Ingredients
In a large mixing bowl, combine the crushed Oreo cookies, melted unsalted butter, and milk. Stir the mixture thoroughly until all ingredients are fully integrated and a cohesive dough forms. The moisture from the milk will bind everything together, creating a thick, fudgy texture. This mixing should take around 3–4 minutes of vigorous stirring.
Step 3: Shape
Once your mixture is well combined, use a cookie scoop to portion out the dough, ensuring each ball is consistent in size. Roll the portions between your palms to form smooth balls about 1 inch in diameter. You should be able to create around 20 to 24 Oreo balls. Place these shaped treats on a parchment-lined tray while you prepare for the next step.
Step 4: Coat in Chocolate
Melt high-quality chocolate in a microwave-safe bowl, heating it in 30-second intervals until smooth, stirring between each interval to prevent seizing. Once melted, dip each of the Oreo balls into the chocolate, ensuring they are fully coated. Using a fork makes dipping easier and allows any excess chocolate to drip off.
Step 5: Chill
Transfer the coated Oreo balls back to the parchment-lined tray and place them in the refrigerator. Allow them to chill for at least 30 minutes, or until the chocolate coating is fully set and firm to the touch. This step ensures you have the perfect texture for your indulgent Oreo balls.

What to Serve with Creamy 4-Ingredient No-Bake Oreo Balls?
Imagine a delightful spread where sweet and savory dance together, elevating your Oreo balls experience to the next level.
-
Vanilla Ice Cream: The cool creaminess of vanilla ice cream perfectly balances the rich flavors of your Oreo balls, providing a comforting and indulgent treat.
-
Fresh Berries: Juicy strawberries or tart raspberries add a refreshing vibrance that cuts through the sweetness, creating a lovely contrast to the rich chocolate.
-
Nutty Biscotti: The crunch of nutty biscotti enhances the texture of your dessert table while adding an elegant touch, making your gathering feel extra special.
-
Coffee or Espresso: A bold cup of coffee or espresso pairs beautifully with the chocolatey richness of Oreo balls, enhancing their flavors with each sip.
-
Sparkling Water with Lime: A splash of citrus in sparkling water cleanses the palate between bites, keeping the experience refreshing and light.
-
Chocolate-Covered Pretzels: For those who love sweet and salty, these bites create an exciting contrast to the creamy Oreo balls, making for an irresistible snack combo.
-
Milkshakes: Creamy milkshakes, whether classic or flavored, create a nostalgic treat experience that complements the fun, bite-sized nature of your Oreo balls.
-
Caramel Sauce: Drizzling warm caramel sauce over Oreo balls adds an extra layer of decadence, perfect for those moments when you want to indulge.
These suggestions will not only make your dessert experience unforgettable but also create a feast that delights all who gather around the table.
Oreo Balls Variations & Substitutions
Feel free to get creative with these Oreo balls by adding your personal touch and flavor twists!
- Gluten-Free Version: Replace regular Oreos with gluten-free cookies to accommodate dietary restrictions.
- Dairy-Free Alternative: Use melted coconut oil in place of butter for a creamy, dairy-free treat without sacrificing flavor.
- Nutty Crunch: Incorporate finely chopped nuts, like pecans or almonds, into the mixture for added texture and a delightful crunch.
- Minty Fresh: Mix in a few drops of mint extract to give your Oreo balls a refreshing mint chocolate vibe that's perfect for the season.
- Spicy Kick: Add a pinch of cayenne pepper or chili powder to the Oreo mixture for a surprising heat that beautifully contrasts the sweetness.
- Flavorful Toppings: After coating in chocolate, consider drizzling with white chocolate or rolling in crushed candy canes for extra flair and festive appeal.
- Different Chocolate Coatings: Experiment with milk, dark, or even ruby chocolate for a unique outer layer that can be tailored to any chocolate lover's preference.
- Coconut Bliss: Roll the finished Oreo balls in shredded coconut for a tropical twist that pairs beautifully with the fudgy chocolate goodness.
These variations provide an opportunity to explore new flavors while still enjoying the classic deliciousness of your Oreo balls. Just think of how wonderful it will be to serve a batch of these tailored treats at your next gathering, creating delightful surprises for your guests!
Make Ahead Options
These Creamy 4-Ingredient No-Bake Oreo Balls are perfect for busy home cooks looking to save time without compromising on taste! You can prepare the base mixture—combining crushed Oreo cookies, melted butter, and milk—up to 24 hours in advance. Simply cover the bowl tightly with plastic wrap and refrigerate to maintain freshness. Once you're ready to serve, shape the mixture into balls and coat them in melted chocolate; refrigerate again until set. By preparing the mixture ahead of time, you'll have a delightful dessert ready in minutes and still boast those deliciously fudgy treats at your next gathering!
How to Store and Freeze Oreo Balls
Fridge: Store your Oreo balls in a covered container lined with parchment paper for up to two weeks to maintain their freshness and deliciousness.
Freezer: If you want to keep them longer, you can freeze Oreo balls for up to three months. Place them in an airtight container, separated by layers of parchment paper to avoid sticking.
Thawing: To enjoy a frozen Oreo ball, transfer it to the fridge for a few hours or leave it at room temperature for about 30 minutes before serving.
Reheating: There’s no need to reheat these treats; simply enjoy them cold right out of the fridge or let them come to room temperature for a softer bite.
Expert Tips for Oreo Balls
• Quality Ingredients: Use high-quality Oreo cookies and melting chocolate for the best flavor and texture, avoiding cheaper brands which may lack richness.
• Chocolate Consistency: Add a teaspoon of oil to melted chocolate for smoother dipping. This helps prevent it from seizing and ensures an even coat on your Oreo balls.
• Chill Time: Don’t skip the chilling step! Refrigerating your coated Oreo balls allows the chocolate to set properly, giving you that satisfying crunch with every bite.
• Storage: Keep your Oreo balls in a covered container in the fridge, layered with parchment paper to prevent sticking. They’ll stay fresh for up to two weeks!
• Perfect Portions: Use a cookie scoop when shaping your balls for consistent sizes. This ensures even coating and makes the final presentation more appealing.

Oreo Balls Recipe FAQs
How do I choose the right Oreo cookies for the recipe?
For the best flavor, stick with standard Oreo cookies as they provide that classic cookie-and-cream taste. If you're looking to switch things up, you can use other similar textured cookies like graham crackers or Nilla wafers for a twist. Make sure to check for any broken cookies before crushing, as large pieces can disrupt your dough consistency.
How should I store my Oreo balls, and how long will they last?
Store your Oreo balls in a covered container lined with parchment paper in the refrigerator for up to two weeks. This will help keep them fresh and prevent them from sticking together. If you want to enjoy them for longer, consider freezing them—just ensure they’re well-wrapped to avoid freezer burn!
Can I freeze Oreo balls, and if so, how?
Absolutely! To freeze your Oreo balls, follow these steps:
- Individually place the rolled and chocolate-coated balls on a parchment-lined tray.
- Freeze them for about 2–3 hours until solid.
- Once frozen, transfer the balls to an airtight container, layering them with parchment paper to prevent sticking.
- They can be kept frozen for up to three months.
When you’re ready to enjoy, simply thaw them in the fridge for a few hours or at room temperature for about 30 minutes.
What should I do if my chocolate coating is too thick?
If you find that your chocolate is difficult to work with, there are a couple of solutions! First, try adding a teaspoon of vegetable oil or coconut oil to the melted chocolate. This extra fat will thin out the chocolate, making it easier to dip. Additionally, ensure you are melting the chocolate gently using a microwave in 30-second intervals, stirring well each time—this helps maintain a smooth consistency.
Are there any dairy-free or gluten-free versions of these Oreo balls?
Very! You can easily make these Oreo balls dairy-free by substituting unsalted butter with melted coconut oil and using a mild dairy-free milk of your choice. For a gluten-free option, swap standard Oreos with gluten-free cookies that have a similar texture. This way, everyone can enjoy these delightful treats without worrying about dietary restrictions.
Can I add flavor variations to my Oreo balls?
Yes! To customize your Oreo balls, consider mixing in a tablespoon of peanut butter or almond butter to the base for a nutty twist. You can also sprinkle in some sea salt or drizzle melted white chocolate over the top for an added layer of flavor and presentation. Let your creativity shine!
Indulgent Oreo Balls That Are Super Easy to Make
Ingredients
Equipment
Method
- Prepare Oreo Crumbs by crushing the Oreo cookies to create fine crumbs.
- Mix Ingredients in a large bowl with crushed Oreo cookies, melted unsalted butter, and milk.
- Shape the mixture into balls about 1 inch in diameter using a cookie scoop.
- Coat in Chocolate by melting chocolate and dipping each ball into it.
- Chill in the refrigerator for at least 30 minutes until the chocolate is set.


Leave a Reply