As I opened the freezer door, an explosion of colors greeted me, shimmering like a hidden treasure beneath a blanket of frost. This is not just any dessert; it’s Mermaid Ice Cream—a delightful creation that promises to transport you to a whimsical world with every scoop. With just ten minutes of prep time, this vibrant treat features a creamy blend of heavy cream and sweetened condensed milk, perfect for adding a playful twist to your dessert repertoire. Plus, it’s a crowd-pleaser that dazzles kids and adults alike, making your gatherings all the more special. Ready to dive into making this enchanting frozen delight? Let’s swirl some magic into your kitchen!
Why is Mermaid Ice Cream Magical?
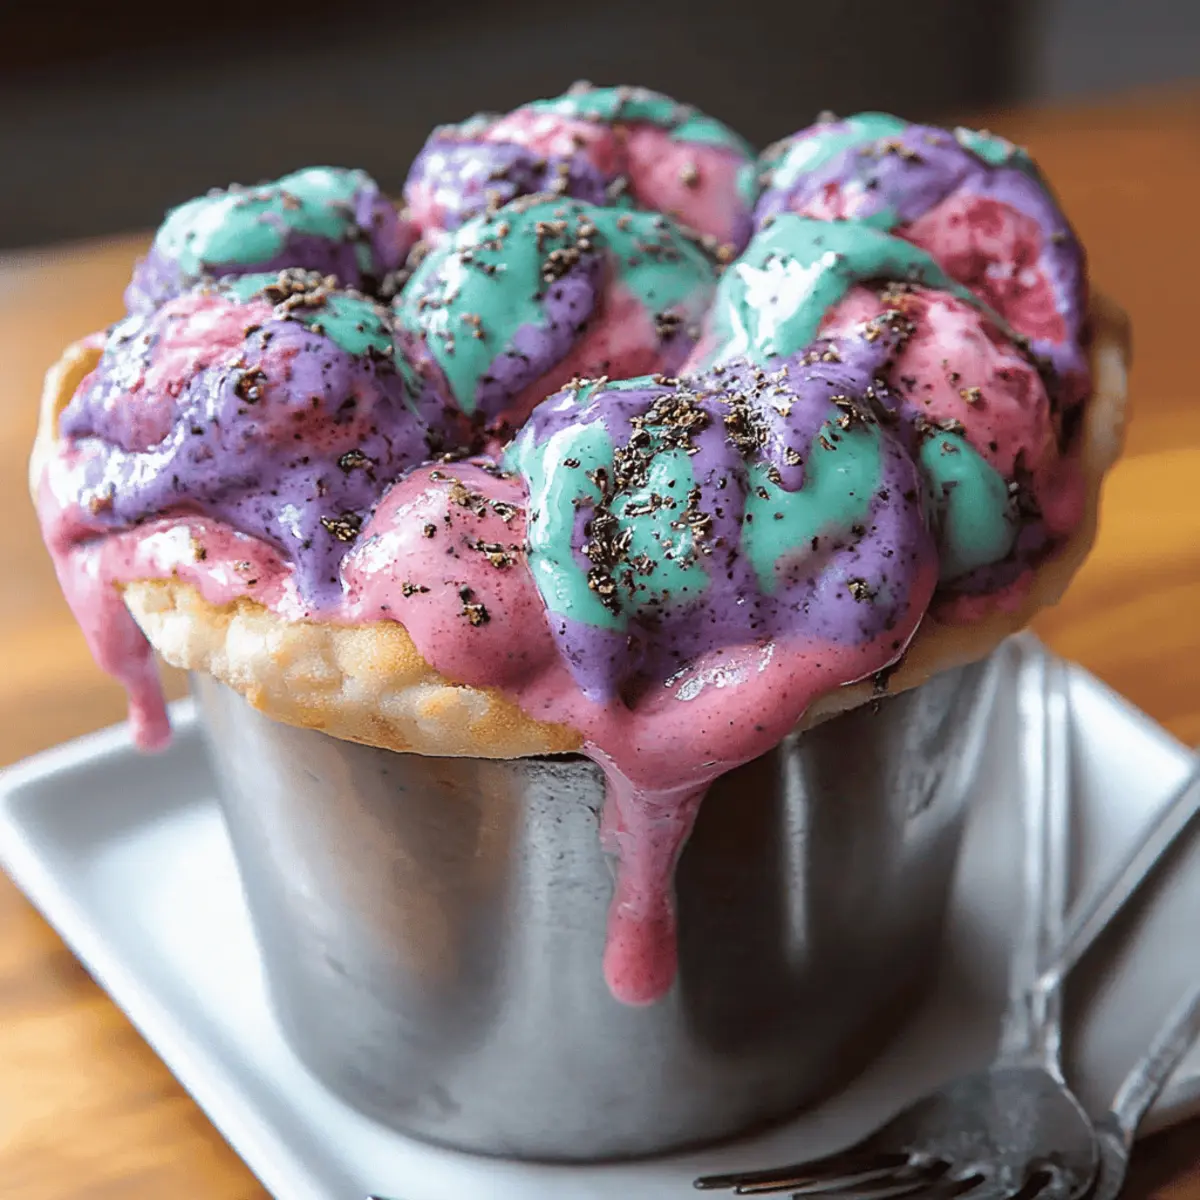
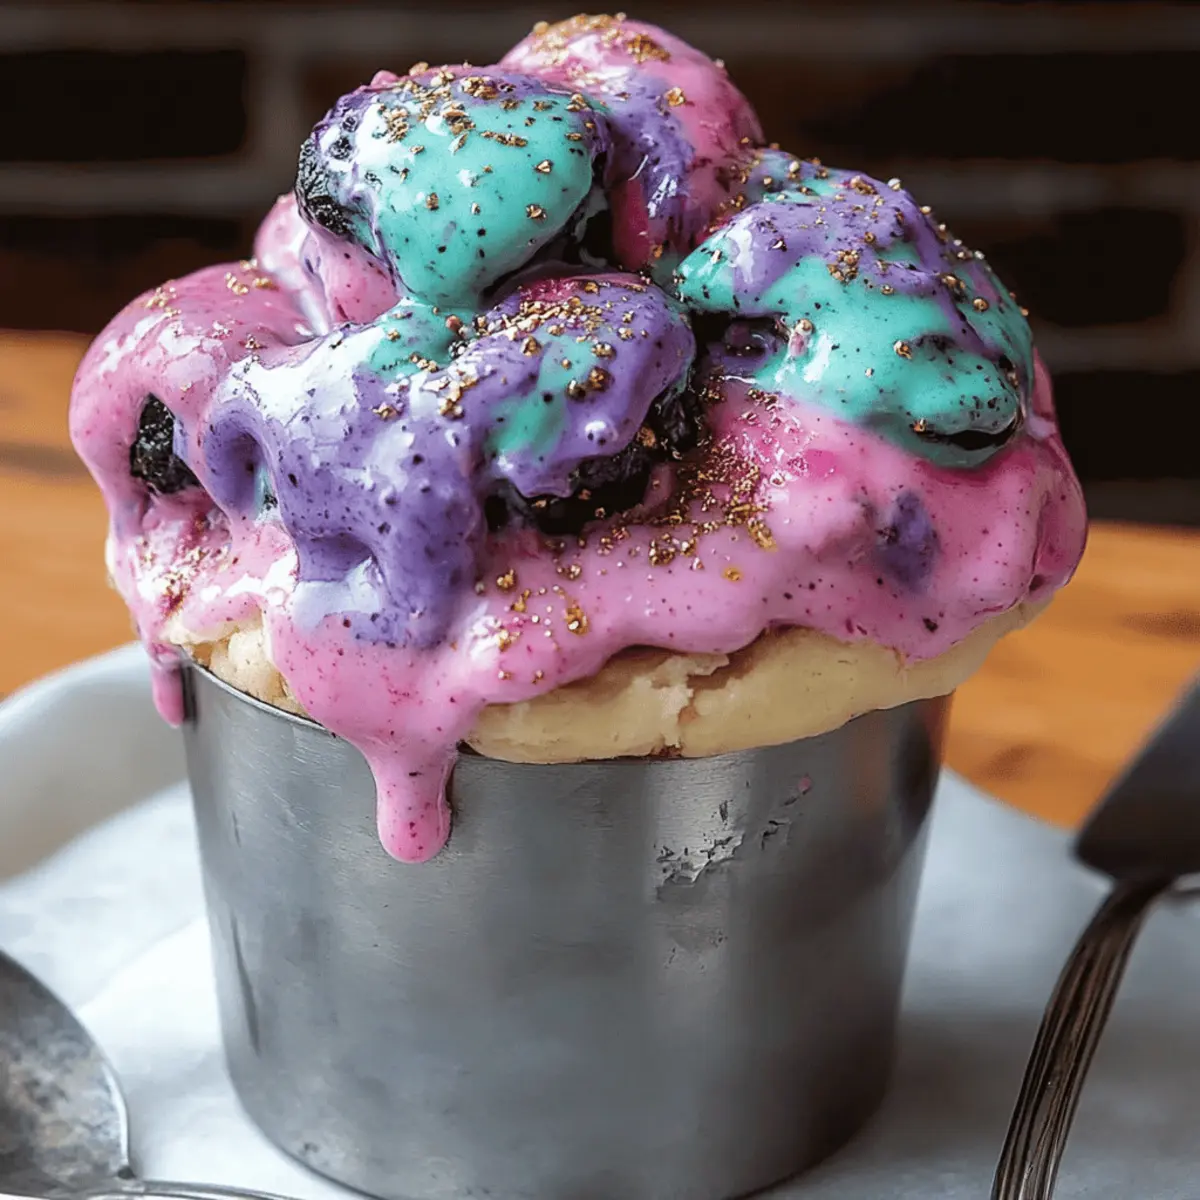
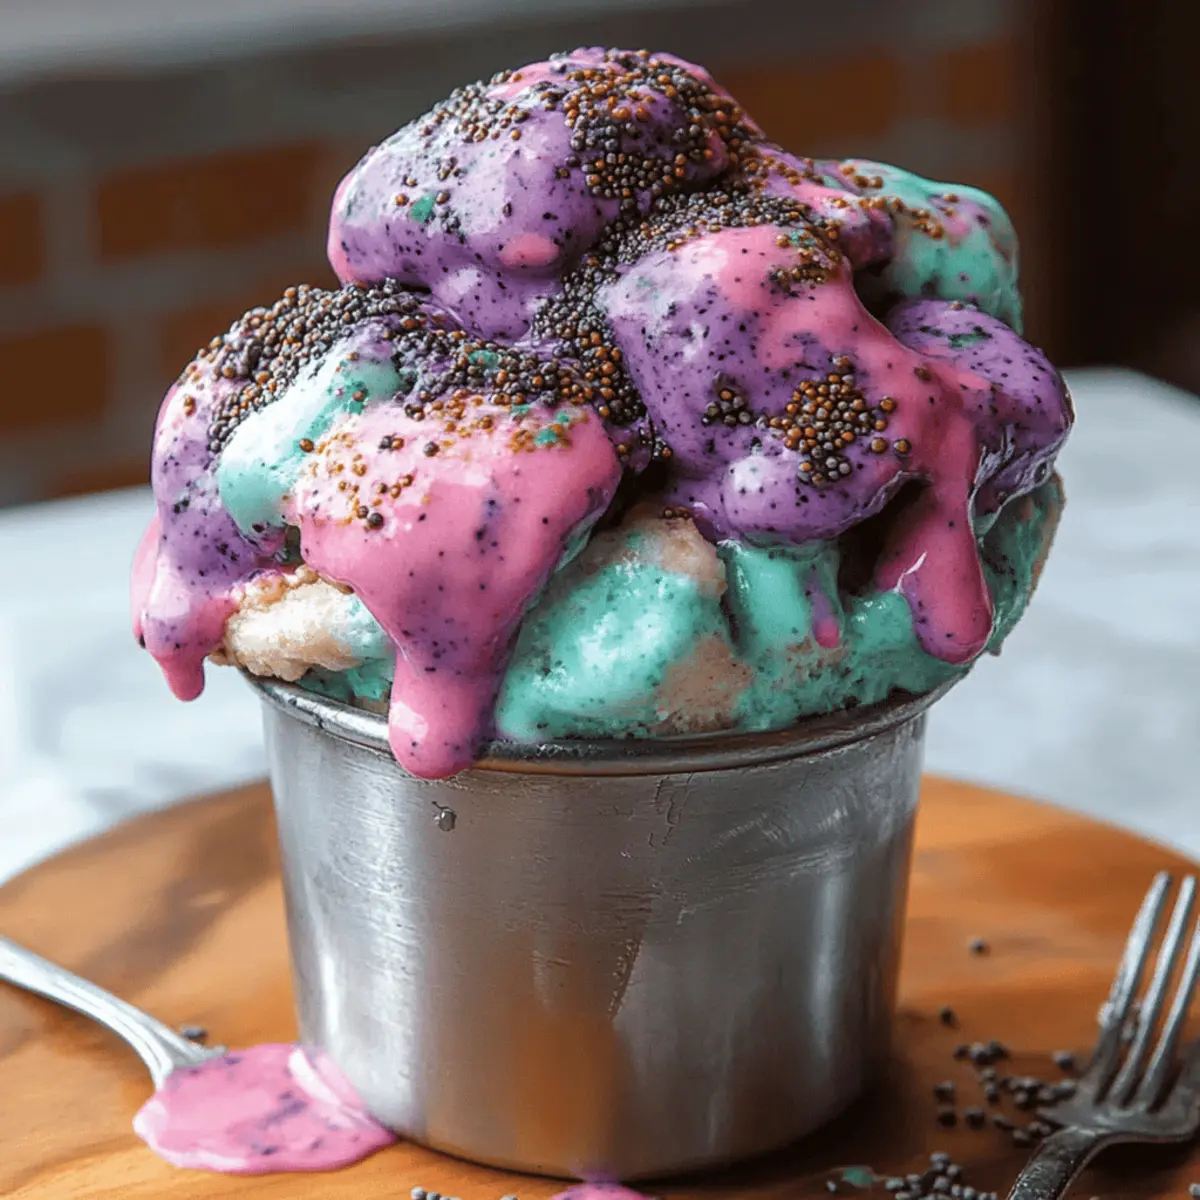
Visually Stunning: This ice cream is a feast for the eyes, with its vibrant pink, purple, and teal swirls that bring a playful spirit to any occasion.
Quick Prep: With just 10 minutes of hands-on time, you can whip up a stellar dessert without the fuss.
Crowd-Pleaser: Delight your friends and family with this whimsical treat—it's guaranteed to spark joy among kids and adults alike.
Versatile Base: The creamy mix of heavy cream and sweetened condensed milk is a classic that you can customize easily for different themes or flavors. You might also enjoy exploring other fun options, like No-Churn Chocolate Ice Cream or a refreshing Fruit Sorbet on warm days.
Perfect for Special Occasions: Whether it’s a birthday party or a summer gathering, this Mermaid Ice Cream adds a touch of magic that will keep your guests talking long after the last scoop!
Mermaid Ice Cream Ingredients
For the Base
- Heavy cream – It creates a luscious and creamy texture for your ice cream.
- Sweetened condensed milk – This adds sweetness and richness, making the ice cream incredibly smooth.
- Vanilla extract – A dash enhances the flavor profile, making every scoop a delight.
For the Colors
- Pink gel food coloring – Brightens your ice cream, perfectly capturing the mermaid vibe.
- Purple gel food coloring – Adds a whimsical touch, evoking the magical ocean depths.
- Teal gel food coloring – Gives a gorgeous, soothing color reminiscent of tropical waters.
For the Finish
- Edible glitter or sprinkles – Sprinkle on top for an enchanting visual spark that makes this Mermaid Ice Cream truly special!
Step-by-Step Instructions for Mermaid Ice Cream
Step 1: Whip the Cream
In a large mixing bowl, use a hand mixer or stand mixer to whip 2 cups of heavy cream on high speed until stiff peaks form, about 3-5 minutes. This fluffy base is essential for your Mermaid Ice Cream, giving it a light and airy texture. Make sure to stop when peaks hold their shape, indicating you're ready for the next step.
Step 2: Combine Condensed Milk and Vanilla
In a separate medium bowl, whisk together one can of sweetened condensed milk with 1 teaspoon of vanilla extract until well blended. This mixture will add a rich sweetness to the Mermaid Ice Cream base. Aim for a smooth consistency, and be sure to scrape down the sides of the bowl for an even mix before combining.
Step 3: Fold in the Whipped Cream
Gently fold the whipped cream into the sweetened condensed milk mixture using a spatula. Be careful not to deflate the whipped cream; this folding technique is key to achieving a creamy, dreamy texture in your Mermaid Ice Cream. Continue folding until the mixtures are just combined, leaving a few streaks for a marbled effect.
Step 4: Divide and Color the Mixture
Divide the ice cream mixture evenly into three separate bowls. To create your mermaid colors, add pink gel food coloring to one bowl, purple to another, and teal to the last. Mix each bowl until the colors are vibrant and uniform. Enjoy the swirls of colors as you prepare to create your magical treat.
Step 5: Layer the Colors
In a loaf pan, start layering the colored mixtures by alternating dollops of pink, purple, and teal. Take your time to create beautiful layers, filling the pan with a colorful dream. Make sure the layers are visible, as they contribute to the striking appearance of your Mermaid Ice Cream.
Step 6: Swirl for Effect
Using a knife or skewer, gently swirl through the layers in the loaf pan to create a marbled effect without fully combining the colors. This step adds that enchanting ocean wave look, making your Mermaid Ice Cream truly unique. Be careful not to over-swirl; you want the colors to remain distinct.
Step 7: Add the Finishing Touches
Sprinkle edible glitter or colorful sprinkles on top of the swirled layer in the loaf pan for that magical finish. This decorative touch enhances the whimsy of your Mermaid Ice Cream while also making it visually stunning. Now your enchanting dessert is ready to head to the freezer!
Step 8: Freeze Until Firm
Place the loaf pan in the freezer and let it set for at least 6 hours, or until firm. This is the crucial step to ensure that your Mermaid Ice Cream has the perfect scoopable texture. Once fully frozen, you can indulge in its delightful colors and creamy goodness.
What to Serve with Mermaid Ice Cream?
Creating a magical dessert experience doesn't stop at the ice cream.
- Colorful Fruit Salad: A refreshing mix of seasonal fruits adds vibrant hues and a burst of flavor, perfectly balancing the creaminess.
- Chocolate Brownies: Rich, fudgy brownies create a delightful contrast, enhancing the decadence of your Mermaid Ice Cream with every bite.
- Waffle Cones: Serve in crispy waffle cones for a delightful crunch that pairs wonderfully with your soft, silky treat.
- Mint Lemonade: This zesty, refreshing drink is the perfect palate cleanser, brightening up the sweetness of the ice cream.
- Graham Cracker Crust Cups: These cups offer delightful crunch and a hint of cinnamon, modeling a whimsical treat comparable to your enchanting ice cream.
- Marshmallow Dip: A fluffy, sweet dip adds a fun element for anyone wanting to indulge, inviting folks to share and enjoy a scoop of magic.
- Edible Glitter Spritzers: A champagne-like twist that sparkles just like the ice cream, these delightful drinks will elevate your gathering.
- Magic Rainbow Cupcakes: Soft, light cupcakes with playful colors bring the whimsy of mermaids to life and are perfect for themed parties!
- Cookie Dough Bites: Their chewy texture provides a fun and nostalgic counterpart to your creamy frozen dessert, making every bite an adventure.
How to Store and Freeze Mermaid Ice Cream
Fridge: Store any leftover Mermaid Ice Cream in an airtight container for up to 3 days, but be aware that it may start to lose its creamy texture.
Freezer: To keep your Mermaid Ice Cream at its best, wrap it tightly with plastic wrap before sealing it in a container. It can be frozen for up to 2 months.
Reheating: If your ice cream becomes too hard, let it sit at room temperature for about 5-10 minutes to soften before scooping. Enjoy your magical treat fully!
Serving Tip: For a delightfully pretty presentation, scoop and serve the Mermaid Ice Cream in colorful bowls, and sprinkle with extra edible glitter or sprinkles right before serving.
Mermaid Ice Cream: Creative Twists
Feel free to unleash your creativity and make this delightful dessert your own with these fun variations!
-
Dairy-Free: Substitute heavy cream with coconut cream and use a dairy-free sweetened condensed milk for a tropical treat.
-
Flavor Fun: Add flavored extracts like almond or mint instead of vanilla to give your Mermaid Ice Cream a unique twist.
-
Fruit Fusion: Fold in some pureed fruit, like strawberries or blueberries, before freezing for a fruity surprise in every scoop.
-
Crunchy Delight: Mix in crushed graham crackers or cookie crumbs just before freezing for an exciting crunchy texture.
-
Chocolate Dream: Swirl in chocolate fudge or brownie pieces alongside the colors for a rich, chocolatey version that's hard to resist.
-
Nutty Twist: Incorporate chopped nuts, such as toasted pistachios or almonds, for a tasty crunch and added nutrition.
-
Tropical Heat: For a spicy kick, sprinkle a hint of cayenne or chili powder on top before freezing. It adds an unexpected zing!
-
Layered Delight: Create a layered version with alternating stripes of Mermaid Ice Cream and your favorite sorbet for a dramatic presentation.
With these creative variations, your Mermaid Ice Cream can truly reflect your personal taste, making every scoop a new adventure!
Make Ahead Options
These whimsical Mermaid Ice Cream treats are perfect for meal prep and make busy weeknights easier! You can whip up the base mixture (heavy cream, sweetened condensed milk, and vanilla) up to 24 hours in advance and store it in the refrigerator—just be sure to cover it tightly to prevent it from absorbing any odors. When you're ready to create, simply divide the mixture and add your gel food coloring, then layer and swirl in a loaf pan. Freeze for at least 6 hours to achieve that delightful firm texture. With these make-ahead tips, you’ll have a magical dessert on hand that’s just as delicious as when freshly made!
Expert Tips for Making Mermaid Ice Cream
• Chill Your Tools: Before whipping the cream, chill your mixing bowl and beaters. Cold tools help achieve those perfect stiff peaks for your Mermaid Ice Cream.
• Don't Overmix: When folding the whipped cream into the condensed milk, be gentle! Overmixing can deflate the air, making your ice cream less fluffy.
• Coloring Carefully: Start with a little gel food coloring. You can always add more to achieve your desired vibrancy without making the mixture too liquid.
• Layer with Love: As you layer the colors in the loaf pan, alternate dollops gently, allowing the colors to slightly overlap for a stunning visual effect.
• Taste Test: Once your mixture is ready, sneak a taste! Adjust the sweetness with a touch more vanilla or condensed milk before freezing.
• Perfect Freezing: For best results, allow the Mermaid Ice Cream to set overnight. This extra time gives you a firmer, creamier texture that's worth the wait!

Mermaid Ice Cream Recipe FAQs
What type of heavy cream should I use for Mermaid Ice Cream?
Absolutely, you want to use heavy cream with a fat content of at least 36%. This will ensure that your ice cream has the rich, creamy texture that makes it indulgent and satisfying. Brands like Dawn or Land O'Lakes are great choices if you're looking for something high-quality.
How long can I store Mermaid Ice Cream in the freezer?
Very! Your Mermaid Ice Cream can be stored in the freezer for up to 2 months if wrapped tightly with plastic wrap and placed in an airtight container. Make sure to press the wrap directly against the surface of the ice cream to avoid ice crystals forming!
Can I make adjustments for dietary restrictions with Mermaid Ice Cream?
Certainly! If you're looking for a dairy-free version, you could substitute the heavy cream with coconut cream and the sweetened condensed milk with a dairy-free alternative. Just ensure that the food coloring and any additional toppings like glitter or sprinkles are also free from allergens or animal products, as some brands may contain dairy.
What should I do if my ice cream is too hard after freezing?
If your Mermaid Ice Cream becomes rock-solid, no worries! Just leave it out at room temperature for about 5-10 minutes before attempting to scoop it. This helps it soften and makes it easier to serve. You can also use a warm scoop to help break through the hard exterior more easily.
Can I use different colors or decorating options?
Of course! The more the merrier! Feel free to customize the gel food coloring to match themes or occasions, such as red and green for Christmas or your favorite pastel shades for spring. You can also experiment with different toppings like crushed cookies or dried fruits for added texture.
How can I prevent ice crystals from forming in my ice cream?
To minimize ice crystals, make sure your Mermaid Ice Cream is stored in an airtight container and try to freeze it in a shallow pan. This will help it freeze more evenly. Also, avoid repeated thawing and refreezing to maintain that delightful creamy texture!
Mermaid Ice Cream: Whimsical Treat for Sweet Dreams
Ingredients
Equipment
Method
- Whip the cream in a bowl until stiff peaks form, about 3-5 minutes.
- Combine sweetened condensed milk with vanilla extract until well blended.
- Fold whipped cream into the condensed milk mixture gently.
- Divide mixture into three bowls and add food coloring to each.
- Layer the colored mixtures in a loaf pan by alternating dollops.
- Gently swirl through the layers with a knife for a marbled effect.
- Sprinkle with edible glitter or sprinkles on top.
- Freeze for at least 6 hours or until firm.


Leave a Reply