As I rummaged through my pantry one rainy afternoon, I stumbled upon a treasure trove of ingredients that promised a sweet escape: mascarpone cheese, ladyfingers, and coffee. Suddenly, my craving for something indulgent led me straight to crafting these delightful Mini Tiramisu Cups. Not only do they come together in just 30 minutes, but they also pack all the classic flavors of traditional tiramisu into single-serving delights that are perfect for sharing—or keeping all to yourself! With layers of creamy mascarpone and coffee-soaked ladyfingers, these cups are a crowd-pleaser that impresses without the fuss. Curious to learn how to whip up this Italian classic right in your own kitchen? Let’s dive into the bliss of these Mini Tiramisu Cups!
Why are these Mini Tiramisu Cups a must-try?
Easy to Make: Whipping up these delightful cups is a breeze, taking only 30 minutes of your time!
Flavor Explosion: The luscious mascarpone paired with rich, coffee-soaked ladyfingers creates an unforgettable taste sensation that rivals any café dessert.
Perfect Portion Sizes: Individually served, they’re perfect for sharing at gatherings or enjoying solo without overindulging.
Chill and Serve: After a simple assembly, just pop them in the fridge for chilling—perfect for busy schedules.
Crowd-Pleaser: Impress your friends and family with this elegant dessert that’s sure to steal the show!
For more delightful dessert options, check out our recipes for Chocolate Mousse Cups and Berry Cheesecake Parfaits—both are equally simple and satisfying.
Mini Tiramisu Cups Ingredients
For the Creamy Mixture
• Mascarpone cheese – the star of the show, it adds a rich and creamy texture that defines classic tiramisu.
• Heavy cream – whips up beautifully to create a light, airy layer that balances the richness of the mascarpone.
• Powdered sugar – sweetens the mixture while dissolving easily for a smooth consistency.
• Vanilla extract – enhances the flavors, giving your dessert a warm, aromatic touch.
For the Layers
• Ladyfingers – these sponge-like treats soak up the coffee beautifully; don’t soak them too long or they’ll fall apart!
• Strong brewed coffee – the key to authentic flavor, it infuses the ladyfingers with a robust coffee essence that pairs perfectly with the cream.
For the Finishing Touch
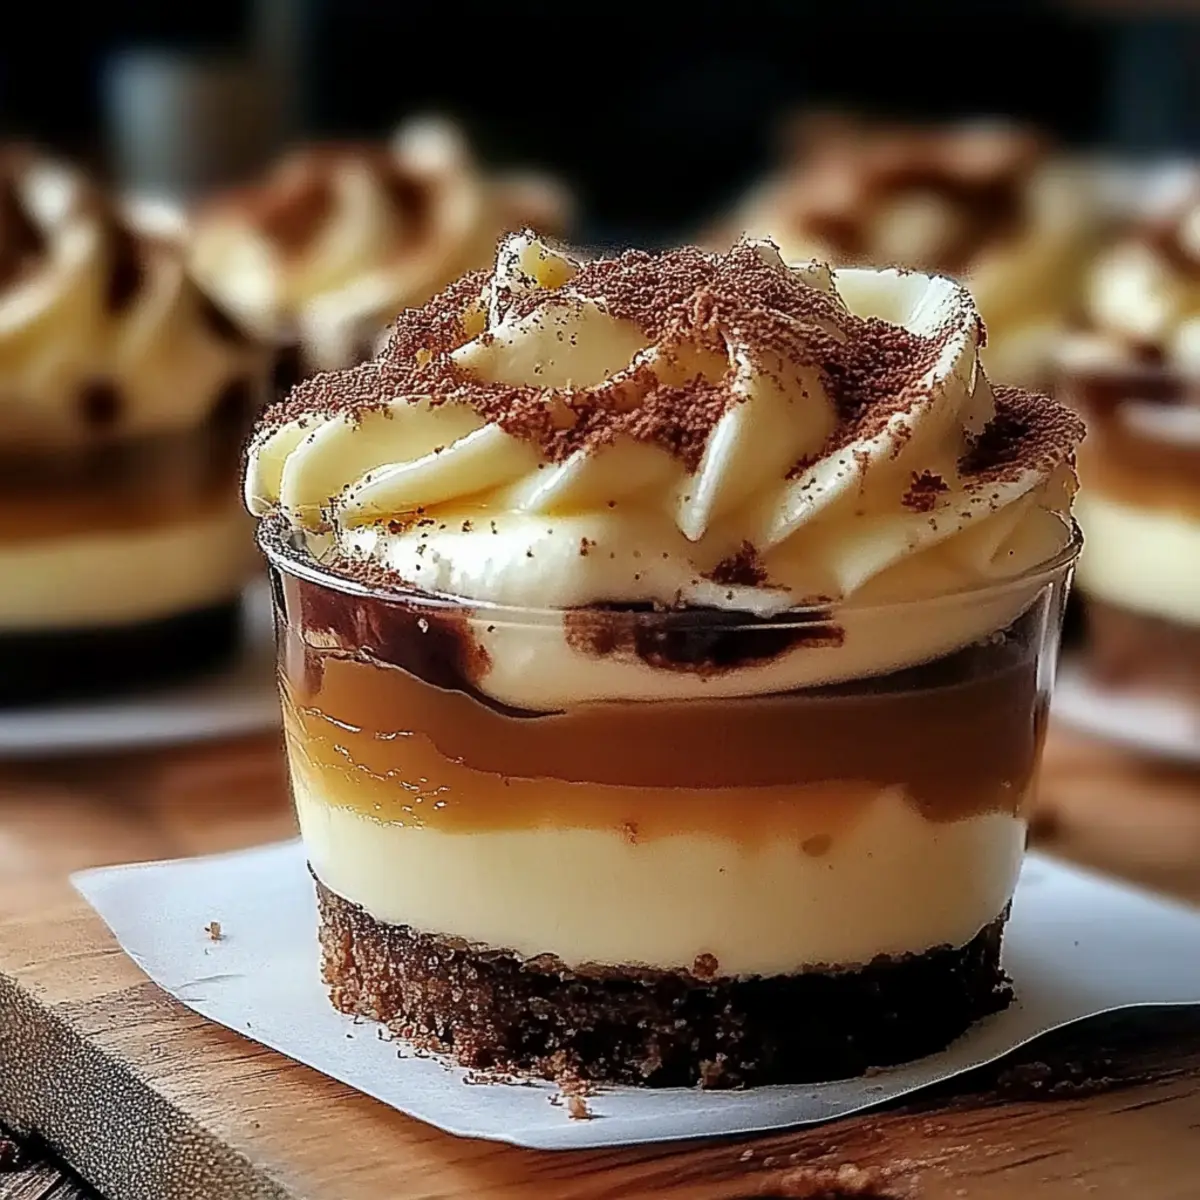
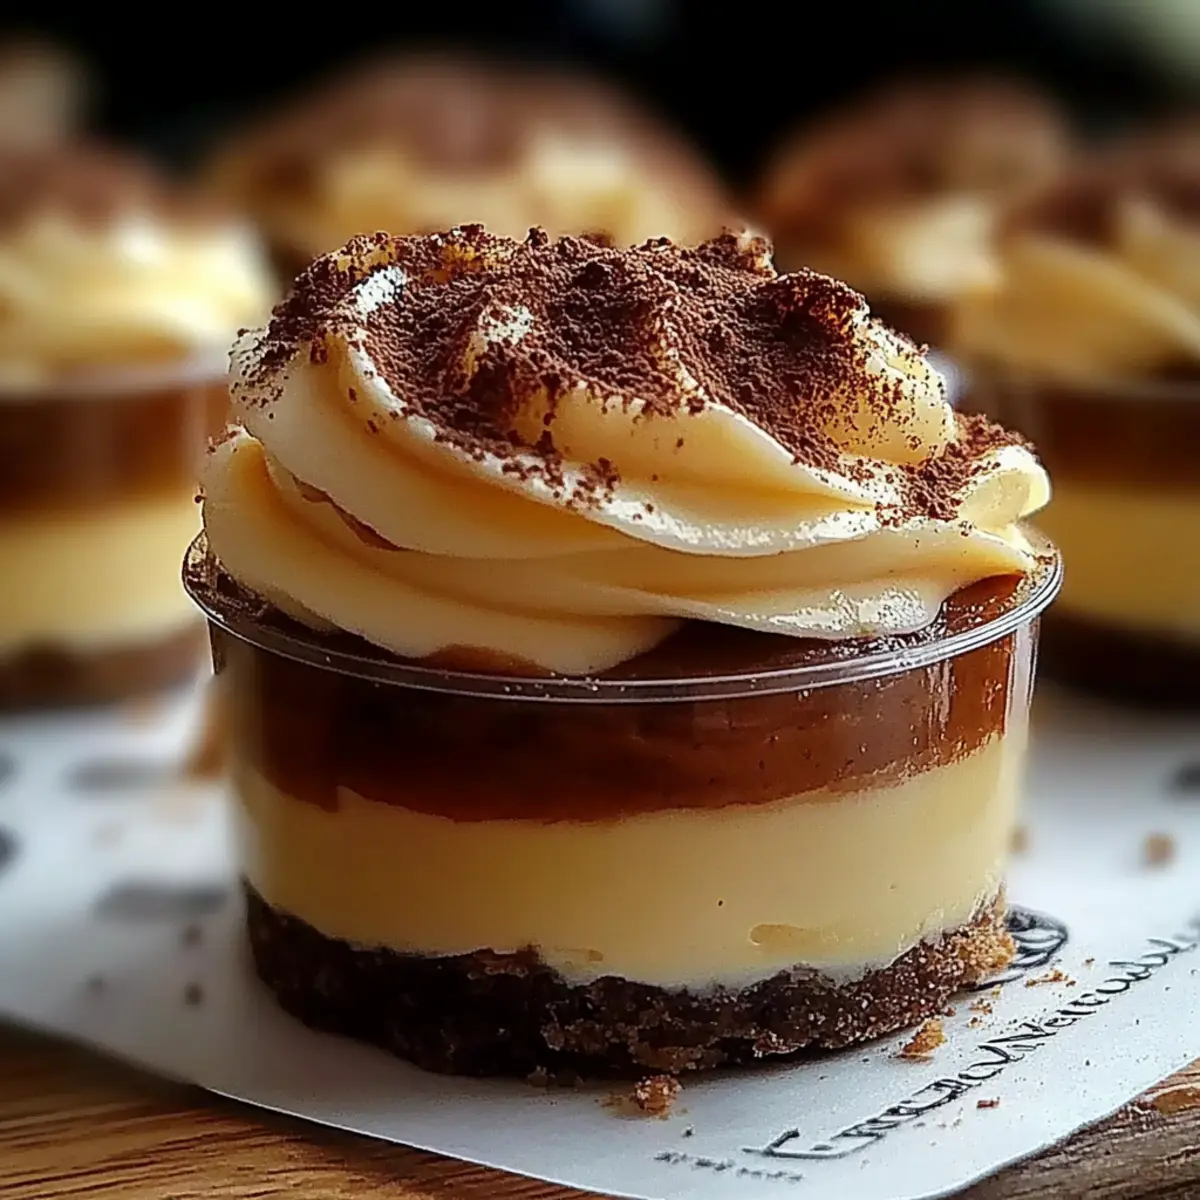
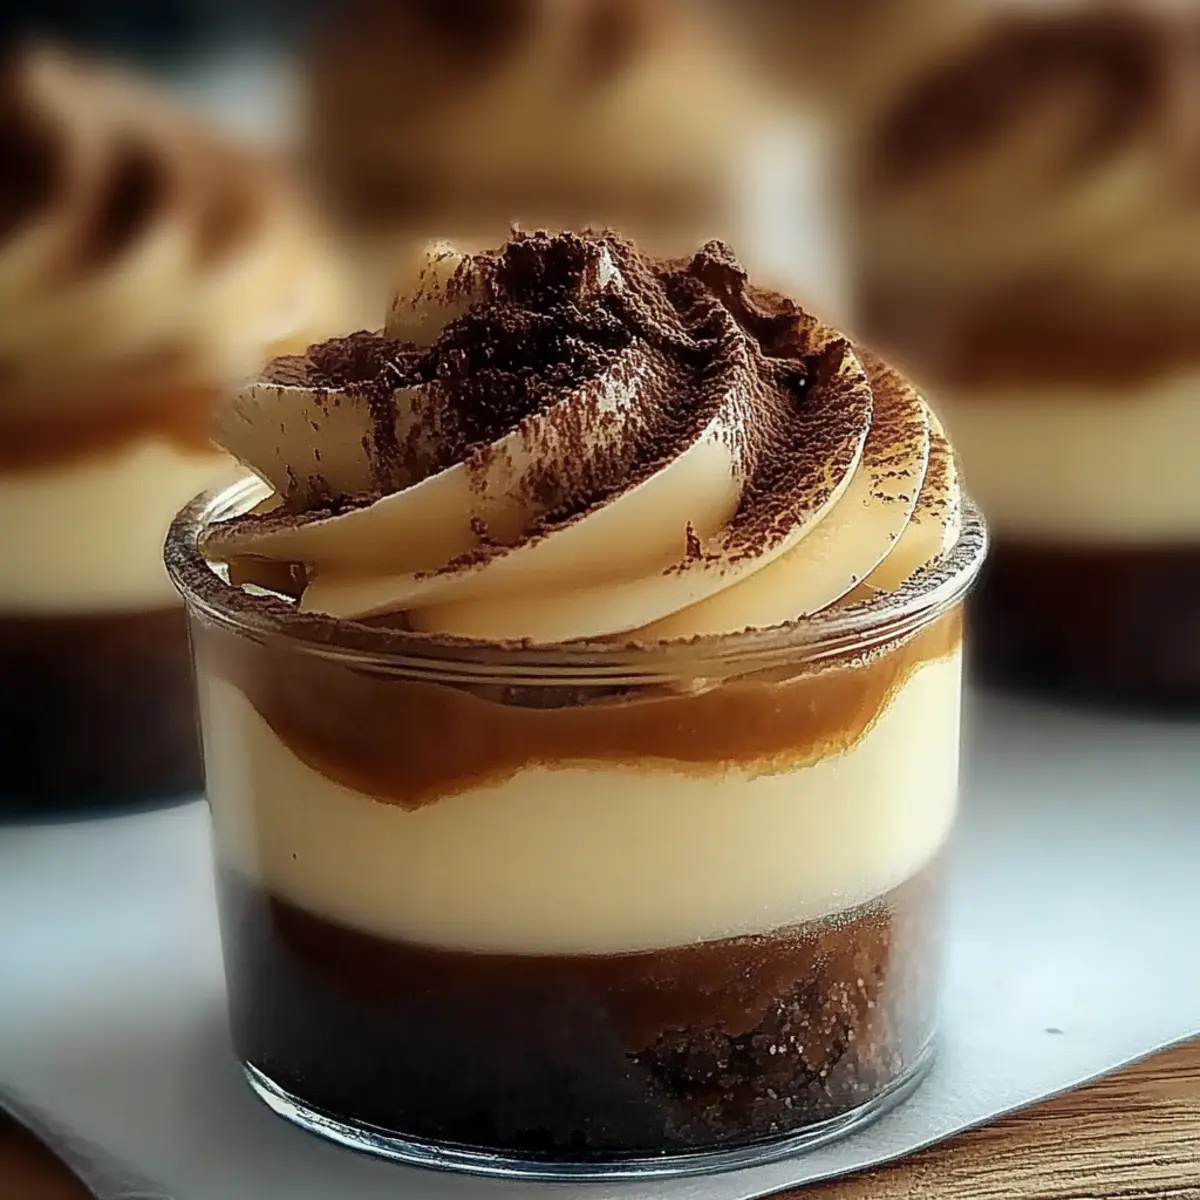
• Cocoa powder – a light dusting on top adds a lovely bittersweet contrast and visual appeal to your Mini Tiramisu Cups.
These Mini Tiramisu Cups are not just easy to make; they’re a delightful way to enjoy a classic dessert with all the familiar flavors in a fun, portable form!
Step‑by‑Step Instructions for Mini Tiramisu Cups
Step 1: Prepare the Cream Mixture
In a mixing bowl, combine 1 cup of mascarpone cheese, 1 cup of heavy cream, ½ cup of powdered sugar, and 1 teaspoon of vanilla extract. Using an electric mixer, beat the ingredients on medium speed for about 3-5 minutes until the mixture becomes smooth and fluffy, with soft peaks forming. This rich cream will be the luxurious filling for your Mini Tiramisu Cups.
Step 2: Soak the Ladyfingers
While the cream mixture is coming together, brew 1 cup of strong coffee and allow it to cool slightly. Quickly dip each ladyfinger into the brewed coffee for 1-2 seconds—just enough to soak them without becoming soggy. The soaked ladyfingers will provide the perfect base for your Mini Tiramisu Cups, as they absorb the coffee flavor deliciously.
Step 3: Assemble the Mini Tiramisu Cups
In a serving cup, place a layer of the dipped ladyfingers at the bottom. Aim for a single, even layer to create an inviting foundation. Once completed, gently press the ladyfingers down to adhere them to the cup's base. This first layer paves the way for the delightful flavors of the coffee-soaked treat, setting the stage for your Mini Tiramisu Cups.
Step 4: Add the Cream Layer
Spoon a generous layer of the creamy mascarpone mixture over the ladyfingers, smoothing it out with a spatula. Make sure to reach the edges of the cup for an even presentation. This soft, luscious layer adds a divine contrast to the coffee-soaked sponge, bringing the iconic taste of classic tiramisu into your individual servings.
Step 5: Repeat the Layers
Continue layering by repeating the process: add another layer of soaked ladyfingers, followed by another layer of mascarpone mixture. Fill the cups until you’ve used up your ingredients, ensuring that the final layer you add is the creamy mascarpone. This repetition creates beautiful, irresistible layers that are visually appealing in each Mini Tiramisu Cup.
Step 6: Dust with Cocoa Powder
Once your cups are assembled, take a fine mesh strainer and dust the top layer of mascarpone with cocoa powder to finish. Aim for an even coating to enhance the flavor profile and provide a beautiful contrast against the creamy white layers below. This finishing touch adds an indulgent visual appeal to your Mini Tiramisu Cups.
Step 7: Chill Before Serving
Cover the cups with plastic wrap and place them in the refrigerator to chill for at least 4 hours, or overnight for the best results. This chilling time allows the flavors to meld beautifully and gives the ladyfingers time to soften. When ready, these Mini Tiramisu Cups will be a delightful, cold treat, ready to be enjoyed!
How to Store and Freeze Mini Tiramisu Cups
• Fridge: Store Mini Tiramisu Cups in an airtight container in the fridge for up to 3 days. This ensures the layers stay fresh and the flavors meld beautifully.
• Freezer: If you want to prepare them ahead of time, you can freeze the assembled cups for up to 2 weeks. Cover them well to prevent freezer burn.
• Thawing: To enjoy frozen Mini Tiramisu Cups, move them to the fridge for about 6 hours or overnight to thaw. This maintains their creamy texture.
• Reheating: Do not reheat Mini Tiramisu Cups. Instead, serve them chilled, as the refreshing taste is part of their charm!
Make Ahead Options
These Mini Tiramisu Cups are perfect for meal prep, making your dessert planning a breeze! You can prepare the mascarpone cream and assemble the cups up to 24 hours in advance; simply cover them tightly with plastic wrap to prevent drying out. To ensure the ladyfingers maintain their texture, avoid soaking them for too long right before assembling. When you're ready to serve, just dust the tops with cocoa powder for that beautiful finish. Chilling overnight allows the flavors to meld, resulting in a delicious treat that’s just as delightful as if you made it last minute. Prepare ahead, and you’ll enjoy the luxury of dessert without the last-minute fuss!
Expert Tips for Mini Tiramisu Cups
• Soak Wisely: Dip ladyfingers in coffee for only 1-2 seconds. Over-soaking can lead to soggy layers.
• Chill Time Matters: Allow your Mini Tiramisu Cups to chill for at least 4 hours. This sets the layers and melds the flavors beautifully.
• Layering Techniques: Aim for even layers of ladyfingers and cream. This not only enhances the visual appeal but also ensures balanced flavors in each bite.
• Use Fresh Ingredients: Using fresh mascarpone and real vanilla extract elevates the taste. Avoid substitutes to truly experience the authentic flavor.
• Presentation Counts: For an elegant touch, consider serving with a sprig of mint or chocolate shavings on top. It makes each cup irresistible!
What to Serve with Mini Tiramisu Cups?
A touch of elegance and delight can transform your dining table into a sweet symphony of flavors.
- **Espresso: ** A bold shot of espresso perfectly complements the coffee notes in your Mini Tiramisu Cups, enhancing their rich flavor.
- Fresh Berries: Juicy strawberries or raspberries add a tart freshness that brightly contrasts the creamy layers of your dessert.
- Chocolate Shavings: A sprinkle of chocolate shavings on top introduces a delightful crunch while elevating the indulgent experience.
- Whipped Cream: A dollop of lightly sweetened whipped cream on the side adds velvety richness that pairs wonderfully with each bite.
- Almond Biscotti: Crunchy biscotti offers a satisfying texture contrast and seamlessly ties in with the flavors of coffee and cream.
Indulging in these delightful additions transforms an already fantastic dessert into a full sensory experience that everyone will remember!
Mini Tiramisu Cups Variations
Don’t be afraid to get creative—these delightful Mini Tiramisu Cups are perfect for personalizing to your taste!
- Dairy-Free: Swap mascarpone and heavy cream for coconut cream and dairy-free cream cheese for a vegan twist.
- Flavor Infusion: Add a splash of coffee liqueur or hazelnut syrup to the coffee for an exciting flavor boost.
- Chocolate Lovers: Incorporate chocolate shavings or cocoa powder into the mascarpone mixture for a rich chocolate flavor.
- Fruit Twist: Layer fresh raspberries or strawberries between the mascarpone and ladyfingers for a fruity burst.
- Nutty Crunch: Sprinkle crushed walnuts or almonds between layers for a delightful texture contrast.
- Make it Spicy: Add a pinch of cinnamon or nutmeg to the mascarpone mixture for a warming aromatic note.
- Decadent Alternative: For an even richer treat, replace regular coffee with espresso for a true Italian experience.
- Gluten-Free: Use gluten-free ladyfingers or sponge cake if you’re looking for a gluten-free version without losing flavor.
Feel free to explore these variations and create a version of Mini Tiramisu Cups that suits your palate. For even more inspiration, consider trying our Chocolate Mousse Cups for a different chocolatey delight or our refreshing Berry Cheesecake Parfaits for a fruity alternative. Enjoy your culinary adventure!

Mini Tiramisu Cups Recipe FAQs
What type of mascarpone cheese should I use?
Absolutely go for fresh mascarpone! Look for it in the refrigerated section of your grocery store. Avoid any that has dark spots or looks overly runny, as these are signs it might be past its prime.
How should I store Mini Tiramisu Cups?
Store your Mini Tiramisu Cups in an airtight container in the refrigerator for up to 3 days. This way, they will remain fresh, allowing the flavors to meld beautifully. Before serving, ensure they are chilled for that refreshing taste!
Can I freeze Mini Tiramisu Cups?
Yes! You can freeze these delightful cups for up to 2 weeks. Just cover them with plastic wrap or transfer to a freezer-safe container to prevent freezer burn. When you’re ready to enjoy, thaw them in the refrigerator for about 6 hours or overnight, ensuring they keep that creamy texture.
What should I do if my cream mixture isn’t fluffy?
If your cream mixture isn’t reaching the fluffy peak stage, there could be a couple of reasons. Make sure your heavy cream is cold and your mixing bowl is clean and dry; even a small amount of fat can prevent it from whipping up properly. Beat on medium to high speed for 3-5 minutes until it's smooth and fluffy!
Are Mini Tiramisu Cups suitable for those with dietary restrictions?
If you’re concerned about dietary restrictions, you can make tweaks to the recipe. Use dairy-free mascarpone cheese and coconut cream for a lighter, lactose-free option. Always be cautious about cross-contamination when it comes to allergies, and check for gluten-free ladyfingers if necessary.
Indulge in Delightful Mini Tiramisu Cups Made Easy
Ingredients
Equipment
Method
- In a mixing bowl, combine mascarpone cheese, heavy cream, powdered sugar, and vanilla extract. Beat on medium speed for 3-5 minutes until smooth and fluffy.
- Brew strong coffee and allow it to cool slightly. Dip each ladyfinger in the brewed coffee for 1-2 seconds.
- Place a layer of dipped ladyfingers at the bottom of each serving cup, pressing them down gently.
- Spoon a layer of creamy mascarpone mixture over the ladyfingers, smoothing it out with a spatula.
- Repeat the process with another layer of soaked ladyfingers and then another layer of mascarpone mixture, finishing with the cream.
- Dust the top layer of mascarpone with cocoa powder using a fine mesh strainer.
- Cover with plastic wrap and refrigerate for at least 4 hours before serving.


Leave a Reply