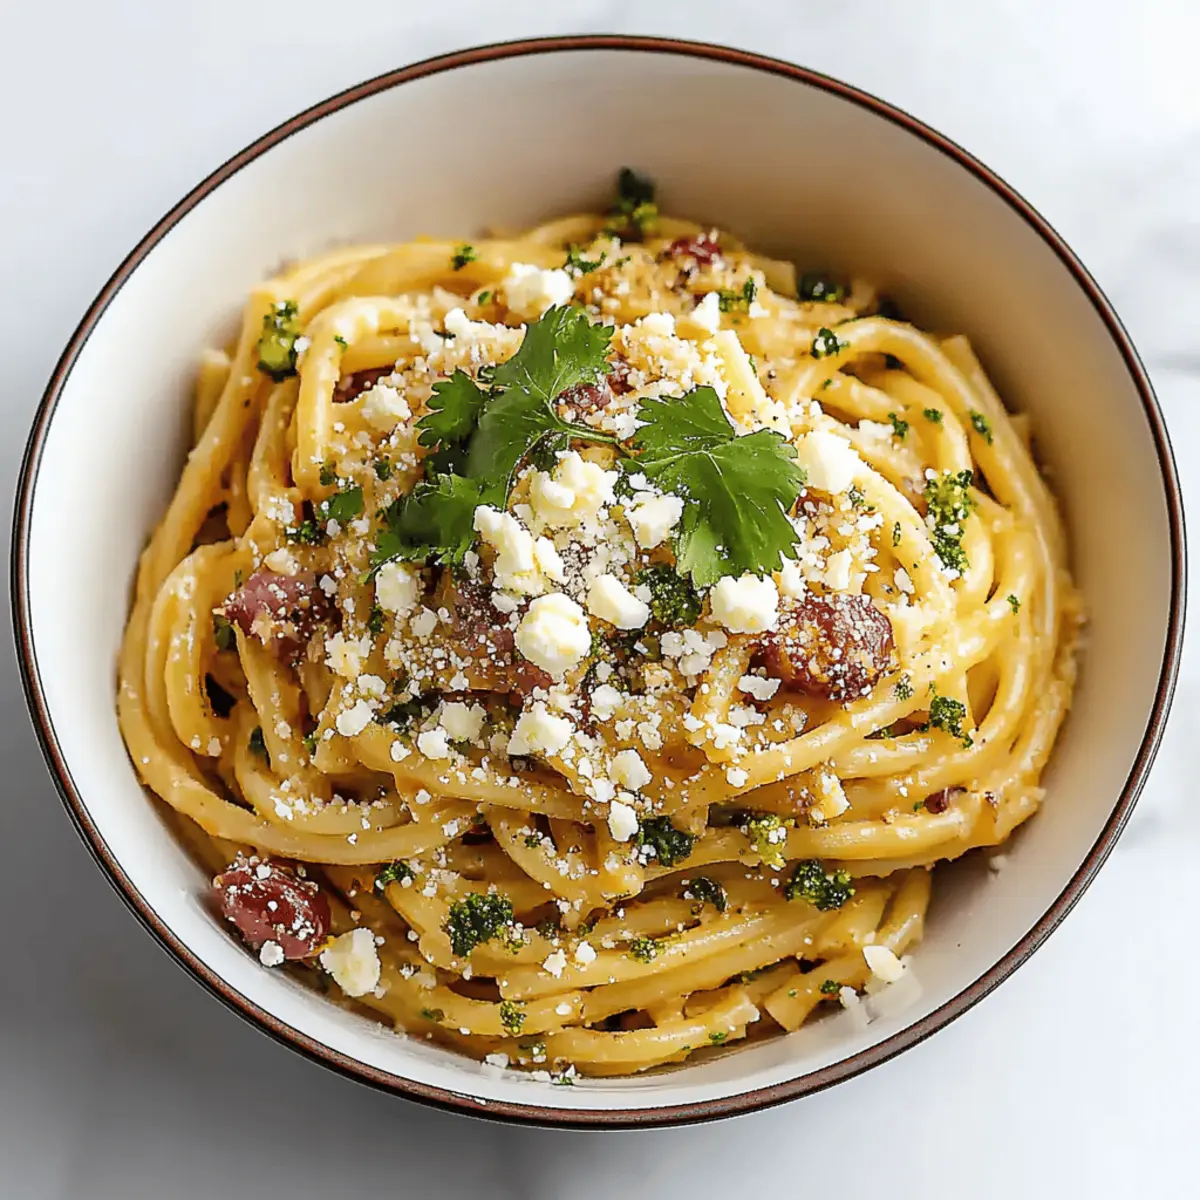
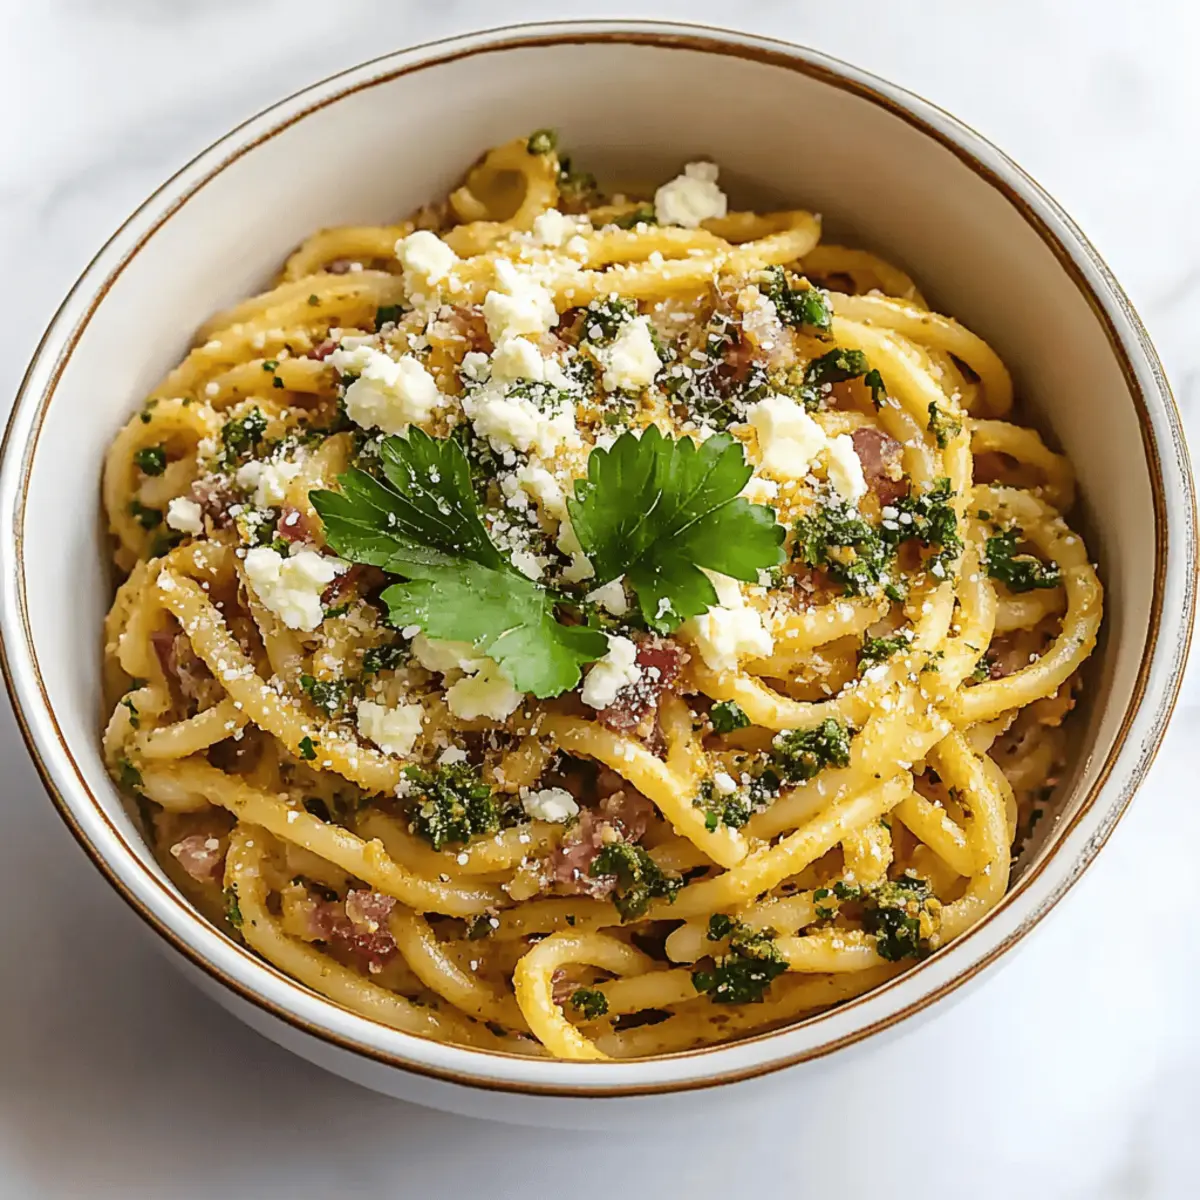
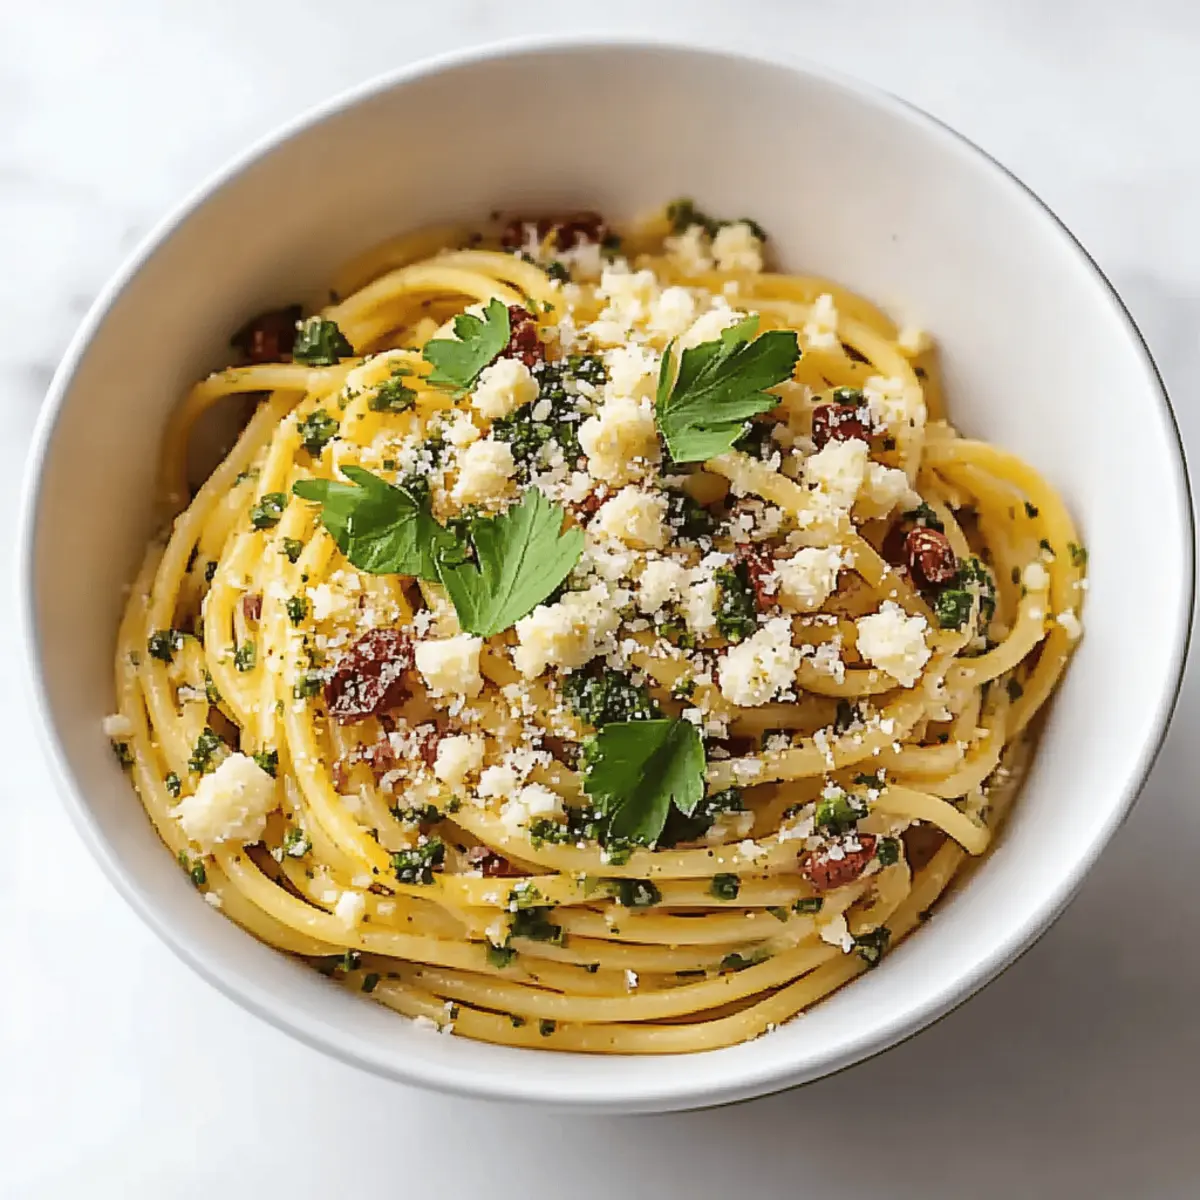
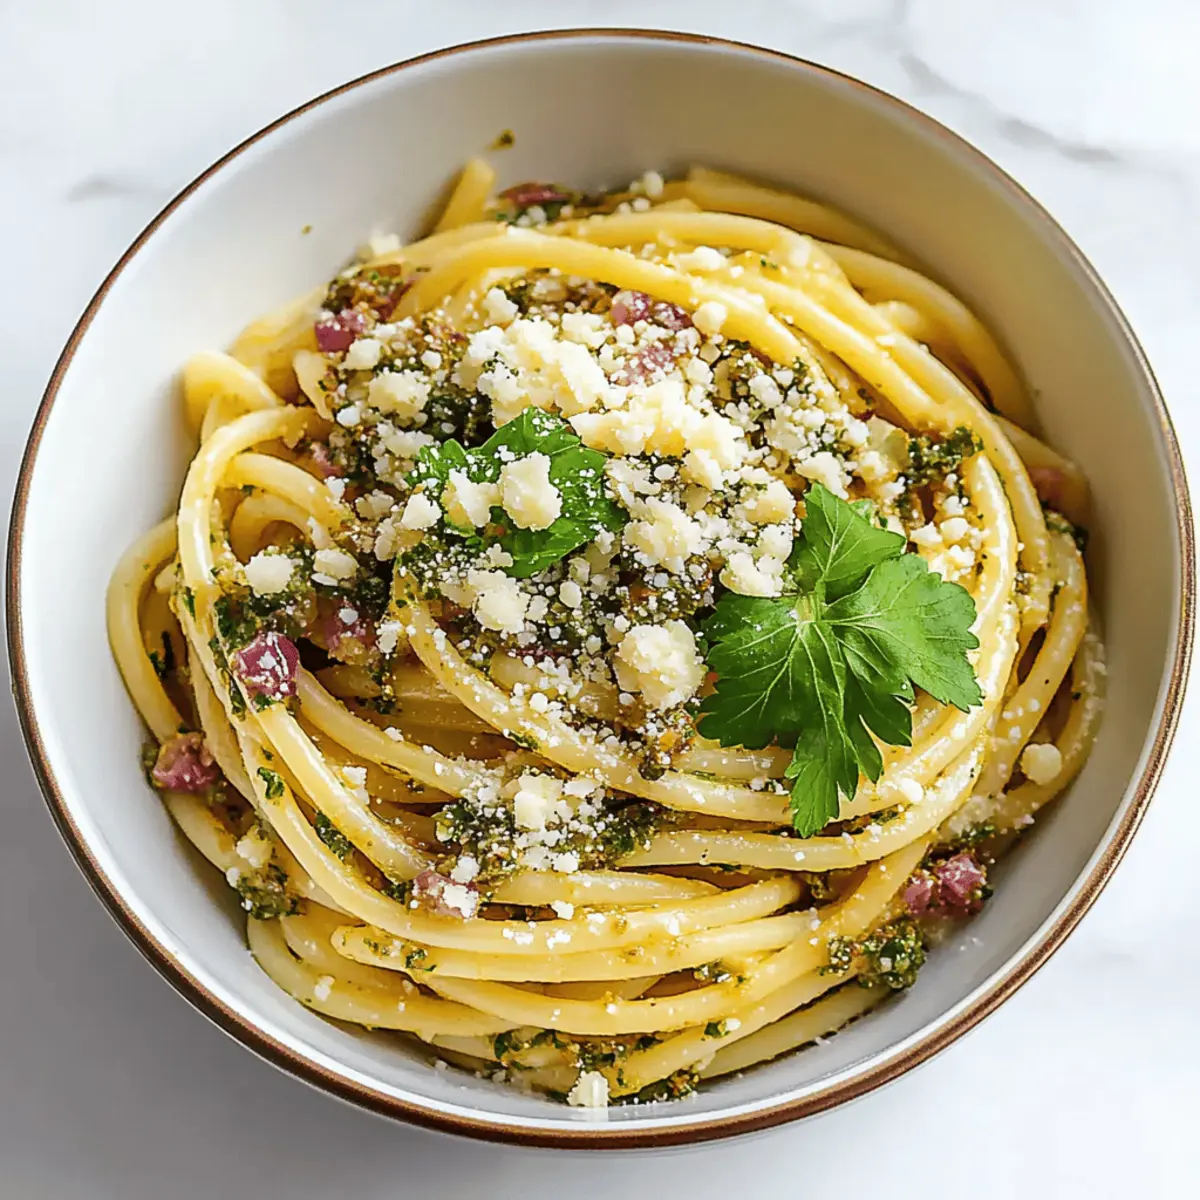
The aroma of roasted chiles wafting through my kitchen always evokes memories of sun-soaked summer afternoons. This is why I’m excited to share my beloved Hatch Chile Pasta, a dish that brings vibrant flavors to your dinner table in just 25 minutes! Made with fire-roasted hatch chiles, creamy Monterey Jack cheese, and a hint of cilantro, this recipe is both a crowd-pleaser and a comforting escape from the usual weeknight fare. You’ll love how quick it is to whip up, allowing you to savor those delightful homemade vibes without spending hours in the kitchen. Plus, it’s the perfect way to introduce fresh ingredients into your meals and impress your loved ones. Ready to add a zing to your pasta night? Let’s dive into this sensational Hatch Chile Pasta recipe!
Why Is Hatch Chile Pasta So Special?
Irresistible Flavor: This dish is bursting with vibrant taste thanks to the fire-roasted hatch chiles and creamy Monterey Jack cheese.
Quick and Easy: With a total time of just 25 minutes, it's perfect for busy weeknights when you want something homemade without the hassle.
Crowd-Pleasing Appeal: Whether you’re hosting friends or feeding the family, this pasta is sure to impress everyone at the table.
Versatile Options: Customize it by adding proteins like chicken or shrimp for a satisfying twist. You might also enjoy exploring variations like Cajun Chicken Pasta for an extra kick!
Colorful Presentation: Topped with fresh cilantro and crumbled cotija cheese, it’s as beautiful as it is delicious.
Indulge in this delightful recipe and elevate your pasta game with new flavors today!
Hatch Chile Pasta Ingredients
• Dive into the rich flavors with these essential ingredients!
For the Pasta
- 8 ounces spaghetti – a classic choice that perfectly holds onto the creamy sauce.
For the Sauce
- 1 cup fire-roasted hatch chiles, chopped – brings a smoky heat and vibrant color to your dish.
- 1 small onion, finely diced – adds sweetness and depth when sautéed.
- 2 cloves garlic, minced – infuses the sauce with aromatic goodness.
- 2 tablespoons olive oil – for sautéing the onions and garlic to golden perfection.
- 1 cup vegetable broth – a savory base that enhances the flavors without being overpowering.
- 1 teaspoon sea salt – balances the intense flavors beautifully.
- 1 teaspoon chili powder – adds an extra punch to your Hatch Chile Pasta!
For the Creamy Finish
- 1 cup Monterey Jack cheese, shredded – melts beautifully for a rich, creamy texture.
- 1 cup sour cream – creates a luscious, velvety sauce that clings to each noodle.
- ¼ cup chopped cilantro (or more for serving) – brings freshness and a pop of color.
For Serving
- Crumbled cotija cheese – adds a delightful salty flavor and texture.
- Chili powder (for dusting) – a sprinkle brings an enticing visual and flavor boost.
- Lime wedges (for serving) – a zesty squeeze brightens it all up!
Get ready to savor and share this delicious Hatch Chile Pasta with your loved ones!
Step‑by‑Step Instructions for Hatch Chile Pasta
Step 1: Boil the Pasta
Start by bringing a large pot of salted water to a rolling boil over high heat. Once boiling, add 8 ounces of spaghetti and cook according to the package instructions until al dente, which usually takes about 8–10 minutes. Stir occasionally to ensure even cooking, and keep an eye on it as it cooks to achieve that perfect texture.
Step 2: Prepare the Vegetables
While the pasta cooks, prepare your veggies by seeding and chopping 1 cup of fire-roasted hatch chiles and finely dicing 1 small onion. Set these aside, as they will add incredible flavor to your Hatch Chile Pasta. Make sure your garlic is minced as well, which typically takes just a minute or so.
Step 3: Sauté the Aromatics
In a large pan, heat 2 tablespoons of olive oil over medium heat. Once hot, add the diced onion and sauté for about 3–5 minutes, or until it becomes soft and translucent. This step is crucial as it builds the foundation of flavor for your sauce. Your kitchen will start to smell amazing!
Step 4: Add Garlic and Chiles
Next, add the minced garlic to the pan, cooking for an additional minute until fragrant. Then, incorporate the chopped hatch chiles, 1 cup of vegetable broth, 1 teaspoon of sea salt, and 1 teaspoon of chili powder. Stir everything together and let the mixture simmer for 3–5 minutes, allowing the flavors to meld and the sauce to thicken slightly.
Step 5: Incorporate Dairy
When the spaghetti is about 2 minutes from being done, reduce the heat on your pan and mix in 1 cup of shredded Monterey Jack cheese, 1 cup of sour cream, and ¼ cup of chopped cilantro. Stir continuously until the cheese melts completely and the sauce looks creamy and luscious, enveloping all the delightful ingredients.
Step 6: Adjust Sauce Consistency
Gradually pour in about ½ to ¾ cup of the reserved pasta cooking water to the sauce, stirring to loosen it to your desired consistency. This step ensures the sauce clings beautifully to the noodles in your Hatch Chile Pasta, making every bite creamy and flavorful.
Step 7: Combine Spaghetti and Sauce
Once the pasta is cooked and drained, immediately add it to the pan with the creamy hatch chile sauce. Toss gently but thoroughly to coat the spaghetti evenly, allowing the flavors to infuse into each noodle. The vibrant colors from the chiles and cheese will create a visual feast.
Step 8: Let Rest and Serve
After mixing, let the Hatch Chile Pasta rest off the heat for a few minutes. This helps the sauce thicken even more while you prepare to serve. When ready, transfer the pasta to serving plates, making sure to highlight those gorgeous colors.
Step 9: Garnish for Presentation
To finish, add beautiful garnishes of extra chopped cilantro, crumbled cotija cheese, and a dusting of chili powder over each plate. This not only elevates the flavors but also adds a pop of color, making your dish visually appealing.
Step 10: Enjoy with Lime Wedges
Serve your delicious Hatch Chile Pasta immediately, accompanied by lime wedges. A zesty squeeze from the lime will brighten the flavors, creating a delightful dining experience. Gather your loved ones and enjoy!
Hatch Chile Pasta Variations
Feel free to make this delicious Hatch Chile Pasta your own with these exciting variations!
-
Protein Boost: Add grilled chicken or shrimp for extra protein that complements the creamy sauce beautifully. They add a satisfying heartiness that everyone will love!
-
Vegan Twist: Substitute the Monterey Jack cheese and sour cream with a vegan cheese alternative and coconut yogurt for a dairy-free experience. The flavor transformation will still delight your taste buds!
-
Spice Level: For more heat, include fresh diced jalapeños or additional chili powder; it’s the perfect way to dial up the fiery flavor if you crave a little extra kick.
-
Flavorful Greens: Toss in spinach or kale during the final mixing step for added nutrition and vibrant color. They wilt down perfectly and blend wonderfully into the creamy sauce.
-
Cilantro Alternates: If cilantro isn’t your favorite, try using fresh basil or parsley to add a different flavor profile that perfectly complements the sauce.
-
Cheesy Delight: Incorporate different cheeses like pepper jack for an extra spicy twist or goat cheese for a creamy texture that’s simply irresistible.
-
Pasta Shapes: Switch up the spaghetti with other pasta shapes like fettuccine or penne for a new textural experience that can surprise and delight your family. Each noodle carries sauce differently!
-
Roasted Veggies: Throw in some roasted zucchini or bell peppers for a burst of flavor and added nutrition. They’ll provide a fresh crunch and enhance the overall texture of the dish.
These delicious variations will help you enjoy your Hatch Chile Pasta in multiple ways! For another delightful experience, try out my Pesto Pasta Sauce or a comforting Carbonara Pasta for a change of pace. Enjoy your culinary journey!
Expert Tips for Hatch Chile Pasta
-
Select Quality Chiles: Use fresh fire-roasted hatch chiles for the best, smoky flavor; store-bought canned versions may lack the same depth.
-
Pasta Cooking Water: Don’t forget to reserve the pasta cooking water; it helps adjust the sauce consistency perfectly, ensuring it clings to your Hatch Chile Pasta.
-
Sauté Time: Avoid rushing the sauté of onions and garlic. Allow them to soften completely for a fuller flavor foundation in your sauce.
-
Dairy Alternatives: If you want a lighter version, consider using Greek yogurt instead of sour cream and a lower-fat cheese alternative.
-
Mix and Rest: After mixing the pasta and sauce, let it rest off the heat briefly. This ensures the sauce thickens beautifully for a creamy finish.
-
Garnish With Flavor: Don't skimp on garnishes like cotija cheese and lime wedges—they elevate the taste and presentation of your Hatch Chile Pasta!
How to Store and Freeze Hatch Chile Pasta
Fridge: Store any leftover Hatch Chile Pasta in an airtight container in the fridge for up to 3 days to maintain its creamy texture and flavors.
Freezer: To freeze, portion the pasta into airtight freezer bags or containers, allowing up to 2 months for storage. Thaw overnight in the fridge before reheating.
Reheating: When ready to enjoy, reheat gently in a pan over low heat, adding a splash of vegetable broth or reserved pasta water to revive the creamy sauce.
Room Temperature: Avoid leaving Hatch Chile Pasta at room temperature for more than 2 hours to ensure food safety.
What to Serve with Hatch Chile Pasta
When it comes to elevating your Hatch Chile Pasta meal, complementary sides and drinks can transform a simple dinner into a delightful feast that tantalizes the senses.
-
Creamy Mashed Potatoes: These buttery, smooth potatoes offer a comforting texture that balances the heat of the chiles wonderfully.
-
Tangy Cucumber Salad: Refreshing and crisp, this salad contrasts nicely with the creamy pasta, offering a burst of cool flavor in each bite.
-
Garlic Bread: Crunchy on the outside and soft on the inside, garlic bread adds a savory touch. Scoop up any leftover sauce with each delicious slice!
-
Roasted Vegetables: Seasonal roasted veggies bring in earthy flavors and vibrant colors, enhancing your dinner table visually as well as nutritionally.
-
Chilled White Wine: Pair your meal with a crisp Sauvignon Blanc; its acidity will cut through the richness of the pasta while enhancing the flavor profile.
-
Spicy Grilled Shrimp: For protein lovers, shrimp skewers with a dash of spice can heighten the flavors of the Hatch Chile Pasta while adding a delightful textural contrast.
-
Lemon Sorbet: A light and zesty dessert to cleanse your palate after the rich pasta, ending the meal on a refreshing note.
Mix and match these companions to create a vibrant dining experience that turns your table into a symphony of flavors, making the most of your delicious Hatch Chile Pasta!
Make Ahead Options
These Hatch Chile Pasta preparations are perfect for busy home cooks looking to save time during hectic weeknights! You can chop and sauté the onions and garlic up to 3 days in advance, storing them in an airtight container in the refrigerator. Additionally, you can prepare the creamy sauce (sans the pasta) and refrigerate it for up to 24 hours. To finish the dish, simply reheat the sauce over medium heat, then cook the spaghetti according to package instructions. Combine everything, adding a splash of reserved pasta water to achieve that luscious creamy consistency. This way, you ensure your Hatch Chile Pasta remains just as delicious while saving you precious time!
Hatch Chile Pasta Recipe FAQs
What type of hatch chiles should I use?
It's best to use fresh fire-roasted hatch chiles for their smoky, rich flavor. If you're unable to find them fresh, you can opt for canned hatch chiles, but keep in mind that they may not provide the same depth of flavor as freshly roasted ones.
How should I store leftover Hatch Chile Pasta?
Store any leftover Hatch Chile Pasta in an airtight container in the fridge for up to 3 days. This will help maintain its creamy texture and delicious flavors. Just make sure to let it cool down before sealing!
Can I freeze Hatch Chile Pasta?
Absolutely! To freeze, portion the pasta into airtight freezer bags or containers, ensuring you remove excess air to prevent freezer burn. It can be stored for up to 2 months. When you're ready to enjoy it, defrost it overnight in the fridge and reheat gently on the stove, adding a splash of vegetable broth if necessary.
What should I do if the sauce is too thick?
If your creamy sauce turns out too thick, don’t worry! Simply add a bit of the reserved pasta cooking water, stirring until you achieve your desired consistency. Start with a couple of tablespoons and gradually add more if needed. This should help loosen everything up beautifully!
Are there any dietary considerations for this recipe?
Yes! This Hatch Chile Pasta contains dairy from sour cream and Monterey Jack cheese, making it unsuitable for anyone with lactose intolerance or dairy allergies. For a dairy-free version, try using a non-dairy sour cream alternative and a dairy-free cheese that melts well. Additionally, be cautious if serving to pets—ingredients like onions and garlic are toxic to dogs!
How long can I leave Hatch Chile Pasta at room temperature?
It's important to prioritize food safety! Avoid leaving Hatch Chile Pasta at room temperature for more than 2 hours. If it’s a hot day, keep it refrigerated, and serve immediately to ensure freshness and taste.
Creamy Hatch Chile Pasta That'll Spice Up Dinner Tonight
Ingredients
Equipment
Method
- Start by bringing a large pot of salted water to a rolling boil over high heat. Once boiling, add 8 ounces of spaghetti and cook according to the package instructions until al dente, which usually takes about 8–10 minutes. Stir occasionally to ensure even cooking, and keep an eye on it as it cooks to achieve that perfect texture.
- While the pasta cooks, prepare your veggies by seeding and chopping 1 cup of fire-roasted hatch chiles and finely dicing 1 small onion. Set these aside, as they will add incredible flavor to your Hatch Chile Pasta. Make sure your garlic is minced as well, which typically takes just a minute or so.
- In a large pan, heat 2 tablespoons of olive oil over medium heat. Once hot, add the diced onion and sauté for about 3–5 minutes, or until it becomes soft and translucent. This step is crucial as it builds the foundation of flavor for your sauce. Your kitchen will start to smell amazing!
- Next, add the minced garlic to the pan, cooking for an additional minute until fragrant. Then, incorporate the chopped hatch chiles, 1 cup of vegetable broth, 1 teaspoon of sea salt, and 1 teaspoon of chili powder. Stir everything together and let the mixture simmer for 3–5 minutes, allowing the flavors to meld and the sauce to thicken slightly.
- When the spaghetti is about 2 minutes from being done, reduce the heat on your pan and mix in 1 cup of shredded Monterey Jack cheese, 1 cup of sour cream, and ¼ cup of chopped cilantro. Stir continuously until the cheese melts completely and the sauce looks creamy and luscious, enveloping all the delightful ingredients.
- Gradually pour in about ½ to ¾ cup of the reserved pasta cooking water to the sauce, stirring to loosen it to your desired consistency. This step ensures the sauce clings beautifully to the noodles in your Hatch Chile Pasta, making every bite creamy and flavorful.
- Once the pasta is cooked and drained, immediately add it to the pan with the creamy hatch chile sauce. Toss gently but thoroughly to coat the spaghetti evenly, allowing the flavors to infuse into each noodle. The vibrant colors from the chiles and cheese will create a visual feast.
- After mixing, let the Hatch Chile Pasta rest off the heat for a few minutes. This helps the sauce thicken even more while you prepare to serve. When ready, transfer the pasta to serving plates, making sure to highlight those gorgeous colors.
- To finish, add beautiful garnishes of extra chopped cilantro, crumbled cotija cheese, and a dusting of chili powder over each plate. This not only elevates the flavors but also adds a pop of color, making your dish visually appealing.
- Serve your delicious Hatch Chile Pasta immediately, accompanied by lime wedges. A zesty squeeze from the lime will brighten the flavors, creating a delightful dining experience. Gather your loved ones and enjoy!
Leave a Reply