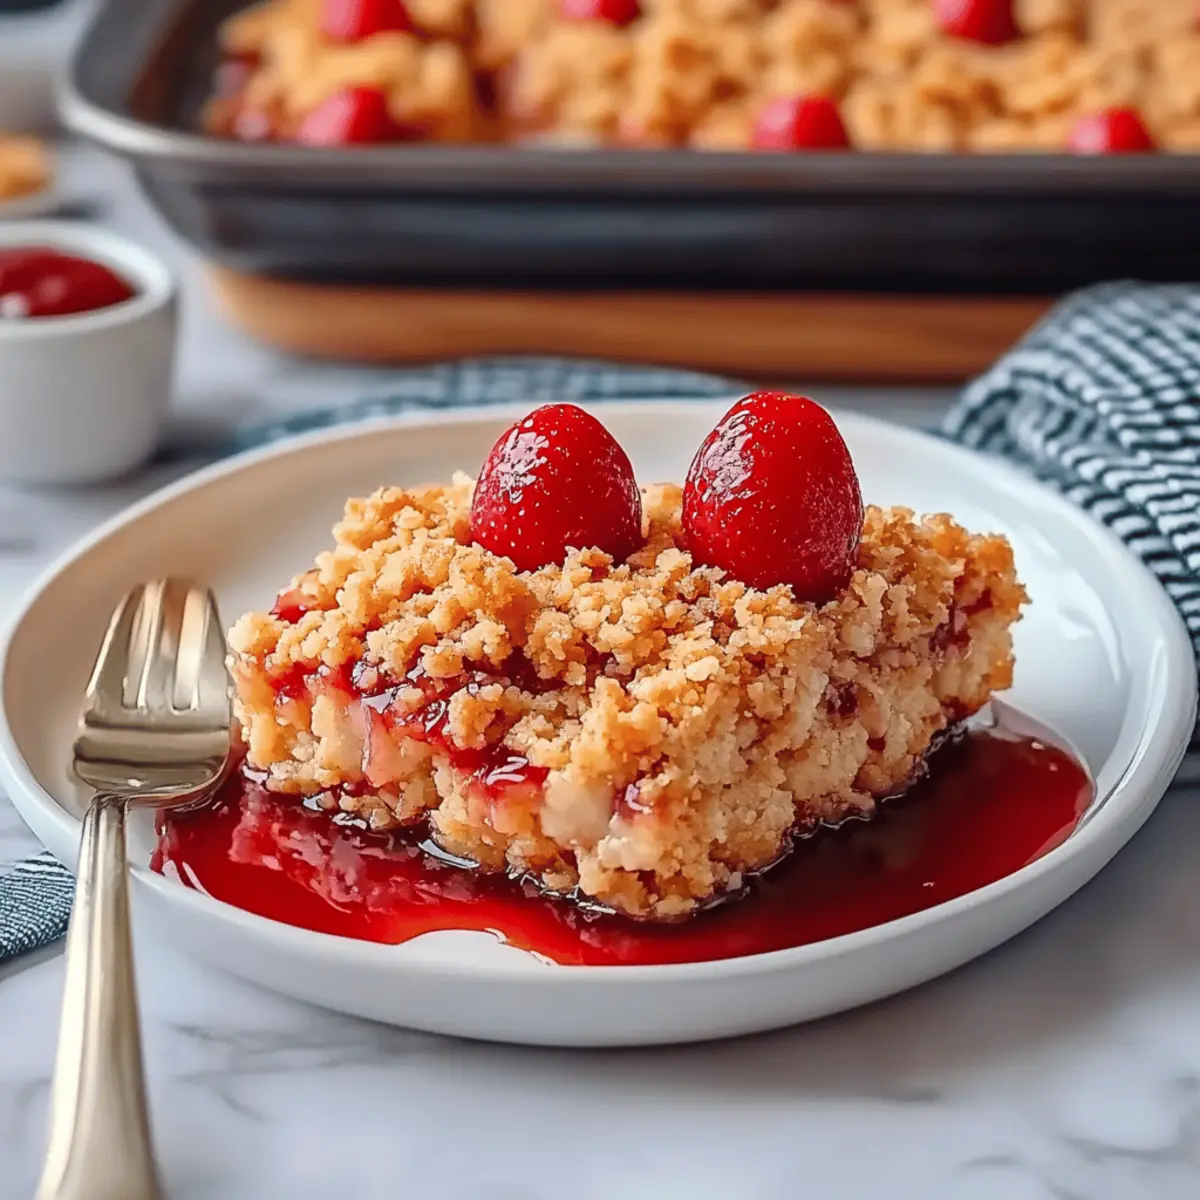
The first bite of a warm Cherry Crumble feels like a warm embrace on a chilly evening. With each forkful, the sweet-tart burst of fresh cherries dances on my palate, reminding me of sunny orchard days. This Cherry Crumble isn't just a dessert; it's a delightful experience that comes together in just one hour, making it perfect for those busy weeknights or leisurely weekends. Not only is this recipe a crowd-pleaser, but it also showcases the fresh flavors of summer in an easy-to-make dish that won’t leave you feeling guilty. Trust me, once you serve this to your loved ones, they'll be lining up for seconds! Ready to transform simple ingredients into something extraordinary? Let's dive into the details of creating this comforting delight!

Why is Cherry Crumble the Ultimate Dessert?
Comforting, there’s nothing quite like the cozy aroma of warm cherries baking in the oven. Quick and Easy, this Cherry Crumble comes together in just one hour, making it perfect for any occasion. Versatile, you can easily swap out cherries for other fruits, adapting the recipe to your seasonal favorites. Deliciously Indulgent, the combination of sweet cherries and a buttery oat topping is simply irresistible. Plus, crowd-pleasing goodness means everyone will want to dig in—it's the perfect way to impress your family or guests! Embrace summer flavors by whipping up this delightful dish, and don't forget to check out my tips on how to choose ripe cherries.
Cherry Crumble Ingredients
• Discover the magic of a Cherry Crumble with these simple ingredients.
For the Filling
- Fresh cherries – Use 6 cups, pitted and sliced, for that sweet-tart flavor.
- Granulated sugar – ½ cup helps balance the cherries' natural tartness.
- All-purpose flour – ½ cup thickens the filling, giving it a nice texture.
For the Topping
- Rolled oats – 1 cup creates a deliciously crunchy topping perfect for contrast.
- Unsalted butter – 6 tablespoons, softened, adds richness and binds the topping.
- Granulated sugar – ⅝ cup enhances the flavor and sweetness of the topping.
- Salt – ¼ teaspoon balances the sweetness, making all the flavors pop.
- Ground cinnamon (optional) – ½ teaspoon adds a warm, comforting spice to the mix.
Embrace the joy of home-cooked comfort food with this delightful Cherry Crumble!
Step‑by‑Step Instructions for Cherry Crumble
Step 1: Preheat the Oven
Begin by preheating your oven to 375°F (190°C). While the oven heats up, grab your 9×9-inch baking pan and grease or line it with parchment paper to avoid any sticking later. This first step sets the stage for a perfectly baked Cherry Crumble, so let that warm, inviting air fill your kitchen!
Step 2: Prepare the Cherry Filling
In a large mixing bowl, combine 6 cups of fresh, pitted, and sliced cherries with ½ cup of granulated sugar and ½ cup of all-purpose flour. Stir gently until the cherries are well-coated and the sugar and flour are fully integrated. Once mixed, pour this enticing mixture into your prepared baking pan, spreading it evenly to form a beautiful base for your crumble.
Step 3: Make the Crumble Topping
In another bowl, combine 1 cup of rolled oats, ⅝ cup of granulated sugar, 6 tablespoons of softened unsalted butter, ¼ teaspoon of salt, and the optional ½ teaspoon of ground cinnamon. Use your hands or a fork to mix until crumbly. The topping should have a delightful texture that will create a crispy layer atop the juicy cherries in your Cherry Crumble.
Step 4: Assemble the Dish
Take your crumble topping and evenly sprinkle it over the cherry filling in the baking pan. Ensure that every bit of cherry filling is covered with the topping; this will create that perfect contrast of flavors and textures. The anticipation builds as you prepare to create a warm, golden dessert that will envelop your senses.
Step 5: Bake to Perfection
Once your Cherry Crumble is assembled, place it in the preheated oven and bake for 40–45 minutes. Keep an eye on it; you’ll know it’s ready when the cherry filling bubbles and the topping turns a rich, golden brown. This delightful transformation promises to fill your home with an irresistible aroma, drawing everyone in!
Step 6: Cool and Serve
After baking, remove the Cherry Crumble from the oven and let it cool for about 10 minutes. This allows the flavors to meld and makes serving easier. The warm, bubbly cherries paired with a crunchy topping will be absolutely irresistible when you scoop it onto plates. Enjoy the comforting goodness of your homemade Cherry Crumble!
What to Serve with Cherry Crumble
When the aroma of warm cherries and buttery oats fills the air, your mind naturally wonders what to pair with this delicious dessert masterpiece.
-
Vanilla Ice Cream: This classic pairing offers a creamy contrast to the warm crumble, making each bite utterly divine. The cold ice cream melts into the warm cherry filling, creating a delightful flavor explosion.
-
Whipped Cream: Light and airy, this topping adds a luxurious softness that balances the tartness of the cherries beautifully. A dollop on top invites a whimsical touch to each serving.
-
Greek Yogurt: A spoonful of tangy Greek yogurt brings a refreshing zing that cuts through the sweetness, perfect for a healthier option. Plus, it adds an extra layer of creaminess that complements the crumble.
-
Coffee: A rich cup of freshly brewed coffee pairs perfectly with the sweet-tart flavors, enhancing the overall experience. The warm beverage contrasts with the cold dessert, creating a cozy moment.
-
Sparkling Water: For a refreshing lift, serve it with a slice of lemon in sparkling water. The effervescence cleanses the palate and offsets the sweetness of the crumble.
-
Peach Sorbet: This fruity indulgence provides a lovely shortcut to summer bliss, with flavors that meld harmoniously with the cherry goodness. The sorbet's icy texture is a delightful counterpoint to the warm crumble.
-
Fruit Salad: A light, fresh fruit salad with seasonal fruits adds a bright burst of flavor, contrasting nicely with the richness of the Cherry Crumble. It’s a refreshing way to balance out your dessert course.
Expert Tips for Cherry Crumble
- Use Ripe Cherries: Make sure your cherries are fully ripe for the best sweetness! Overripe or underripe cherries can throw off the balance of flavors.
- Adjust Sweetness: Taste your cherries before adding sugar; if they’re very sweet, reduce the sugar slightly for a more balanced Cherry Crumble.
- Crispy Topping: For added crunch, consider toasting the oats in a pan before mixing them into the topping. This enhances flavor and texture!
- Storage Solutions: If you have leftovers, store the Cherry Crumble in the fridge, covered tightly. Reheat in the oven for a few minutes for that freshly baked feel.
- Serving Suggestions: Serve warm with a scoop of vanilla ice cream or a dollop of whipped cream for a delightful contrast to the warm, tart cherries!
Storage Tips for Cherry Crumble
Fridge: Store any leftover Cherry Crumble in an airtight container for up to 3 days. This keeps it fresh and ready to enjoy anytime!
Freezer: If you want to save it for later, freeze the Cherry Crumble in a tightly sealed container for up to 3 months. Just make sure it’s completely cooled before freezing.
Reheating: To enjoy your Cherry Crumble again, reheat in the oven at 350°F (175°C) for 15–20 minutes until warm and bubbly. This helps maintain its delightful texture!
Make Ahead Options
These Cherry Crumble preparations are perfect for busy home cooks looking to save time during the week! You can prepare the cherry filling and topping up to 24 hours in advance. Simply combine the pitted and sliced cherries with sugar and flour, then refrigerate them in an airtight container. Next, make the oat topping using the rolled oats, softened butter, and spices, and store it separately. When you’re ready to bake, just assemble the layers in your baking pan and pop it in the oven, following the original baking instructions. This way, you’ll have a deliciously warm Cherry Crumble ready to impress your family and friends with minimal effort!
Cherry Crumble Variations & Substitutions
Feel free to unleash your creativity by trying out these delightful twists on the classic Cherry Crumble!
- Berry Bliss: Swap cherries with a mix of blueberries and raspberries for a vibrant, berry-filled treat. The burst of flavors will dance on your taste buds!
- Nutty Addition: Fold in ½ cup of chopped pecans or walnuts into the crumble mixture for an extra crunch. The toasted nuts add a delicious complexity that will elevate your dessert.
- Gluten-Free: Substitute all-purpose flour with almond flour or a gluten-free blend to cater to gluten sensitivities. This swap keeps the essence intact while making it accessible for everyone.
- Coconut Crumble: Add ½ cup of shredded coconut to the topping for a tropical flair! This twist introduces a subtle sweetness that complements the cherries perfectly.
- Spicy Kick: Sprinkle in a pinch of cayenne or chili powder into the topping for a surprising heat. This unique addition creates a tantalizing sweet-spicy contrast that’s simply unforgettable!
- Peachy Keen: For a summery take, replace some or all of the cherries with sliced fresh peaches. The juicy peaches will blend beautifully with the crumble, offering a delightful twist.
- Vegan Delight: Swap butter with coconut oil or a vegan butter substitute for a plant-based version. Combine it with maple syrup instead of granulated sugar for a lovely, caramel-like flavor.
- Chocolate Drizzle: Enhance your crumble by drizzling melted dark chocolate over the top just before serving. The rich chocolate will create an indulgent finish that’s hard to resist!
Explore these variations to create your ideal Cherry Crumble, and don’t forget to share your favorite twists with family and friends!
Cherry Crumble Recipe FAQs
How do I choose ripe cherries for my Cherry Crumble?
Absolutely! Look for cherries that are vibrant in color and firm to the touch. Ideally, they'll be glossy and plump, without any dark spots or blemishes. If the cherries are sweet and juicy, they’re perfect for your crumble!
What’s the best way to store leftover Cherry Crumble?
Very! After you’ve savored your delicious Cherry Crumble, store any leftovers in an airtight container in the fridge for up to 3 days. If you plan on keeping it longer, transfer it to the freezer, where it can last for up to 3 months. Just make sure it's fully cooled before freezing!
Can I freeze Cherry Crumble, and how should I do it?
Yes, you can! To freeze your Cherry Crumble, allow it to cool completely to room temperature. Slice it into portions and wrap each one tightly in plastic wrap, then place them in a freezer-safe container or zip-top bag. This method maintains its flavor and texture, making it ready for a rainy day!
What should I do if my Cherry Crumble topping isn’t crispy?
The more the merrier! If the topping comes out soft, it could be due to too much butter or not baking it long enough. Next time, ensure you sprinkle the topping evenly over the cherries and bake until golden brown and bubbling. If you like, you can also toast your oats lightly before mixing them in; this adds extra crunch!
Are there any dietary considerations for making Cherry Crumble?
Absolutely! If you're accommodating allergies, consider using gluten-free oats and flour to make this recipe friendly for those with gluten sensitivities. For a dairy-free option, substitute the butter with coconut oil or a vegan butter alternative. Just be sure to check your ingredients for any other allergens!

Delicious Cherry Crumble That Will Brighten Your Day
Ingredients
Equipment
Method
- Preheat your oven to 375°F (190°C) and prepare your baking pan.
- In a large bowl, combine fresh cherries, sugar, and flour, then pour the mixture into the pan.
- In another bowl, mix oats, sugar, butter, salt, and cinnamon until crumbly, then sprinkle over the cherry filling.
- Bake for 40–45 minutes until bubbly and golden brown.
- Let it cool for about 10 minutes before serving.


Leave a Reply