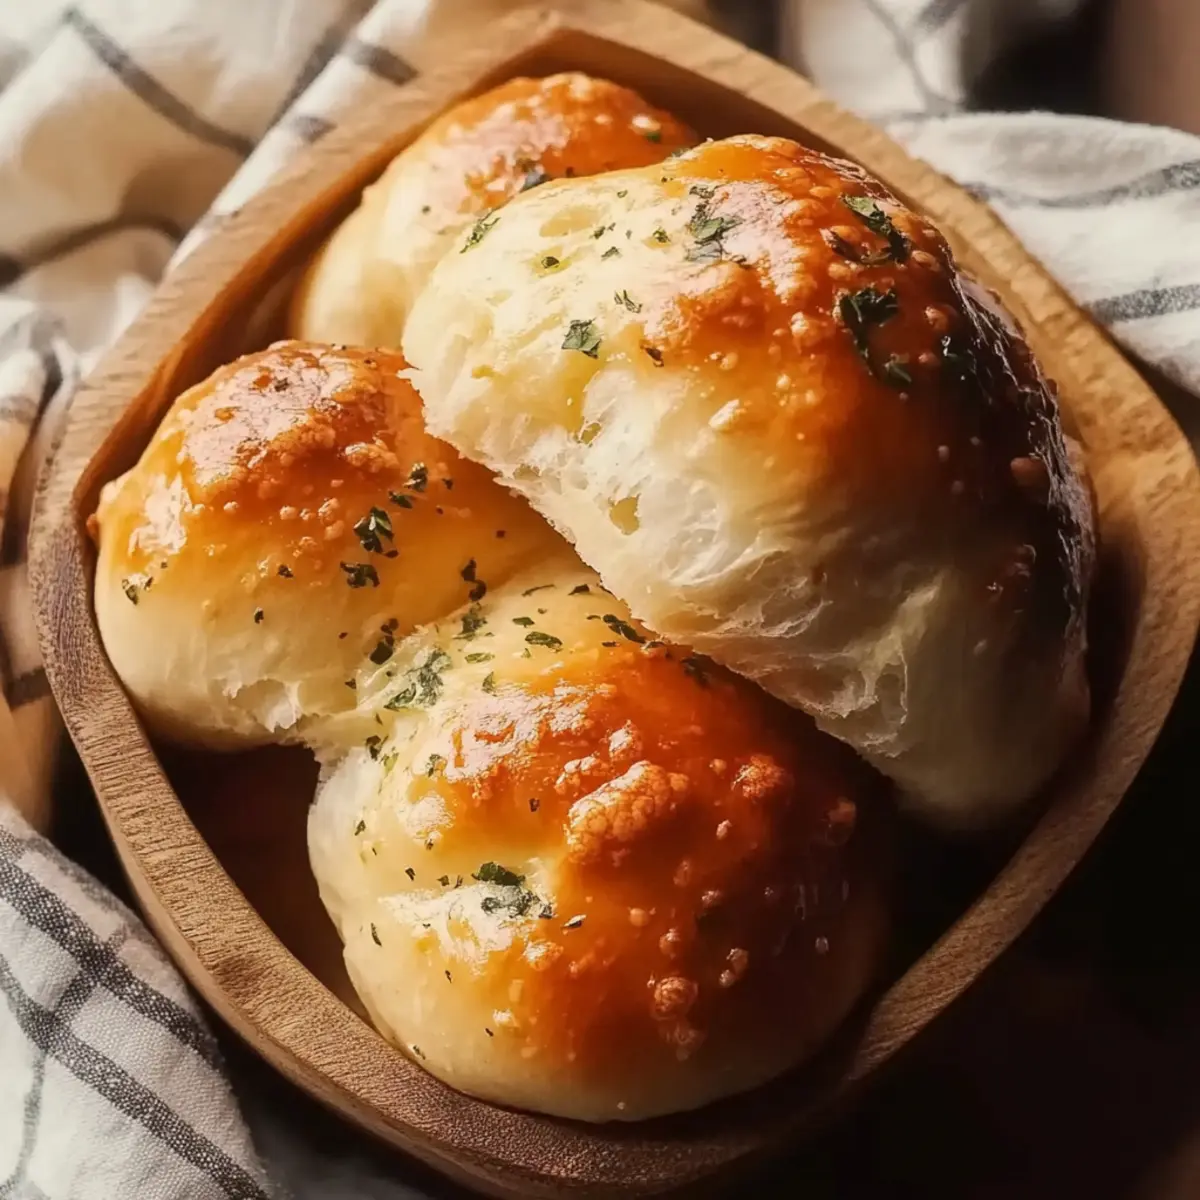
As I pulled the fluffy, golden-cheeked rolls from the oven, the intoxicating aroma of garlic and melted cheese enveloped my kitchen—it was a moment worth savoring. Today, I'm excited to share my recipe for Cheesy Garlic Dinner Rolls, a delightful dish that elevates any meal while effortlessly impressing friends and family. These rolls not only come together in less than an hour but also freeze beautifully, ensuring you’re always ready for unexpected guests or a comforting weeknight dinner. Perfectly soft on the inside and delightfully crispy on the outside, they’re a crowd-pleaser that pairs well with everything from hearty soups to refreshing salads. Ready to dive into the world of homemade deliciousness? Let's roll up our sleeves and get started!
Why are these rolls so irresistible?
Warm, Cheesy Delight: Each bite bursts with molten cheese and fragrant garlic, making them utterly addictive.
Homemade Simplicity: With just a few staple ingredients, this recipe allows you to create restaurant-quality rolls right in your kitchen.
Versatile Accompaniment: Perfect alongside soups, salads, or even as a standalone snack, these rolls adapt to any meal.
Project for Everyone: Whether you’re a seasoned chef or a kitchen newbie, the step-by-step instructions make it accessible for all cooking levels.
Make-Ahead Magic: Prepare the dough in advance and keep it ready in the fridge for a last-minute treat or surprise gatherings.
Get ready to impress your family and friends with these Cheesy Garlic Dinner Rolls that will have everyone asking for more!
Cheesy Garlic Dinner Rolls Ingredients
• Get ready to create irresistible rolls!
For the Dough
- Warm milk – This activates the yeast, creating a fluffy texture for your rolls.
- Sugar – A pinch sweetens the dough and helps feed the yeast for better proofing.
- Yeast – Make sure it’s fresh for the magic of rising!
- Melted butter – Adds richness and flavor to the rolls.
- Salt – Balances the sweetness and enhances overall taste.
- Large eggs – Provides structure and moisture to keep the rolls tender.
- All-purpose flour – The foundation of your roll, giving it the right texture.
For the Filling
- Shredded cheese – Choose your favorite cheese for that gooey, melty goodness inside!
- Minced garlic – Infuses the rolls with a savory aroma and flavor burst.
For the Finishing Touches
- Additional melted butter – Brush on top for a golden-brown, crispy exterior.
- Fresh parsley – Adds a pop of color and freshness as a beautiful garnish.
With these ingredients, you're just a few steps away from making mouthwatering Cheesy Garlic Dinner Rolls that will steal the show at any meal!
Step‑by‑Step Instructions for Cheesy Garlic Dinner Rolls
Step 1: Activate the Yeast
In a small bowl, combine 1 cup of warm milk with 2 ¼ teaspoons of sugar and 2 ¼ teaspoons of yeast. Stir gently and let it sit for about 5-10 minutes until it becomes frothy, signaling that the yeast is activated and ready to create that delightful fluffiness in your Cheesy Garlic Dinner Rolls.
Step 2: Mix the Dough
In a large mixing bowl, pour in the melted butter, add 1 teaspoon of salt and 2 large eggs. Stir in the frothy yeast mixture, then gradually add 3 ½ cups of all-purpose flour while mixing until a soft dough forms. This step sets the foundation for your rolls, so ensure everything is well combined before moving on.
Step 3: Knead the Dough
Lightly flour a clean surface and transfer the dough onto it. Knead the dough for about 5-7 minutes until it becomes smooth and elastic, a sign that gluten is developing. You’ll know it’s ready when the dough springs back slightly when pressed. This kneading will lead to fluffy, light dinner rolls.
Step 4: Let the Dough Rise
Place the kneaded dough into a greased bowl and cover it with a kitchen towel. Allow it to rise in a warm area for 1-2 hours or until it doubles in size. You want the dough to become puffy and airy, which is crucial for those perfect Cheesy Garlic Dinner Rolls we all crave.
Step 5: Prepare the Filling
In a separate bowl, mix together 3 cloves of minced garlic with 1 cup of shredded cheese. Set this scrumptious mixture aside as it will be the delicious surprise hidden inside our rolls. It's this filling that makes your Cheesy Garlic Dinner Rolls unforgettable!
Step 6: Shape the Rolls
Once the dough has risen, gently punch it down to release the air, then divide it into 12 equal pieces. Flatten each piece slightly and place about one tablespoon of the garlic and cheese mixture in the center. Pinch around the filling to seal it closed and shape each piece into a ball, ensuring all that goodness stays wrapped inside.
Step 7: Second Rise
Arrange the rolls seam-side down in a greased baking dish, leaving a little space between each. Cover them with a towel and let them rise for another 30-45 minutes until they look puffy and full. This final rise will help achieve those airy, lovely Cheesy Garlic Dinner Rolls.
Step 8: Bake the Rolls
Preheat your oven to 375°F (190°C). Brush each roll with additional melted butter to enhance flavor and achieve a golden-brown crust. Bake for 20-25 minutes or until they are beautifully golden and a bit crispy on top. Their aromatic scent will fill your kitchen, making it hard to wait!
Step 9: Finish with a Glaze
Once baked, remove the rolls from the oven and immediately brush them with melted butter. Sprinkle fresh parsley on top for a pop of color and that final touch of flavor. The warmth of the rolls will soak in that extra butter, making them even more irresistible.
Step 10: Serve Warm
Now, your delightful Cheesy Garlic Dinner Rolls are ready to share! Serve them warm as a perfect accompaniment to any meal, or simply enjoy them on their own. Their soft texture and cheesy goodness will surely have everyone coming back for seconds!
Make Ahead Options
Preparing Cheesy Garlic Dinner Rolls in advance can save you precious time for those busy weeknights! You can prepare the dough, shape it into rolls, and refrigerate it for up to 24 hours before baking. Simply follow all steps until the second rise, then cover the rolls tightly with plastic wrap and store them in the fridge. When you're ready to bake, take them out and let them rise at room temperature for about 30 minutes before brushing with melted butter and baking. This method ensures the rolls remain light and fluffy, delivering that melt-in-your-mouth goodness when served!
Expert Tips for Cheesy Garlic Dinner Rolls
-
Perfect Yeast Activation: Always ensure the milk is warm (not hot) to keep yeast alive. If it’s too hot, it could kill the yeast, resulting in dense rolls.
-
Knead with Care: Knead the dough until smooth and elastic—about 5-7 minutes. This develops gluten, ensuring soft and fluffy Cheesy Garlic Dinner Rolls.
-
First Rise is Key: Don’t rush the rising time! Allow the dough to double in size in a warm area to achieve the airy consistency we all love in rolls.
-
Seal the Filling Well: Pinch the dough tightly around the cheese and garlic filling to prevent it from leaking during baking. This keeps all the deliciousness sealed inside.
-
Golden Finish: Brush with melted butter before baking for that gorgeous golden-brown crust. You can add more butter after baking for an extra luscious taste.
How to Store and Freeze Cheesy Garlic Dinner Rolls
Fridge: Store leftover Cheesy Garlic Dinner Rolls in an airtight container for up to 3 days. This keeps them fresh and soft, ready to enjoy later.
Freezer: For longer storage, freeze the rolls in a single layer on a baking sheet. Once frozen, transfer them to a freezer bag for up to 3 months.
Reheating: To reheat, simply pop the rolls in the oven at 350°F (175°C) for about 10 minutes. This revives their fluffy texture and warm cheesy goodness!
Thawing: When you're ready to enjoy frozen rolls, thaw them overnight in the fridge and reheat as mentioned for the best results.
Cheesy Garlic Dinner Rolls Variations
Feel free to mix and match these ideas to tailor the rolls to your taste, ensuring deliciousness in every bite!
-
Dairy-Free: Substitute shredded cheese with a dairy-free alternative like vegan cheese for a delightful plant-based treat. You'll still get that creamy, cheesy experience without the dairy.
-
Garlic Lover’s Delight: Increase the garlic to 6 cloves for an intense flavor burst that will satisfy any garlic enthusiast. It’s a fantastic way to crank up the aroma and taste.
-
Herb-Infused: Add fresh herbs like rosemary or thyme to the dough for a fragrant twist. This brings an aromatic quality that elevates the rolls to a whole new level.
-
Spicy Kick: Mix in red pepper flakes with the cheese filling for a zesty twist that will surprise your palate. It's a fun way to add some heat to your rolls!
-
Cheese Lover’s Dream: Experiment with different cheeses such as mozzarella, cheddar, or even bleu cheese for unique flavor profiles. Each cheese offers a distinct character that can transform these rolls.
-
Whole Wheat Option: Swap half of the all-purpose flour with whole wheat flour for a nuttier flavor and added nutrition. These rolls will be heartier yet still deliciously soft!
-
Stuffed Surprise: Consider adding a few chunks of ham or pepperoni to the cheese mixture for a savory overload. It's a mouthwatering surprise that makes your rolls even more satisfying.
-
Sweet Touch: For a fun dessert twist, fill the rolls with a mix of cinnamon, sugar, and butter. Bake them, then drizzle with glaze for a tasty treat perfect for any occasion.
With these variations, your Cheesy Garlic Dinner Rolls will never be the same twice! And if you're curious about what to serve alongside these rolls, don't miss out on pairing them with homemade creamy tomato soup or a vibrant green salad for a complete meal.
What to Serve with Cheesy Garlic Dinner Rolls
Looking to create the perfect meal alongside these warm, cheesy bites? Let’s dive into some delightful pairings that will elevate your dining experience.
-
Hearty Tomato Soup: This classic dish’s rich flavors and smooth texture blend perfectly with the cheesy, garlicky rolls, making every bite comforting. Imagine dipping those luscious rolls into a warm bowl of tomato goodness!
-
Crisp Garden Salad: The freshness of greens and vibrant veggies brings a refreshing crunch that balances the rich, cheesy rolls. Add a light vinaigrette to enhance the flavors and cleanse the palate.
-
Savory Roast Chicken: Juicy, well-seasoned roast chicken pairs beautifully with the fluffy rolls, allowing the rolls to soak up all those delicious chicken juices for an unforgettable experience.
-
Creamy Mashed Potatoes: The smoothness of creamy mashed potatoes complements the rolls’ texture while providing a satisfying contrast. Top with a dollop of gravy for added delight, creating a comforting plate.
-
Zesty Grilled Vegetables: Bright, charred vegetables add a pop of color and a lovely smoky flavor that contrasts nicely with the richness of the cheesy filling. Their beautiful presentation makes any meal feel special.
-
Lemonade or Iced Tea: To wash it all down, serve a refreshing glass of lemonade or iced tea. Their refreshing acidity cuts through the cheese, leaving you feeling refreshed and ready for another roll.
These pairing ideas promise a delicious array of flavors and textures, ensuring your Cheesy Garlic Dinner Rolls are the star of the meal!
Cheesy Garlic Dinner Rolls Recipe FAQs
How do I choose the right milk for these rolls?
Absolutely! For the best results, use whole milk as its fat content adds richness and flavor. However, you can also use 2% milk if that’s what you have on hand. Just ensure it's warm, around 110°F (43°C), to effectively activate the yeast.
What’s the best way to store leftover dinner rolls?
Very! Store any leftover Cheesy Garlic Dinner Rolls in an airtight container at room temperature for up to 3 days. If you notice them becoming a bit dry, a slice of bread in the container can help keep them moist!
Can I freeze these rolls, and how should I do it?
Absolutely! To freeze, let the rolls cool completely, then place them on a baking sheet in a single layer and freeze until solid. After that, transfer them to a freezer bag or airtight container for up to 3 months. When you’re ready to enjoy, thaw them overnight in the fridge and reheat them at 350°F (175°C) for about 10 minutes.
How can I troubleshoot if my rolls aren’t rising?
If your Cheesy Garlic Dinner Rolls aren't rising, there are a couple of things to check. First, ensure your yeast is fresh—check the expiration date. Second, the warm milk should be around 110°F (43°C). If it's too hot, it will kill the yeast. Aim for a warm, draft-free area for the dough to rise, which usually takes 1-2 hours. If all else fails, you can try again with a new batch of yeast.
Are these rolls suitable for people with dietary restrictions?
Very! If you’re making these rolls for someone with gluten sensitivities, I recommend using a gluten-free all-purpose flour blend. Just ensure it has a binding agent like xanthan gum included. For those with dairy allergies, try substituting the milk with a non-dairy alternative and use vegan butter.
Melt-in-Your-Mouth Cheesy Garlic Dinner Rolls to Impress
Ingredients
Equipment
Method
- Combine warm milk, sugar, and yeast in a small bowl. Let sit for 5-10 minutes until frothy.
- In a large bowl, combine melted butter, salt, and eggs. Stir in the yeast mixture, then gradually add flour until a soft dough forms.
- Knead the dough on a floured surface for 5-7 minutes until smooth and elastic.
- Place the dough in a greased bowl, cover, and let rise in a warm area for 1-2 hours until doubled.
- In a bowl, mix minced garlic with shredded cheese and set aside.
- Punch down the dough, divide into 12 pieces, place filling in the center, and shape into balls.
- Arrange rolls in a greased baking dish, cover, and let rise for 30-45 minutes until puffy.
- Preheat oven to 375°F (190°C). Brush rolls with melted butter and bake for 20-25 minutes until golden.
- Brush baked rolls with melted butter and sprinkle with parsley before serving warm.


Leave a Reply