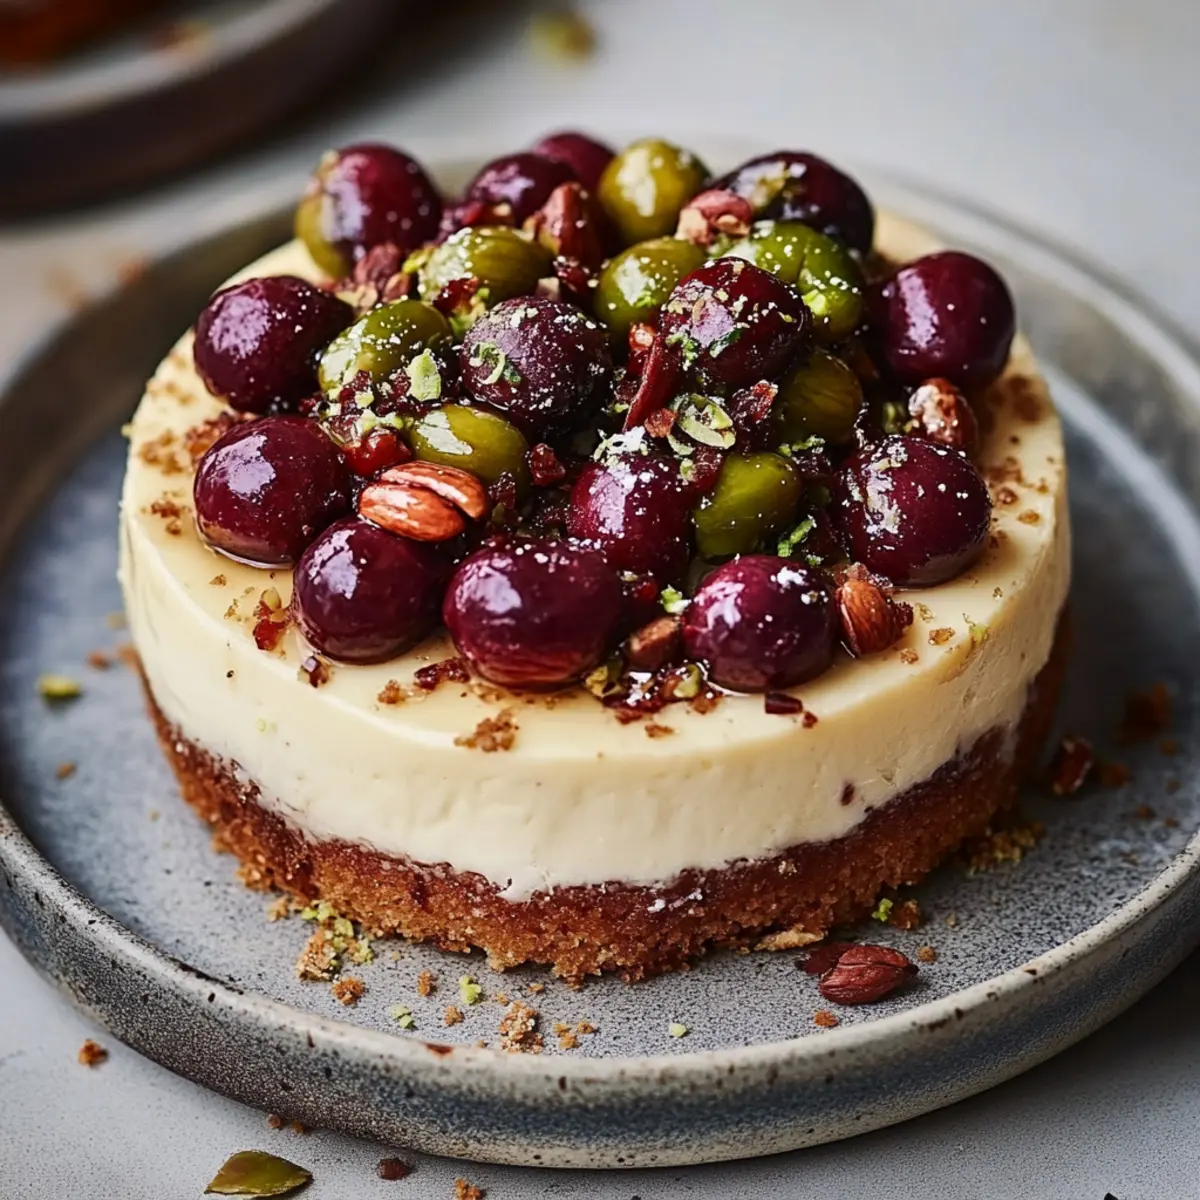
As I sifted through my kitchen pantry, a delightful thought fluttered through my mind—the perfect blend of sweet and nutty. Enter my Cherry Pistachio Cheesecake, a luxurious dessert that’s not just delicious but also a stunning centerpiece for any occasion. This recipe is a quick and easy crowd-pleaser, ideal for those who want to impress without spending the whole day in the kitchen. It marries tangy cherries with crunchy pistachios, creating a flavor combination that dances on your palate while still offering the comforting embrace of homemade cheesecake. And let's not forget the fun of preparing it—each step is filled with joy and anticipation. Are you ready to dive into this graceful dessert that will have everyone asking for seconds?
What makes this cheesecake special?
Unique Flavor Fusion: The Cherry Pistachio Cheesecake perfectly blends tart cherries with crunchy pistachios, creating a delightful taste sensation that’s unlike any regular cheesecake.
Easy Prep: With simple ingredients and straightforward steps, you'll have this delicious dessert ready in no time, making it perfect for both seasoned chefs and home bakers alike.
Stunning Presentation: Serve this showstopper at your next gathering, and watch as it becomes the star of the dessert table, impressing friends and family with its beautiful colors and flavors.
Make-Ahead Convenience: With its chilling time, this cheesecake allows you to prep ahead, letting you enjoy the festivities without stress, just like with my No-Bake Blueberry Cheesecake.
Crowd-Pleasing Delight: Whether it’s a holiday, birthday, or just a treat for yourself, this cheesecake is sure to have everyone coming back for another slice!
Cherry Pistachio Cheesecake Ingredients
For the Crust
- Graham cracker crumbs – These provide a sweet and crunchy base, perfect for holding the creamy filling.
- Unsalted butter – Binding the crumbs together, this adds richness; make sure it's melted for easy mixing.
- Granulated sugar – A touch of sweetness complements the graham flavor in the crust.
For the Filling
- Cream cheese – This is the star ingredient that gives the cheesecake its smooth and creamy texture.
- Powdered sugar – Adds sweetness without grittiness for a silky filling.
- Vanilla extract – Enhances the overall flavor; always opt for pure vanilla for the best taste!
- Sour cream – Adds a tangy flavor that balances the sweetness of the filling, making the cheesecake irresistibly creamy.
- Large eggs – Essential for setting the cheesecake; room temperature eggs are easier to incorporate.
- Fresh cherries – These juicy gems add a tartness that beautifully contrasts with the sweet filling. Using seasonal cherries elevates the flavor!
- Shelled pistachios – Bring a delightful crunch and nutty flavor; a fantastic complement to the cherries.
- Lemon juice – Brightens the overall flavor; fresh lemon juice will give you the best zing!
Feel free to let your creativity flow with these ingredients as you craft your Cherry Pistachio Cheesecake—each element works together to create a masterpiece that’s both beautiful and delicious!
Step‑by‑Step Instructions for Cherry Pistachio Cheesecake
Step 1: Preheat and Prepare the Pan
Preheat your oven to 325°F (160°C). While it heats, take a 9-inch springform pan and grease it well with unsalted butter, then lightly dust it with flour. This prevents any sticking and ensures easy removal later. The pan should be ready to hold the delicious Cherry Pistachio Cheesecake that’s to come.
Step 2: Make the Crust
In a medium mixing bowl, combine 1 ½ cups of graham cracker crumbs, ½ cup of melted unsalted butter, and ¼ cup of granulated sugar. Stir until the mixture resembles wet sand. This will create a tasty, crunchy layer. Once ready, press the crumb mixture firmly and evenly into the bottom of your prepared springform pan.
Step 3: Bake the Crust
Place the crust in the preheated oven and bake for 10 minutes. You’ll know it’s ready when it has set slightly and given off a lovely golden aroma. After baking, remove it from the oven and let it cool completely. This allows the crust to firm up, providing a sturdy base for your Cherry Pistachio Cheesecake.
Step 4: Prepare the Filling
In a large mixing bowl, using an electric mixer on medium speed, beat 2 cups of softened cream cheese until it’s creamy and smooth—about 2 minutes. This step is crucial for achieving that luxurious texture. Make sure to scrape down the sides of the bowl for even mixing.
Step 5: Incorporate the Sugars
Gradually add 1 cup of powdered sugar to the cream cheese while continuing to mix. Blend until the sugar is fully incorporated and the mixture is silky. Scraping the sides once more ensures you catch any remaining lumps. The filling for your Cherry Pistachio Cheesecake should now be sweet and smooth.
Step 6: Mix in Flavorings
Add 1 teaspoon of vanilla extract, 1 cup of sour cream, and 1 tablespoon of lemon juice to the mixture. Blend until everything is combined and smooth. This delightful mixture will create a refreshing flavor that perfectly complements your cheesecake, enhancing its overall character beautifully.
Step 7: Add the Eggs
Now, add 3 large eggs to the bowl, one at a time, mixing gently just until combined after each addition. Be careful not to overmix—overworking the eggs can lead to cracks in your cheesecake! Your filling should look perfectly blended and ready for those beautiful cherries and pistachios.
Step 8: Fold in Cherries and Pistachios
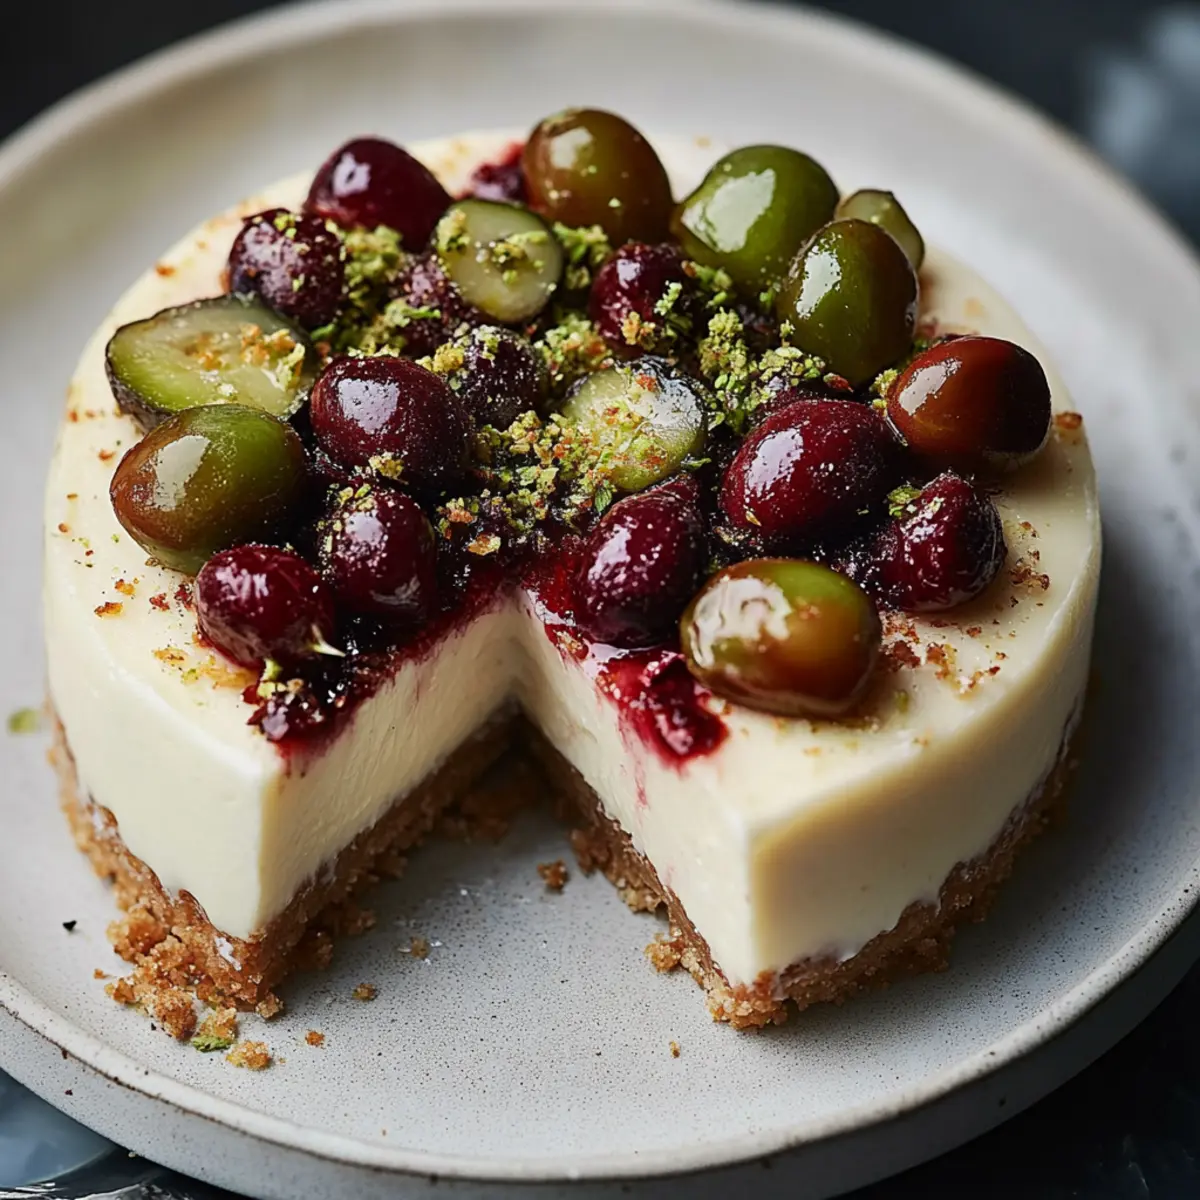
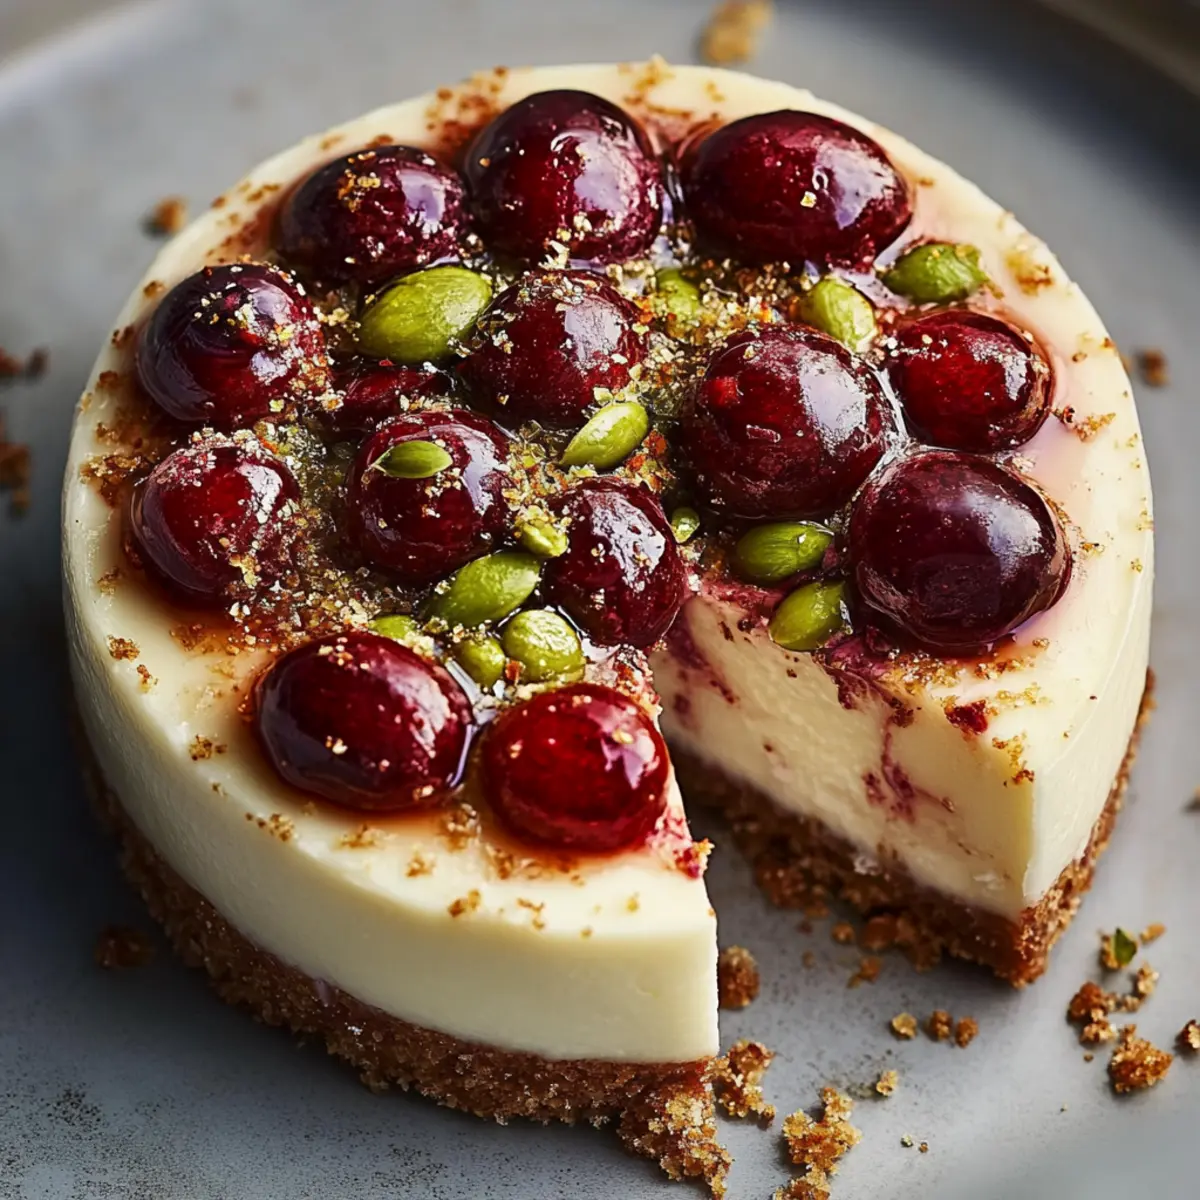
Using a spatula, gently fold in 1 cup of pitted and halved fresh cherries along with 1 cup of roughly chopped shelled pistachios. Take care to incorporate them without breaking the cherry halves, as they add not just flavor but also a lovely visual appeal to your Cherry Pistachio Cheesecake.
Step 9: Pour the Filling
Pour the luscious cheesecake filling into the cooled crust in the springform pan. Use a spatula to smooth the top for that flawless finish. Once poured, the filling will await its turn to bake, promising a decadent dessert that you and your guests will adore.
Step 10: Bake the Cheesecake
Bake the cheesecake in the oven for 50–60 minutes. You’ll know it’s done when the edges are set, and the center has a slight jiggle. Keep an eye on it as it bakes, as this is when your Cherry Pistachio Cheesecake transforms into a stunning centerpiece for any occasion.
Step 11: Cool in the Oven
Once baked, turn off the oven and crack the door open. Let the cheesecake cool in the oven for about 1 hour. This step helps prevent cracking by slowly lowering the temperature. The aroma of your Cherry Pistachio Cheesecake will fill your kitchen, tempting everyone nearby!
Step 12: Chill the Cheesecake
After the hour has passed, transfer your cheesecake to the refrigerator and let it chill for a minimum of 4 hours—or better yet, overnight. This allows the flavors to meld beautifully and ensures a perfectly set texture that's a delight to slice into when serving.
Step 13: Serve and Enjoy!
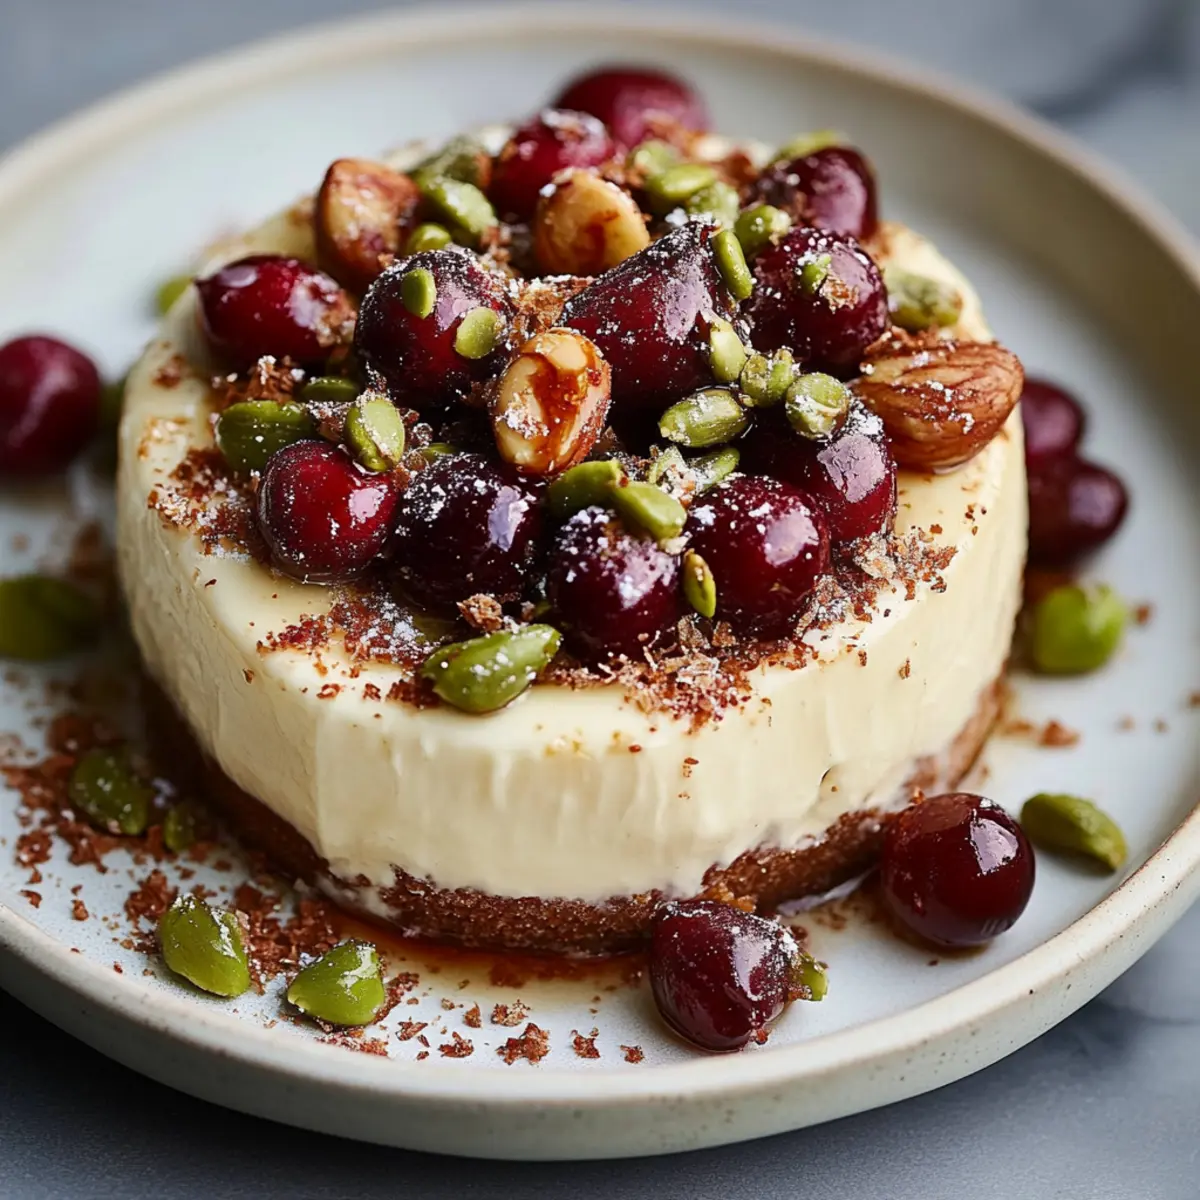
Once chilled and set, carefully remove the sides of the springform pan. Slice your stunning Cherry Pistachio Cheesecake and serve it chilled, optionally garnishing with additional cherries and chopped pistachios. Each serving promises a burst of flavor that will have everyone coming back for more.
Cherry Pistachio Cheesecake Variations
Feel free to unleash your creativity and make this cheesecake your own with these delightful ideas!
-
Nut-Free: Substitute the pistachios with sunflower seeds for a similar crunch without the nuts. Great texture and flavor await!
-
Chocolate Lover's Twist: Add ½ cup of melted dark chocolate to the filling for a rich contrast that complements the cherries beautifully. Indulge in that luxurious chocolate flavor!
-
Fruit Fusion: Try swapping cherries for fresh raspberries or strawberries for a vibrant and fresh twist. Each bite will bring a lovely tartness that excites the taste buds.
-
Lower-Sugar Option: Use a sugar substitute like stevia or erythritol in equal amounts to make this cheesecake a guilt-free treat. Enjoy the same delightful flavor without the extra calories.
-
Vegan-Friendly: Replace cream cheese with vegan cream cheese and eggs with flaxseed meal mixed with water. This option retains the creamy texture while catering to plant-based diets.
-
Spice it Up: Add 1 teaspoon of cinnamon or nutmeg to the filling for a warm, spicy undertone. This will tickle your senses and elevate the cheesecake's flavor profile.
-
Citrus Infusion: Incorporate zest from one orange or lime into the filling for a zesty brightness that livens up the cheesecake. The refreshing flavor is sure to surprise!
-
Extra Crunch: Top the finished cheesecake with toasted coconut flakes for an unexpected twist of flavor and texture. The added crunch will make each slice unforgettable.
These variations will not only keep things exciting but will also adapt this cheesecake to fit any taste or dietary preference. Happy baking and experimenting!
What to Serve with Cherry Pistachio Cheesecake
Looking to complete your meal in style? These delicious pairings will elevate your experience and delight your taste buds.
-
Fresh Fruit Salad: A vibrant mix of seasonal fruits adds a refreshing contrast, balancing the richness of the cheesecake beautifully.
-
Vanilla Ice Cream: Creamy ice cream melds perfectly with the flavors of the cheesecake, providing a delightful temperature and taste contrast.
-
Chocolate Drizzle: A drizzle of dark chocolate sauce can add a decadent touch, enhancing the flavors of the cherries and pistachios.
-
Whipped Cream: Light and fluffy, freshly whipped cream adds an airiness that complements each slice of Cherry Pistachio Cheesecake beautifully.
-
Sparkling Water: A chilled glass of sparkling water cleanses the palate, allowing each bite of cheesecake to shine without overpowering.
-
Coffee or Espresso: The rich bitterness of coffee provides an enjoyable and sophisticated pairing, balancing the sweetness of the cheesecake.
-
Lemon Sorbet: This light and zesty sorbet refreshes the palate, making for a delightful finish that echoes the lemon juice in the cheesecake.
-
Toasted Nuts: A sprinkle of toasted almonds or additional pistachios offers a crunchy texture contrast, enhancing the overall experience with extra nuttiness.
Expert Tips for Cherry Pistachio Cheesecake
-
Perfect Cherries: Choose ripe cherries for maximum flavor; they should be slightly firm with a deep red color for the best results in your cheesecake.
-
Room Temperature Ingredients: Make sure cream cheese and eggs are at room temperature—this helps create a smooth filling without lumps, which keeps your Cherry Pistachio Cheesecake creamy.
-
Gentle Mixing: When adding eggs, mix just until incorporated. Overmixing can introduce air bubbles, leading to cracks in your cheesecake as it bakes.
-
Avoiding Cracks: Follow the cooling process by leaving the cheesecake in the oven post-bake—this gradual cooling helps prevent cracks and maintain a beautiful surface.
-
Chilling Time: Don't rush the chilling time! Allowing the cheesecake to set overnight enhances flavors and ensures a perfect texture when slicing.
Make Ahead Options
Preparing your Cherry Pistachio Cheesecake ahead of time is a fantastic way to save precious hours during busy weeknights or special occasions! You can make the crust and filling up to 24 hours in advance. Simply prepare the crust and let it cool completely, then store it covered in the refrigerator. Once you're ready to bake, mix your filling, pour it over the crust, and bake as directed. To maintain the cheesecake's creamy quality, be sure to refrigerate it for a minimum of 4 hours (preferably overnight) after baking. Just before serving, garnish with additional cherries and pistachios for a fresh, vibrant touch. Enjoy the scrumptious flavors with minimal last-minute effort!
How to Store and Freeze Cherry Pistachio Cheesecake
Fridge: Keep your Cherry Pistachio Cheesecake in an airtight container or covered with plastic wrap for up to 5 days to maintain its creamy texture and delightful flavors.
Freezer: For longer storage, freeze the cheesecake after it has set. Wrap it tightly in plastic wrap and then in aluminum foil to prevent freezer burn, and it will last for up to 2 months.
Thawing: When ready to enjoy, thaw the cheesecake overnight in the fridge for the best texture. This gentle thawing retains its delicious creaminess.
Reheating: Serve your cheesecake chilled directly from the fridge; it’s best enjoyed cold, letting those wonderful flavors shine!
Cherry Pistachio Cheesecake Recipe FAQs
How do I choose ripe cherries for my cheesecake?
Absolutely! Look for cherries that are slightly firm with a deep red color—this indicates ripeness and maximum flavor. Avoid any cherries with dark spots or blemishes, as they may be overripe or bruised.
What’s the best way to store leftovers?
Very! Store your Cherry Pistachio Cheesecake in an airtight container or cover it tightly with plastic wrap. It will stay fresh in the fridge for up to 5 days, maintaining that lovely creamy texture and delightful flavors.
Can I freeze my cheesecake?
Yes! To freeze, let the cheesecake cool completely after chilling, then wrap it tightly in plastic wrap followed by aluminum foil to prevent freezer burn. It can be stored for up to 2 months.
How should I thaw my frozen cheesecake?
To thaw, place the cheesecake in the refrigerator overnight. This slow thawing process retains its delicious creaminess and ensures a wonderful texture when serving.
Why is my cheesecake cracking, and how can I prevent it?
Cracking can occur for a few reasons, such as overmixing the eggs or rapid temperature changes while baking. To prevent cracking, make sure to mix the eggs just until combined, and after baking, let the cheesecake cool in the oven with the door slightly ajar for about an hour—this will help it cool gradually.
Are there any dietary considerations I should be aware of?
If you have guests with dietary restrictions, be mindful that this cheesecake contains dairy and eggs. You could consider alternatives, like using dairy-free cream cheese or plant-based eggs, to accommodate those with allergies.
Delightful Cherry Pistachio Cheesecake for Your Taste Buds
Ingredients
Equipment
Method
- Preheat your oven to 325°F (160°C) and grease a 9-inch springform pan with unsalted butter, then lightly dust it with flour.
- In a medium mixing bowl, combine graham cracker crumbs, melted unsalted butter, and granulated sugar, stirring until it resembles wet sand. Press the mixture into the bottom of the prepared springform pan.
- Bake the crust in the preheated oven for 10 minutes, then let it cool completely.
- In a large mixing bowl, beat softened cream cheese until creamy and smooth, about 2 minutes.
- Gradually add powdered sugar while mixing, blending until fully incorporated.
- Add vanilla extract, sour cream, and lemon juice to the mixture, blending until combined and smooth.
- Add eggs one at a time, mixing gently until just combined.
- Fold in pitted and halved fresh cherries and roughly chopped shelled pistachios.
- Pour the cheesecake filling into the cooled crust, smoothing the top.
- Bake the cheesecake for 50–60 minutes or until the edges are set with a slight jiggle in the center.
- Turn off the oven, crack the door open, and let the cheesecake cool in the oven for about 1 hour.
- Transfer the cheesecake to the refrigerator and chill for a minimum of 4 hours or overnight.
- Remove the sides of the springform pan, slice your Cherry Pistachio Cheesecake, and serve chilled.


Leave a Reply