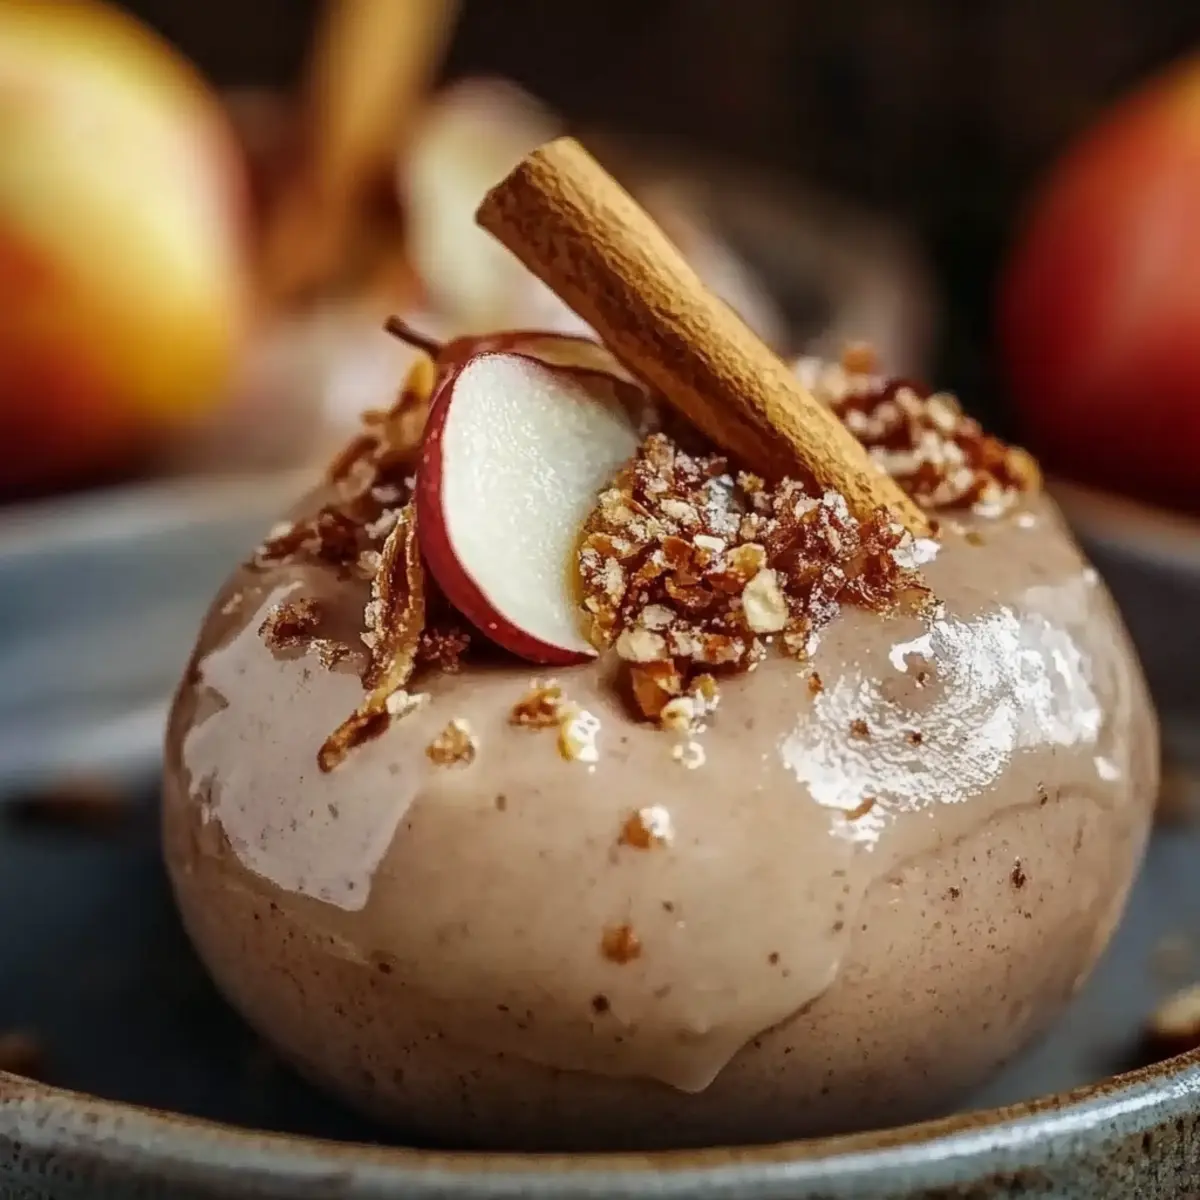
As I stood in my kitchen, surrounded by the warm, cinnamon-spiked aroma that filled the air, I couldn’t help but smile at the thought of my latest creation: Apple Pie Truffles. These delightful little bites pack the nostalgic flavor of homemade apple pie into an easy-to-make treat that’s perfect for sharing—or savoring all by yourself! With minimal prep time and a fun twist on a classic, anyone can whip up these scrumptious truffles without breaking a sweat. They’re great for gatherings or as a sweet surprise for your family after dinner. Are you ready to dive into this delightful recipe and elevate your dessert game?

Why Are Apple Pie Truffles a Must-Try?
Irresistible flavor: Each truffle bursts with warm, cozy spices and sweet apple filling, evoking the comfort of fall.
Easy prep: With just 15 minutes of active time, these treats are perfect for busy home cooks and aspiring chefs alike.
Crowd-pleaser: Serve them at gatherings or as a delightful dessert after dinner, and watch them disappear!
Versatile substitutes: Experiment by using crushed cookies instead of graham crackers for an exciting twist. These Apple Pie Truffles are a wonderful sweet surprise any time of the year!
Apple Pie Truffles Ingredients
For the Truffles
- Apple filling – Use homemade or store-bought for convenience!
- Graham cracker crumbs – Provides the perfect base; consider crushed cookies for a fun twist.
- Cinnamon – A key spice that enhances the warm, cozy flavors of apple pie.
- Nutmeg – Adds a hint of nutty sweetness; feel free to adjust to taste!
- Salt – Just a pinch helps to balance the sweetness in these Apple Pie Truffles.
For the Coating
- Chocolate coating – Melts down smoothly for a decadent finish; dark chocolate works beautifully!
Optional Ingredients
- Apple cider – Adds depth and a delightful flavor burst if you're looking to elevate your truffles!
- Crushed cookies – Introduce a different texture or flavor alternative for a unique variation.
Step‑by‑Step Instructions for Apple Pie Truffles
Step 1: Prepare the Apple Filling
Begin by peeling and chopping your apples, then cook them in a medium saucepan over medium heat for about 10–15 minutes. Stir occasionally until the apples are soft and slightly translucent, releasing their sweet juices. This flavorful base will bring the essence of homemade apple pie to your Apple Pie Truffles.
Step 2: Combine Ingredients
In a large mixing bowl, combine the cooked apple filling with graham cracker crumbs, cinnamon, nutmeg, and a pinch of salt. Use a spatula to mix thoroughly until the ingredients are well combined, creating a sticky and fragrant dough. This mixture will form the delicious center of your truffles.
Step 3: Chill the Mixture
Transfer the bowl to the refrigerator and allow the mixture to chill for about 15–20 minutes. This cooling period helps the apple filling to firm up, making it easier to roll into truffles later. Keep an eye on the clock, as this step is crucial for shaping perfect bites of your Apple Pie Truffles.
Step 4: Shape the Truffles
Once chilled, remove the mixture from the refrigerator and start rolling it into small balls, about one inch in diameter. Aim for uniform sizes to ensure even coating later on. Place each ball on a parchment-lined baking sheet, creating a neat array of your soon-to-be delectable Apple Pie Truffles.
Step 5: Melt the Chocolate Coating
In a microwave-safe bowl, heat the chocolate coating in 30-second intervals, stirring between each session until completely smooth. Be cautious not to overheat, as burnt chocolate won't coat well. This rich glaze will elevate your truffles, adding a deliciously decadent layer.
Step 6: Coat the Truffles
Dip each truffle into the melted chocolate using a fork, ensuring it is fully coated. Gently tap the fork against the edge of the bowl to let any excess chocolate drip off. Place the coated truffles back on the parchment-lined baking sheet, creating beautiful, shiny treats that are ready for chilling.
Step 7: Set the Chocolate
Refrigerate the chocolate-coated truffles for about 30 minutes or until the chocolate has fully set and hardened. This final step solidifies your delightful creations, making them ready to devour. The contrast between the crunchy chocolate shell and the soft, spiced apple center will be irresistible!
Step 8: Serve Your Truffles
Once set, serve the Apple Pie Truffles to family and friends, or store them in an airtight container for later enjoyment. These charming little bites bring the warmth of apple pie to any occasion, whether it’s a cozy gathering or just a treat for yourself.
Expert Tips for Apple Pie Truffles
Achieve the Perfect Texture: Use well-cooked apples in your filling to ensure a smooth consistency that binds well with graham crackers.
Chill Thoroughly: Don't skip the chilling step; it’s crucial for easily shaping the Apple Pie Truffles and helps achieve that delightful bite.
Coat Evenly: When dipping in chocolate, let the excess drip off completely to avoid a clumpy finish. A smooth coat makes all the difference!
Customize Your Flavor: Feel free to play with spices; adding a dash of clove or allspice can elevate the flavor profile of your truffles.
Storage Savvy: Keep your truffles in an airtight container in the fridge. They taste even better after they've had a day to meld in the fridge!
How to Store and Freeze Apple Pie Truffles
Fridge: Store your Apple Pie Truffles in an airtight container in the refrigerator for up to 5 days. This helps preserve their delicious flavor and softness.
Freezer: For longer storage, freeze the truffles in a single layer on a baking sheet, then transfer to an airtight container for up to 3 months. Thaw in the fridge before enjoying again.
Reheating: If you prefer a warm treat, gently microwave the chilled truffles for 10-15 seconds, just until slightly warm. Enjoy their cozy flavor any time of year!
Apple Pie Truffles Variations & Substitutions
Get creative and make these truffles uniquely yours with simple alterations that enhance flavor and texture!
- Gluten-Free: Use gluten-free graham cracker crumbs or crushed gluten-free cookies to ensure everyone can enjoy.
- Nut-Free: Substitute sunflower seed butter for nut-based spreads, making these truffles safe for schools or gatherings.
- Spicy Kick: Add a pinch of cayenne pepper to the mix for a surprising twist that warms the palate. Spicy and sweet can create an unforgettable flavor experience!
- Fruit Fusion: Incorporate finely chopped dried fruits like cranberries or raisins alongside the apple filling for a chewy texture and extra sweetness. Every bite will have a new dimension of flavor!
- Flavor Boost: Swap the regular chocolate coating with white chocolate or a mix of dark and milk chocolate for a different taste profile. Play with flavors and delight everyone’s taste buds!
- Apple Variance: Try using different varieties of apples—like Granny Smith for tartness or Honeycrisp for additional sweetness—that will change the overall taste. Each fruit brings its own character to your truffles!
- Cocoa Dust: Roll the finished truffles in cocoa powder or crushed nuts instead of chocolate for a gourmet touch. It'll provide an exquisite outer texture, unforgettable and appealing!
- Mini Truffles: Shape your truffles into bite-sized mini versions—perfect for parties or snack time. These little gems are sure to charm everyone!
Feel free to explore these fun variations and substitutions, and don’t forget—your love for cooking shines through when you experiment. For further inspiration, check out Ingredients Notes for great tips on texture changes!
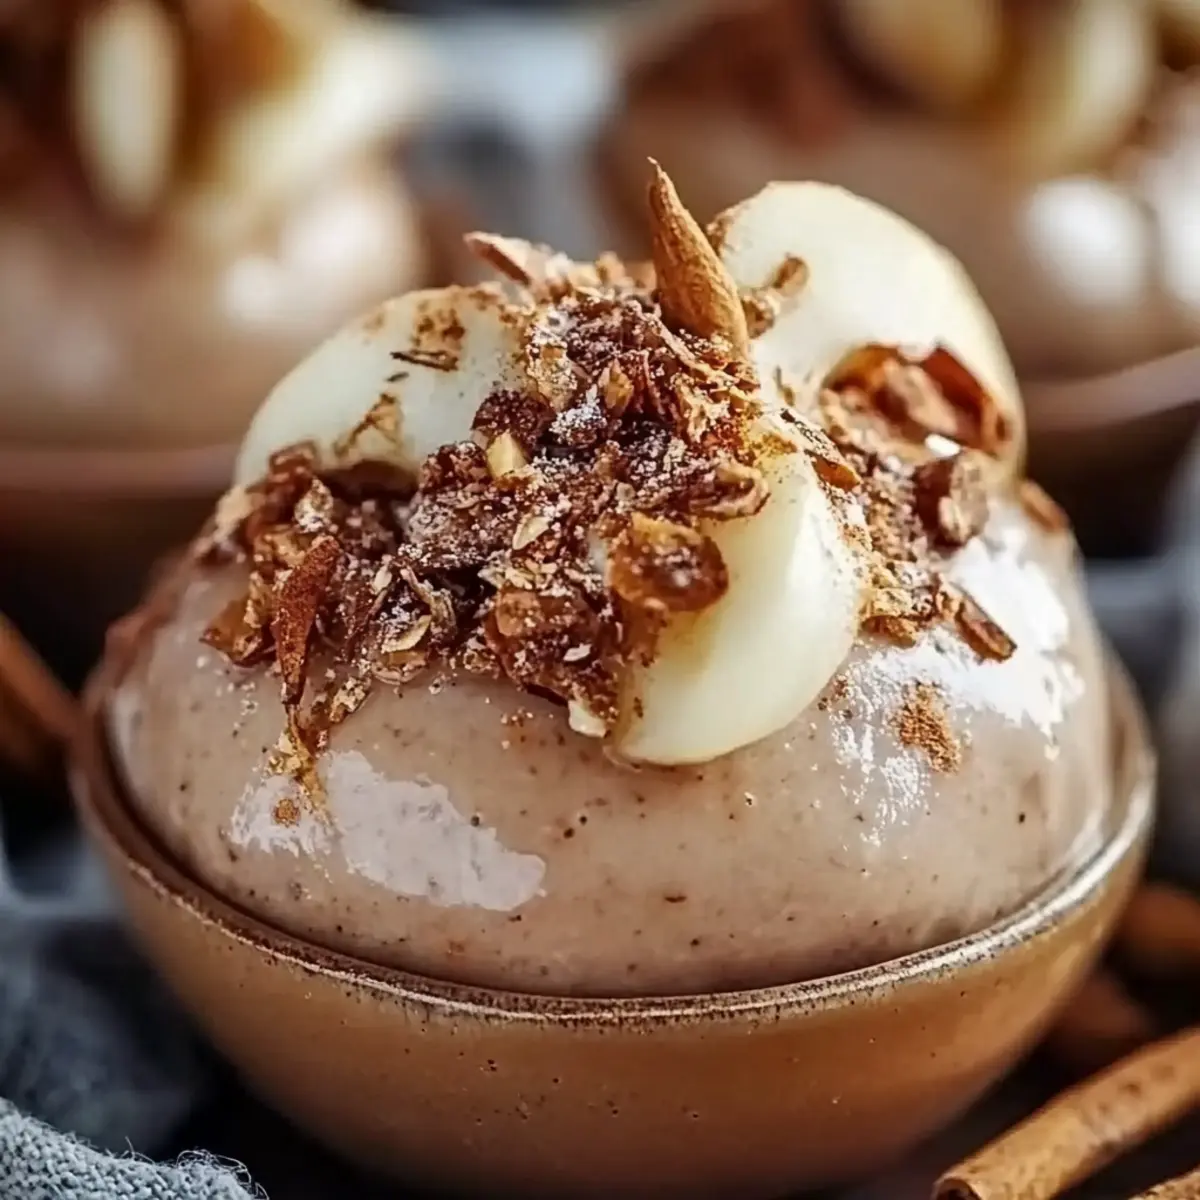
What to Serve with Apple Pie Truffles
Imagine a gathering filled with laughter and the scent of freshly baked treats, where your sweet creations take center stage.
-
Warm Spiced Cider: The perfect companion, offering a cozy texture that complements the sweetness of the truffles. This drink evokes memories of fall and comfort.
-
Homemade Vanilla Ice Cream: Creamy and cool, this classic pairing enhances the rich flavors of the truffles while providing a delightful contrast in temperature.
-
Nutty Caramel Sauce: Drizzling this over your Apple Pie Truffles creates a luscious layer of flavor that elevates each bite into a decadent dessert experience.
-
Oven-Baked Cinnamon Chips: Crispy and light, these chips add a fun crunch and cinnamon kick that beautifully echoes the spices in your truffles.
-
Hot Chocolate: Rich and velvety, this beverage adds warmth and sweetness, creating a delightful balance with the spiced apple flavors.
-
Fresh Fruit Salad: A refreshing and vibrant option, this medley of fruits cuts through the sweetness of the truffles for a delightful contrast and adds a burst of freshness to the meal.
-
Cheesecake Bites: These creamy morsels offer a rich, tangy flavor that contrasts nicely with the sweet, spiced truffles, making for an indulgent dessert platter.
-
Pumpkin Spice Latte: Embrace the flavors of autumn with this coffee classic, which pairs beautifully with the warm spices of your truffles while keeping you cozy.
-
Decaf Tea Blend: A soothing option, herbal teas provide a calming finish to the meal, enhancing the sweet, warm flavors of the apple and spice in the truffles.
Make Ahead Options
These Apple Pie Truffles are perfect for meal prep enthusiasts looking to save time on busy weeknights! You can prepare the apple filling and form the truffles up to 24 hours in advance. Simply complete steps one through four, then store the rolled truffles in an airtight container in the refrigerator. This helps maintain their delicious flavor and texture. When you’re ready to enjoy your truffles, melt the chocolate coating, dip each truffle, and let them chill until set—this final touch takes just 30 minutes! With these prep-ahead instructions, you'll have scrumptious, homemade treats at your fingertips without the last-minute rush!

Apple Pie Truffles Recipe FAQs
How do I select the right apples for the filling?
Absolutely! For a delicious apple filling, I recommend using a mix of sweet and tart apples like Granny Smith and Honeycrisp. Look for apples that are firm and free from blemishes or dark spots; this ensures a fresh and flavorful filling for your Apple Pie Truffles.
What’s the best way to store leftover Apple Pie Truffles?
Very! Store your truffles in an airtight container in the refrigerator for up to 5 days. Make sure they are completely cooled and set before packaging them to maintain their delightful texture and flavor. If you're in a pinch, these truffles can even be left in the fridge overnight!
Can I freeze Apple Pie Truffles for later enjoyment?
Absolutely! To freeze, place the truffles on a baking sheet in a single layer. Freeze them unwrapped for about 1-2 hours until firm, then transfer them to an airtight container or freezer bag. They can be stored for up to 3 months. Thaw in the refrigerator before enjoying—it's an excellent way to keep that fall flavor on hand!
What can I do if the chocolate coating is clumpy?
Don’t worry! If your chocolate is clumpy, it may have been overheated. To salvage it, try adding a teaspoon of vegetable oil or shortening and gently reheat until smooth. If you find the texture still isn’t right, you can dip the truffles in freshly melted chocolate using this method.
Are Apple Pie Truffles suitable for those with allergies?
For sure! If you or anyone you're serving has allergies, be cautious with the ingredients. Ensure the chocolate is allergen-free, and consider alternative fillers like crushed gluten-free cookies or nut-free substitutes for the graham cracker crumbs. Always check packaging to ensure safety!
How can I adjust the sweetness in my Apple Pie Truffles?
Great question! If you prefer a less sweet truffle, I often recommend reducing the amount of graham cracker crumbs slightly or using unsweetened cocoa powder in your chocolate coating to balance the flavors. You can also omit any added sugar in the apple filling if you're using sweet apples. Enjoy experimenting!
Delicious Apple Pie Truffles that Taste Like Fall in Every Bite
Ingredients
Equipment
Method
- Prepare the Apple Filling: Peel and chop apples, cook in a medium saucepan over medium heat for about 10-15 minutes until soft.
- Combine Ingredients: In a bowl, mix cooked apple filling with graham cracker crumbs, cinnamon, nutmeg, and salt.
- Chill the Mixture: Transfer the bowl to the refrigerator for about 15-20 minutes to firm up.
- Shape the Truffles: Roll the chilled mixture into small balls about one inch in diameter.
- Melt the Chocolate Coating: Heat chocolate coating in 30-second intervals until smooth.
- Coat the Truffles: Dip each truffle into melted chocolate and tap off excess chocolate.
- Set the Chocolate: Refrigerate for about 30 minutes until chocolate is fully set.
- Serve Your Truffles: Serve immediately or store in an airtight container.


Leave a Reply