As I stared at the ingredients on my countertop, a lightbulb flickered—what if I transformed ordinary mini cheesecakes into something delightfully spooky? Enter these Frankenstein Mini Cheesecakes, the perfect blend of creamy indulgence and seasonal whimsy! Not only are they fun and easy to whip up, but their playful decoration makes them a hit at any gathering, especially Halloween parties. With only a 15-minute prep time, these little treats promise not to stress your busy schedule and they’re sure to have your family and friends grinning ear to ear. Imagine the joy of creating a dessert that’s not only delicious but looks like it came straight out of a monster’s lair! Curious about how to bring these charming little ghouls to life? Let’s get started!
Why Are These Cheesecakes Perfect for Parties?
Irresistible Appeal: These Frankenstein Mini Cheesecakes are not just desserts; they are conversation starters! Their quirky design makes them a delightful addition to any party spread, especially during Halloween.
Quick and Easy: With a total time of just 2 hours, including cooling and decorating, you can whip up a batch without spending all day in the kitchen. Perfect for those who want homemade treats without the hassle!
Fun for Everyone: Ideal for both kids and adults, these cheesecakes will have guests of all ages smiling and indulging. The unique presentation is sure to impress!
Creamy Delight: The combination of rich cream cheese and crunchy Oreo crust creates a delicious contrast, while the vibrant green color and playful decorations add an extra layer of fun.
Customize with Ease: Feel free to personalize your decorations to match any theme! Need ideas for your next gathering? Check out our other unique Halloween treat ideas for inspiration!
Frankenstein Mini Cheesecakes Ingredients
• Let’s gather what you need to bring these delightful treats to life!
For the Cheesecake Filling
- Cream cheese – Softened, so it blends smoothly for that creamy texture.
- Sugar – Enhances sweetness; consider using a sugar substitute if needed.
- Eggs – Bring richness and help the cheesecake set perfectly.
- Flour – Aids in thickening the filling while keeping it light.
- Vanilla – Adds a warm, inviting flavor that complements the sweetness.
- Green food coloring – Gives that spooky Frankenstein hue; adjust based on intensity desired.
For the Crust
- OREO cookies – Crushed for a chocolaty, crunchy base that pairs beautifully with the filling.
- Butter – Melted to bind the cookie crumbs together into a sturdy crust.
For the Decorations
- Edible eyes – Bring your mini cheesecakes to life! These add the perfect whimsical touch.
- Chocolate chips – Melted for drizzling a fun "mouth" and decorations.
- Chocolate sprinkles – Create a colorful finish that’s both festive and delicious.
- Chocolate chips – Use these as "neck bolts" and to accentuate the design.
Ready to dive into making these whimsical desserts? Let's get started on crafting your Frankenstein Mini Cheesecakes!
Step‑by‑Step Instructions for Frankenstein Mini Cheesecakes
Step 1: Preheat the Oven
Begin by preheating your oven to 350°F (175°C), allowing it to reach the perfect temperature for baking. This is essential for ensuring your Frankenstein Mini Cheesecakes bake evenly. While the oven warms up, gather your mini cheesecake pan and set it aside, ready for the delightful crust.
Step 2: Prepare the Cookie Crust
In a mixing bowl, combine the melted butter with the crushed OREO cookies. Stir until the cookies are evenly coated. Using your hands, form the mixture into 1-inch balls and place them into the mini cheesecake pan. With a tamper or the back of a spoon, press each ball firmly into the bottom of the pan to create a sturdy crust for your cheesecakes.
Step 3: Mix the Cheesecake Filling
In a separate large mixing bowl, beat together the softened cream cheese, sugar, eggs, and vanilla using an electric mixer. Mix for about 2–3 minutes or until the mixture is smooth and creamy, with no lumps visible. This creates the rich filling that will make your Frankenstein Mini Cheesecakes irresistibly delicious!
Step 4: Incorporate the Dry Ingredients
Gradually add the flour to your cheesecake mixture, stirring gently until it’s fully incorporated. Then, add in the green food coloring drop by drop, mixing until you achieve your desired spooky hue. Keep in mind that vibrant green shades work best for your Frankenstein theme and will bring those cheesecakes to life!
Step 5: Fill the Cheesecake Tins
Carefully pour the green cheesecake filling over the prepared cookie crusts in your mini cheesecake pan, filling each tin almost to the top. This beautiful layer will bake up into delightful, creamy cheesecakes. Place the pan into the preheated oven and bake for about 15 minutes, or until the edges are set but the center remains slightly jiggly.
Step 6: Cool the Mini Cheesecakes
Once the cheesecakes are done baking, remove them from the oven and let them cool in the pan on a wire rack for about 15 minutes. Afterward, transfer them to the refrigerator, allowing them to cool completely for at least 1 hour. Chilling enhances the flavors and makes for perfect serving!
Step 7: Decorate with Chocolate
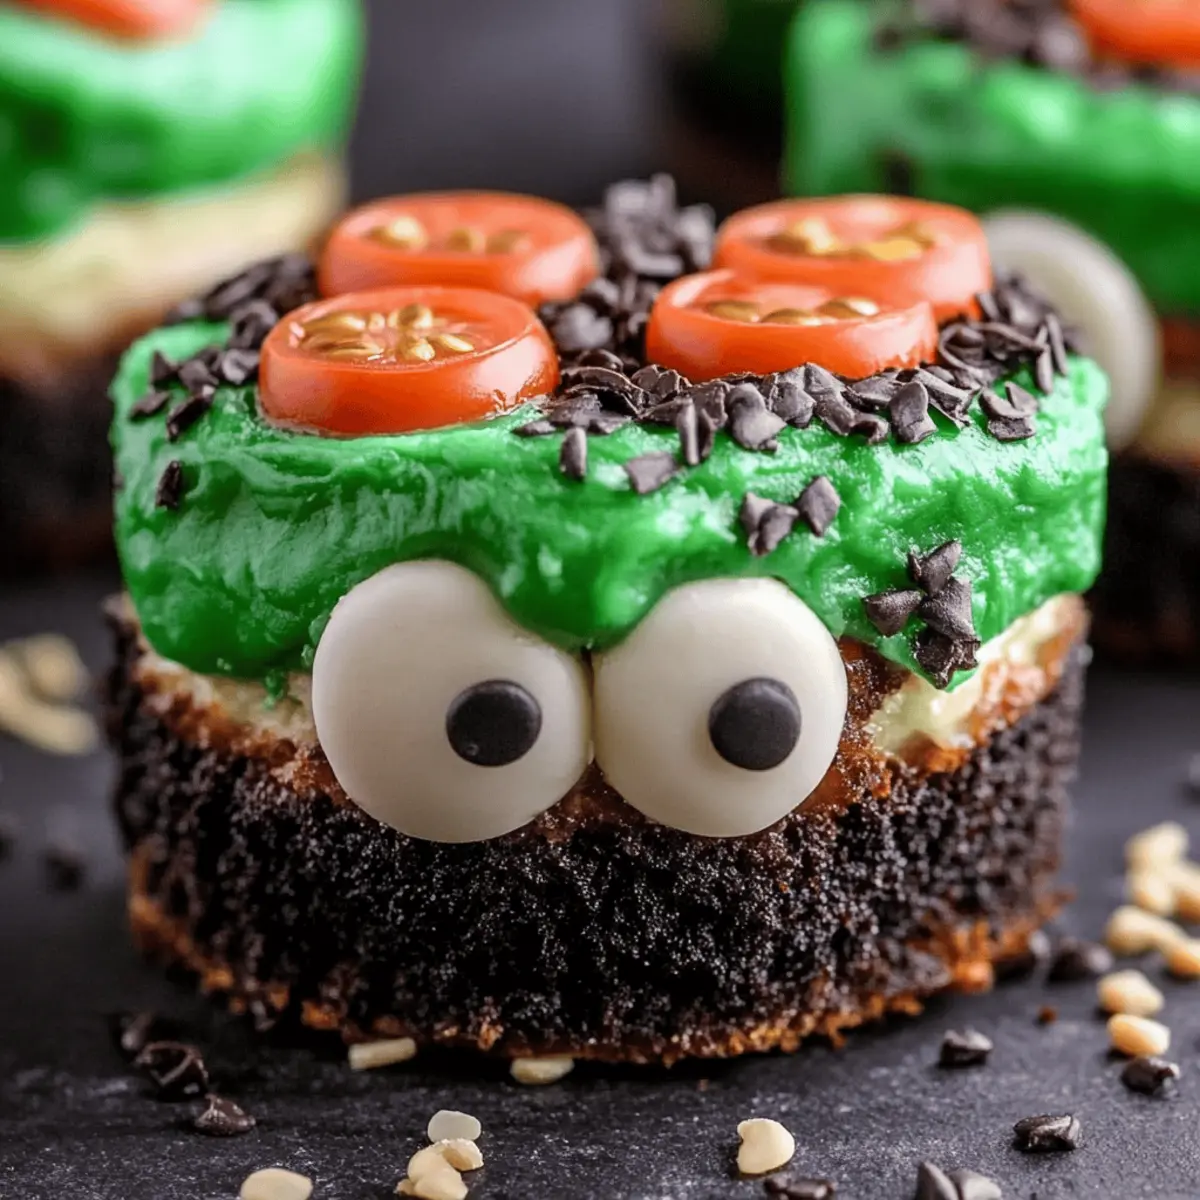
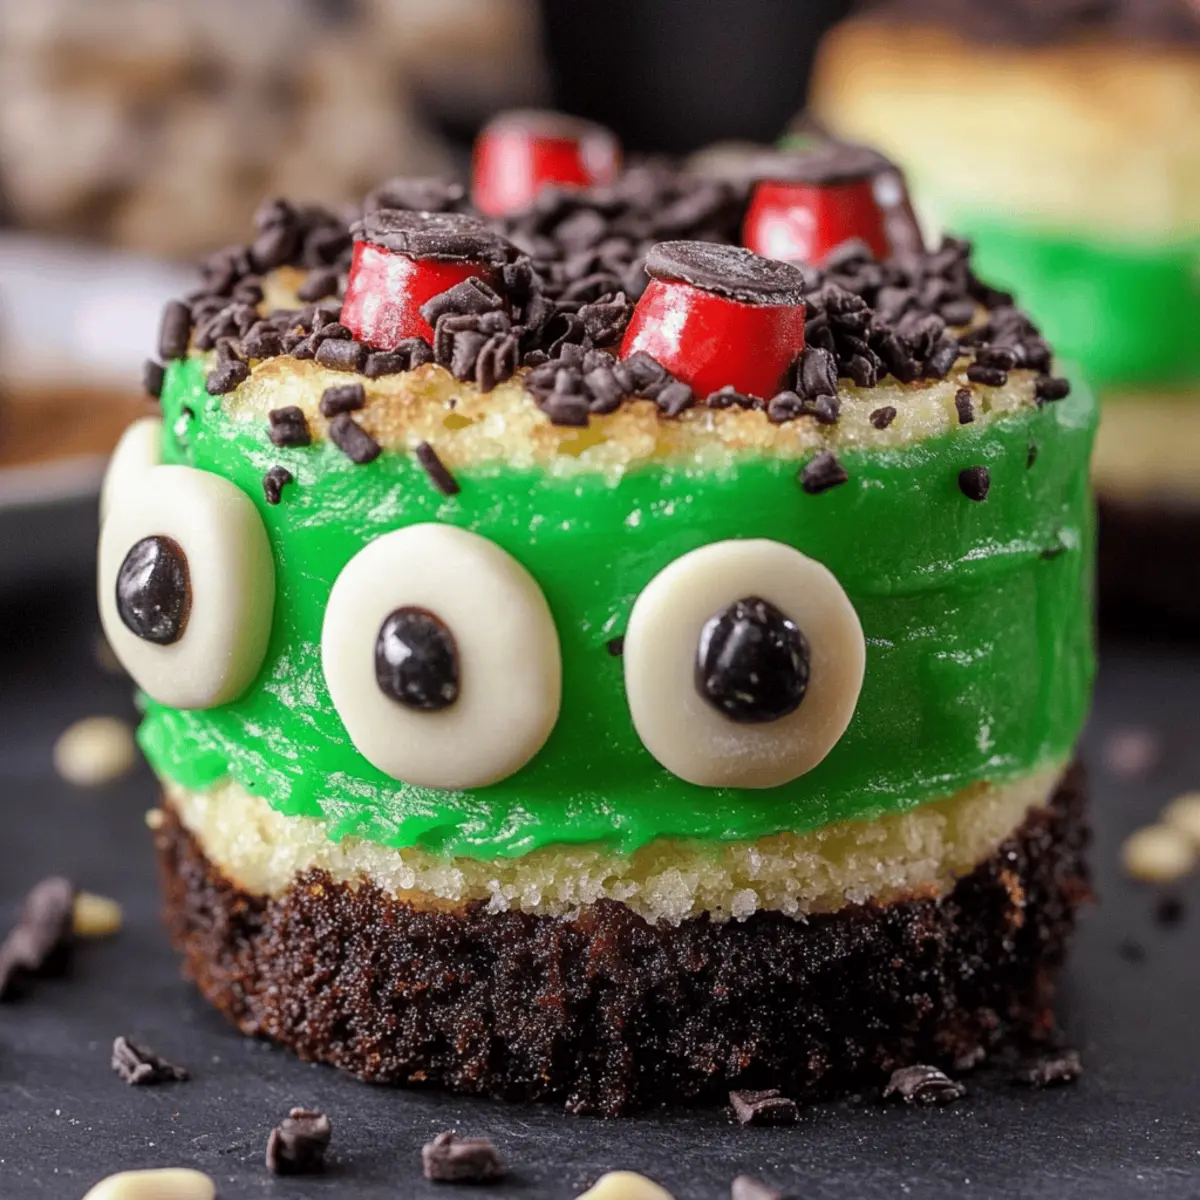
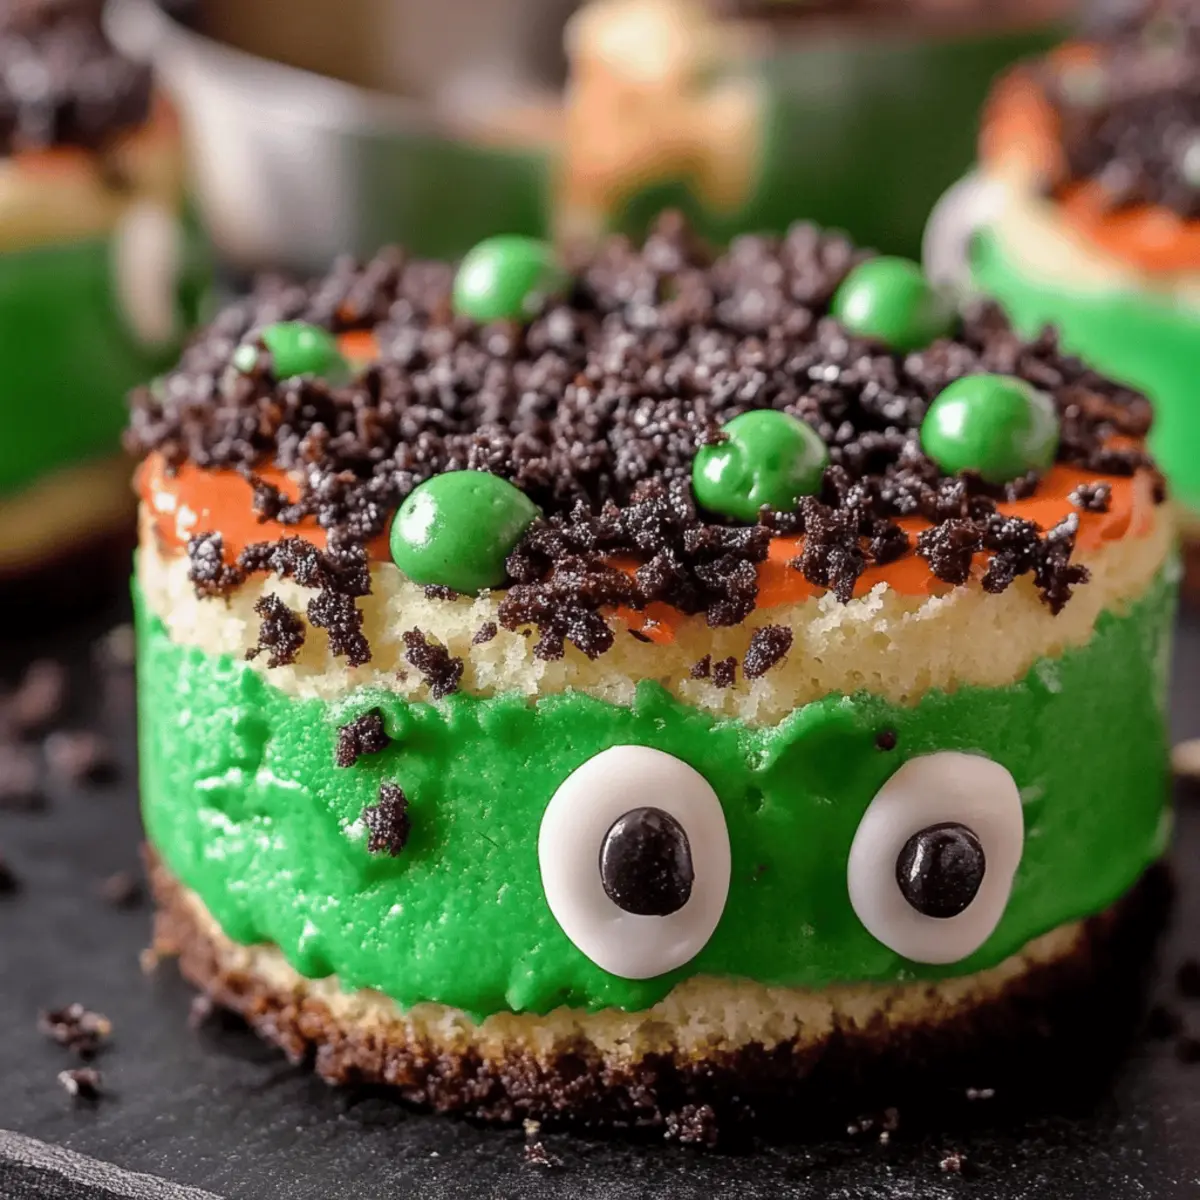
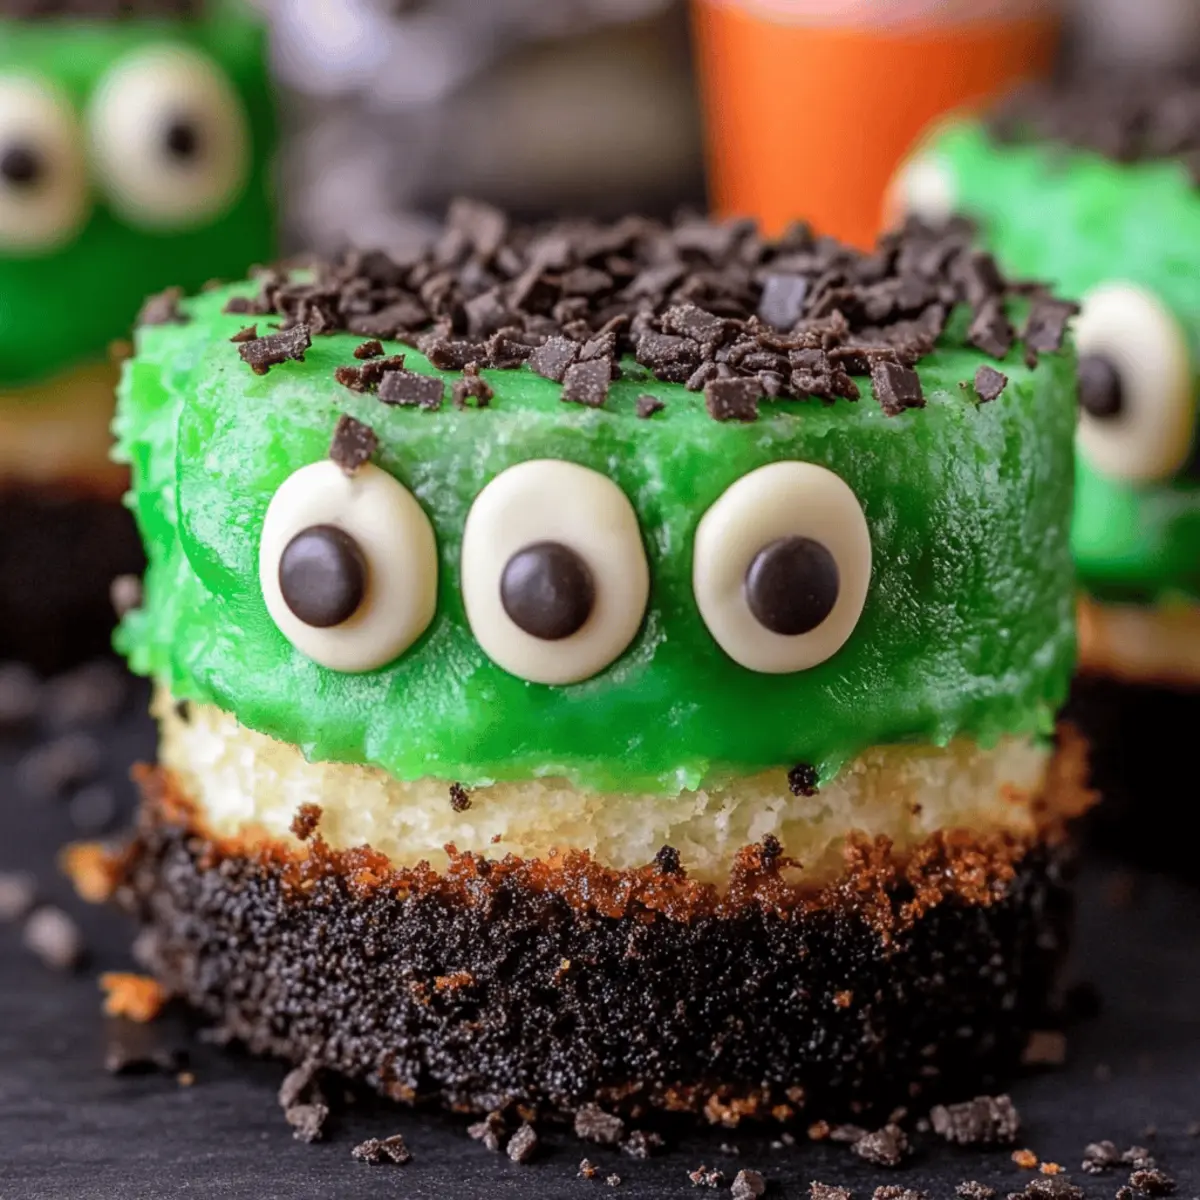
Once your Frankenstein Mini Cheesecakes are completely cooled, carefully remove them from the pan. Dip the top of each cheesecake in the melted chocolate and then into a bowl of chocolate sprinkles, creating a festive and spooky appearance. The smooth layer of chocolate adds a fun touch to each mini cheesecake's design.
Step 8: Create the Frightening Features
Using a piping bag, drizzle melted chocolate onto each cheesecake to craft silly mouths or other fun decorations. Get creative with the design; this is where your mini cheesecakes can truly come to life with character and charm—perfect for Halloween or any festive gathering!
Step 9: Assemble the Edible Eyes
Finally, to bring your Frankenstein Mini Cheesecakes to perfection, pipe a small dot of melted chocolate on the back of each edible eye. Attach them to the cheesecakes along with a chocolate chip on the side like "neck bolts." This whimsical finishing touch will surely delight both kids and adults alike!
How to Store and Freeze Frankenstein Mini Cheesecakes
Fridge: Store your Frankenstein Mini Cheesecakes in an airtight container in the refrigerator for up to 3 days. This keeps them fresh and ready to enjoy whenever the craving strikes!
Freezer: For longer storage, you can freeze the mini cheesecakes for up to 2 months. Place them in a single layer on a baking sheet to freeze until solid, then transfer to an airtight freezer-friendly container.
Thawing: To thaw, remove from the freezer and let them sit in the fridge overnight. This gentle method preserves their creamy texture and delightful decorations.
Reheating: These cheesecakes are best served chilled, but if you prefer them slightly warmed, reheat in the microwave on low power for about 10-15 seconds—just enough to take the chill off!
What to Serve with Frankenstein Mini Cheesecakes
Pair these delightful miniature treats with a few delicious sides that will elevate your gathering to the next level!
-
Festive Fruit Platter: A colorful medley of seasonal fruits adds freshness and balances the sweetness of the cheesecakes perfectly.
-
Savory Charcuterie Board: The assorted meats and cheeses provide a savory contrast, making each bite a delightful adventure in flavor.
-
Pumpkin Spice Latte: Serve alongside this cozy drink for a warm seasonal comfort that complements the fun and festive theme.
-
Gory Gelatin Cups: These spooky-themed gelatin treats are sure to excite guests of all ages and keep the Halloween vibe going strong.
-
Chocolate Covered Strawberries: Their rich flavor and juicy texture enhance the decadent nature of your mini cheesecakes while adding a fruity element.
-
Spooky Punch: Create a fizzy Halloween punch with soda, juice, and floating eyeball gummy candies for a whimsical drink that's both fun and refreshing!
Frankenstein Mini Cheesecakes Variations
Feel free to let your creativity run wild with these customized twists on the classic Frankenstein Mini Cheesecakes!
- Dairy-Free: Substitute cream cheese with vegan cream cheese, and use a dairy-free butter for a delightful vegan treat.
- Gluten-Free: Replace regular flour with almond flour or gluten-free flour for a gluten-free option that still holds up beautifully.
- Chocolate Lovers: Add ¼ cup of cocoa powder to the filling for a rich, chocolatey cheesecake that pairs perfectly with the Oreo base.
- Nutty Crunch: Fold in crushed nuts or seeds into the crust for added texture and flavor—a crunchy surprise awaits with every bite!
- Spiced Delight: Introduce a pinch of cinnamon or nutmeg to the cheesecake batter for a warm, spiced flavor that elevates the classic recipe.
- Fruit Twist: Mix in tiny morsels of chopped fruits such as strawberries or raspberries to the filling for a fresh, fruity surprise in each cheesecake.
- Heat It Up: Add a dash of cayenne pepper or chili powder to the melted chocolate for unexpected warmth that complements the sweetness perfectly.
- Theme It Out: Decorate according to the season! Use orange and black sprinkles for Halloween or pastel hues for a cute Easter dessert transformation.
Ultimately, these Frankenstein Mini Cheesecakes are a blank canvas ready for your personal touch. For more fun ideas, don’t miss our delightful Halloween treat ideas!
Make Ahead Options
These Frankenstein Mini Cheesecakes are perfect for meal prep enthusiasts! You can prepare the crusts by mixing the crushed OREO cookies and melted butter and store them in the fridge for up to 24 hours. Additionally, you can mix the cheesecake filling (without the food coloring) and refrigerate it for up to 3 days. To maintain quality, cover both components well to prevent drying out. When you're ready to serve, simply bake the cheesecakes as instructed, and once cooled, decorate with chocolate and sprinkles for that festive look. This way, you save precious time on busy days while still enjoying delightful, homemade treats!
Expert Tips for Frankenstein Mini Cheesecakes
-
Ingredient Temperature: Use softened cream cheese for a smoother filling, ensuring no lumps remain. This is key for your Frankenstein Mini Cheesecakes' creamy texture!
-
Food Coloring Caution: Start with a few drops of green food coloring. You can always add more! This way, you’ll avoid an overly intense hue right off the bat.
-
Perfect Baking Time: Keep an eye on the cheesecakes as they bake. Overbaking can lead to a rubbery texture; look for that slight jiggle in the center for perfect results.
-
Cooling Before Decorating: Allow your cheesecakes to cool completely before adding decorations. This helps the chocolate adhere and prevents it from melting into the filling.
-
Creative Decorating: Get imaginative with your decorations! Use different candies or toppings to personalize your Frankenstein Mini Cheesecakes for various festive occasions.
-
Storing Leftovers: If there are any leftover cheesecakes, store them in an airtight container in the fridge for up to 3 days. Enjoy the spooky fun a little longer!
Frankenstein Mini Cheesecakes Recipe FAQs
What’s the best way to select ripe ingredients?
Absolutely! For the creamiest cheesecake, always choose cream cheese that’s at room temperature; it should feel soft but not melted. Check the eggs to ensure they are fresh; a quick sniff can help detect any off smells. For the green food coloring, opt for a gel or liquid that is fresh; avoid any packaging that appears bloated or damaged.
How should I store leftover Frankenstein Mini Cheesecakes?
You can store your Frankenstein Mini Cheesecakes in an airtight container in the refrigerator for up to 3 days. Make sure they are completely cooled before placing them in the container, as any warmth can cause condensation and affect the texture and taste.
Can I freeze my mini cheesecakes, and how?
Yes! For longer storage, you can freeze your Frankenstein Mini Cheesecakes. Here’s how: Place them on a baking sheet in a single layer until solid, which typically takes about 1-2 hours. Then, transfer them to an airtight, freezer-safe container, layering them with parchment paper to prevent sticking. They can be frozen for up to 2 months.
What are some common troubleshooting tips for my cheesecakes?
If your cheesecakes end up cracking, it’s often due to overbaking. Keep an eye on them towards the end of the baking time. Look for a slight jiggle in the center—that’s a good sign they’re perfectly done! If the texture turns out too grainy, make sure your cream cheese is thoroughly softened before mixing. A good 15–20 minutes on the countertop usually does the trick!
Are there any dietary considerations I should keep in mind?
Very! If you're serving these delightful treats to guests, keep in mind any allergies. The ingredients include dairy (cream cheese and butter) and gluten (OREO cookies), which may be a concern for those with lactose intolerance or celiac disease. Consider using gluten-free cookies and dairy alternatives to accommodate various dietary needs. Also, be cautious with edible eyes, as some brands may contain allergens.
Sinfully Sweet Frankenstein Mini Cheesecakes Recipe
Ingredients
Equipment
Method
- Preheat your oven to 350°F (175°C).
- In a mixing bowl, combine melted butter with crushed OREO cookies. Form into 1-inch balls and press firmly in mini cheesecake pan.
- In a separate bowl, beat cream cheese, sugar, eggs, and vanilla until smooth. Mix for about 2–3 minutes.
- Gradually add flour and green food coloring, mixing until incorporated.
- Pour green cheesecake filling over the crust in the pan. Bake for about 15 minutes, until edges are set but center is jiggly.
- Cool in the pan for about 15 minutes, then transfer to the refrigerator to cool completely for at least 1 hour.
- Dip cooled cheesecakes in melted chocolate and then in chocolate sprinkles for decoration.
- Drizzle melted chocolate to create features on each cheesecake. Attach edible eyes and chocolate chips as decorations.


Leave a Reply