As I watched the kitchen transform into a spooky wonderland, I found myself daydreaming of vibrant treats that capture the magic of Halloween. This season, I’ve whipped up a batch of Halloween Rocky Road Slices that not only deliver on nostalgia but also offer a sensational twist for your autumn gatherings. With a fantastically simple prep time of just 15 minutes, these delightful slices are the perfect solution for anyone looking to create a memorable homemade dessert without the fuss. Imagine the joy on your friends' faces as they discover crunchy peanuts, soft marshmallows, and an eye-catching array of candy in each bite. Plus, they’re refrigerator-friendly, making them the ideal make-ahead treat. Curious about how to bring a little sweetness and spookiness to your celebrations? Let’s dive into this deliciously fun recipe!
Why Celebrate Halloween with Rocky Road Slices?
Unmatched Flavor: Each bite of these Halloween Rocky Road Slices bursts with scrumptious chocolate and crunchy peanuts, combined with fluffy marshmallows for a taste sensation that’s hard to resist.
Effortless Preparation: With just 15 minutes of prep time, you’ll have a delectable treat ready to chill overnight – perfect for busy baking schedules!
Eye-Catching Design: The vibrant candy melts and festive sprinkles make these slices not only delicious but also a showstopper at any Halloween gathering.
Versatile Treat: Swap out ingredients based on your cravings, or make these fun treats for birthdays and parties year-round!
Crowd-Pleasing Goodness: With 25 servings per batch, this recipe is excellent for feeding a crowd, ensuring everyone enjoys a taste of the spooky fun!
Treat yourself to more delightful desserts by checking out our collection of easy no-bake treats.
Halloween Rocky Road Slices Ingredients
For the Base
• 340 g semi-sweet chocolate chips – essential for creating the rich chocolate base.
• 170 g butter – adds creaminess and helps bind the mixture.
• Generous pinch of salt – enhances the sweetness of the chocolate.
For the Crunch
• 150 g roasted peanuts – offers a satisfying crunch to balance the soft textures.
• 10 mini Kit Kat bars (or 5 regular Kit Kat bars) – adds delightful layers of crispiness and chocolate flavor.
For the Fluff
• 75 g mini marshmallows – creates a soft, chewy texture that complements the crunch.
For the Decorating
• 115 g candy melts (in each color - about 1 cup each) – adds vibrant swirls and fun colors to your Halloween Rocky Road Slices.
• Gummy worms (regular or sour) – for a spooky touch that kids will love.
• M&M candy (Ghoul mix) – enhances the visual appeal with playful colors.
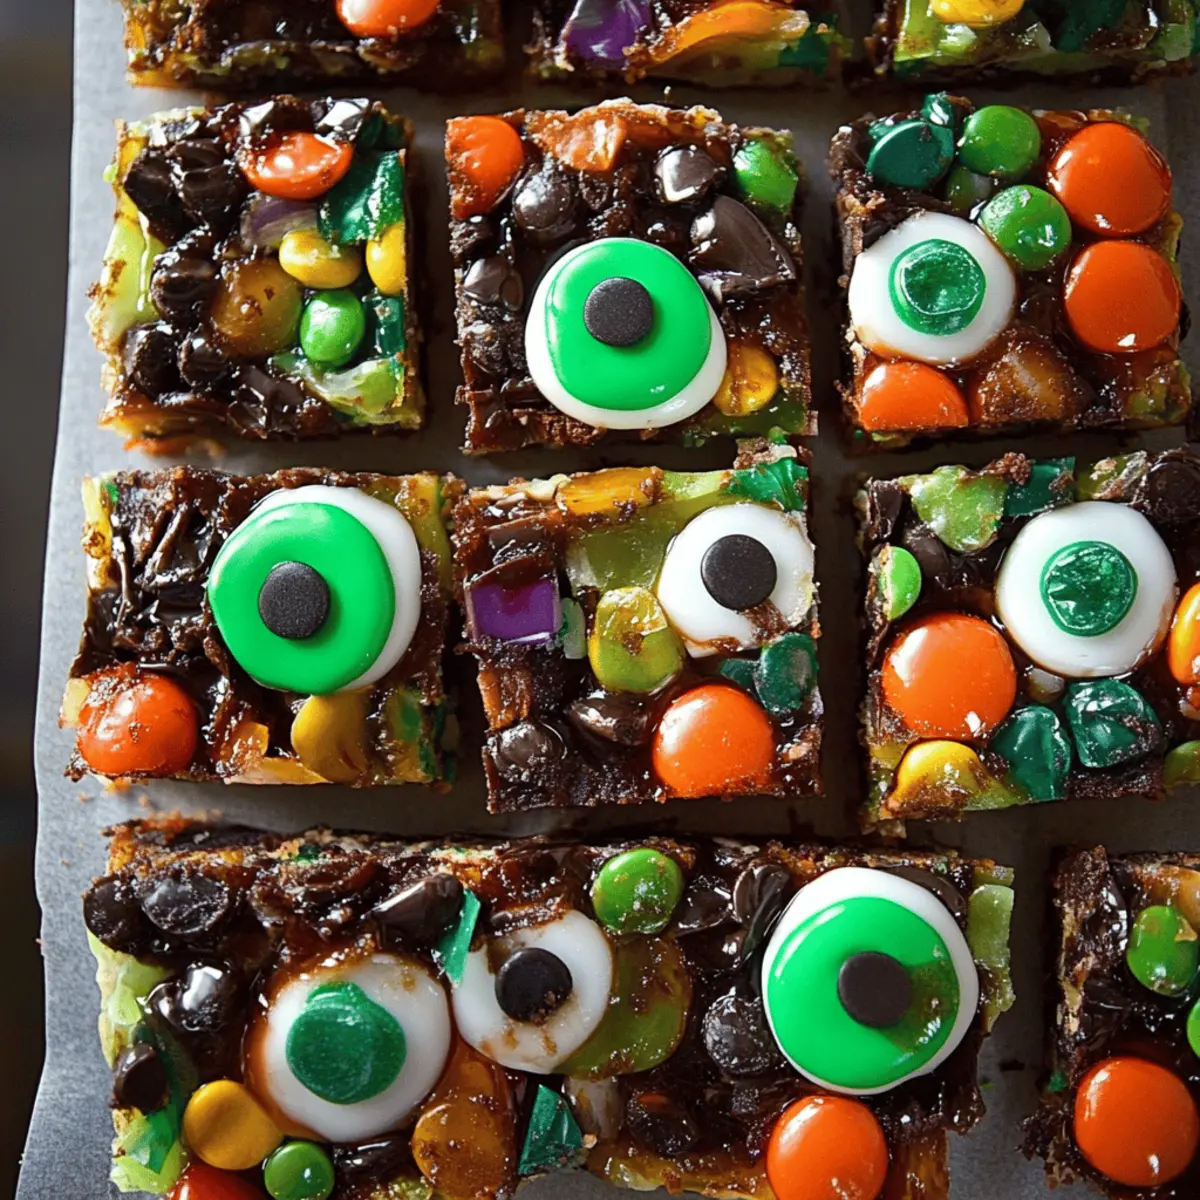
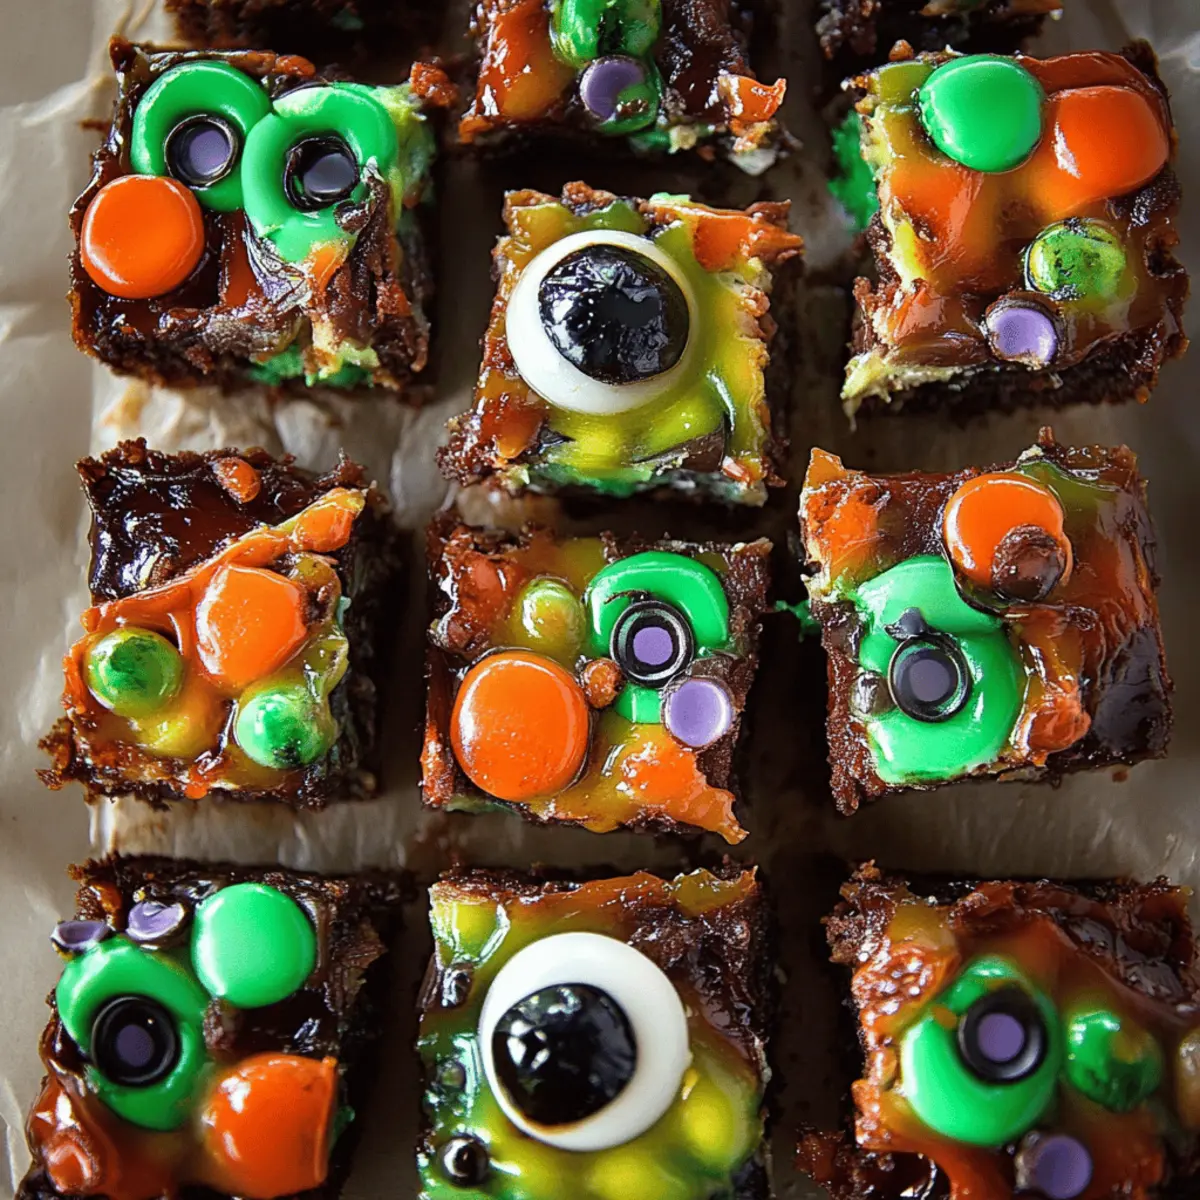
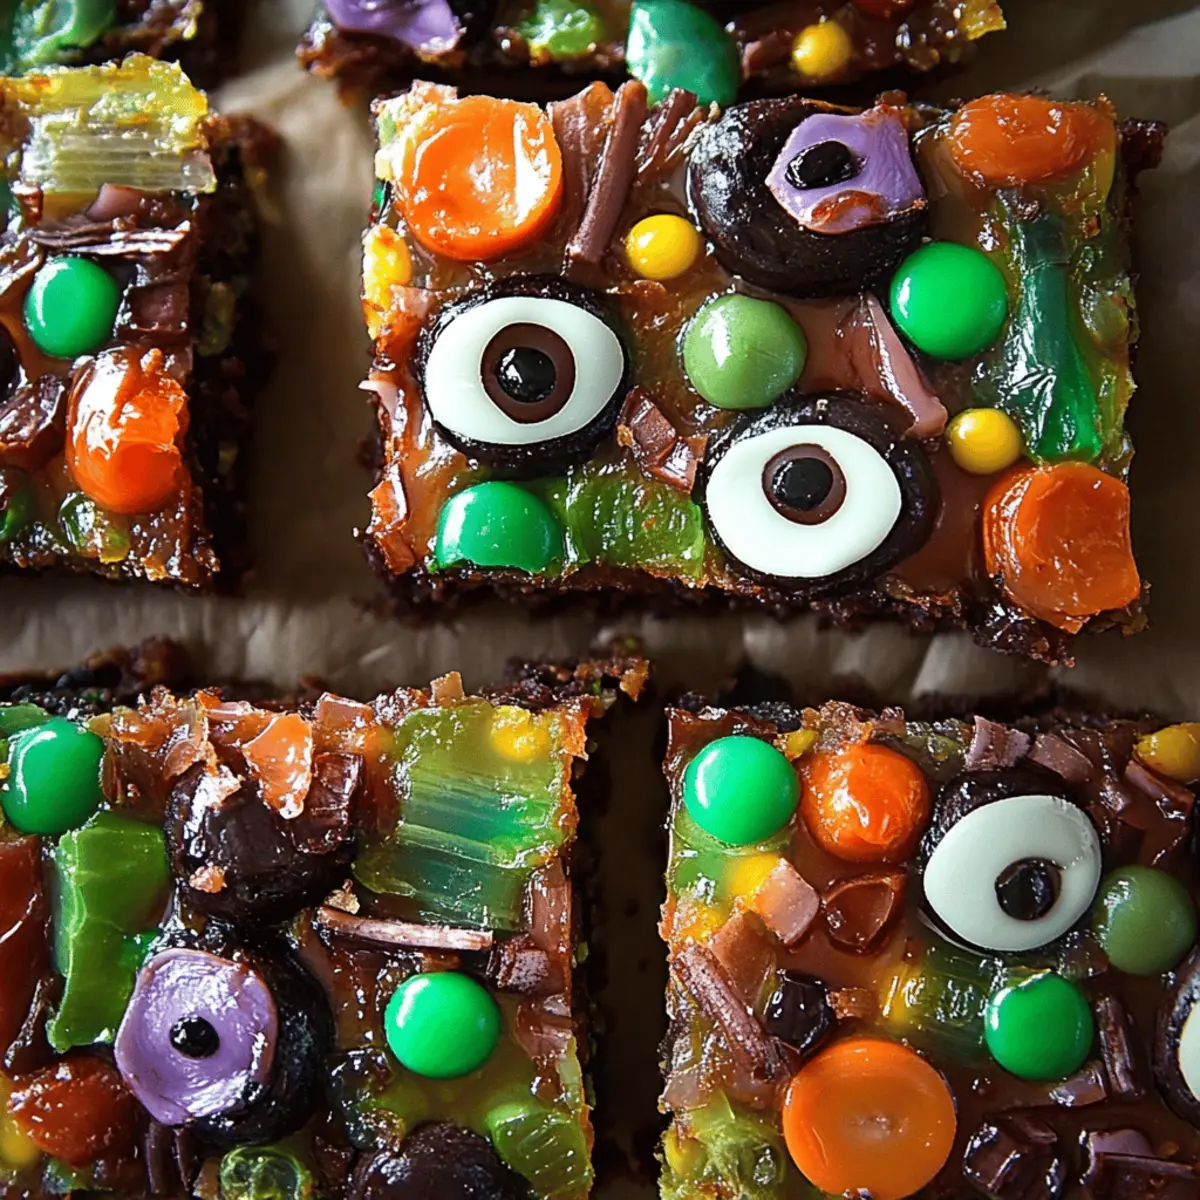
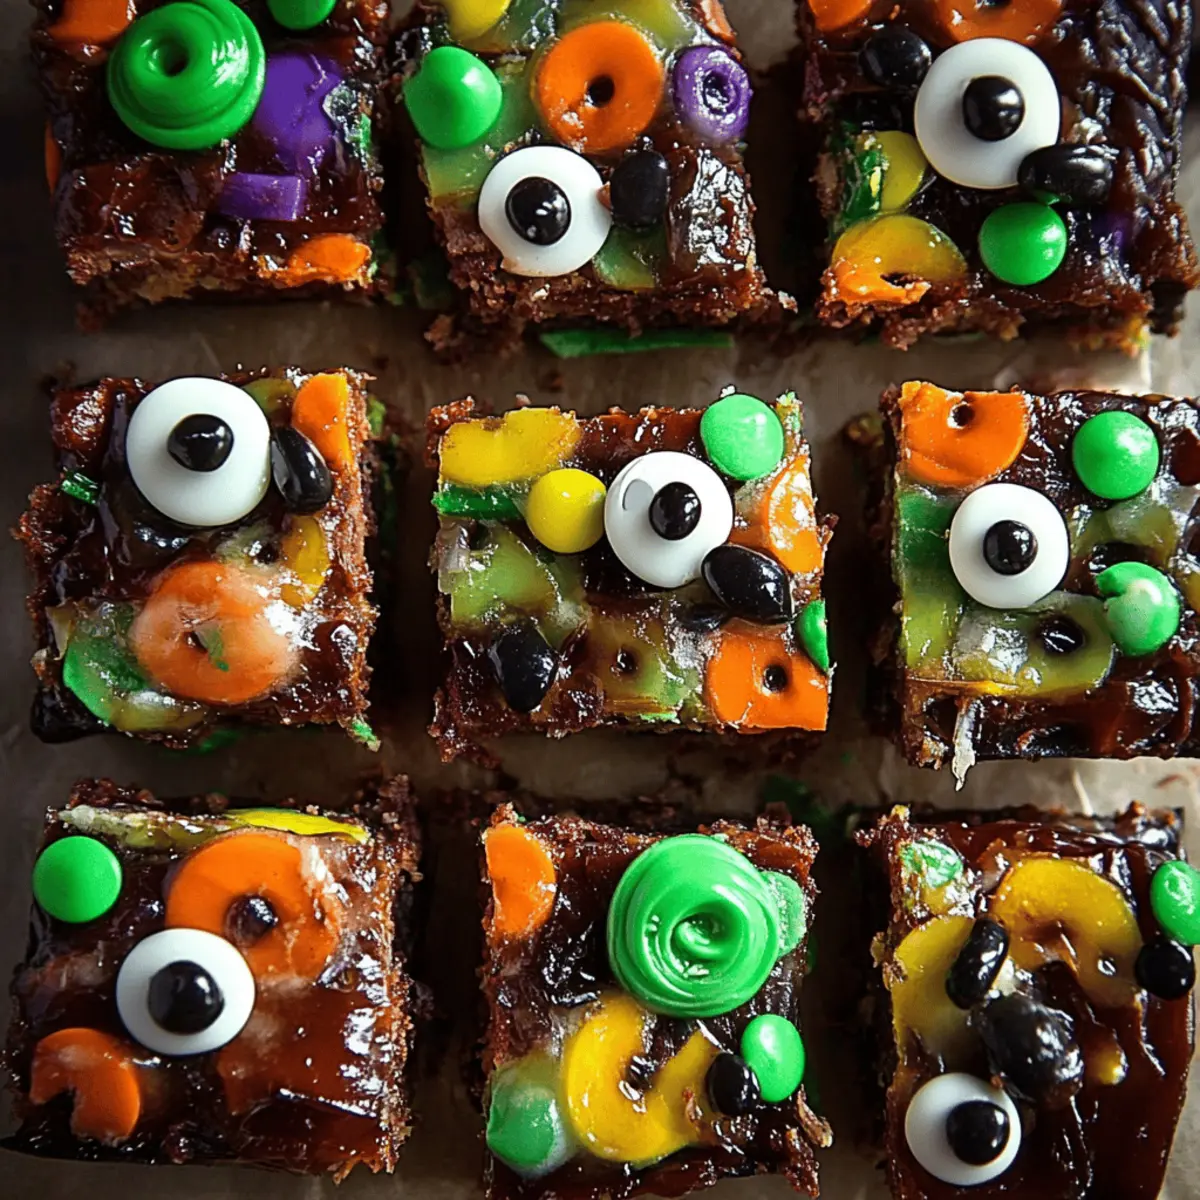
• Candy eyes (a mix of small and large eyes) – brings your creation to life, making it irresistibly fun!
• Halloween sprinkles – sprinkle some magic on top for the perfect festive finish.
• Extra melted semi-sweet chocolate – use for drizzling on top for added decadence.
Step‑by‑Step Instructions for Halloween Rocky Road Slices
Step 1: Prepare the Pan
Start by lining an 8-inch or 9-inch square pan with parchment paper, ensuring that it hangs over the edges slightly. This will allow for easy removal of your Halloween Rocky Road Slices later. Set the pan aside as you move on to the chocolate base, making sure your work area is clean and organized.
Step 2: Melt the Chocolate Mixture
In a large microwave-safe bowl, combine 170 g of butter, 340 g of semi-sweet chocolate chips, and a generous pinch of salt. Microwave the mixture in 30-second intervals, stirring vigorously between each interval until completely melted and smooth, which should take about 2 minutes total. Allow the chocolate mixture to cool slightly before adding your crunchy ingredients.
Step 3: Prepare the Candy Melts
While your chocolate base cools, grab additional bowls for the colorful candy melts. Melt 115 g of candy melts in each bowl using 20-30 second intervals, stirring to achieve a smooth consistency. Set the melted candy aside, as you’ll be incorporating it into the Halloween Rocky Road Slices later to create beautiful swirls.
Step 4: Cut the Kit Kats
Next, carefully cut the 10 mini Kit Kat bars (or 5 regular-sized ones) into bite-sized pieces. Set these aside, ready to blend into your chocolate mixture. Their crispy layers will add delightful texture to your rocky road, enhancing each slice with extra flavor.
Step 5: Combine Ingredients
Once the chocolate mixture has cooled slightly, stir in the roasted peanuts and Kit Kat pieces. Mix well to ensure that the chocolate envelops each ingredient thoroughly. This step is crucial to achieving an evenly distributed flavor throughout your Halloween Rocky Road Slices.
Step 6: Incorporate Marshmallows
Gently fold in the 75 g of mini marshmallows last, taking care not to squash them, as their fluffy texture offers a delightful contrast. Mix just until they are evenly dispersed throughout the chocolate base. This step enhances the soft chewiness in each delicious slice, making them irresistible.
Step 7: Transfer to the Pan
Scrape the creamy mixture into your prepared pan, using a spatula to spread it evenly. As you do this, swirl in dollops of the melted candy melts from earlier, creating a marbled effect that adds both flavor and visual appeal to your Halloween Rocky Road Slices.
Step 8: Score the Slices
Using the tip of a knife, gently mark where you will cut the slices, being careful not to cut all the way through. This will help you achieve neat, uniform pieces once your creation sets. It's important to visualize your cutting lines to make serving easier later on.
Step 9: Add Festive Decorations
Now it’s time to decorate! Carefully place gummy worms and M&M candies over the top, avoiding the marked cut lines. Enhance your spooky theme further with candy eyes and Halloween sprinkles. This fun step infuses personality into your Halloween Rocky Road Slices, making them a hit at any gathering.
Step 10: Chill and Set
Refrigerate the pan, allowing the slices to set completely, preferably overnight. This chilling process helps the flavors meld and ensures that your Halloween Rocky Road Slices hold their shape when cut. Patience is key, and trust me, the wait will be worth it!
Step 11: Cut and Store
Once set, lift the rocky road carefully out of the pan using the parchment edges. Cut along the marked lines into 25 perfect slices. Store your Halloween Rocky Road Slices in an airtight container in the fridge to keep them fresh and delicious for you and your guests to enjoy!
Expert Tips for Halloween Rocky Road Slices
-
Melt with Care: Avoid overheating chocolate by microwaving in short intervals and stirring often. This prevents burning and ensures a smooth base for your Halloween Rocky Road Slices.
-
Proper Mixing: Always fold in marshmallows last and gently to maintain their fluffy texture. Overmixing can melt them and ruin the desired chewy consistency.
-
Chill Time Matters: Patience pays off! Allow the mixture to set overnight for the best texture and flavor. Rushing this step can lead to messy slices.
-
Decorate Smartly: When decorating, steer clear of the marked cut lines with gummy worms and M&Ms to ensure clean cuts and a neat presentation.
-
Customization Options: Feel free to swap out nuts or candies based on your preferences. This flexibility can make your Halloween Rocky Road Slices a year-round favorite!
Make Ahead Options
These Halloween Rocky Road Slices are perfect for meal prep, allowing you to create magic ahead of time! You can prepare the entire mixture and chill it up to 24 hours in advance, ensuring the flavors meld beautifully. To do this, simply follow the recipe until the chilling step, then tightly cover the pan with plastic wrap or foil before refrigerating. When you’re ready to serve, just lift them out of the pan, cut along the marked lines, and enjoy the same deliciousness as if they were freshly made! Remember, storing them in an airtight container in the fridge will maintain their delightful texture and taste, giving you homemade treats that are just as tempting as ever.
How to Store and Freeze Halloween Rocky Road Slices
Fridge: Store the sliced Halloween Rocky Road Slices in an airtight container in the refrigerator for up to 1 week to maintain the perfect taste and texture.
Freezer: For longer storage, wrap individual slices in plastic wrap and place them in a freezer-safe bag. They can last up to 3 months in the freezer, making them a delightful treat ready to enjoy anytime!
Reheating: If frozen, allow the slices to thaw in the fridge overnight before serving. You can also microwave a slice for a few seconds to enjoy a warm chocolatey treat.
Room Temperature: While it's best to store these in the fridge, you can leave them at room temperature for up to 2 hours when serving for parties or gatherings.
What to Serve with Halloween Rocky Road Slices
As you prepare your spooky dessert spread, consider these delicious pairings that enhance the festive fun!
-
Chilled Apple Cider: Wholesome and refreshing, this autumn classic pairs beautifully with the richness of chocolate. Its crispness offers a delightful contrast to the creamy slices, making each bite a seasonal celebration.
-
Pumpkin Spice Cupcakes: These fluffy treats, adorned with creamy frosting, echo the cozy flavors of fall, making them a sweet companion for your Rocky Road Slices. The festive spices add warmth, inviting everyone to savor both treats.
-
Crunchy Popcorn Mix: A fun mix of popcorn, candy corn, and nuts provides a satisfying crunch. Its lightness complements the dense texture of the slices while adding a playful, shareable element for all your guests.
-
Spooky Cheese Board: Create a visually enticing spread with assorted cheeses, crackers, and seasonal fruit. The savory notes and textures balance out the sweetness of your dessert, offering something for every palate.
-
Ghostly Milkshakes: Rich and creamy, these milkshakes can be dressed up with whipped cream and Halloween-themed sprinkles. Their coolness pairs well with the chocolatey bites, making them a hit among kids and adults alike!
-
Chocolate Mint Cookies: The refreshing mint flavor cuts through the richness of the chocolate slices, giving your dessert table an extra layer of deliciousness. Plus, their cute designs can fit right into your Halloween theme!
-
Candy Corn Parfaits: Layer candy corn with whipped cream and crumbled cookies in cups for a colorful treat. Their sweet flavors and texture create a fun, interactive dessert alongside the Halloween Rocky Road Slices.
-
Spiced Hot Chocolate: Cozy up your dessert table with a warm cup of this classic drink. The rich, spiced flavor enhances the chocolatey goodness of your slices, making every bite feel like a warm hug on a chilly night.
-
Caramel Dipped Apples: Juicy apples dunked in silky caramel offer a crunchy sweetness. These provide a fresh, fruity kick that balances the richness of the Rocky Road Slices in delightful harmony.
Halloween Rocky Road Slices Variations
Feel free to get creative and personalize your Halloween Rocky Road Slices with these delightful twists!
-
Nut-Free: Swap roasted peanuts for sunflower seeds or pumpkin seeds to keep it allergen-friendly while still adding a crunch.
-
Dairy-Free: Use dairy-free chocolate chips and margarine to whip up a version that everyone can enjoy without sacrificing flavor. You'll still get that rich taste without the dairy!
-
Crunchy Twist: Experiment with different candies like Rice Krispies or crushed pretzels for a satisfying, salty contrast in every bite. The addition of texture elevates each slice!
-
Extra Fright: Add orange or black frosting in spooky patterns on top for a festive and fun presentation. Everyone will love the visual feast before they even take a bite!
-
Spicy Kick: Introduce a pinch of cayenne pepper to the chocolate mix for a surprising heat that balances the sweetness beautifully. It’s an adventurous twist that spice lovers will appreciate!
-
Gummy Variety: Play around with different types of gummies, such as gummy bears or gummy spiders, to mix up the flavor and fun factor. Every slice will have a different surprise!
-
Flavor Infusion: Try incorporating extracts like vanilla or peppermint for an unexpected flavor enhancement that can transport your taste buds beyond Halloween. Imagine the cozy aroma wafting through your kitchen!
Get inspired by these suggestions or use them as a launching pad for your unique versions of easy no-bake treats perfect for any occasion!
Halloween Rocky Road Slices Recipe FAQs
How do I choose ripe and quality ingredients for my Rocky Road Slices?
Absolutely! When selecting chocolate chips, opt for high-quality semi-sweet varieties with a rich flavor. For butter, choose unsalted so you can control the saltiness. Select fresh roasted peanuts without dark spots or signs of oiliness, and make sure your marshmallows are soft and fluffy, free from any hard or stale pieces.
What’s the best way to store leftover Halloween Rocky Road Slices?
To maintain freshness, store your sliced Halloween Rocky Road Slices in an airtight container in the fridge for up to 1 week. Make sure they are completely cool before sealing and layering between pieces of parchment paper to prevent sticking. Enjoy them cold for a delightful chocolate treat!
Can I freeze Halloween Rocky Road Slices for later?
Absolutely! To freeze, wrap individual slices in plastic wrap and place them in a freezer-safe bag or airtight container. They will stay fresh for up to 3 months. When you’re ready to indulge, thaw the slices in the fridge overnight. For a quick treat, pop a slice in the microwave for a few seconds for that warm chocolatey goodness.
What should I do if my chocolate mixture is too thick or not mixing well?
No worries! If your chocolate mixture seems too thick, try adding a small splash of melted butter or a bit more melted chocolate, stirring gently until you reach a creamier consistency. If it’s not mixing well, ensure that the chocolate has cooled slightly before adding the other ingredients and mix more thoroughly to incorporate everything evenly.
Are there any dietary considerations I should keep in mind?
Definitely! If you’re serving these delightful Halloween Rocky Road Slices to a group, be aware of common allergies. This recipe contains peanuts and dairy, so check with guests regarding nut allergies or lactose intolerance. For a nut-free version, substitute the peanuts with sunflower seeds or crispy rice cereal. Enjoy creating delicious treats everyone can enjoy!
Halloween Rocky Road Slices: Irresistibly Fun Treats to Make
Ingredients
Equipment
Method
- Prepare the Pan: Line an 8-inch or 9-inch square pan with parchment paper.
- Melt the Chocolate Mixture: Combine butter, chocolate chips, and salt in a bowl and microwave until melted.
- Prepare the Candy Melts: Melt candy melts in bowls using short intervals.
- Cut the Kit Kats: Cut mini Kit Kat bars into bite-sized pieces.
- Combine Ingredients: Stir in peanuts and Kit Kat pieces into the chocolate mixture.
- Incorporate Marshmallows: Gently fold in mini marshmallows.
- Transfer to the Pan: Pour the mixture into the prepared pan and spread evenly.
- Score the Slices: Mark cut lines with a knife without cutting all the way through.
- Add Festive Decorations: Decorate with gummy worms, M&Ms, candy eyes, and sprinkles.
- Chill and Set: Refrigerate overnight until set.
- Cut and Store: Lift the sliced rocky road out of the pan and cut into 25 slices.


Leave a Reply