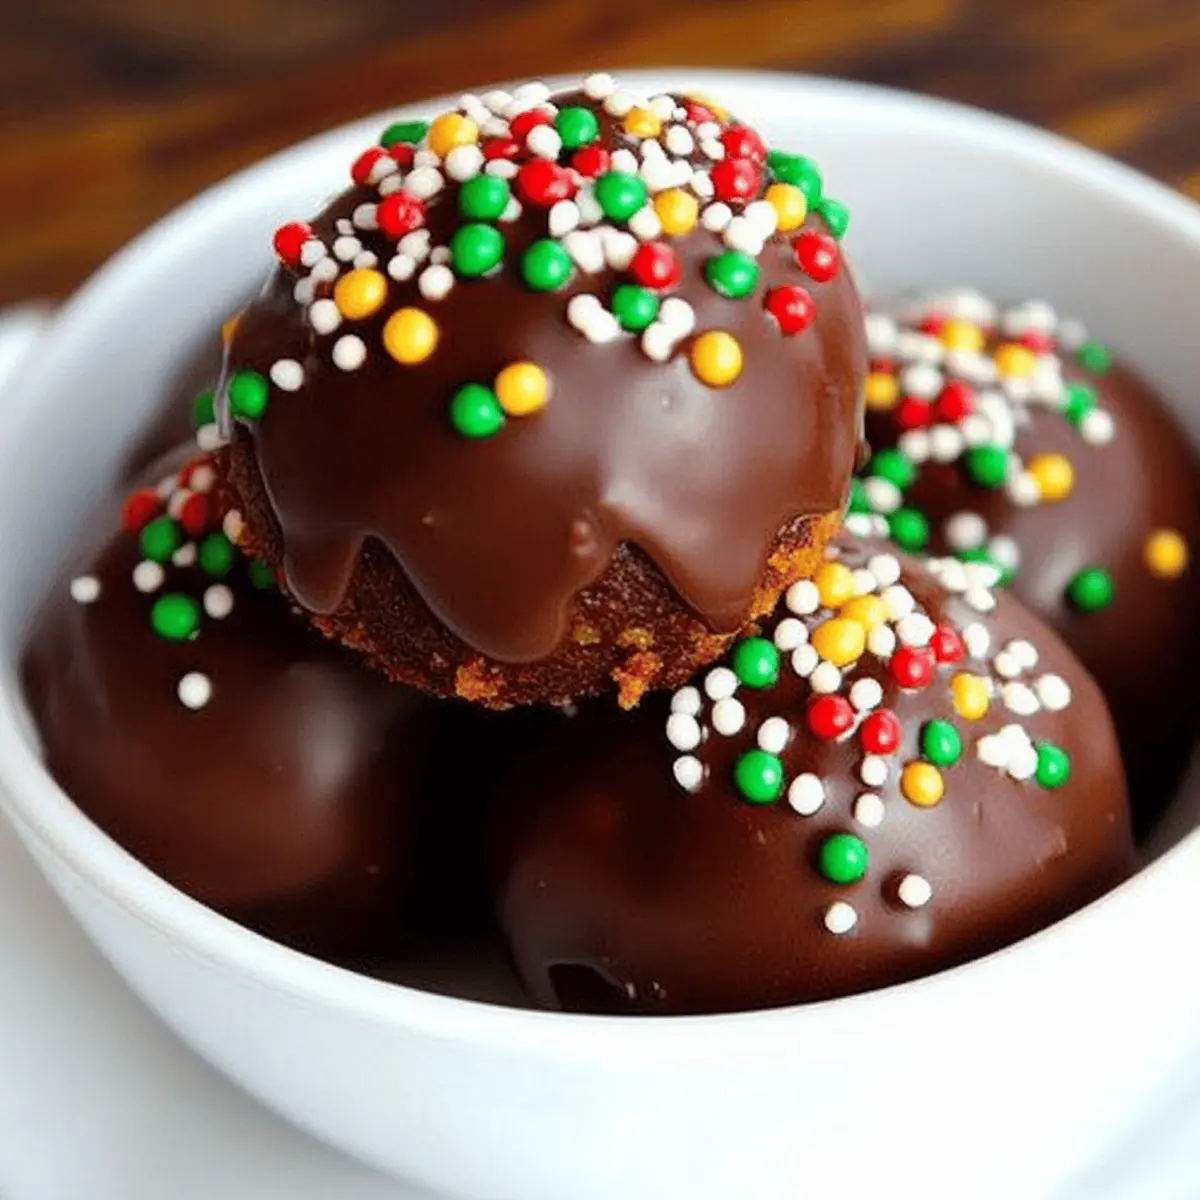
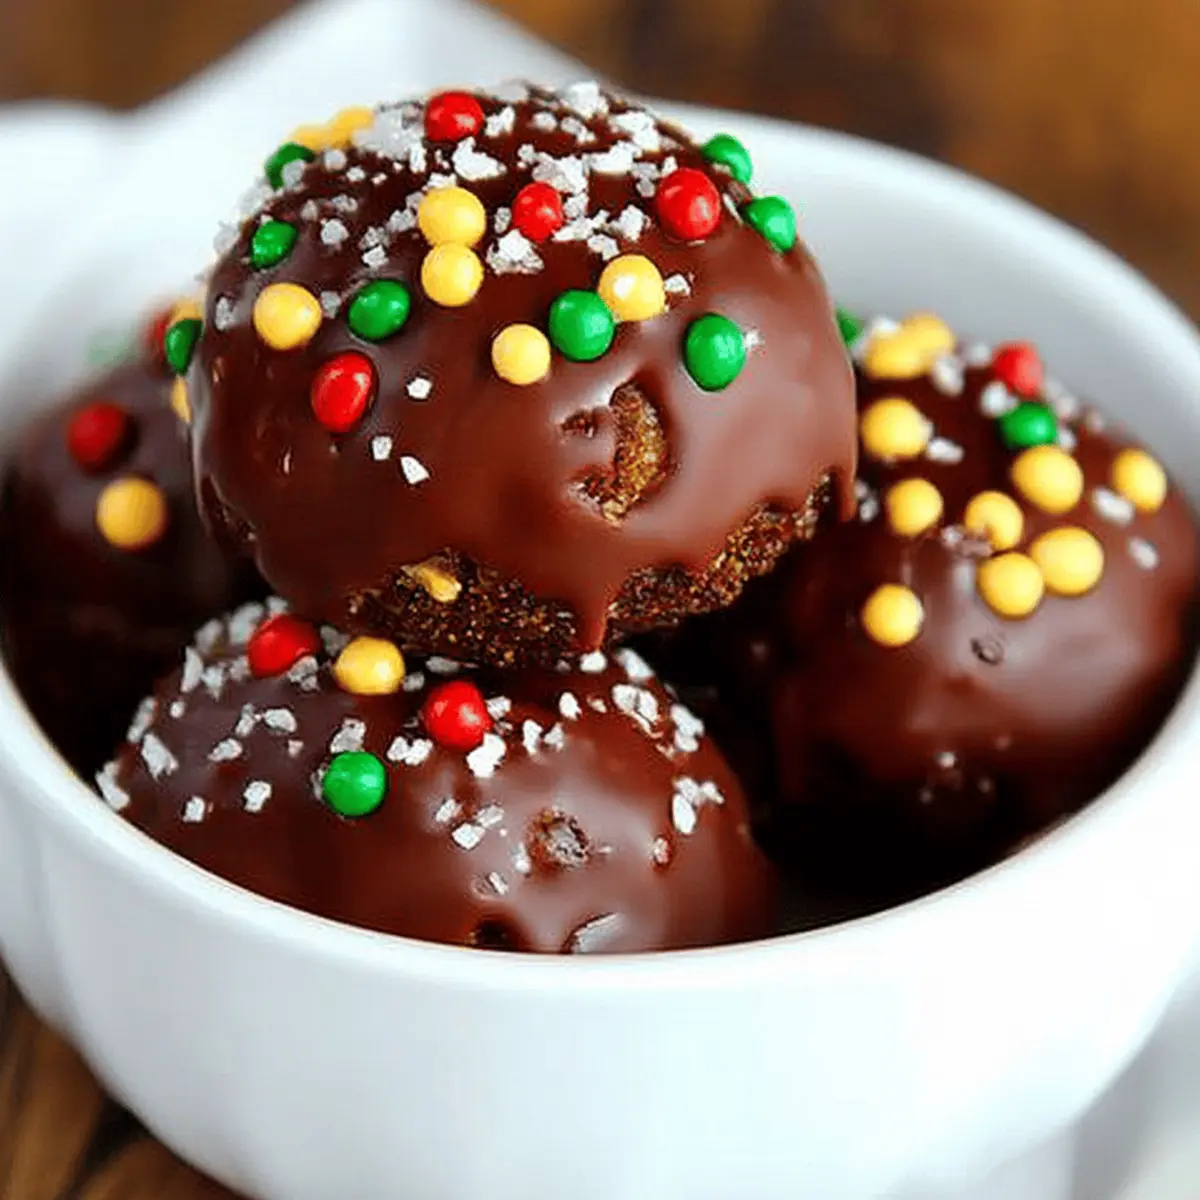
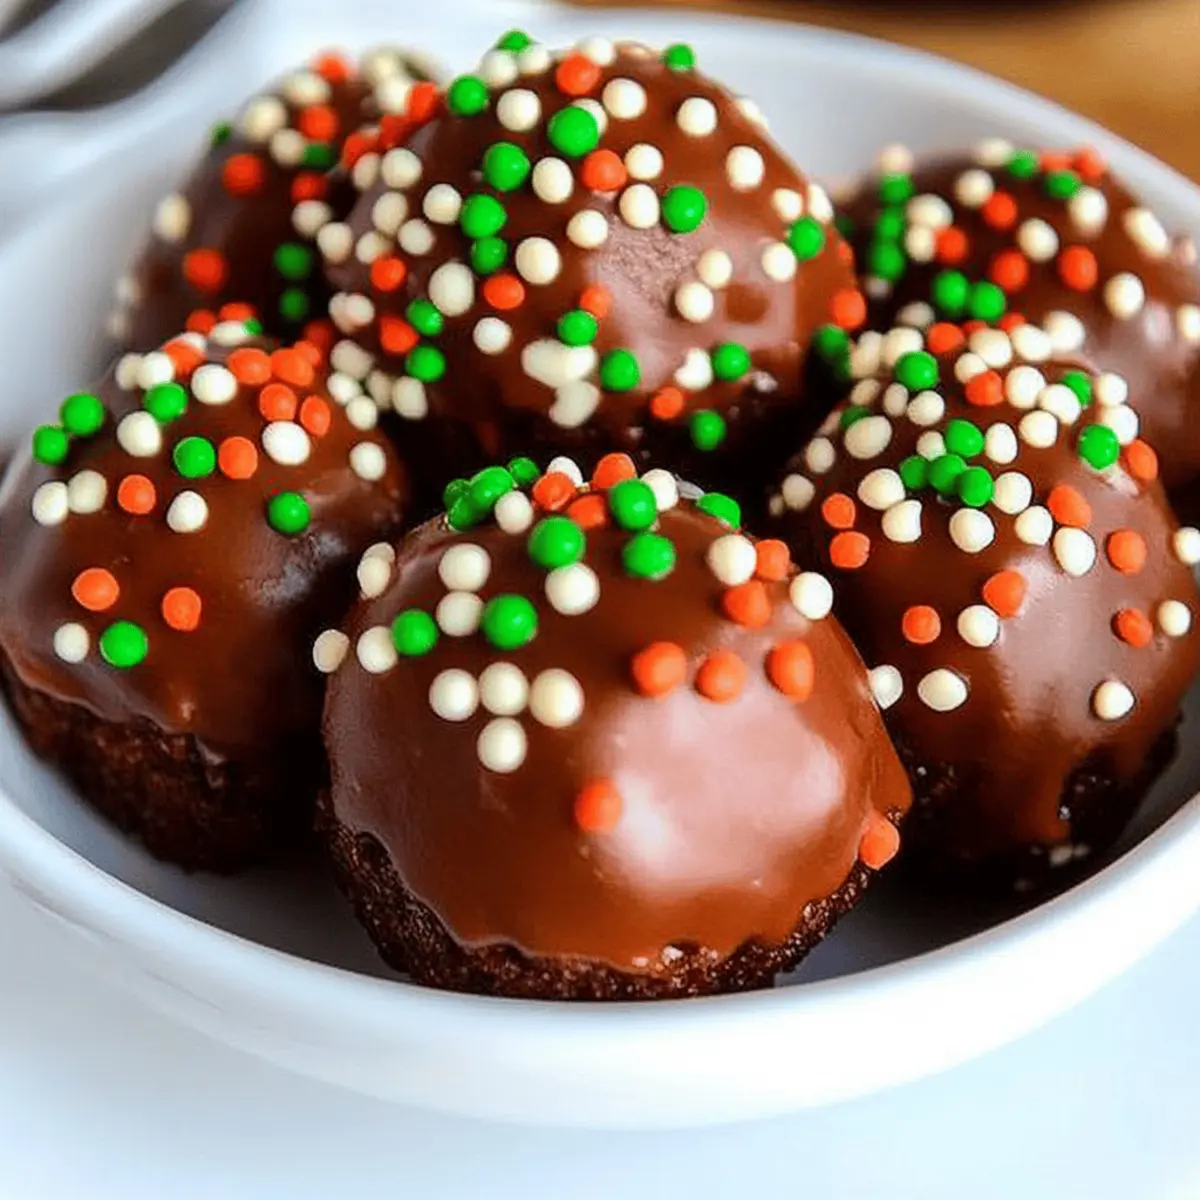
The aroma of sweet holiday treats always stirs up a tingle of joy in my heart, and this year, I couldn't resist sharing my No-Bake Holiday Oreo Truffles with you! These delightful morsels are not only a crowd-pleaser but also a fantastic no-fuss way to indulge during the festive season. Imagine the satisfaction of creating a stunning dessert that requires zero baking, making it perfect for those last-minute gatherings. Plus, this recipe is versatile enough to accommodate various dietary needs, whether you're vegan or gluten-free. So, are you ready to whip up these irresistible truffles that’ll make your holiday celebrations even sweeter? Let’s dive into the recipe!
Why You'll Love No Bake Holiday Oreo Truffles
Unbelievable Simplicity: No baking required! With just a few easy steps, you can whip up these treats in no time.
Irresistible Flavor: Each truffle brings the classic taste of Oreos, paired with rich chocolate for an indulgent treat.
Customizable Delight: Feel free to get creative! You can add festive sprinkles, nuts, or even different types of chocolate for a personalized touch.
Crowd-Pleasing Treat: Perfect for holiday parties, these truffles are sure to impress friends and family alike—everyone will be asking for seconds!
Diet-Friendly Option: Easily adapt this recipe to be vegan or gluten-free, ensuring everyone can enjoy these festive bites.
Minimal Cleanup: Less mess means more time for holiday cheer! Grab your ingredients and enjoy a stress-free baking experience this season.
No Bake Holiday Oreo Truffles Ingredients
For the Truffles
- 16 Oreo cookies – Crush them into fine crumbs for a perfect truffle base.
- 8 ounces cream cheese – Soften it to ensure a smooth, creamy texture.
- 1 teaspoon vanilla extract – Adds a delightful hint of flavor that enhances the chocolate.
For the Coating
- 8 ounces chocolate (milk or dark) – Choose your favorite for coating, making these truffles irresistible.
- 1 tablespoon coconut oil – Helps temper the chocolate for a glossy finish.
Optional Toppings
- Crushed Oreos or festive sprinkles – Add a fun touch to your truffles for that holiday spirit!
- Chopped nuts or sea salt – Elevate the flavor profile for a gourmet twist.
Now get ready to impress with these No Bake Holiday Oreo Truffles that are sure to be a favorite at your festive gatherings!
Step‑by‑Step Instructions for No Bake Holiday Oreo Truffles
Step 1: Crush the Oreos
Begin by placing your 16 Oreo cookies in a food processor. Pulse until they form fine crumbs, resembling sand. If you don’t have a food processor, you can place the cookies in a zip-top bag and crush them with a rolling pin. Ensure there are no large pieces remaining, as the fine crumbs will combine beautifully with the cream cheese for your No Bake Holiday Oreo Truffles.
Step 2: Mix the Base
In a mixing bowl, combine the crushed Oreos with 8 ounces of softened cream cheese and 1 teaspoon of vanilla extract. Using a spatula or your hands, mix until the ingredients are well blended and form a cohesive dough. This should take about 2-3 minutes of mixing. The mixture should be moist but not sticky, allowing you to easily shape it into truffles.
Step 3: Shape the Truffles
Once your mixture is well combined, take small portions (about 1 inch in diameter) and roll them into balls using your hands. Place the shaped truffles on a parchment-lined baking sheet. Aim for uniform sizes to ensure even coating later. Once all truffles are formed, refrigerate them for at least 30 minutes to firm up, making them easier to coat in chocolate.
Step 4: Prepare the Coating
While the truffles chill, melt 8 ounces of chocolate (milk or dark) using a double boiler or in the microwave in 30-second intervals. Stir in 1 tablespoon of coconut oil to achieve a smooth and glossy texture. If using a microwave, be careful not to overheat the chocolate; it should be fully melted but not bubbling.
Step 5: Coat the Truffles
After chilling, remove the truffles from the refrigerator. Dip each chilled truffle into the melted chocolate, ensuring it's fully coated. Use a fork to lift them out, allowing any excess chocolate to drip off before placing them back on the parchment paper. Work quickly to ensure the chocolate remains smooth for your stunning No Bake Holiday Oreo Truffles.
Step 6: Add Toppings
If desired, sprinkle crushed Oreos or festive sprinkles on top of the chocolate-coated truffles before the chocolate sets. This adds a delightful touch and a pop of color, perfect for the holiday season. Allow the truffles to rest at room temperature for about 15 minutes until the chocolate has hardened.
Step 7: Serve and Enjoy
Once the chocolate coating is set, your No Bake Holiday Oreo Truffles are ready to dazzle your guests! Transfer them to a decorative plate or gift box for sharing. These delightful bites are not only visually appealing but also a sweet and creamy indulgence that everyone will adore during your holiday celebrations.

How to Store and Freeze No Bake Holiday Oreo Truffles
Room Temperature: Keep your truffles in an airtight container at room temperature for up to 3 days to maintain freshness.
Fridge: Store the truffles in the refrigerator for up to 2 weeks. Make sure they're in a sealed container to prevent them from absorbing odors.
Freezer: For longer storage, freeze the truffles for up to 3 months. Place them in a single layer on a baking sheet to freeze solid, then transfer to an airtight container.
Reheating: If they have been frozen, allow the No Bake Holiday Oreo Truffles to thaw in the fridge before serving to maintain their creamy texture.
What to Serve with No Bake Holiday Oreo Truffles
Indulging in these delightful truffles opens up a world of delicious pairings that will elevate your festive gatherings.
-
Festive Hot Chocolate: This rich, creamy beverage complements the chocolatey truffles perfectly, creating a cozy holiday indulgence. Flavors meld beautifully, warming hearts and tummies alike.
-
Vanilla Ice Cream: A scoop of this classic treat adds a refreshing contrast to the sweet, rich truffles while delivering a delightful creaminess. Top with chocolate syrup for extra decadence!
-
Peppermint Bark: The cool mint flavor harmonizes beautifully with the chocolate components of the truffles, providing a crunchy and sweet pairing for your dessert table.
-
Sparkling Cider: This bubbly drink brings a festive touch! Its sweetness enhances the chocolate richness while providing a fun, fizzy contrast, making it perfect for toasting.
-
Holiday Cheeseboard: Create a spread featuring assorted cheeses, fruits, nuts, and olives. The mix of sweet and savory highlights the rich flavors of your truffles, offering something for everyone.
-
Fruit Skewers: Fresh berries or tropical fruits cut through the richness of the truffles while bringing a pop of color and healthiness to your dessert spread. Delightful and visually appealing!
-
Gingerbread Cookies: These spiced treats create a nostalgic pairing that echoes holiday flavors, making for a lovely match with the Oreo truffles at any celebration!
No Bake Holiday Oreo Truffles Variations
Get ready to make these delightful truffles even more enticing with a dash of creativity!
-
Nut-Free: Substitute peanut butter for cream cheese for a nut-free twist, while keeping it creamy and delicious.
-
Vegan: Use vegan cream cheese and semi-sweet chocolate to transform your truffles into a plant-based treat that everyone will love.
-
Minty Fresh: Add a few drops of peppermint extract into the mixture for a festive, minty flavor that dances on your taste buds. Perfect for those who fancy a holiday classic.
-
Spicy Kick: Stir in a pinch of cayenne pepper or cinnamon to the cream cheese mix for a surprising hint of warmth that elevates the flavor profile.
-
Add-Ins Galore: Fold in some mini marshmallows or crushed nuts before shaping the truffles for extra texture and flavor, making each bite more exciting.
-
White Chocolate Coating: Switch out the milk or dark chocolate for white chocolate for a sweeter take that beautifully contrasts with the Oreo base.
-
Seasonal Flavors: Swap in pumpkin spice or gingerbread spices during the winter months to give your truffles a seasonal twist that matches the festive cheer.
-
Drizzled Finish: Drizzle melted chocolate over the set truffles for a decorative touch, and take your presentation to the next dreamy level.
Feeling inspired? These variations offer tasty opportunities to customize your No Bake Holiday Oreo Truffles, so let your imagination run wild! For more delicious recipes, you might also enjoy trying these No-Bake Christmas Cheesecake Bars or the delightful Chocolate Peppermint Rice Crispy Bars. Happy indulging!
Tips for the Best No Bake Holiday Oreo Truffles
• Perfectly Crush Oreos: Ensure your Oreo cookies are finely crushed for a smooth truffle base. Large pieces can disrupt the texture and make shaping difficult.
• Cream Cheese Temperature: Use softened cream cheese for easy mixing. If it’s too cold, the truffles may end up lumpy and hard to combine.
• Chill for Firmness: Don’t skip refrigerating the truffles after shaping. This step makes coating them in chocolate much easier and prevents melting.
• Smooth Chocolate Coating: Make sure your chocolate is melted smoothly with the coconut oil. A lumpy or thick chocolate will not coat the truffles well, impacting their presentation.
• Get Creative with Toppings: Feel free to experiment with toppings like crushed nuts or colorful sprinkles. This adds a festive flair to your No Bake Holiday Oreo Truffles and makes them extra inviting!
• Tempering Chocolate: Dip quickly to avoid the chocolate setting before fully coating. Work in batches if necessary for optimal coating results.
Make Ahead Options
These No Bake Holiday Oreo Truffles are perfect for meal prep enthusiasts and will save you time during the busy holiday season! You can make the truffle mixture up to 24 hours in advance; simply follow the first three steps of the recipe, then shape the truffles and refrigerate them until you're ready to coat. When it’s time to serve, melt the chocolate with coconut oil and coat the chilled truffles. The refrigeration helps the truffles maintain their shape and texture, ensuring they come out just as delicious as if made fresh. For the best quality, keep finished truffles stored in an airtight container in the fridge for up to 3 days before your gathering!
No Bake Holiday Oreo Truffles Recipe FAQs
How do I choose the best Oreos for the truffles?
Absolutely! Opt for classic Oreos for the best flavor, but feel free to experiment with flavored varieties like mint or peanut butter for a unique twist. Just ensure they're crushed finely for a smooth texture.
How should I store my No Bake Holiday Oreo Truffles?
For room temperature storage, keep them in an airtight container for up to 3 days. If you want them to last longer, refrigerate them in a sealed container for up to 2 weeks. They’re perfect for making ahead of time!
Can I freeze No Bake Holiday Oreo Truffles?
Very! To freeze, place the truffles in a single layer on a baking sheet lined with parchment paper until solid. Transfer them to an airtight container, and they’ll keep well for up to 3 months. Just thaw in the fridge before serving for the best texture.
What if my truffles are too sticky to roll?
If your truffle mixture is sticky, try refrigerating it for a bit longer to firm it up. If it's still problematic, consider adding a bit more crushed Oreos to balance the moisture, which will help shape them easily.
Are there any dietary considerations I should keep in mind?
Of course! To make these No Bake Holiday Oreo Truffles vegan, swap the cream cheese for a plant-based alternative. Additionally, check the Oreo packaging for gluten-free options if needed. Everyone should be able to indulge in these delights!
How do I ensure a smooth chocolate coating on my truffles?
To achieve a smooth coating, melt the chocolate gently, stirring in coconut oil to aid consistency. Dip the chilled truffles quickly to allow the chocolate to set perfectly. If the chocolate thickens, reheat gently to restore its smoothness.
Decadent No Bake Holiday Oreo Truffles You'll Love
Ingredients
Equipment
Method
- Crush the Oreos by pulsing in a food processor until they form fine crumbs.
- Mix the crushed Oreos with softened cream cheese and vanilla extract until well combined.
- Shape the mixture into 1-inch balls and refrigerate for 30 minutes.
- Melt the chocolate and coconut oil together until smooth.
- Coat each truffle in the melted chocolate and place on parchment paper.
- Add optional toppings before the chocolate sets.
- Allow the truffles to rest until the chocolate hardens before serving.


Leave a Reply