As I unwrapped the twinkling lights and fragrant spices of the holiday season, I found myself on a mission: to create something irresistibly festive without the hassle of baking. Enter my No-Bake Christmas Treats—an easy, delightful solution perfect for when your schedule is bursting at the seams. With quick prep time and a variety of flavor-packed combinations, these treats let you shine in the kitchen without the heat! Whether you're conjuring sweet truffles or crunchy bark, you’ll delight in crafting personalized goodies that cater to all tastes, including vegan and gluten-free friends. So, ready to whip up a batch of pure joy and sprinkle some holiday magic? Let’s dive into the fun of creating these delicious no-bake marvels!
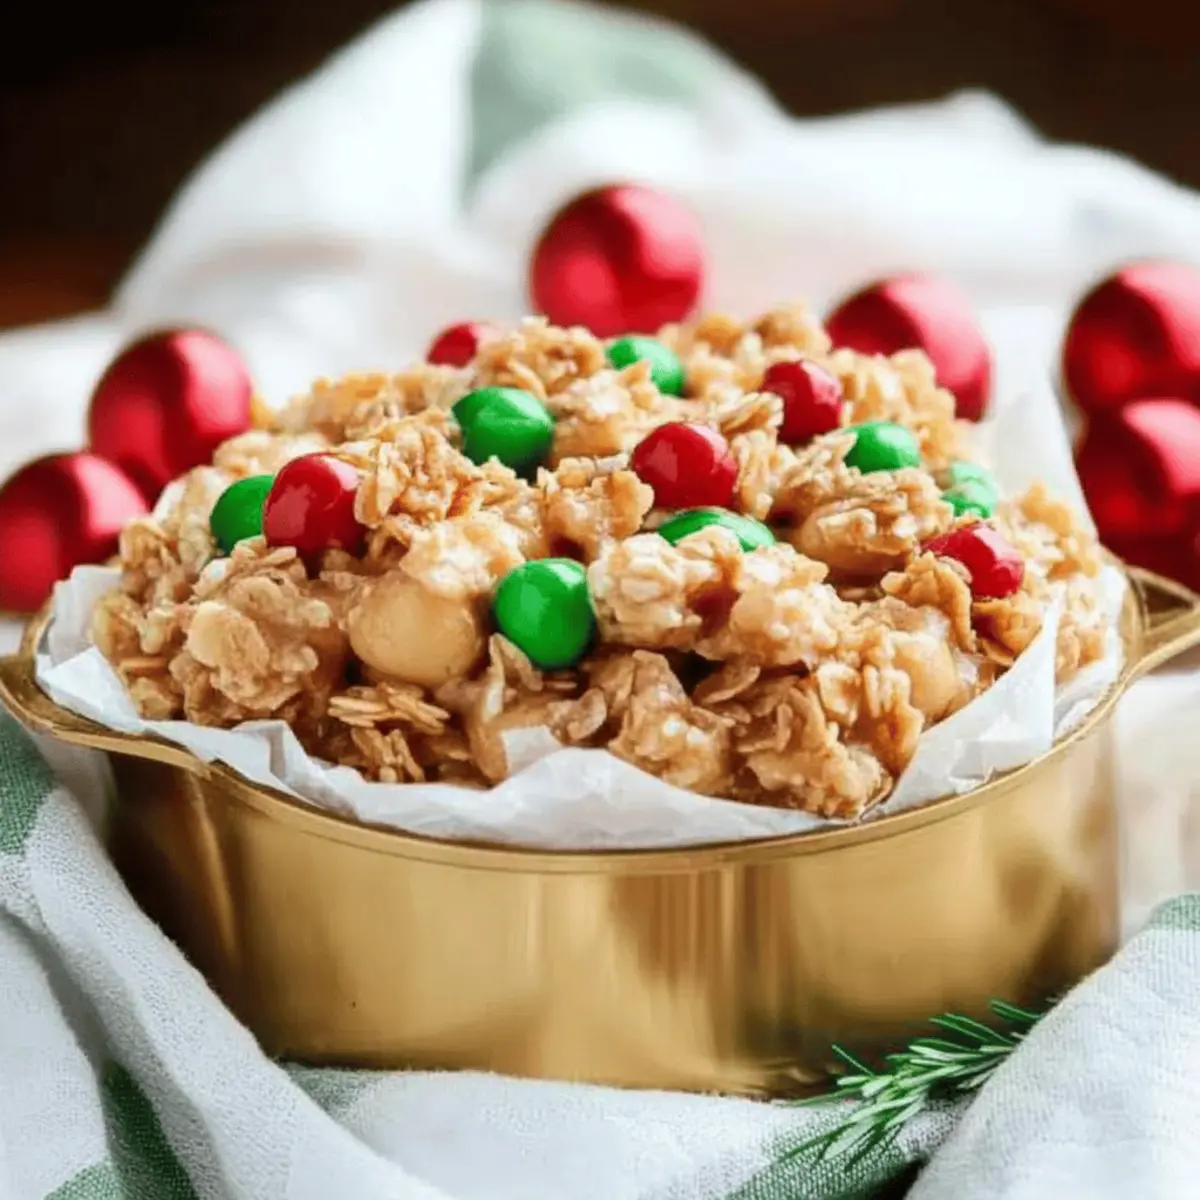
Why Make No-Bake Avalanche Cookies?
Effortless Enjoyment: These treats come together in just 10 minutes and require no cooking, making them perfect for busy holiday schedules.
Endless Variations: With options like fudge, truffles, and bark, you can mix and match to create the perfect flavors for your gatherings.
Health-Conscious Choices: Offering vegan and gluten-free variations ensures that everyone can indulge, no matter their dietary needs.
Sweet Crowd-Pleaser: Everyone loves a delicious cookie, and these No-Bake Avalanche Cookies are bound to impress at any holiday gathering or party.
Festive Presentation: Assemble them beautifully on a platter, making them not just treats but also stunning holiday decor. Ready to simplify your holiday baking with delightful goodies? Check out our simple baking guide for more easy recipes!
Ingredients
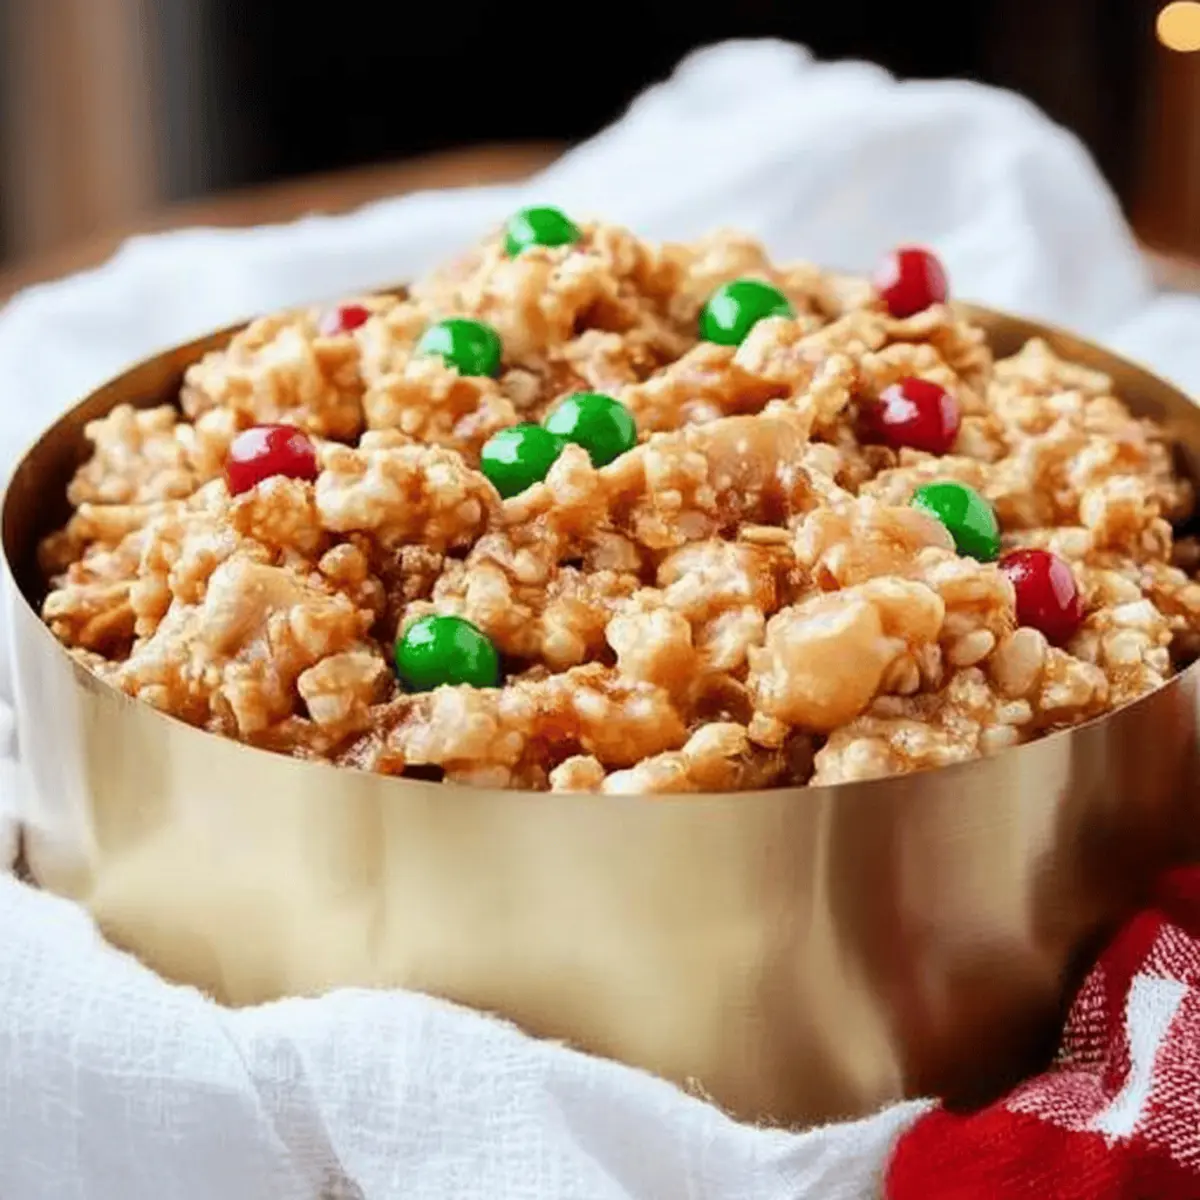
No Bake Avalanche Cookies Ingredients
• The perfect mix to satisfy your sweet tooth!
For the Base
- 1 cup walnuts – Adds a delightful crunch and healthy fats.
- 1 cup peanut butter – Offers creamy richness and binds the mixture together.
- 1 cup rice cereal – Gives the cookies a light, crispy texture.
- ½ cup sugar – Sweetens the base, balancing the flavors perfectly.
For the Flavor Boost
- 1 cup chocolate – Melt for a smooth coating that enhances each cookie.
- ½ cup white chocolate – Drizzle or dip for a beautiful contrast and sweetness.
- ½ cup coconut flakes – Adds a tropical flair and chewy texture.
- ¼ cup mini marshmallows – For an extra sweet, gooey touch.
- ¼ cup cocoa powder – Introduces a rich, chocolatey depth.
For the Toppings
- ¼ cup Oreo crumbs – Sprinkle for a fun crunch and familiar flavor.
- ¼ cup candy canes – Crush for a festive minty twist.
- ¼ cup pretzels – Adds saltiness and an enjoyable crunch.
- ¼ cup almonds – Provides extra nutrition and a satisfying bite.
- 1 tablespoon peppermint extract – Enhances the holiday spirit with a refreshing finish.
- ½ cup cream cheese – Use for a creamy truffle filling, truly decadent!
Now you’re ready to create your No-Bake Avalanche Cookies that will wow everyone at your holiday celebration!
Step‑by‑Step Instructions for No Bake Avalanche Cookies
Step 1: Prepare Your Baking Sheet
Begin by lining a baking sheet with parchment paper to prevent sticking. This easy step ensures that when your No Bake Avalanche Cookies are ready, they will come off effortlessly. Make sure the parchment is flat and covers the entire surface, creating a perfect foundation for your delicious treats.
Step 2: Caramelize the Walnuts
In a medium saucepan over medium heat, combine the walnuts, sugar, and a pinch of cinnamon. Stir continuously for about 5-7 minutes until the mixture is fragrant and the nuts are golden brown and caramelized. Remove from heat and let them cool slightly while you gather the rest of your ingredients.
Step 3: Create the Cranberry Mixture
To add a burst of flavor, coat the cranberries in sugar. In a small bowl, toss the cranberries with just enough sugar to lightly coat them. Set aside for about 10 minutes to allow the sugars to adhere, creating a lovely sweet layer that complements your No Bake Avalanche Cookies.
Step 4: Melt the Chocolate
In a microwave-safe bowl, combine the chocolate and white chocolate. Microwave the mixture in 30-second intervals, stirring in between until smooth and fully melted, about 1-2 minutes total. This silky chocolate will serve as a rich coating that envelops your cookies, adding a decadent finish.
Step 5: Mix Peanut Butter and Sugar
In a large mixing bowl, combine the peanut butter, butter, and sugar. Using a spatula or electric mixer, blend until completely smooth and creamy, approximately 3-4 minutes. This sweet and nutty mixture forms the base of your No Bake Avalanche Cookies, bringing richness and flavor to every bite.
Step 6: Fold in the Rice Cereal
Gently fold the rice cereal into the peanut butter mixture using a spatula until well-coated. This should take about 1-2 minutes. The cereal adds a delightful crunch, ensuring your No Bake Avalanche Cookies have the perfect texture. After fully incorporated, transfer the mixture to your prepared baking sheet.
Step 7: Shape Your Cookies
Press the cereal mixture down into an even layer on the baking sheet, ensuring it is compact. Use your hands or the back of a spatula to create a smooth surface. Allow it to cool for about 15 minutes to set, then cut into desired sizes for your No Bake Avalanche Cookies.
Step 8: Prepare the Cream Cheese Mixture
In a mixing bowl, blend the cream cheese with Oreo crumbs until fully combined. Roll this mixture into small balls, approximately 1 inch in diameter. This creamy filling adds a delightful surprise inside your cookies, enhancing the overall flavor profile of your No Bake Avalanche Cookies.
Step 9: Dip Truffles in Chocolate
Take each truffle and dip it into the melted chocolate, using a fork to fully coat. Allow excess chocolate to drip off before placing the truffles back on the parchment paper. Let them sit until the chocolate is set, about 20-30 minutes, ensuring a glossy and tempting finish.
Step 10: Assemble Toppings and Decorate
Combine the crushed candy canes and additional toppings like mini marshmallows, pretzels, and nuts in a bowl. After the chocolate has set, drizzle or sprinkle these festive toppings generously over your No Bake Avalanche Cookies, creating a stunning presentation that will wow your guests.
Step 11: Chill and Serve
Refrigerate your assembled No Bake Avalanche Cookies for at least 30 minutes to firm up the truffles and toppings. Once set, arrange them beautifully on a platter for a delightful holiday treat. Their festive appearance and delicious flavor will surely captivate everyone at your gathering.

Make Ahead Options
These No-Bake Avalanche Cookies are a fantastic choice for meal prep, allowing you to enjoy the festive season without the stress! You can prepare the base mixture, including the caramelized walnuts, peanut butter, and rice cereal, up to 24 hours in advance. Simply store it in an airtight container in the refrigerator to maintain freshness. The cream cheese mixture can also be rolled into truffles and refrigerated for up to 3 days before dipping. When you're ready to serve, melt the chocolate and coat the truffles, then assemble with your favorite toppings for a vibrant presentation. With these prep options, you can delight your guests with stunning treats that taste just as delicious as if made fresh!
What to Serve with No-Bake Christmas Treats?
Elevate your gathering with side delights that complement these festive no-bake wonders!
- Festive Fruit Platter: Bright, juicy fruits provide a refreshing contrast to the rich sweetness of the treats.
- Warm Mulled Cider: This spiced drink adds cozy flavors, perfectly pairing with the holiday treats and enhancing the festive mood.
- Creamy Hot Chocolate: Rich, velvety hot chocolate topped with whipped cream is a classic that everyone adores.
- Cheddar Cheese Board: A savory cheese assortment balances the sweetness, creating a delightful flavor journey for your guests.
- Chocolate Dipped Pretzels: The salty crunch of pretzels dipped in chocolate echoes the treat's flavors while adding an enticing texture.
- Gingerbread Cookies: Traditional and heartwarming, these festive cookies are a nostalgic pairing that will charm your audience.
- Peppermint Bark: A crunchy, chocolatey treat that mirrors the flavors in your no-bake cookies, tempting those sweet cravings.
- Sparkling Water with Lime: Offer a sophisticated, refreshing drink option that cleanses the palate between sweet bites.
- Eggnog Milkshakes: Indulge in this seasonal favorite for a rich, creamy blend that satisfies holiday cravings.
- Vanilla Ice Cream: Serve a scoop alongside—its creamy texture is the perfect contrast to the no-bake delights.
Expert Tips for No Bake Avalanche Cookies
Keep it Cool: Always refrigerate your No Bake Avalanche Cookies after assembling to ensure they hold their shape and flavors meld beautifully.
Avoid Overheating: When melting chocolate, use 30-second intervals to prevent burning; stirring frequently helps achieve a silky melt without any graininess.
Mixing Order Matters: For the peanut butter mixture, blend the butter and sugar first for a creamier consistency, which helps the rice cereal to stick better.
Customize Toppings: Feel free to get creative with toppings! Substitute ingredients to fit your taste—think dried fruits or nuts for a personal touch.
Watch Your Measurements: Accurate measurements of sugar and cereal ensure your cookies won’t be too sticky or crumbly, delivering that perfect bite every time!
Diet-Friendly Options: Don’t hesitate to swap in vegan or gluten-free ingredients; this recipe is versatile, ensuring everyone can enjoy the deliciousness of No Bake Avalanche Cookies!
No Bake Avalanche Cookies Variations
Feel free to get creative with your No Bake Avalanche Cookies, as there are endless ways to customize these delightful treats!
-
Nut-Free: Replace walnuts with sunflower seeds or pumpkin seeds for a delicious crunch without the nuts.
-
Vegan: Use maple syrup instead of sugar and swap peanut butter for almond or cashew butter to keep it plant-based.
-
Spicy Kick: Add a pinch of cayenne or chili powder for unexpected heat—balance it with a sprinkle of sea salt for contrast.
-
Fruit-Infused: Stir in dried cherries or apricots into the mixture for a sweet, chewy texture—perfect for a fruity twist!
-
Gluten-Free: Ensure all ingredients are certified gluten-free; swap rice cereal for puffed quinoa for a delightful crunch that fits the diet!
-
Chocolate Lovers: Incorporate a splash of espresso powder into the chocolate mixture to create an even richer flavor profile.
-
Coconut Delight: Replace half the rice cereal with crushed graham crackers and more coconut flakes for an island-inspired treat.
-
Festive Additions: Sprinkle edible glitter or holiday-themed sprinkles on top to bring extra cheer to your cookies this season.
These variations will not only keep your No Bake Avalanche Cookies fresh and exciting but can also cater to any dietary preferences your friends and family might have! If you’re looking for additional inspirations, feel free to explore our healthy dessert ideas or try out some delicious vegan baking recipes!
How to Store and Freeze No Bake Avalanche Cookies
Fridge: Store your No Bake Avalanche Cookies in an airtight container for up to 1 week. This keeps them fresh and ready to indulge!
Freezer: For longer storage, freeze the cookies in a single layer on a baking sheet. Once solid, transfer to a freezer bag or container, where they’ll stay good for up to 3 months.
Thawing: To enjoy, simply remove the cookies from the freezer and let them sit at room temperature for about 15-30 minutes before serving.
Reheating: If you'd like a warm treat, consider microwaving each cookie for a few seconds to slightly soften them—just be careful not to overheat!
No-Bake Avalanche Cookies Recipe FAQs
What should I look for when selecting ingredients?
Absolutely! For the freshest taste, choose walnuts that are firm and not too oily. Look for cranberries that are bright and plump, avoiding any that appear wrinkled or dried out. When selecting chocolate, ensure it's shiny and smooth, while your peanut butter should be creamy without added sugars for the best flavor balance.
How should I store my No-Bake Avalanche Cookies?
Store your No-Bake Avalanche Cookies in an airtight container at room temperature for about 1 week. They’ll remain fresh and delicious, ready to be enjoyed whenever the craving strikes. If you have leftovers or want to make a batch ahead of time, refrigerating them is a great option too; just be sure they’re well wrapped to maintain their flavor.
Can I freeze No-Bake Avalanche Cookies and how?
Yes, you can! To freeze your No-Bake Avalanche Cookies, start by placing them in a single layer on a baking sheet. Freeze for about 1-2 hours until they’re firm. Then, transfer them to an airtight container or freezer bag. They will keep for up to 3 months! When you’re ready to enjoy, thaw them at room temperature for 15-30 minutes before serving.
What can I do if my cookie mixture is too sticky or crumbly?
Very good question! If your mixture is too sticky, try adding a bit more rice cereal or powdered sugar, a tablespoon at a time, until you reach the desired consistency. For a crumbly texture, it might help to add a touch of peanut butter or melted chocolate, integrating it thoroughly to achieve that perfect, cohesive blend.
Are there any dietary considerations I should be aware of?
Definitely! If you have guests with dietary restrictions, this recipe is very versatile. You can easily swap traditional ingredients for vegan options (like using almond butter instead of peanut butter or coconut cream instead of cream cheese) to suit vegan diets. Gluten-free rice cereal can replace regular cereal, allowing everyone to enjoy these No-Bake Avalanche Cookies without worry!
How long do I need to chill these cookies before serving?
Make sure to chill your assembled No-Bake Avalanche Cookies for about 30 minutes. This will help the flavors meld beautifully and firm up the treats, resulting in a delightful bite that captures the essence of the holidays. Enjoy your delicious creations!

No Bake Avalanche Cookies: Sweet Treats That Wow Every Time
Ingredients
Equipment
Method
- Prepare Your Baking Sheet: Line a baking sheet with parchment paper to prevent sticking.
- Caramelize the Walnuts: Combine the walnuts, sugar, and cinnamon in a saucepan; stir for about 5-7 minutes until golden and fragrant.
- Create the Cranberry Mixture: Toss cranberries with sugar and set aside for 10 minutes.
- Melt the Chocolate: Combine chocolate and white chocolate in a microwave-safe bowl; microwave in 30-second intervals until smooth.
- Mix Peanut Butter and Sugar: Blend peanut butter, butter, and sugar until smooth, about 3-4 minutes.
- Fold in the Rice Cereal: Gently fold the rice cereal into the peanut butter mixture until well-coated.
- Shape Your Cookies: Press the mixture down into an even layer; let cool for about 15 minutes.
- Prepare the Cream Cheese Mixture: Blend cream cheese with Oreo crumbs and roll into small balls.
- Dip Truffles in Chocolate: Dip each truffle into the melted chocolate and let set on parchment paper.
- Assemble Toppings and Decorate: Combine crushed toppings and sprinkle over cookies after chocolate is set.
- Chill and Serve: Refrigerate for at least 30 minutes before serving on a platter.


Leave a Reply