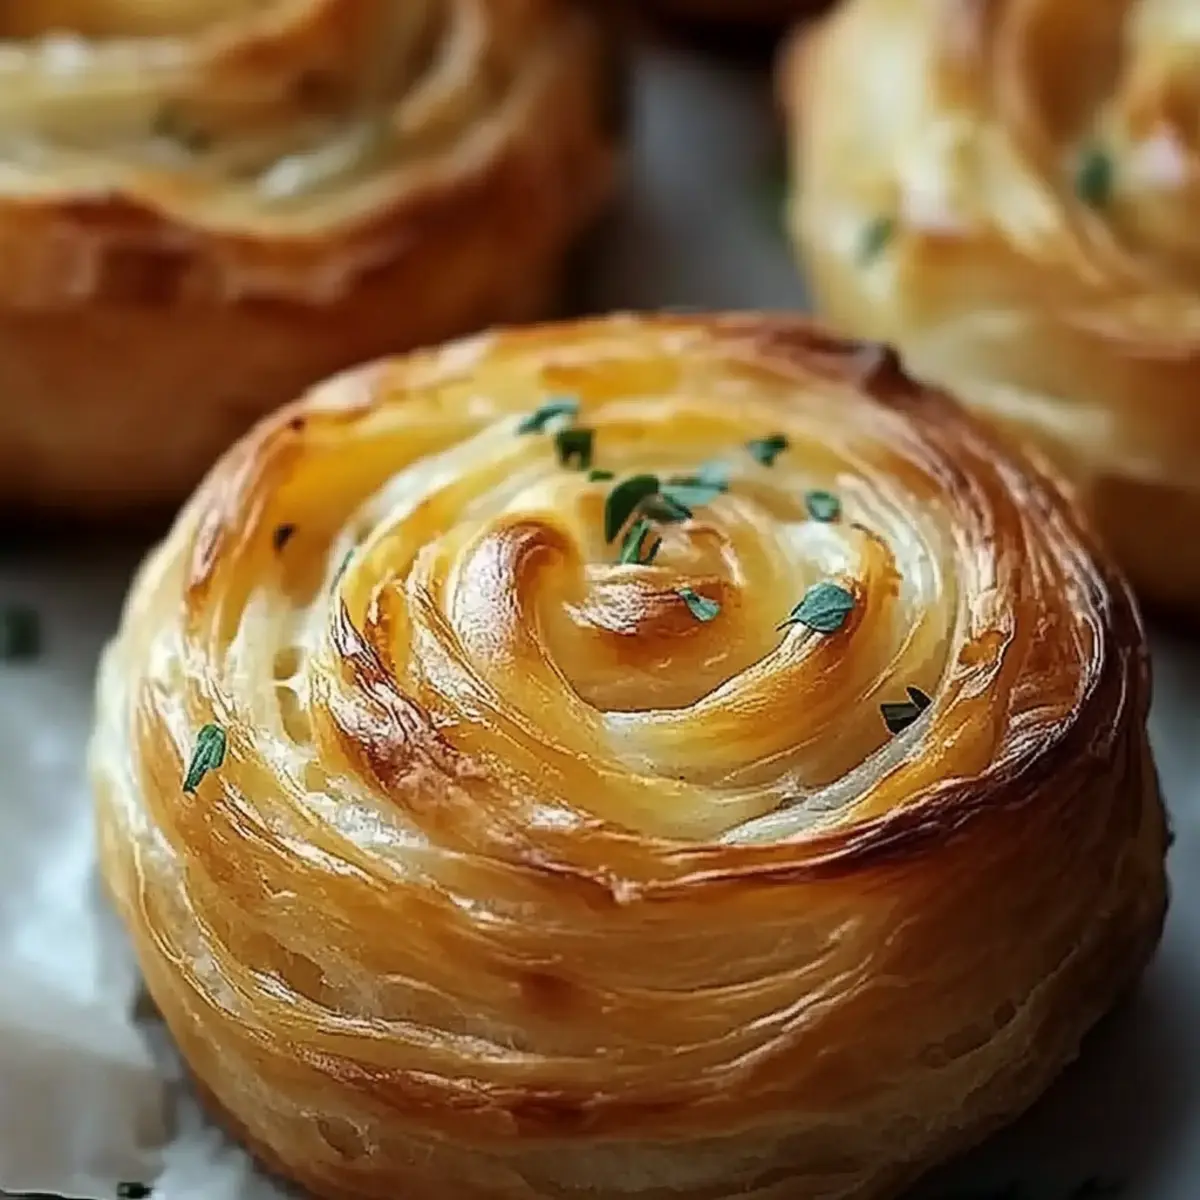
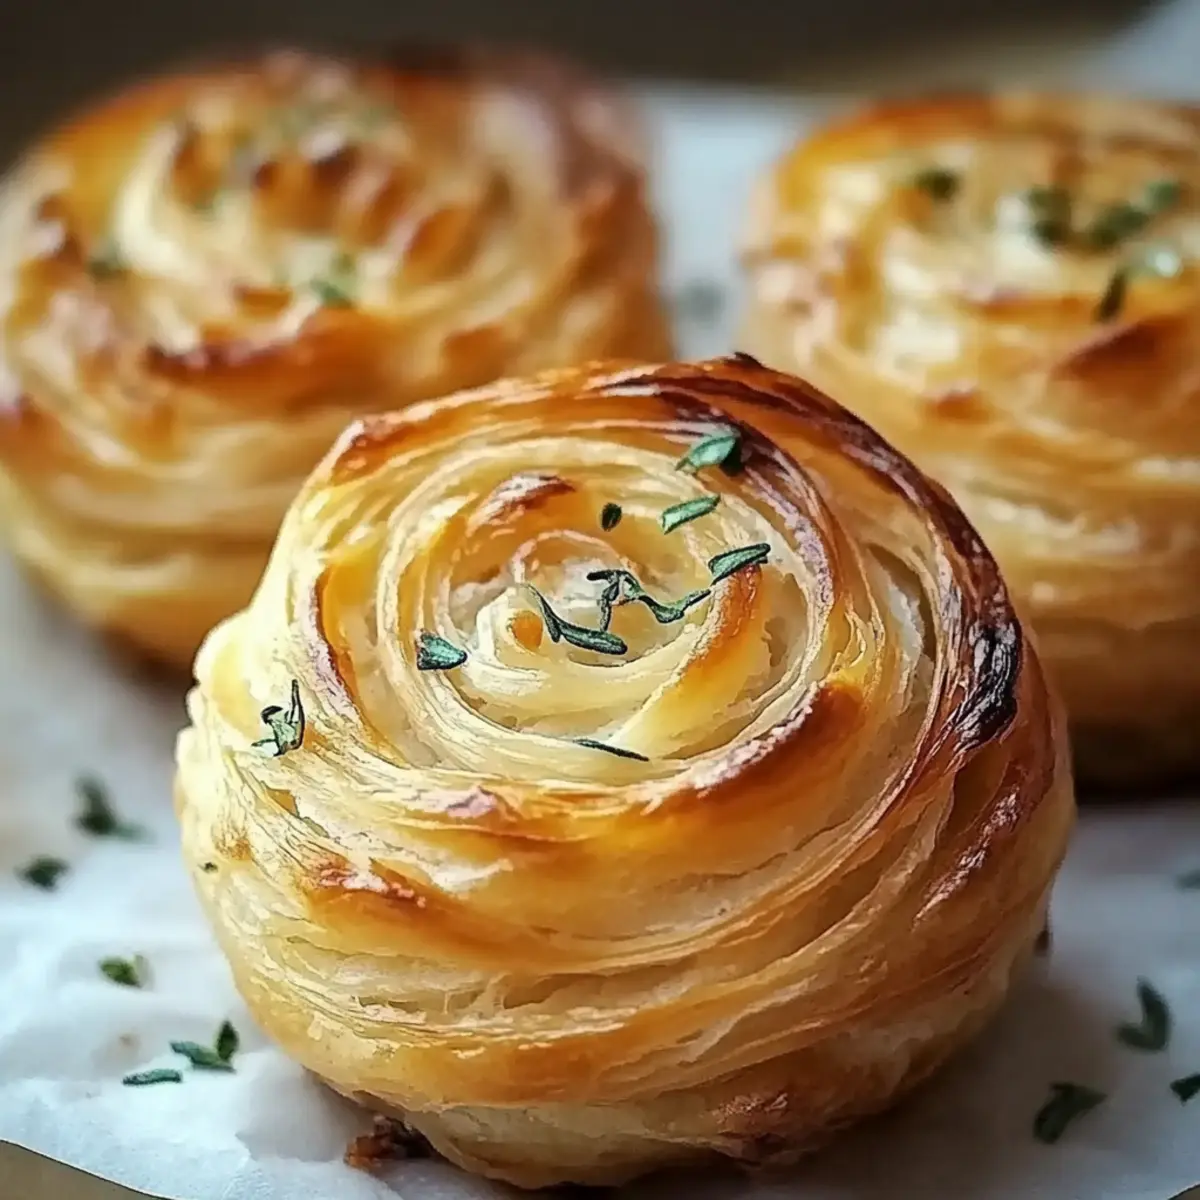
As I flipped through my cookbook, a little voice inside whispered for something warm and comforting. That's when the idea of Cheesy Garlic Cruffins popped into my mind, instantly igniting my culinary curiosity. These delightful treats are the perfect antidote for anyone weary of fast food—ready in less than an hour, they usher you into a world of homemade goodness, bursting with cheesy, garlicky charm. Imagine serving these golden, muffin-like pastries fresh from the oven, filling your home with a mouthwatering aroma. Not only do they make an impressive appetizer or snack that’ll wow your friends, but they’re also freezer-friendly, so you can save some for a rainy day. Ready to elevate your baking game and create a little magic in your kitchen? Let’s dive into this easy-to-follow recipe!
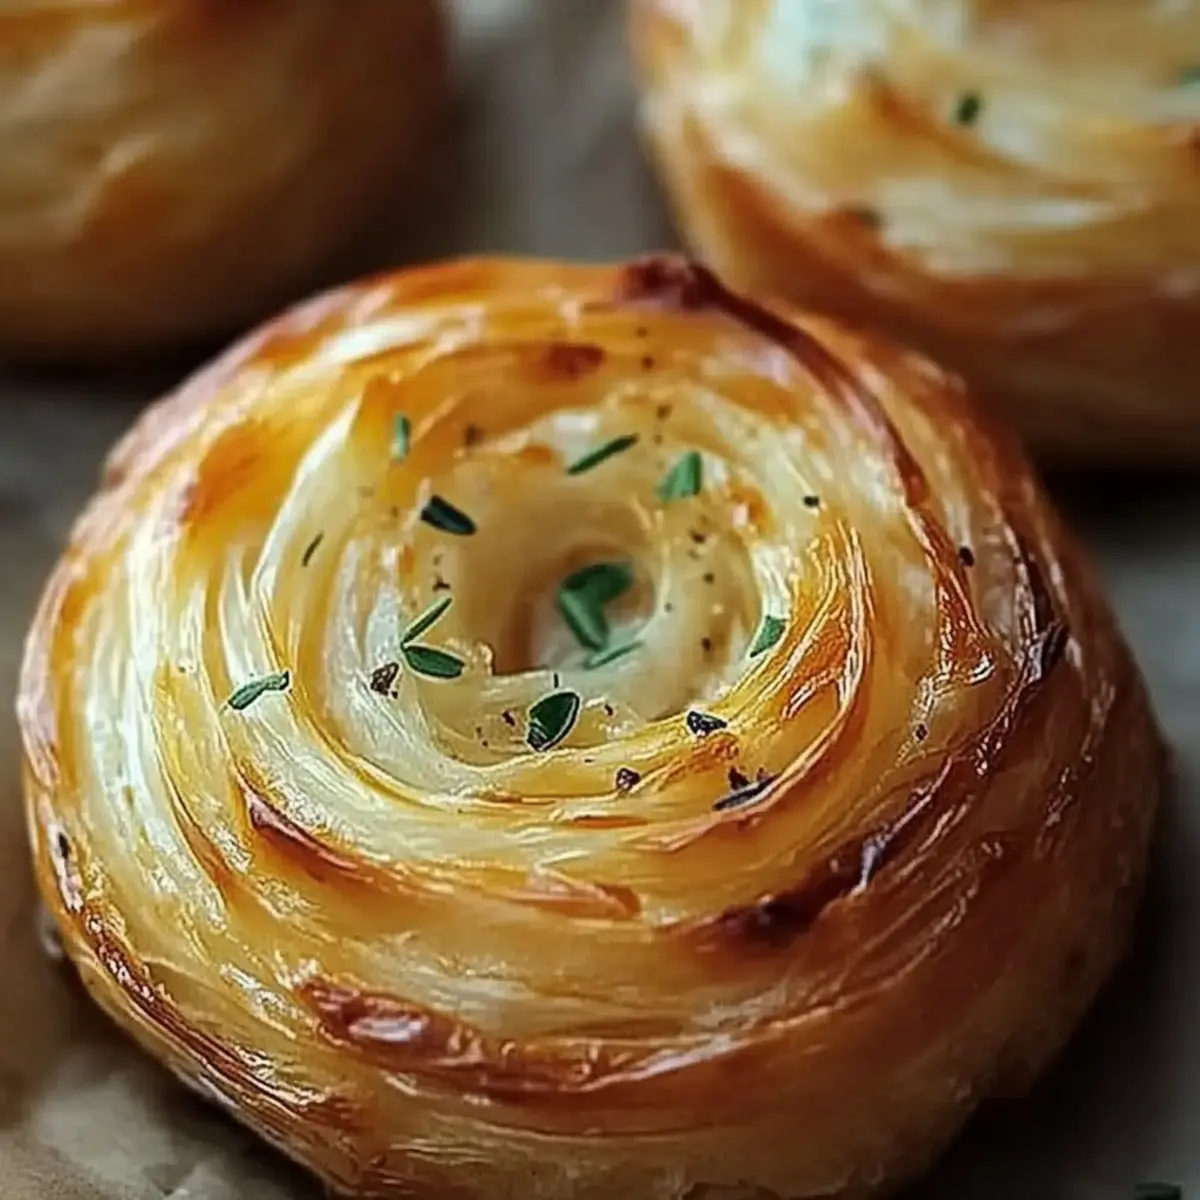
Why are Cheesy Garlic Cruffins irresistible?
Warm, Comforting Treats: These cruffins bring warmth and comfort to your kitchen, perfect for cozy family gatherings or a quiet night in.
Bold, Flavorful Ingredients: With a harmonious blend of cheese and garlic, every bite delights the palate and lures you back for more.
Simple Preparation: Requiring just one bowl, this recipe saves time and mess—an inviting option for both busy home cooks and professional chefs alike.
Versatile Serving Options: Pair them with marinara sauce for dipping or enjoy them as is; these cruffins adapt to your taste!
Freezer-Friendly: Make a batch and stash them away. They’re a quick and satisfying treat ready at any moment! Embrace the homemade charm by trying this easy Cheesy Garlic Cruffins recipe today!
Cheesy Garlic Cruffins Ingredients
Discover the magic behind these delightful Cheesy Garlic Cruffins with this essential list!
For the Batter
- All-purpose flour – This forms the base, giving your cruffins that perfect fluffy texture.
- Baking powder – Helps your cruffins rise, ensuring they’re light and airy.
- Salt – Enhances the flavors, making each bite irresistible.
- Garlic powder – Adds a subtle yet delightful garlic flavor throughout.
- Unsalted butter – Creates richness and moisture, making your cruffins delightful.
- Milk – Works with the butter to ensure a tender crumb.
- Large egg – Binds the ingredients, providing structure and richness.
For the Flavor
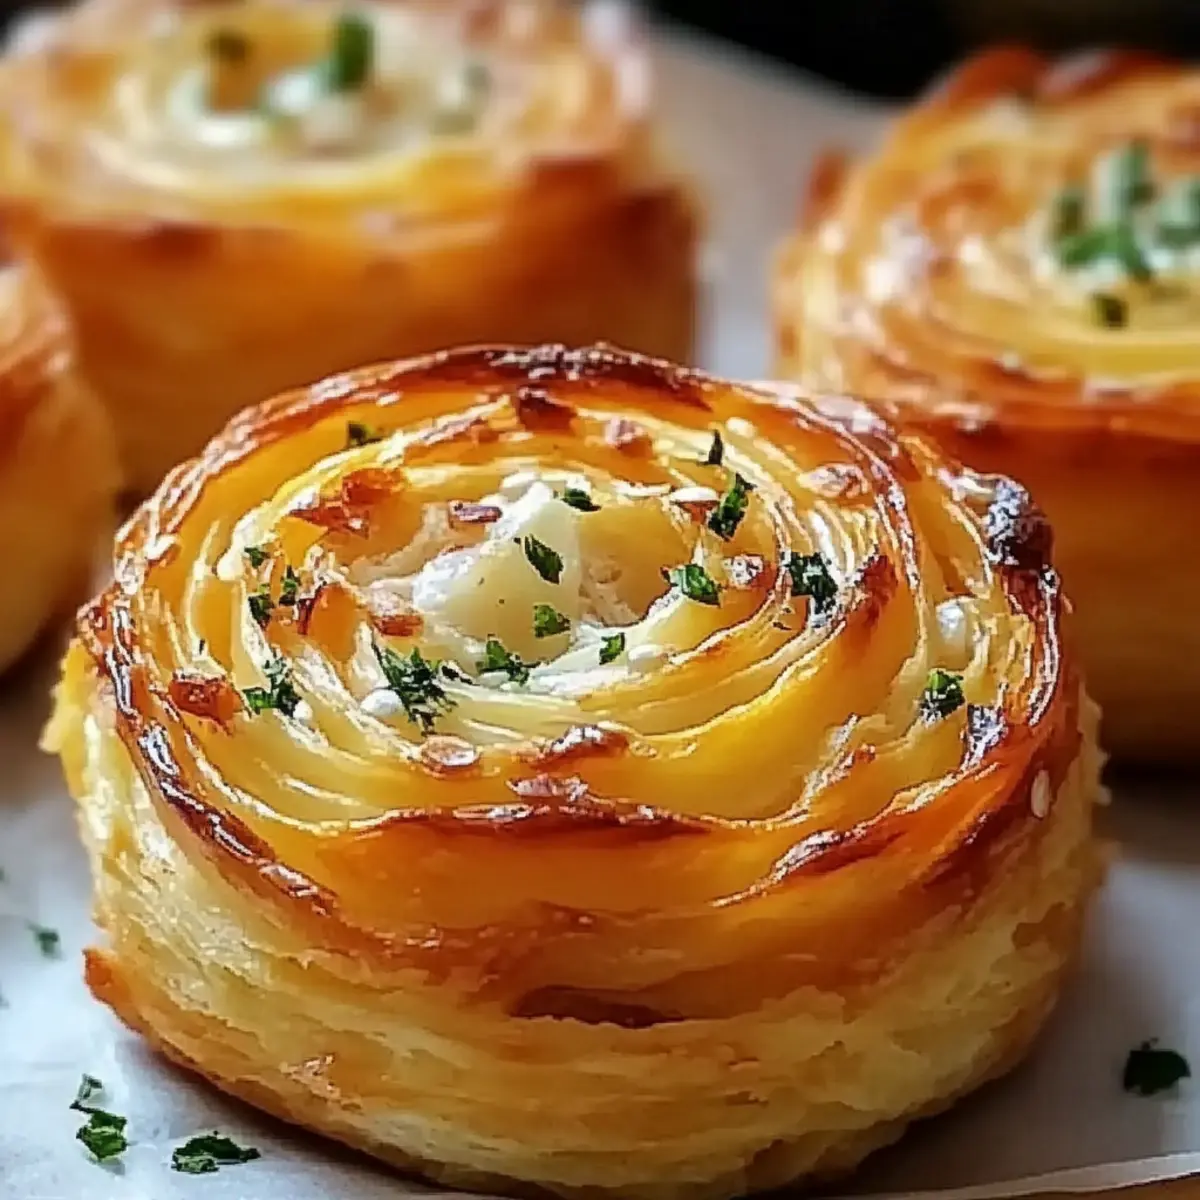
- Shredded cheese – Choose cheddar or mozzarella for that ooey-gooey, cheesy goodness!
- Minced garlic – Fresh garlic packs a punch of flavor that elevates this dish.
- Chopped fresh parsley (optional) – Adds a pop of color and freshness, enhancing the presentation.
Feel free to explore and enjoy this delicious recipe for Cheesy Garlic Cruffins with family and friends!
Step‑by‑Step Instructions for Cheesy Garlic Cruffins
Step 1: Preheat and Prepare
Start by preheating your oven to 375°F (190°C) to ensure it’s hot and ready for baking. While it’s warming up, lightly grease a muffin tin with cooking spray or butter. This will help your Cheesy Garlic Cruffins release easily once they’re golden and baked to perfection.
Step 2: Mix Dry Ingredients
In a large mixing bowl, whisk together the flour, baking powder, salt, and garlic powder until well combined. This step is crucial as it evenly disperses the leavening agent and flavors throughout the Cheesy Garlic Cruffins, creating a delightful base. Set this bowl aside while you prepare the wet mixture.
Step 3: Combine Wet Ingredients
In a separate bowl, whisk together the melted butter, milk, and egg until smooth and well blended. The melted butter adds richness, while the egg brings the mixture together. Once combined, gently pour the wet ingredients into the bowl with the dry ingredients, ensuring a harmonious blend of flavors.
Step 4: Stir Until Just Combined
Carefully stir the two mixtures together until just combined; this is key to keeping your Cheesy Garlic Cruffins light and fluffy. Avoid overmixing to prevent dense texture. You want a few small flour streaks to remain, as they’ll incorporate during the next steps.
Step 5: Fold in the Goodness
Next, gently fold in the shredded cheese and minced garlic until evenly distributed throughout the batter. The melted cheese will create those beautiful, gooey pockets in your Cheesy Garlic Cruffins when they bake. This step is where the flavor truly starts to shine!
Step 6: Fill the Muffin Tin
Using a ladle or spoon, fill each muffin cup with the batter, aiming for about three-quarters full. This allows enough room for the Cheesy Garlic Cruffins to rise while baking. As you fill the tins, try to evenly distribute any cheese or garlic pieces to ensure every bite is delicious.
Step 7: Bake Until Golden
Place the muffin tin in your preheated oven and bake for 20-25 minutes or until the tops are a lovely golden brown and a toothpick inserted into the center comes out clean. The aroma of cheesy garlic will fill your kitchen, enticing everyone nearby!
Step 8: Cool and Serve
Once baked, remove the Cheesy Garlic Cruffins from the oven and let them cool in the tin for about 5 minutes. This cooling period allows them to firm up slightly. After that, gently transfer them to a wire rack to cool a bit more before serving, ensuring they stay fluffy and delicious.
Make Ahead Options
These Cheesy Garlic Cruffins are ideal for meal prep, making your busy weeknights easier! You can mix together the dry ingredients (flour, baking powder, salt, and garlic powder) up to 24 hours in advance and store them in an airtight container. The wet ingredients (butter, milk, and egg) can be whisked together and refrigerated overnight. Just be sure to bring them back to room temperature before you combine the wet and dry ingredients. When you're ready to bake, simply fold in the cheese and garlic, fill your muffin tin, and bake as instructed. Enjoy the convenience of having these savory treats ready with minimal effort!
Expert Tips for Cheesy Garlic Cruffins
-
Use Fresh Ingredients: Fresh garlic and quality cheese enhance flavor significantly. Avoid pre-packaged garlic or low-quality cheese to ensure the best Cheesy Garlic Cruffins.
-
Don’t Overmix: When combining wet and dry ingredients, stir just until combined. Overmixing can lead to dense and chewy cruffins rather than the light, fluffy texture you want.
-
Cool Slightly Before Serving: Allow your cruffins to cool for a few minutes before serving. This helps them firm up and ensures they’re easier to remove from the tin without falling apart.
-
Adjust Baking Time: Ovens vary, so keep an eye on your cruffins as they bake. If they’re browning too quickly, cover lightly with foil to prevent burning while they finish cooking.
-
Experiment with Cheese: Feel free to mix different types of cheese or add herbs to customize your Cheesy Garlic Cruffins. A blend of cheddar and mozzarella gives a great flavor and texture!
-
Storage Tips: Store any leftover cruffins properly in an airtight container to maintain freshness. Reheat gently in the oven for perfectly warm cruffins later!
Cheesy Garlic Cruffins Variations
Let your creativity flow by customizing these mouthwatering Cheesy Garlic Cruffins to suit your taste and dietary needs!
-
Dairy-Free: Swap the milk and butter with almond milk and coconut oil for a dairy-free version without sacrificing flavor.
-
Gluten-Free: Use a 1:1 gluten-free baking mix instead of all-purpose flour for a gluten-free alternative. Your guests won’t even notice the difference!
-
Cheese Combinations: Experiment with different cheeses like pepper jack for a spicy kick or feta for a tangy twist. Each cheese brings its unique charm.
-
Herb Boost: Add fresh herbs like rosemary or thyme to the batter for an aromatic fragrance that elevates these cruffins even further.
-
Veggie-Packed: Toss in sautéed spinach or roasted red peppers for an extra flair of color and nutrition. They will brighten your cruffins delightful!
-
Spicy Touch: Incorporate a pinch of crushed red pepper flakes into the batter for those who enjoy a little heat. It turns up the flavor and adds excitement!
-
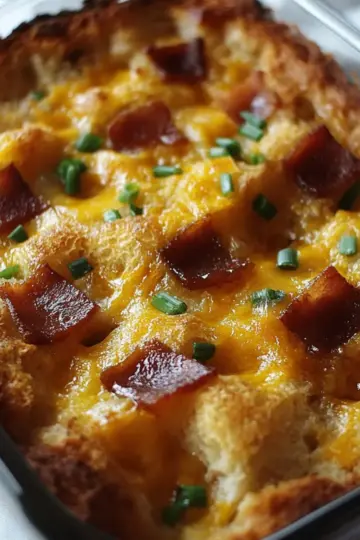
Bacon Lovers: Fold in crispy, chopped bacon pieces for a savory treat that friends and family will love. Imagine the delicious combination of cheese, garlic, and bacon!
-
Sweet Twist: For a dessert version, consider adding chocolate chips or blueberries to the batter, creating a surprising sweet note that complements the savory base.
Feel free to mix and match these ideas, and don’t be afraid to let your culinary imagination lead the way for your Cheesy Garlic Cruffins adventure!
Storage Tips for Cheesy Garlic Cruffins
Room Temperature: Store unopened cruffins in an airtight container at room temperature for up to 3 days, keeping them fresh and delightful for snacking.
Fridge: If you prefer, you can store cruffins in the fridge for up to 5 days; just remember to seal them in an airtight bag or container.
Freezer: For longer storage, wrap cruffins tightly in plastic wrap or aluminum foil, then place them in a freezer-safe bag. They’ll stay good for up to 3 months.
Reheating: When ready to enjoy, thaw them overnight in the fridge, then reheat in a preheated oven at 350°F (175°C) for about 10-15 minutes for that freshly baked texture.
What to Serve with Cheesy Garlic Cruffins
Imagine a warm spread that turns your Cheesy Garlic Cruffins into the star of your next gathering!
- Marinara Sauce: Inviting and flavorful, it's the perfect dip that amplifies the rich garlic and cheese notes in your cruffins.
- Fresh Green Salad: A light, crunchy salad brightens up the meal, enhancing each cheesy bite with pops of freshness.
- Creamy Tomato Soup: This classic duo is comforting and hearty, creating a cozy experience to warm hearts and fill bellies.
- Garlic Butter Shrimp: The delicate sweetness of shrimp combined with garlic butter mirrors the flavors in your cruffins, creating a delicious harmony.
- Herbed Quinoa: Nutty and nutritious, quinoa is the ideal base that offers a delightful textural contrast alongside your cheesy treat.
- Roasted Vegetables: Colorful and caramelized veggies add a roasted sweetness, bringing balance to the rich, cheesy flavor of the cruffins.
- Crisp White Wine: A chilled glass enhances the indulgent experience, cutting through the richness and refreshing your palate with each sip.
- Apple Pie: A warm slice brings a sweet finish to your meal, contrasting beautifully with the savory cruffins and leaving guests with a smile.
Feel free to mix and match these pairings to create a cozy spread that all will adore!
Cheesy Garlic Cruffins Recipe FAQs
How do I select the right ripeness for garlic?
Absolutely! When choosing garlic, look for bulbs that are firm and compact without any soft spots or dark blemishes. The skins should be dry and papery, indicating freshness. Avoid any bulbs that are sprouting or shriveled, as these can result in a less desirable flavor.
How should I store leftover Cheesy Garlic Cruffins?
After baking, store your cruffins in an airtight container at room temperature for up to 3 days. If you want to keep them longer, transferring them to the refrigerator will extend their freshness to about 5 days. Just make sure to seal them well to prevent them from drying out!
Can I freeze Cheesy Garlic Cruffins for later use?
Certainly! To freeze, first let the cruffins cool completely. Then wrap each one tightly in plastic wrap or aluminum foil, ensuring no air can enter. Place them in a freezer-safe bag or container, and they’ll stay delicious for up to 3 months. When you’re ready to enjoy, thaw overnight in the fridge and reheat in a preheated oven at 350°F (175°C) for about 10-15 minutes.
What should I do if my cruffins come out dense or tough?
Very often, density in baked goods comes from overmixing the batter. To keep your Cheesy Garlic Cruffins light and fluffy, mix the wet and dry ingredients just until combined, leaving some small flour streaks. Also, be cautious not to pack the muffin cups too tightly; allowing space for rising is key.
Can I make these cruffins gluten-free?
Yes, absolutely! You can substitute the all-purpose flour with a gluten-free flour blend that’s designed for baking. I recommend using a cup-for-cup gluten-free flour mix. Just keep in mind that this may slightly alter the texture, but with the right blend, you can still achieve those delicious Cheesy Garlic Cruffins!
Are Cheesy Garlic Cruffins safe for my pets?
While the ingredients in these cruffins are generally safe for human consumption, garlic can be toxic to pets in larger amounts. It’s best to keep these treats out of reach from your furry friends. Always be cautious and consult your vet if you have concerns about your pet’s diet!
Irresistibly Cheesy Garlic Cruffins for Cozy Days
Ingredients
Equipment
Method
- Preheat your oven to 375°F (190°C) and lightly grease a muffin tin.
- In a large bowl, whisk together flour, baking powder, salt, and garlic powder.
- In another bowl, whisk melted butter, milk, and egg until smooth. Pour into dry ingredients and mix gently.
- Stir the mixtures until just combined, with some small flour streaks remaining.
- Fold in shredded cheese and minced garlic until evenly distributed.
- Fill each muffin cup about three-quarters full with the batter.
- Bake for 20-25 minutes or until golden brown and a toothpick comes out clean.
- Allow cruffins to cool in the tin for 5 minutes before transferring to a wire rack.

Leave a Reply