With a hint of chocolate melting in the air, I realized I was in for a delightful treat. Ever found yourself craving those luscious cake pops from Starbucks but wished you could enjoy them in the comfort of your own home? Now you can with this easy Cake Pop recipe that brings the art of dessert-making right to your kitchen! With only a handful of ingredients and a preparation time of just 15 minutes, these sweet morsels are not only a crowd-pleaser but also a great way to use up leftover cake crumbs. Whether you’re throwing a birthday bash or simply looking to satisfy your sweet tooth, these cake pops are a fun and nostalgic addition. Are you ready to dip into this delightful adventure?

Why Are Cake Pops So Irresistible?
Sweetness in Every Bite: These cake pops are packed with flavor, combining moist cake crumbs and creamy frosting for that perfect indulgence.
Effortless Fun: Crafted in just 15 minutes of prep, this recipe transforms your leftover cake into an unforgettable treat.
Customization Galore: Get creative with toppings! Whether it’s sprinkles, chocolate chips, or edible glitter, you can personalize each pop for occasions or preferences.
Perfect for Sharing: With 20 servings per batch, these little delights are ideal for parties, holidays, or simply as a sweet surprise for family.
Storage Made Simple: Storing these treats is a breeze. Keep them in an airtight container for up to a week and enjoy individually whenever the craving strikes.
Dive into the world of homemade dessert delights with this easy and satisfying Cake Pop recipe!
Cake Pop Ingredients
• Get ready to create delicious cake pops with these simple ingredients!
For the Cake Mixture
- Cake crumbs – 1 cup of leftover cake makes the base; any flavor will work wonders.
- Frosting – ½ cup adds the creamy sweetness that binds the crumbs together.
For Assembly
- Lollipop sticks – 20 sticks hold your cake pops; choose sturdy ones for easy handling.
For Coating
- Chocolate candy melts – Essential for coating; choose your favorite flavor for a delightful finish.
For Decoration
- Sprinkles or additional decorations – Optional, but they add a fun and whimsical touch to your cake pops!
Let’s get popping! Enjoy creating these sweet treats right in your kitchen.
Step‑by‑Step Instructions for Cake Pop
Step 1: Mix Cake Crumbs and Frosting
In a large bowl, combine 1 cup of cake crumbs with ½ cup of frosting. Using your hands or a spatula, mix the ingredients thoroughly until fully blended. The mixture should be moist and able to hold its shape when molded. This step creates the delightful base for your homemade Cake Pop delights.
Step 2: Form Cake Balls
Once the mixture is fully combined, take small portions and roll them into 1-inch round balls. Ensure that they are compact and smooth, as this will help them hold together when dipped in chocolate later. Set these formed balls on a parchment-lined baking sheet while you prepare the lollipop sticks.
Step 3: Insert Lollipop Sticks
Take a lollipop stick and gently insert it into the center of each cake ball, pushing it about halfway through. This will allow for easy handling during the dipping process. Be careful not to push too hard, as you don’t want to break the cake pops. Once completed, it’s time to chill them for a bit.
Step 4: Chill the Cake Pops
Place the baking sheet with the cake pops in the refrigerator for about 30 minutes. Chilling helps the cake pops firm up, making them easier to dip into the melted chocolate. They should be slightly firm to the touch when you remove them from the fridge, ensuring they maintain their shape.
Step 5: Melt Chocolate Candy Melts
In a microwave-safe bowl, melt the chocolate candy melts according to the package instructions, usually about 1 minute, stirring every 30 seconds until smooth. The chocolate should be fully liquefied and have a glossy appearance. This melted chocolate will create a delicious coating for your Cake Pops.
Step 6: Dip Cake Pops
Carefully dip each chilled cake pop into the melted chocolate, ensuring it is fully coated. Rotate the stick gently to allow any excess chocolate to drip back into the bowl. Aim for an even coating that covers all sides for a beautiful and tasty finish.
Step 7: Set Cake Pops Upright
Once dipped, place the cake pops upright in a Styrofoam block or a similar holder to allow the chocolate to set without smudging. Leave them to stand for a few minutes until the coating hardens. This ensures a nice, clean appearance for your delicious Cake Pops.
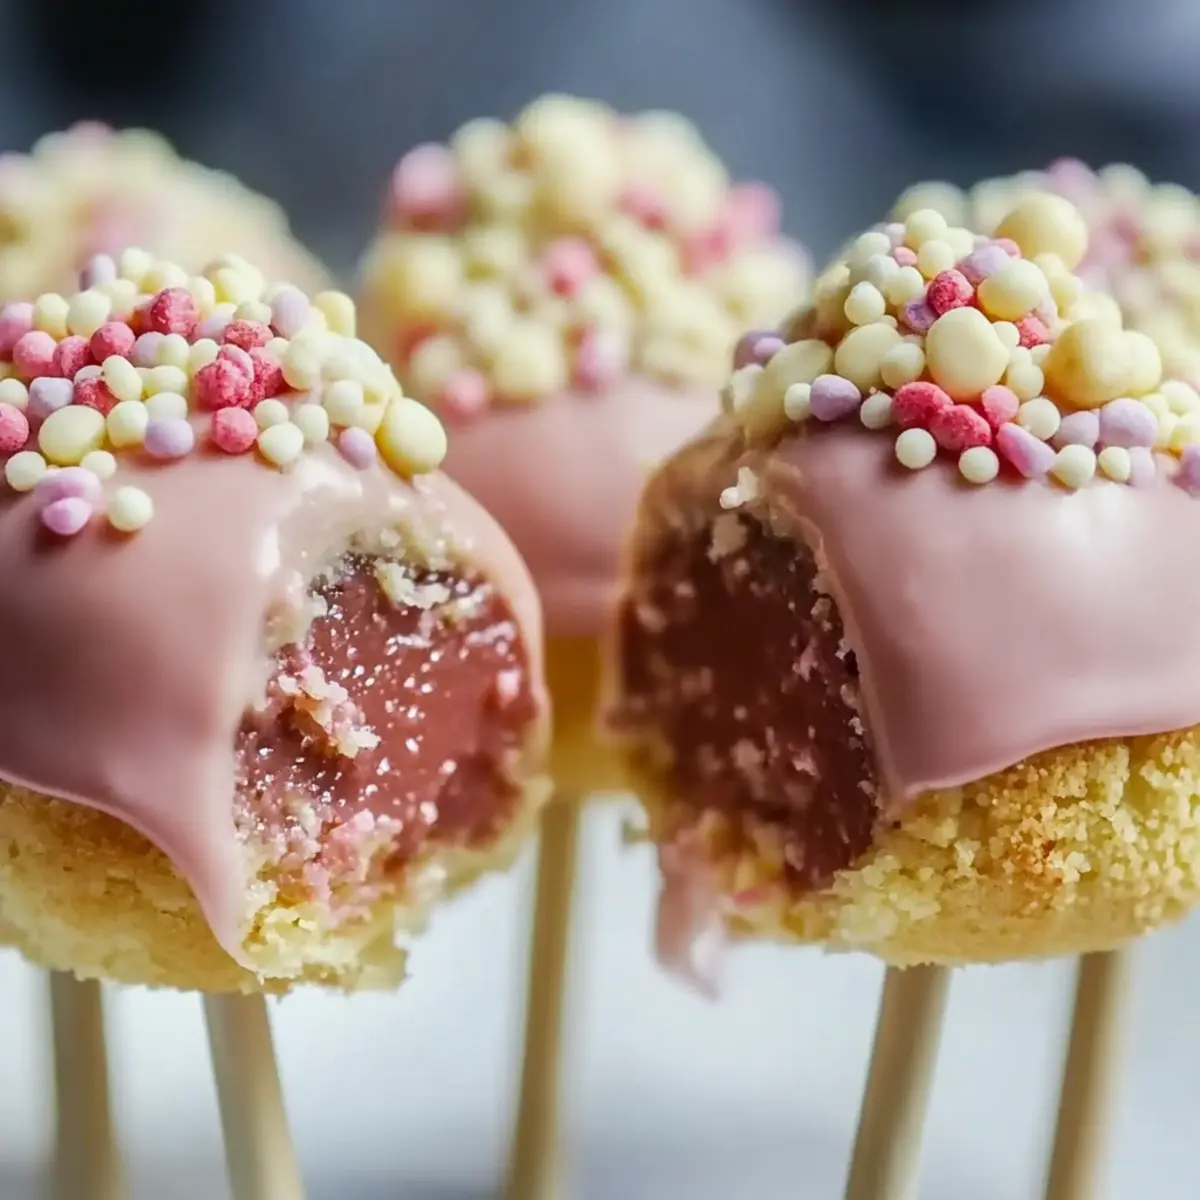
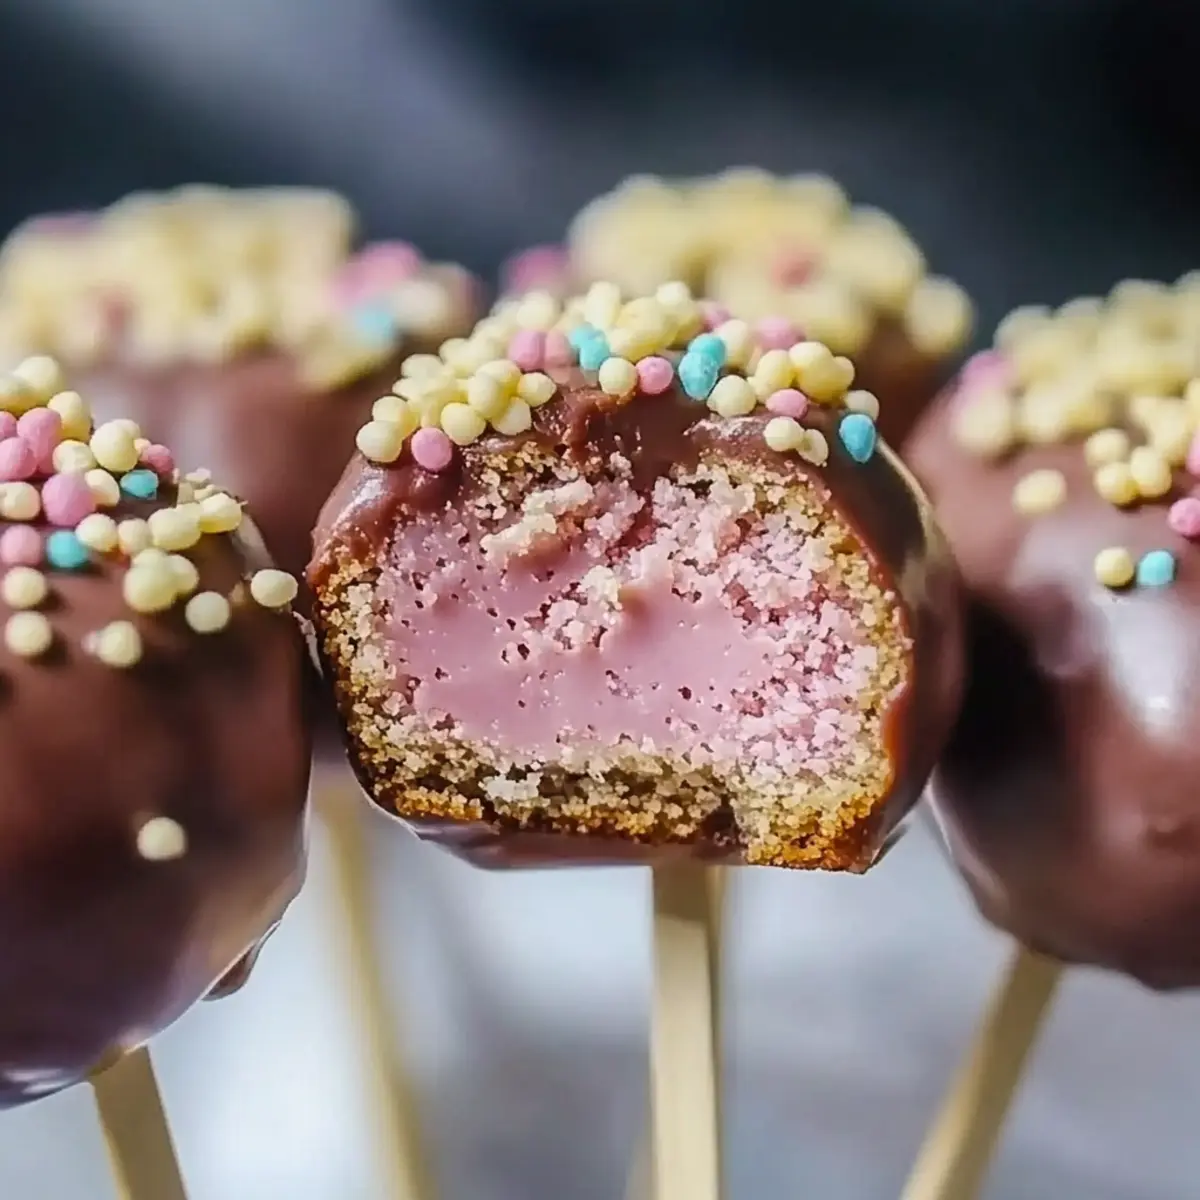
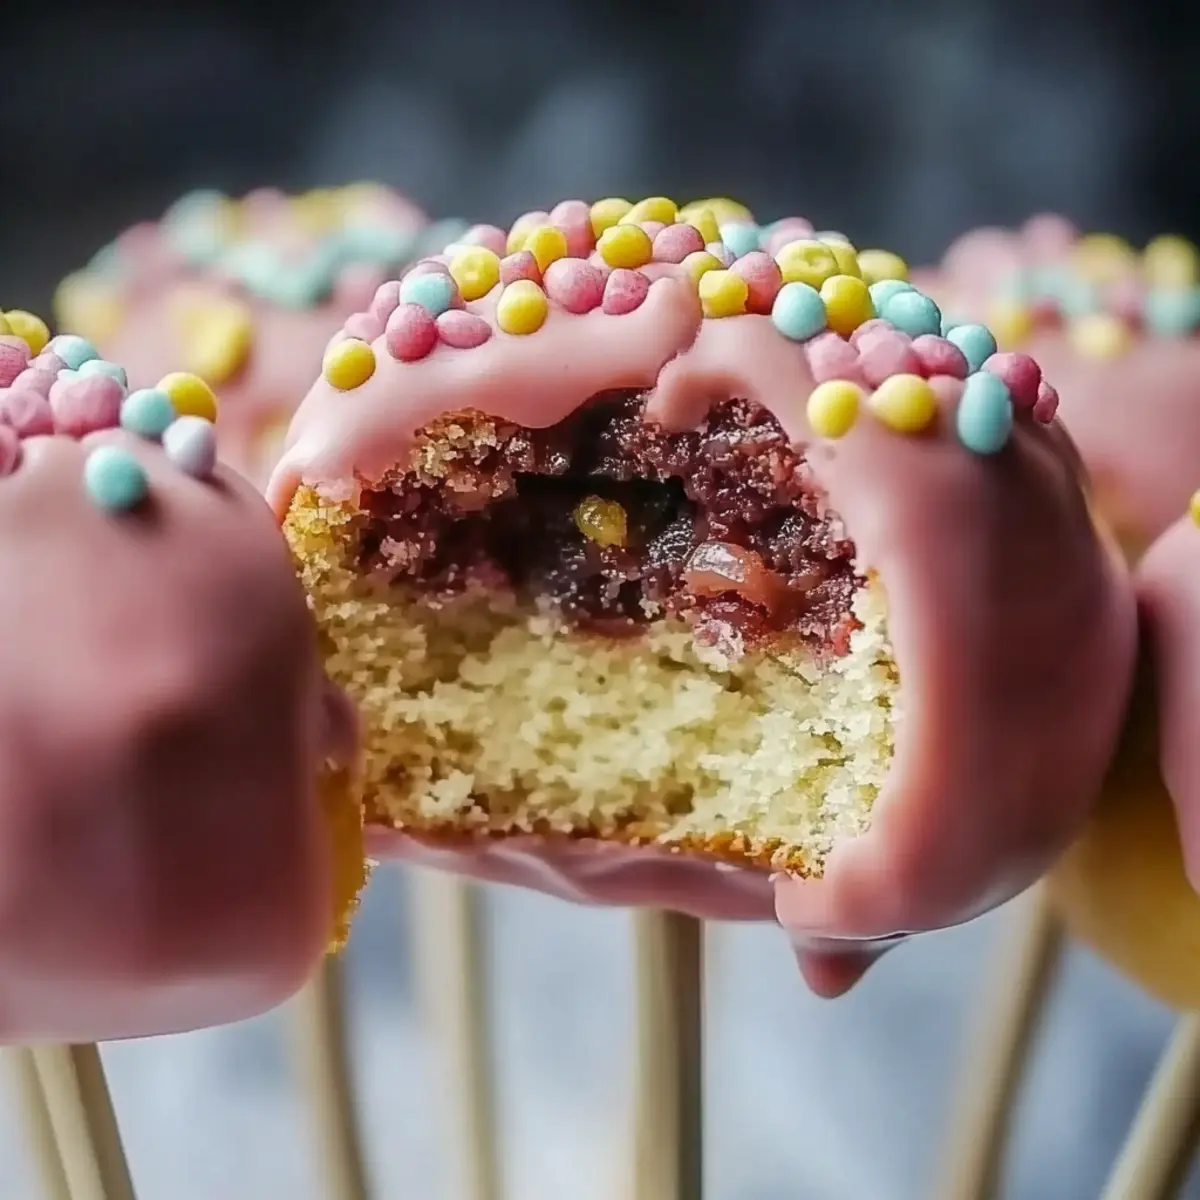
Step 8: Add Decorations
Before the chocolate coating sets, sprinkle with your choice of decorative toppings such as sprinkles or edible glitter. This is a fun way to personalize each Cake Pop and adds a festive touch. Allow decorations to adhere before moving on to enjoying your creations!
How to Store and Freeze Cake Pops
Fridge: Store your cake pops in an airtight container in the refrigerator for up to 1 week to keep them fresh and delicious.
Freezer: For longer storage, place cake pops in a single layer in a freezer-safe container; they can last up to 3 months. Just remember to let them thaw in the fridge before enjoying!
Reheating: If you want to enjoy them warm, microwave for 10-15 seconds once thawed, but be careful not to overheat, or the chocolate may become too soft.
Decoration Tip: For best results, add sprinkles or other decorations just before serving, ensuring they stay vibrant and appealing!
Cake Pop Customization Ideas
Feel free to put your personal spin on these cake pops and make them truly your own! The flavors and textures can be easily adjusted to suit your tastes or dietary needs.
- Gluten-Free: Swap out traditional cake crumbs for gluten-free cake or almond flour to cater to gluten sensitivities.
- Vegan: Use a plant-based frosting and dairy-free chocolate melts for a delightful vegan twist. They’re just as scrumptious!
- Flavor Boost: Add extracts like vanilla, almond, or peppermint to your mixture for an extra layer of flavor that will tantalize your taste buds.
- Nutty Delight: Mix in finely chopped nuts or nut butter to the cake mixture for a crunchy surprise in every bite.
- Fruit Fusion: Add dried fruit like cranberries or mini chocolate chips into the mix for a burst of unexpected flavor and texture.
- Heat It Up: For a spicy kick, mix a pinch of cayenne pepper or chili powder into the chocolate coating; just a little elevates the experience wonderfully!
- Boozy Pops: For an adult twist, infuse the frosting with a splash of your favorite liqueur, like Baileys or rum, for a sweet party treat.
- Decorate Differently: Instead of sprinkles, use crushed cookies or coconut flakes to cover the chocolate for a unique visual appeal and taste!
This same creativity can also inspire custom cake recipes; get ready to unleash your inner pastry chef!
Expert Tips for the Best Cake Pops
Choose the Right Cake: Use moist cake crumbs for better flavor and texture. Avoid dry cake, which can result in crumbly pops.
Popping Temperature: Ensure the melted chocolate is warm, not too hot, to avoid cracking when dipping the cake pops.
Chill for Firmness: Don’t skip chilling time! This step is crucial; it keeps your cake pops from falling apart when coated.
Even Coating: Dip slowly and rotate your cake pops to achieve an even coat—this prevents the chocolate from pooling at the bottom.
Decorate Quickly: Add decorations while the chocolate is still wet to ensure they stick properly. Enjoy personalizing each cake pop!
With these tips, you'll create delightful cake pops that are sure to impress!
What to Serve with Starbucks Cake Pops?
These delightful bites are perfect for adding a sweet touch to any gathering or cozy afternoon treat.
-
Coffee and Cream: The rich flavors of coffee contrast beautifully with the sweetness of cake pops, creating a comforting pairing.
-
Fruit Platter: Fresh fruits like strawberries and raspberries add a refreshing, tangy element, balancing the sweetness of the cake pops nicely.
-
Vanilla Ice Cream: A scoop of creamy vanilla ice cream served alongside cake pops enhances the dessert experience, making it indulgent and satisfying.
-
Chocolate Milk: For the young at heart, a glass of chocolate milk offers a playful and nostalgic drink option that pairs deliciously with these treats.
-
Nutty Trail Mix: Adding some crunch with a nutty trail mix provides a delightful textural contrast, making the dessert experience even more enjoyable.
-
Sparkling Water: A fizzy drink softens the sweetness of cake pops, making it a light and refreshing companion for your dessert table.
-
Chocolate Ganache Dip: For an extra decadent experience, serve additional melted chocolate for dipping, elevating the indulgence of each pop.
-
Mini Cheesecakes: Offering mini cheesecakes alongside cake pops creates a delightful dessert duo that your guests will love, providing variety and richness.
Make Ahead Options
These delightful cake pops are perfect for meal prep enthusiasts! You can prepare the cake mixture and mold the pops up to 24 hours in advance, simply refrigerate them on a baking sheet covered with plastic wrap. When you're ready to serve, take them out of the fridge and dip into the melted chocolate. For added convenience, you can also decorate your cake pops the day before your event and store them in an airtight container in the fridge. This way, they stay fresh and just as delicious! Just remember to allow some time for the chocolate coating to set after dipping before serving. Enjoy the time-saving benefits these make-ahead options provide, making your busy days a little sweeter!
Starbucks Cake Pop Recipe FAQs
How do I choose the best cake for my cake pops?
Absolutely! Opt for moist cake crumbs to ensure your cake pops are flavorful and have a pleasant texture. Avoid using dry cake, as it can lead to a crumbly mixture that won’t hold its shape well. Any flavored cake works wonders, so feel free to get creative!
How should I store cake pops?
To maintain freshness, store your cake pops in an airtight container in the refrigerator for up to 1 week. This will keep them delicious and ready for your sweet cravings whenever they strike. Make sure they aren’t touching each other to avoid any smudging.
Can I freeze cake pops?
Very! For long-term storage, you can freeze your cake pops. Just place them in a single layer in a freezer-safe container and they can last up to 3 months. To thaw, simply move them to the refrigerator for a few hours before serving. For a warm treat, pop them in the microwave for 10-15 seconds after thawing—just don’t overheat!
What if my chocolate coating cracks?
If you find your chocolate coating cracking, it might be due to the chocolate being too hot or too thick. Make sure to melt your chocolate on low heat, stirring often until smooth and glossy. If it thickens, you can add a tiny bit of shortening or vegetable oil to achieve a better dipping consistency.
Are cake pops safe for my pets?
Definitely avoid sharing cake pops with your pets, especially if they contain chocolate, as it can be toxic to dogs and cats. Always keep your baked goodies out of paw's reach and enjoy these delicious treats yourself!
Can I prep cake pops in advance?
Absolutely! You can prepare your cake pops a day in advance. Just follow the steps to shape and coat them, then store them properly in the fridge. This makes them a fantastically convenient option for parties or gatherings, allowing you to enjoy more time with your guests!
Delicious Cake Pop Recipe for Sweet Homemade Bliss
Ingredients
Equipment
Method
- In a large bowl, combine cake crumbs with frosting. Mix thoroughly until blended.
- Roll small portions into 1-inch round balls and set on a parchment-lined baking sheet.
- Insert a lollipop stick into each cake ball halfway.
- Chill cake pops in the refrigerator for about 30 minutes.
- Melt chocolate candy melts according to package instructions until smooth.
- Dip each chilled cake pop into melted chocolate until fully coated.
- Place dipped cake pops upright in a Styrofoam block to set.
- Sprinkle with decorative toppings before the chocolate sets.


Leave a Reply