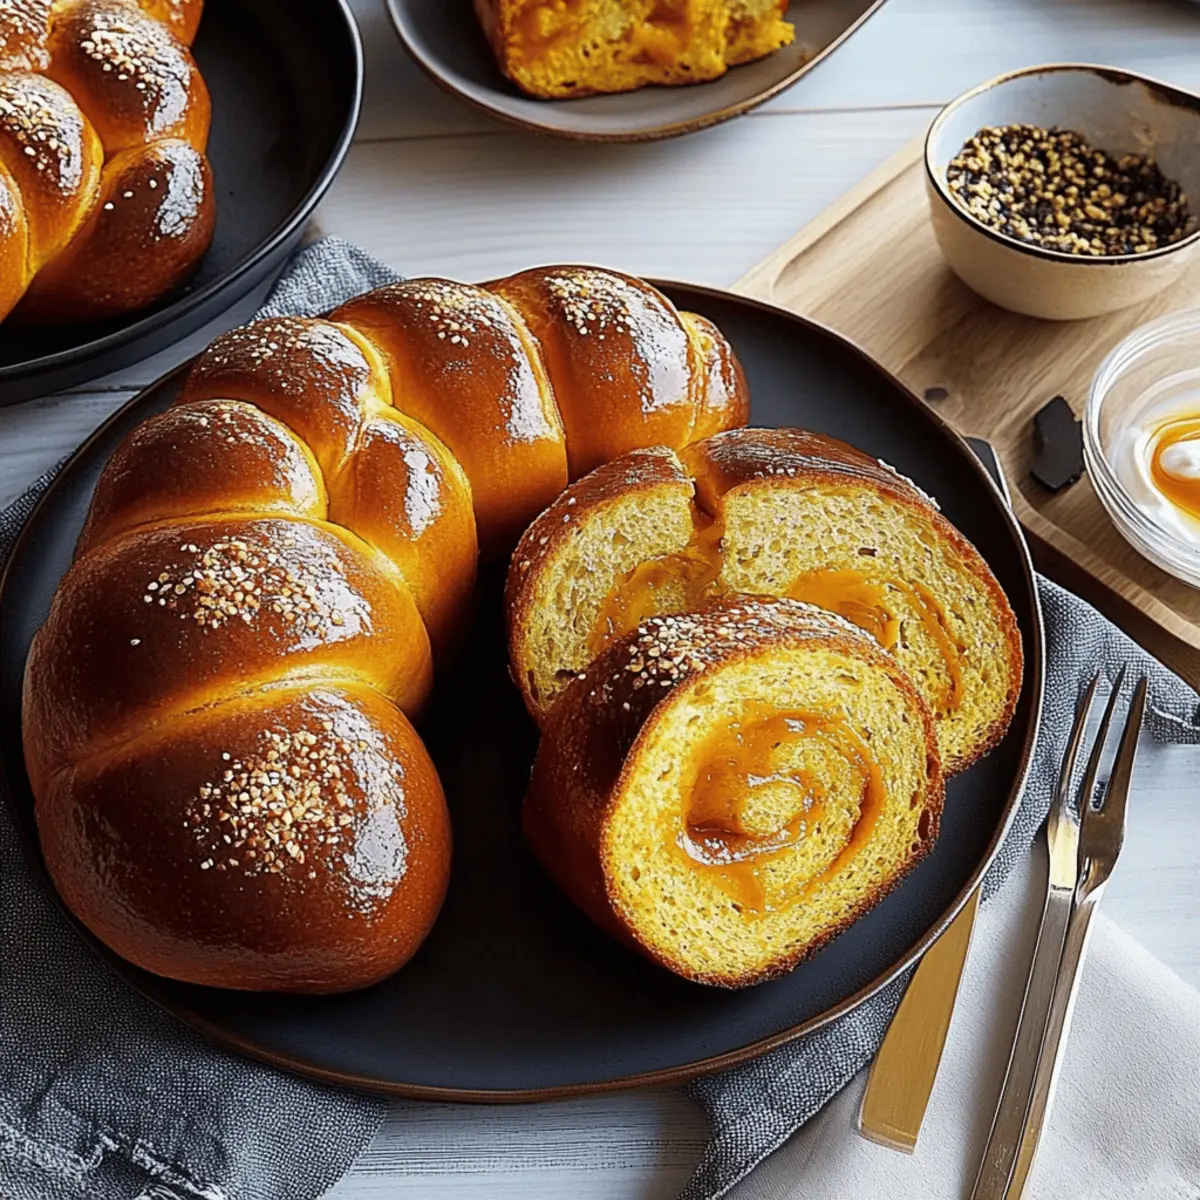
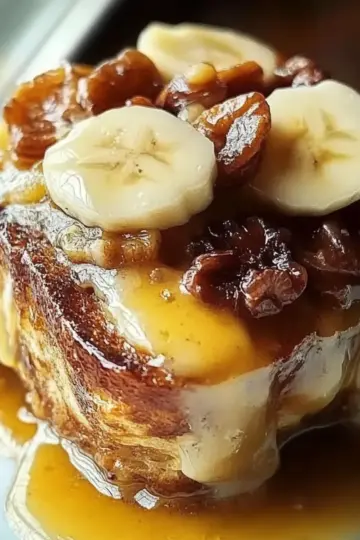
As the days grow shorter and the leaves turn crisp, there's a certain comfort in creating something special in the kitchen. Enter Pumpkin Challah—a warm, inviting bread that celebrates the essence of autumn while also adding a delightful twist to your bread-making repertoire. The perfect blend of pumpkin purée and warm spices gives this loaf a unique flavor, making it not just a delicious treat but an irresistible crowd-pleaser for any gathering. Plus, it’s surprisingly easy to whip up! With just a few simple ingredients, you’ll have a homemade delight that fills your home with cozy aromas and brings everyone to the table. Ready to create this seasonal masterpiece? Let's dive in and discover how to make your very own Pumpkin Challah!
Why is Pumpkin Challah a must-try?
Uniqueness: This Pumpkin Challah combines the light, fluffy texture of traditional challah with the rich, autumnal flavor of pumpkin and warm spices, making it a standout on any dining table.
Easy Preparation: With straightforward steps, even novice bakers can create this delectable bread without any fuss.
Versatile Delight: Perfect for breakfast, snacks, or as a festive centerpiece for holiday gatherings, it adapts wonderfully to any occasion.
Aromatically Inviting: The delightful scent of baking pumpkin bread will fill your kitchen, bringing comfort and warmth to your home.
Crowd-Pleaser: Impress family and friends with a loaf that's not only visually stunning but also bursting with flavor. For those who love seasonal baking, explore other options like Classic Cinnamon Rolls to expand your baking repertoire!
Pumpkin Challah Ingredients
Get ready to create this cozy autumn treat with these simple ingredients!
For the Dough
- King Arthur Unbleached All-Purpose Flour – This flour provides the perfect texture for soft and fluffy bread.
- Granulated Sugar – It enhances the sweetness of the Pumpkin Challah, balancing out the flavors.
- Instant Yeast – Fast-acting yeast that helps the dough rise quickly and easily.
- Table Salt – Essential for flavor, bringing out the best in your Sweet Pumpkin Challah.
- Cinnamon – Adds a delightful warmth and aromatic spice, perfect for fall baking.
- Lukewarm Water – Activates the yeast when mixed with the other ingredients, ensuring a proper rise.
- Pumpkin Purée – The star ingredient that provides moisture and rich flavor, making this bread truly unique.
- Vegetable Oil – Keeps the bread tender and helps maintain its freshness.
- Large Egg – Provides structure and richness to the dough for an excellent crumb.
For the Egg Wash
- Beaten Egg with Water – A simple wash that gives the Pumpkin Challah a beautiful, shiny finish when baked.
Step‑by‑Step Instructions for Pumpkin Challah
Step 1: Prepare Your Ingredients
Start by weighing 630g of King Arthur Unbleached All-Purpose Flour or measure out 5 ¼ cups by gently spooning it into a cup and leveling off. Gather all other ingredients including granulated sugar, instant yeast, salt, cinnamon, lukewarm water, pumpkin purée, vegetable oil, and a large egg. Having everything ready will make the process of making your Pumpkin Challah much smoother.
Step 2: Mix the Dry Ingredients
In the bowl of a stand mixer fitted with a dough hook or in a large mixing bowl, combine the measured flour, sugar, instant yeast, salt, and cinnamon. Mix these dry ingredients thoroughly until evenly incorporated, which should take about 1 minute. This foundational step enhances the flavor and texture of your Pumpkin Challah.
Step 3: Combine Wet Ingredients
In a separate small bowl or liquid measuring cup, whisk the lukewarm water, pumpkin purée, vegetable oil, and the egg together until well blended. The mixture should be smooth and slightly frothy. Once combined, pour this wet mixture into the bowl of dry ingredients. This is where your Pumpkin Challah begins to come together!
Step 4: Form the Dough
Mix the wet ingredients into the dry ingredients until a shaggy dough forms—this should take about 1 minute. Ensure to scrape down the sides of the bowl as you mix to incorporate all the flour. At this stage, the dough will appear rough and uneven, but that's just what you want for the next steps.
Step 5: Knead the Dough
Knead the dough for about 6 minutes on medium speed if using a stand mixer, or by hand for about 10 minutes. Gradually add the remaining ½ cup of flour, a little at a time, as you knead. The goal is an elastic, slightly tacky dough that bounces back when gently poked. This will create the perfect texture for your Pumpkin Challah.
Step 6: Let the Dough Rise
If you used a stand mixer, cover the bowl with plastic wrap or a clean kitchen towel. If you kneaded by hand, transfer the dough into a lightly greased bowl and cover it. Allow the dough to rise in a warm place for about 2 hours, or until it has doubled in size. This rising step is essential for developing flavor and lightness in your Pumpkin Challah.
Step 7: Prepare the Baking Sheet
While your dough rises, lightly grease a baking sheet or line it with parchment paper. This will prevent sticking and ensure easy removal after baking. Setting this up in advance keeps things organized and helps you move quickly once the dough has risen.
Step 8: Shape the Dough
Once the dough has doubled in size, gently deflate it by pushing down on it. Transfer the dough to a lightly greased or floured work surface. Divide it in half, aiming for pieces that weigh about 620g each. Keep one piece covered while you shape the other, preventing it from drying out.
Step 9: Roll Out the Dough
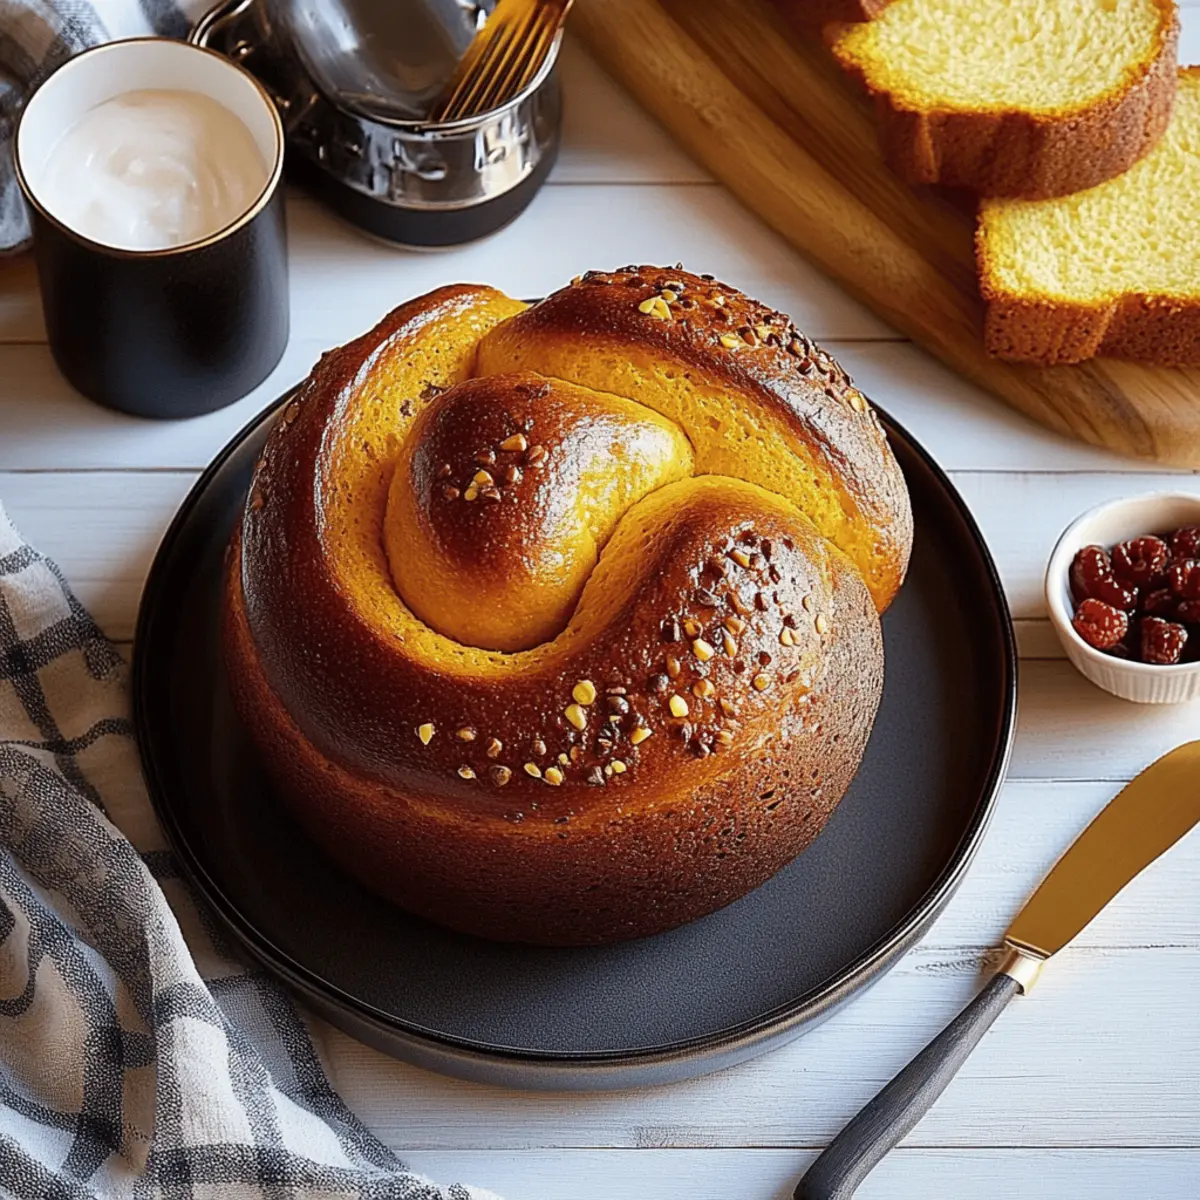
Take one piece of dough and pat or roll it out into a large rectangle, roughly 12" x 5". Begin shaping the Pumpkin Challah by carefully rolling the dough from one of the long edges to create a tight cylinder. Pinch the seam to seal it closed; this step helps form the beautiful shape we love in challah bread.
Step 10: Lengthen the Dough Log
With the sealed log, use the palms of your hands to gently roll it from the center outwards 2 to 3 times, extending it to a 24" rope. Focus on keeping the thickness consistent throughout. This will ensure even baking and a lovely texture in your finished Pumpkin Challah.
Step 11: Coil the Dough
Transfer the twisted dough onto the prepared baking sheet. Loosely coil it into a spiral shape, similar to a snail, and tuck the end of the dough underneath the coil. Leave space for the dough to expand. This shaping technique adds a beautiful presentation aspect to your Pumpkin Challah.
Step 12: Repeat for Second Loaf
Repeat the same rolling and shaping process with the second piece of dough. Place it on the same baking sheet, ensuring it's at least 3 inches away from the first loaf. This ensures adequate space for rising and allows both loaves to bake evenly.
Step 13: Second Rise
Cover both loaves with lightly greased plastic wrap or a clean kitchen towel and let them rise at room temperature until puffy, about 1 hour. As the dough rises, it will nearly double in size, creating a soft and airy texture in your Pumpkin Challah.
Step 14: Preheat Your Oven
While the dough is performing its second rise, preheat your oven to 350°F (175°C) with a rack positioned in the center. This timing allows the bread to go straight from a warm rise into a warm oven, enhancing its lift and crust.
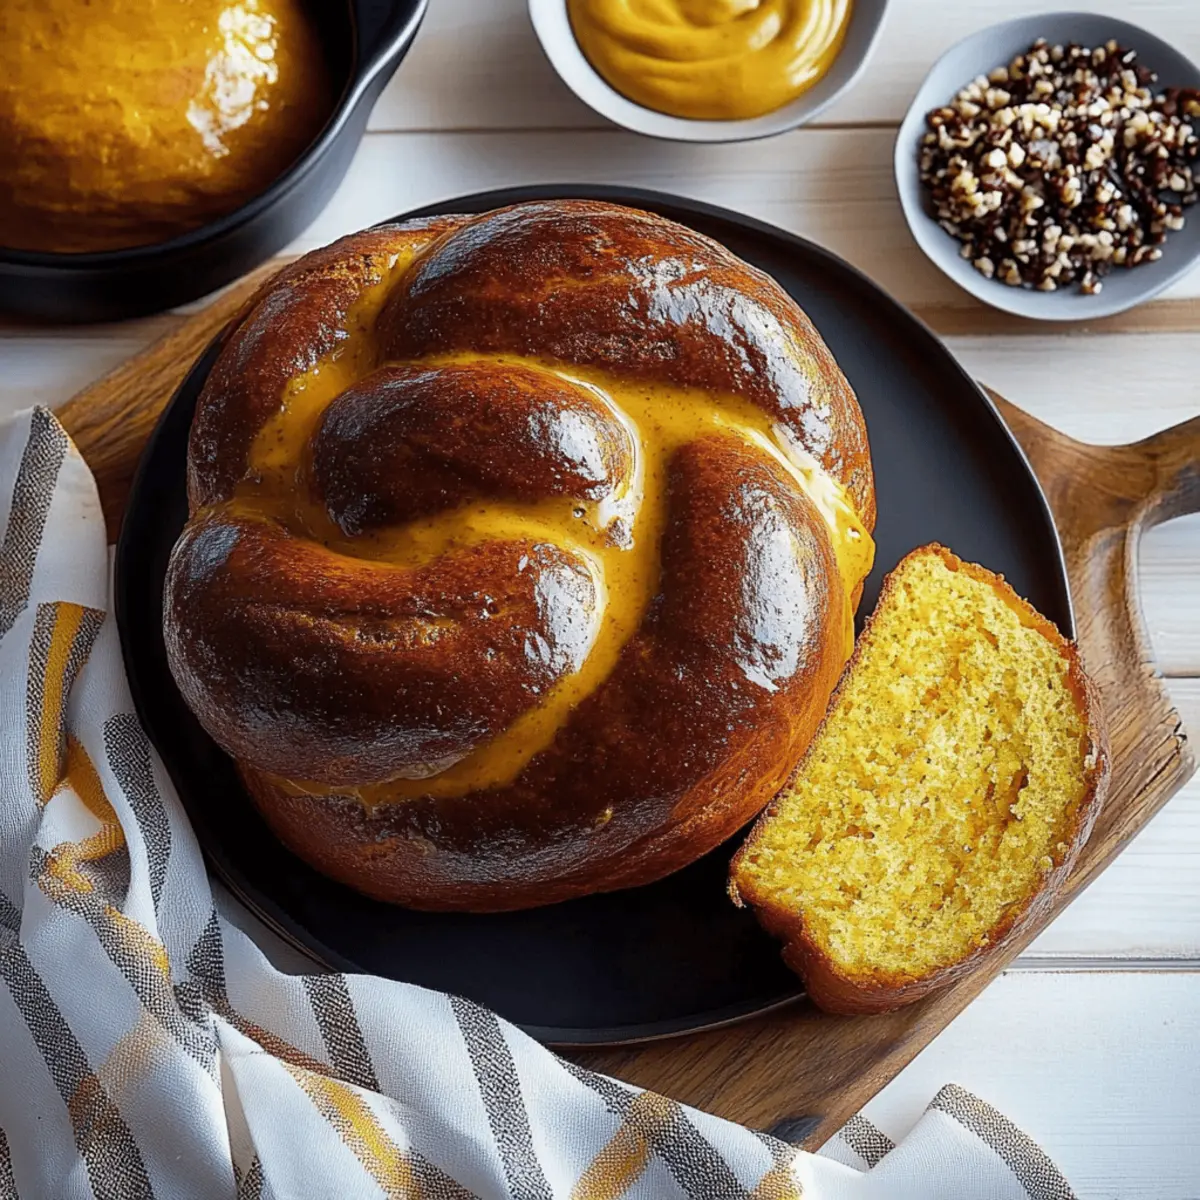
Step 15: Apply Egg Wash
Once the dough has risen, it’s time to brush the loaves with the prepared egg wash (beaten egg combined with water). Use a pastry brush to apply a generous layer for that shiny finish we love. Give it a second layer of egg wash after a couple of minutes for an even glossier exterior.
Step 16: Bake the Loaves
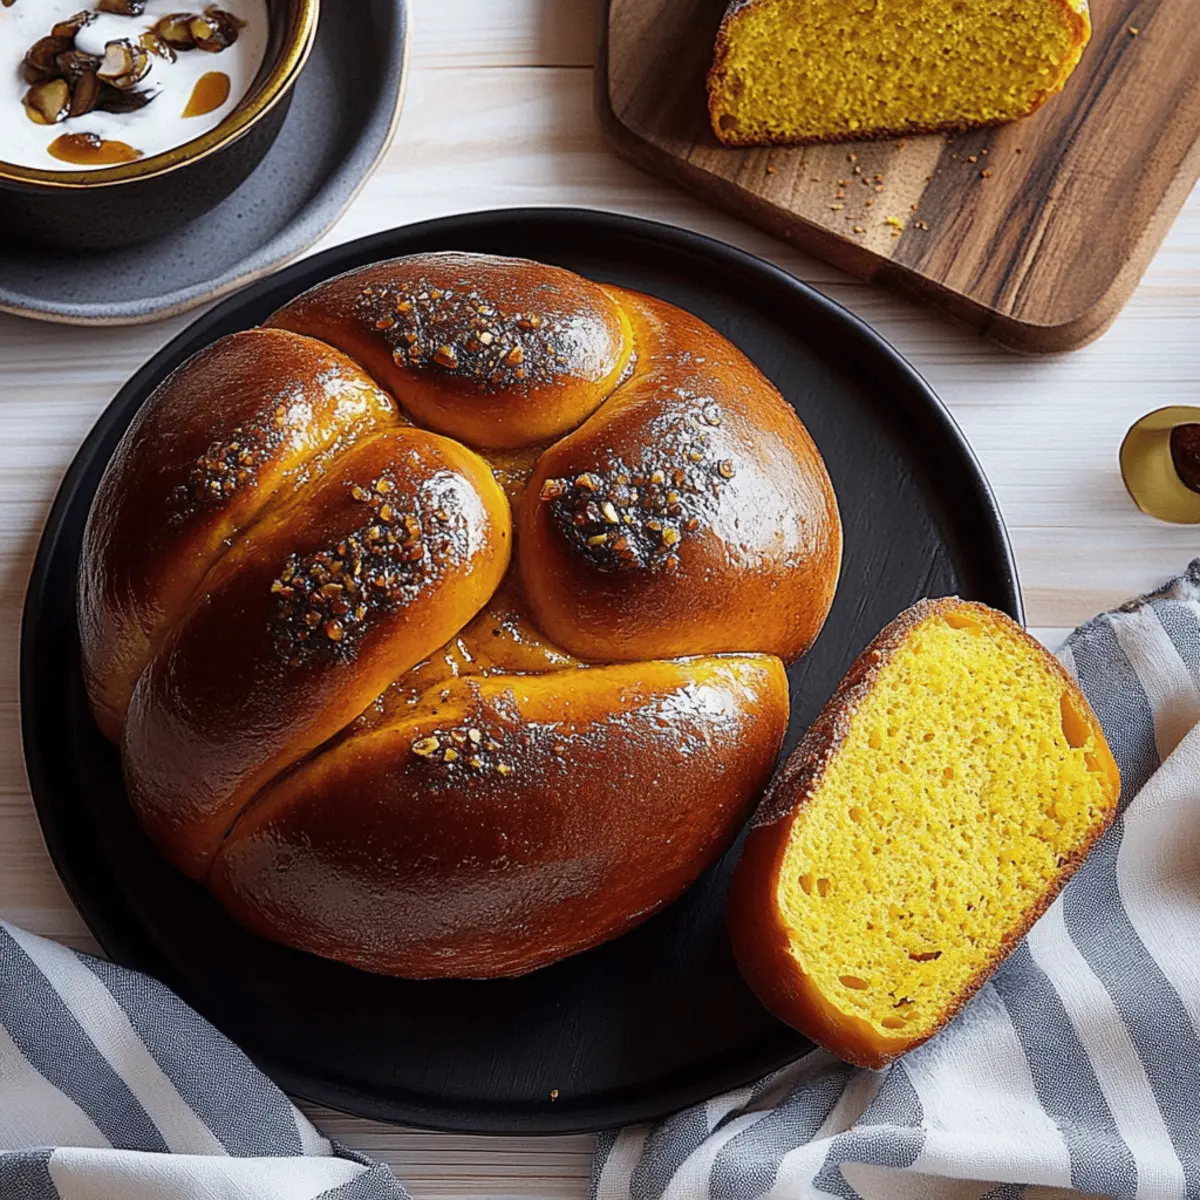
Place the baking sheet in the preheated oven and bake the loaves for 35 to 40 minutes, or until they turn a deep golden brown. Check for doneness by inserting a digital thermometer into the center; it should register 190°F. The aroma of baking Pumpkin Challah will fill your kitchen!
Step 17: Cool the Loaves
Remove the Pumpkin Challah from the oven once baked to perfection. Transfer the loaves to a cooling rack and let them cool completely before slicing. This cooling step is essential to ensure the bread retains its structure and doesn’t become gummy when cut.
Pumpkin Challah Variations & Substitutions
Feel free to get creative and customize your Pumpkin Challah to perfectly match your taste preferences and dietary needs!
-
Gluten-Free: Substitute King Arthur gluten-free flour blend for a delicious gluten-free version. This flour works beautifully to maintain texture without the gluten.
-
Dairy-Free: Use apple cider or a non-dairy milk in place of milk for a completely dairy-free loaf. It’ll still be rich and tasty, just without the dairy.
-
Spiced Twist: Enhance the autumnal flavor by adding a pinch of nutmeg or ginger. This will give your bread an extra layer of warmth and complexity.
-
Swirls of Flavor: Add a filling of cinnamon sugar or a layer of apple butter before rolling for a sweet surprise. This creates delightful swirls and a sweet burst of flavor in every bite.
-
Nutty Addition: Fold in chopped pecans or walnuts during the mixing process for a lovely crunch. This textural twist not only adds flavor but elevates the overall experience of the bread.
-
Less Sweet: Reduce the sugar by half for a more subtly flavored bread. You can pair this less sweet version with jam or honey, inviting a delightful contrast on your breakfast table.
-
Warm and Spicy: If you enjoy heat, try adding a touch of cayenne pepper or crushed red pepper flakes to the dough for a spicy kick. This unexpected heat can delight your taste buds and provide a memorable twist.
-
Holiday Spice Blend: Swap cinnamon for a pumpkin pie spice mixture for a festive flair. This will help transport your Pumpkin Challah into holiday spirit, perfect for gatherings.
Experiment with these variations, and don't forget to share your creations with loved ones! If you're inspired by seasonal flavors, check out our scrumptious Classic Cinnamon Rolls for more delicious baking adventures!
How to Store and Freeze Pumpkin Challah
Room Temperature: Keep your Pumpkin Challah wrapped in plastic wrap or stored in an airtight container to maintain freshness for up to 3 days.
Fridge: For longer storage, you can refrigerate it for up to 1 week, although this may slightly affect its texture. Ensure it's tightly wrapped to prevent drying out.
Freezer: For optimal preservation, slice and freeze your Pumpkin Challah in a freezer-safe bag for up to 3 months. Thaw slices at room temperature or toast directly from the freezer.
Reheating: To enjoy fresh, warm Pumpkin Challah, reheat slices in a toaster or oven at 350°F for about 10 minutes. Enjoy the cozy aroma all over again!
What to Serve with Pumpkin Challah
As you savor each slice of this autumn-inspired bread, consider how to transform it into a memorable meal that warms both heart and home.
-
Creamy Pumpkin Soup: The velvety texture and spiced flavors of pumpkin soup beautifully echo the rich taste of the challah, creating a harmonious pairing.
-
Honey Butter: A dollop of honey butter over warm Pumpkin Challah adds a sweet, indulgent touch that enhances the bread's natural flavors.
-
Roasted Apple Salad: Fresh greens topped with roasted apples and a zesty vinaigrette bring a refreshing crunch that balances the richness of your baked loaf.
-
Herb and Cheese Spread: A tangy cheese spread with fresh herbs complements the warm spices in the challah, making each bite a cheerful symphony of flavors.
-
Chai Tea: Sipping on spiced chai tea while enjoying Pumpkin Challah creates a cozy ambiance, perfectly warming you from the inside out.
-
Maple Glazed Ham: Served as a centerpiece, the savory sweetness of a maple-glazed ham pairs marvelously for a fall gathering, encouraging delightful leftovers for breakfast.
-
Pecan Pie: For dessert, a slice of classic pecan pie provides a delightful contrast to the soft bread, finishing your meal on a sweet note.
Expert Tips for Pumpkin Challah
-
Measure Flour Correctly: Always spoon flour into your measuring cup and level it off. This avoids using too much, which can lead to dense bread.
-
Knead to Perfection: Knead until the dough is elastic and slightly tacky. Over-kneading can make the bread tough, while under-kneading will prevent proper rise.
-
Proper Rising Conditions: Ensure a warm area for dough to rise. Cold temperatures can slow yeast activity, leading to a dense Pumpkin Challah.
-
Don't Rush the Second Rise: Allow the shaped loaves to rise until puffy, even if it takes longer than one hour. This step significantly affects the bread's texture and lightness.
-
Check for Doneness: Use a digital thermometer to ensure your Pumpkin Challah is baked through; it should reach 190°F in the center. This guarantees a perfectly cooked loaf.
Make Ahead Options
These Pumpkin Challah loaves are perfect for meal prep enthusiasts! You can prepare the dough up to 24 hours in advance by following the first six steps, then cover it tightly and refrigerate to let it rise slowly, which deepens the flavor. For an even easier approach, you can shape the loaves and place them in the fridge after the second rise, allowing you to bake them fresh just before serving. To maintain the quality, ensure the loaves are covered well to prevent drying out. When ready to bake, simply apply the egg wash and follow the final steps to achieve that golden, glossy finish—making this Pumpkin Challah just as delightful as if you had made it all in one go!
Pumpkin Challah Recipe FAQs
What kind of pumpkin purée should I use?
Absolutely! For the best flavor and texture in your Pumpkin Challah, I recommend using 100% pure pumpkin purée, which you can find in cans at the grocery store. Avoid pumpkin pie filling, as it contains added sugars and spices that can alter the flavor of your bread. If you're adventurous and have access to fresh pumpkins, roasting and puréeing your own can add an extra depth of flavor!
How should I store leftover Pumpkin Challah?
To keep your Pumpkin Challah fresh, simply wrap it tightly in plastic wrap or place it in an airtight container at room temperature. It should retain its wonderful flavor and texture for up to 3 days. If you live in a particularly humid environment, try storing it in the fridge for up to 1 week, but remember, refrigeration can dry it out slightly.
Can I freeze Pumpkin Challah?
Yes, you can! For the best preservation, slice your Pumpkin Challah and place the pieces in a freezer-safe bag. It can stay fresh in the freezer for up to 3 months. When you're ready to enjoy it, just thaw it at room temperature or pop the slices directly into the toaster for a quick and delicious treat.
What can I do if my dough doesn't rise?
Very! If you find that your Pumpkin Challah dough isn’t rising as expected, check if your yeast is fresh—expired yeast can be a culprit. Ensure the warm water used is between 100°F to 110°F (37°C to 43°C) to activate the yeast effectively. Additionally, placing the dough in a warm, draft-free environment can help it rise properly. If it’s too cold, your dough may take significantly longer to rise.
Is this recipe suitable for people with allergies?
Sure! This Pumpkin Challah contains common allergens like wheat and egg. If you’re baking for someone with dietary restrictions, you can try substituting the all-purpose flour with a gluten-free blend designed for yeast breads. For an egg-free version, consider using a flaxseed meal egg replacement (mix 1 tablespoon of flaxseed meal with 2.5 tablespoons of water and let it sit for about 10 minutes). This way, everyone can enjoy a slice of this cozy treat!
Can I add other flavors or toppings to the Pumpkin Challah?
Absolutely! Feel free to get creative! You can mix in nuts like walnuts or pecans, or even fold in dried fruits like cranberries for a sweet twist. A sprinkle of pumpkin seeds on top before baking can add a delightful crunch. If you love a spicier kick, consider adding a pinch of nutmeg or ginger to the dough for an extra layer of warmth!
Warm and Cozy Pumpkin Challah for Fall Baking Fun
Ingredients
Equipment
Method
- Prepare your ingredients by weighing the flour and gathering all other components.
- Mix the dry ingredients in a large bowl until well combined.
- Whisk the wet ingredients together until smooth, then combine with the dry ingredients.
- Form the dough and ensure it’s mixed until shaggy.
- Knead the dough until elastic, adding flour as necessary.
- Let the dough rise in a warm area for about 2 hours.
- Prepare a baking sheet by greasing or lining it with parchment.
- Shape the dough into two loaves, coiling them on the baking sheet.
- Allow the loaves to rise again for about 1 hour.
- Preheat your oven to 350°F.
- Brush the loaves with egg wash before baking.
- Bake the loaves for 35 to 40 minutes until golden brown.
- Cool the loaves completely on a rack before slicing.


Leave a Reply