As I pulled the warm, marbled cake from the oven, a delightful aroma of cocoa and vanilla wafted through the air, instantly conjuring up memories of Halloween parties filled with laughter and spooky fun. This Spooky Halloween Marble Cake is not just a treat; it’s a whimsical centerpiece that brings the magic of the season right to your table. With its striking black and red swirls, it’s a visual feast that’s sure to impress both kids and adults alike. Plus, it’s surprisingly simple to whip up—perfect for those busy autumn evenings when you crave something homemade without spending all day in the kitchen. So, are you ready to impress your friends with this hauntingly delicious dessert? Let’s dive into the recipe!
Why Will You Love This Cake?
Spooky, Fun Theme: This cake is the ultimate Halloween showstopper, combining playful aesthetics with delicious flavors that will have everyone talking.
Easy to Make: With simple steps to follow, this recipe is perfect for home bakers of all skill levels, ensuring your masterpiece comes together effortlessly.
Rich Flavor Profile: The delightful blend of cocoa and vanilla creates a heavenly taste sensation that balances sweetness with a hint of sophistication.
Crowd-Pleasing Appeal: Whether it’s for a Halloween party, school event, or a cozy family gathering, this cake will steal the spotlight and leave everyone wanting more.
Versatile Decoration: Customize your cake with various toppings and sprinkles, allowing you to unleash your creativity and make it your own. For more delightful ideas, check out my Halloween party treats to complement this spooky dessert!
Spooky Halloween Marble Cake Ingredients
Get ready to mix up some spooky delights with these ingredients!
For the Cake
- All-purpose flour – provides structure and stability to your cake.
- Baking powder – ensures a nice rise for that fluffy texture.
- Baking soda – gives an extra lift and helps balance acidity.
- Salt – enhances the sweetness and overall flavor profile.
- Unsweetened cocoa powder – adds a rich chocolate flavor to the black batter.
- Granulated sugar – sweetens your cake while keeping it moist.
- Vanilla extract – infuses warmth and depth into the cake.
- Buttermilk – adds moisture and a slight tang for a tender crumb.
- Bittersweet chocolate – used in the frosting for a luxurious chocolate experience.
- Unsalted butter – creates a creamy texture and brings all your ingredients together.
For the Frosting
- Powdered sugar – sweetens the frosting and guarantees a smooth finish.
- Milk – adjusts consistency for perfect spreading.
- Black gel icing color – achieves that spooky, dark color for your frosting.
For the Decoration
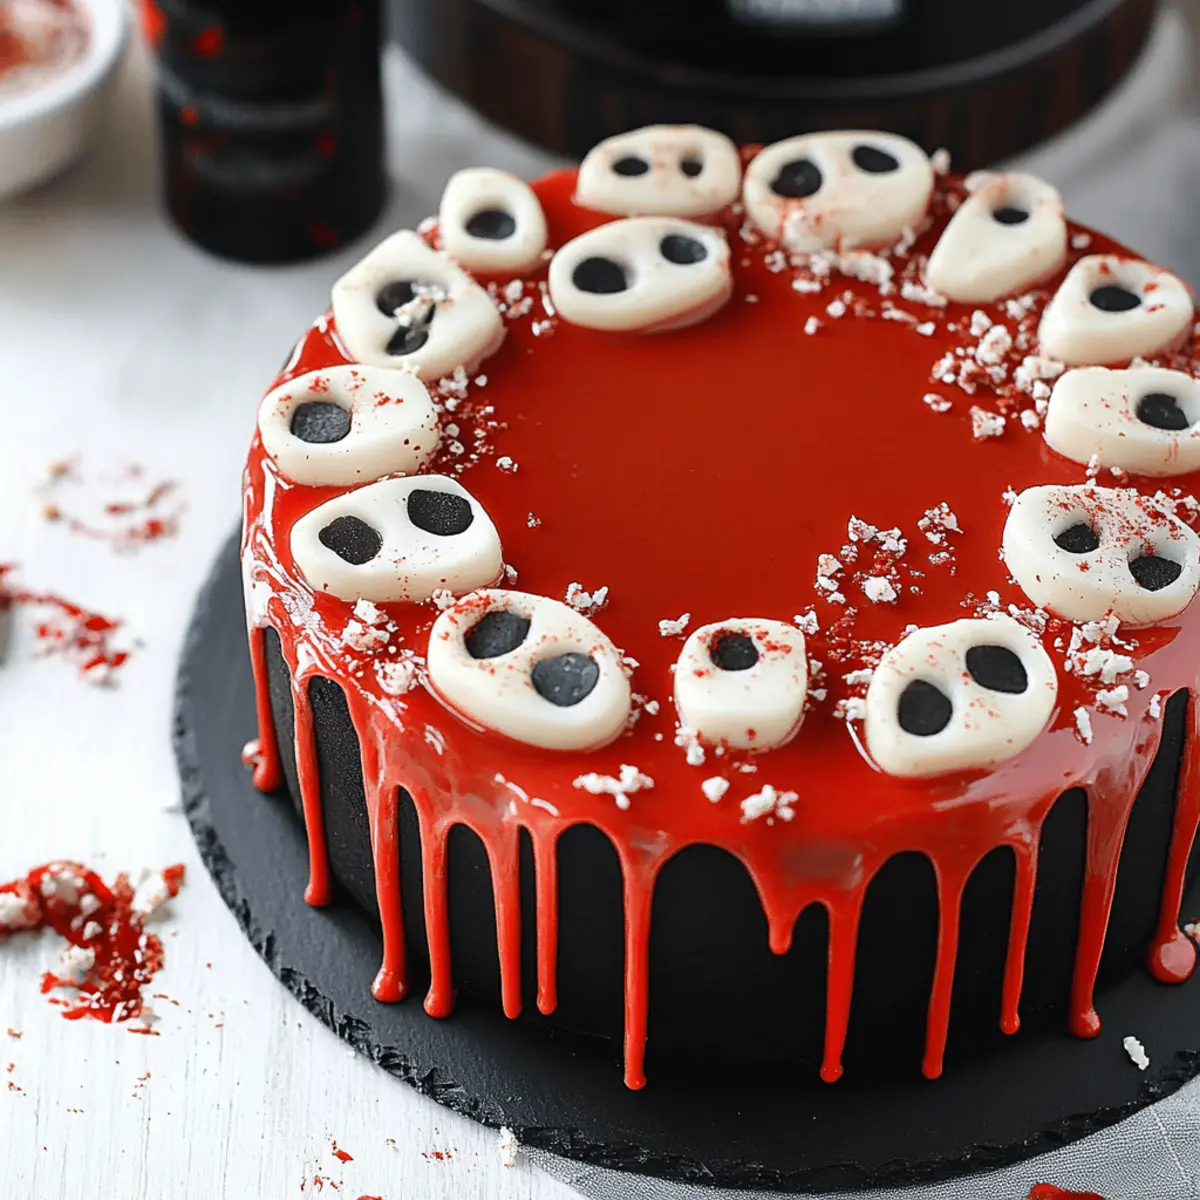
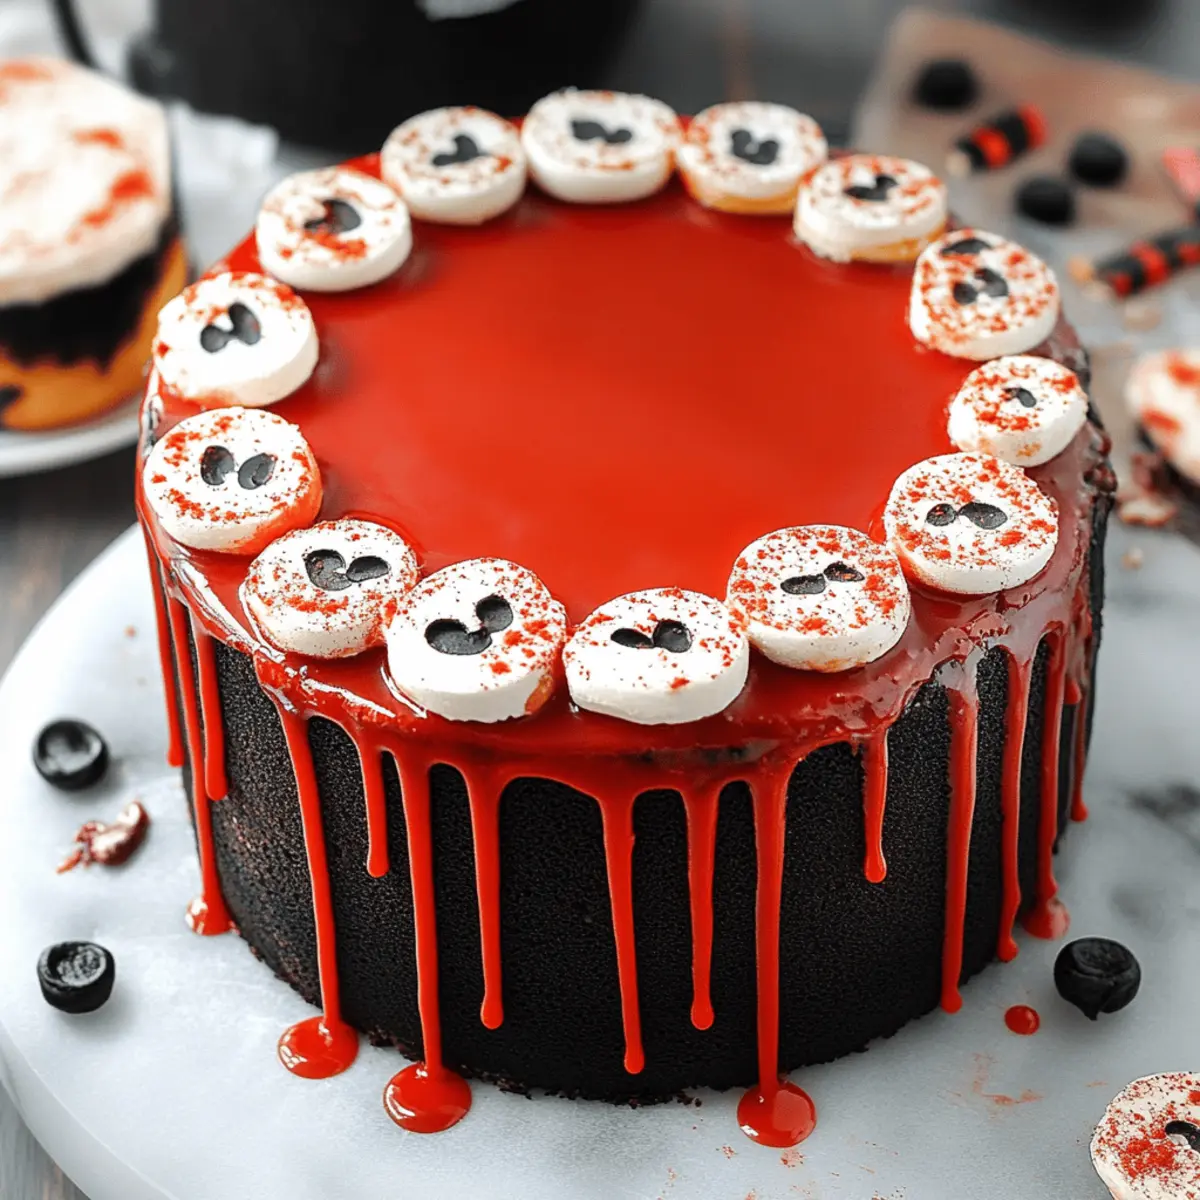
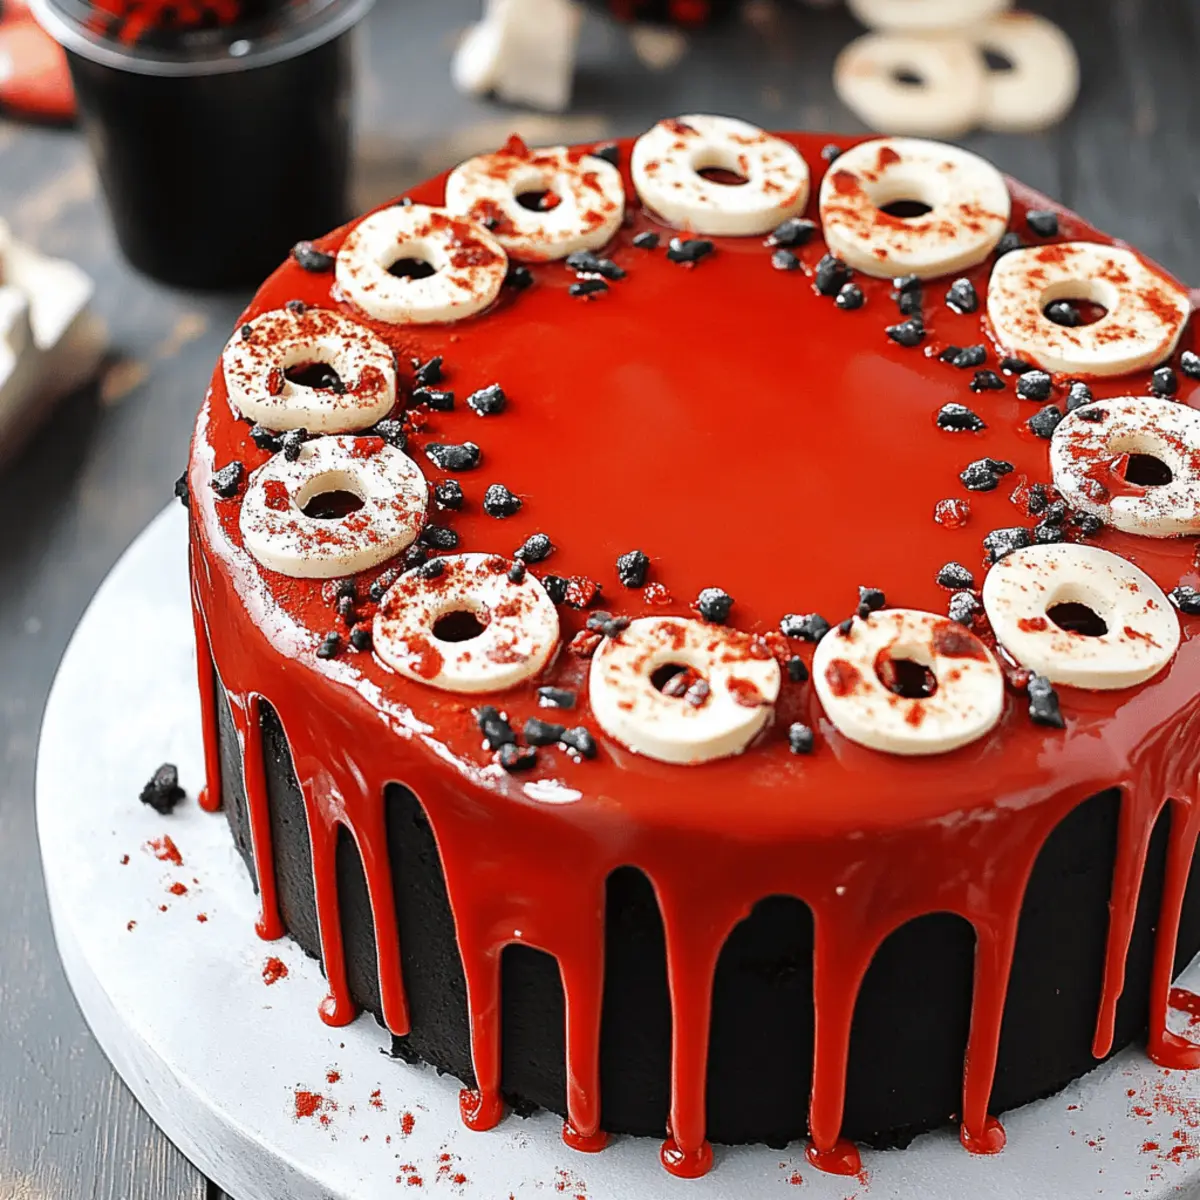
- Red candy melts – perfect for a creepy, dripping effect on top of the cake.
- Bloody bones sprinkles – adds a fun, eerie touch that kids will love.
- Bloody eyeball sprinkles – for an extra ghastly detail, making your cake even more festive.
Gather these ingredients, and you’ll be well on your way to whipping up the unforgettable Spooky Halloween Marble Cake that’s bound to thrill your taste buds!
Step‑by‑Step Instructions for Spooky Halloween Marble Cake
Step 1: Preheat and Prepare the Pans
Begin by preheating your oven to 350°F (175°C). While it warms up, grease and flour three 8-inch round cake pans to ensure that your Spooky Halloween Marble Cake releases easily after baking. This will help create a smooth surface for layering and decorating later.
Step 2: Mix Dry Ingredients
In a large mixing bowl, whisk together 2 ¼ cups of all-purpose flour, 2 ½ teaspoons of baking powder, ¼ teaspoon of baking soda, and ½ teaspoon of salt. This dry mix forms the base of your cake, so ensure it's well combined to avoid any lumps that might affect the batter's texture.
Step 3: Cream Butter and Sugar
In another bowl, cream together 2 ¼ cups of softened unsalted butter and 1 ½ cups of granulated sugar until light and fluffy, about 4-5 minutes using a hand mixer or stand mixer. This process incorporates air into the mixture, which is crucial for a light cake, contributing to the airy texture of your Spooky Halloween Marble Cake.
Step 4: Add Eggs and Vanilla
Add the eggs one at a time to the creamed mixture, mixing well after each addition to ensure they're fully incorporated. Then, stir in 1 tablespoon of vanilla extract, which adds a warm, inviting flavor to your batter, enhancing the overall taste of your cake.
Step 5: Combine Wet and Dry Ingredients
Gradually add the dry ingredients to your creamed mixture in thirds, alternating with 1 cup of buttermilk. Start and end with the dry ingredients, mixing gently until just combined. This technique keeps your batter smooth and ensures a tender crumb in your Spooky Halloween Marble Cake.
Step 6: Create the Chocolate Batter
Divide your batter evenly into two separate bowls. In one bowl, stir in ½ cup of unsweetened cocoa powder to create the chocolate batter. This not only deepens the flavor but also adds a spooky contrast to the vanilla batter, generating the marbled effect that makes this cake a true Halloween delight.
Step 7: Layer the Batters
Using a scoop or spoon, alternate dollops of the red (vanilla) and black (chocolate) batters in the center of each prepared pan. Aim to create a layered look where the colors are distinct, setting the stage for the stunning marbling that will come to life once you swirl the batters together.
Step 8: Swirl for Effect
With a knife or skewer, gently swirl the two batters together in each pan to create a marbled effect. Be careful not to overmix—just a few gentle swirls will do! This technique adds a playful, spooky look to your Spooky Halloween Marble Cake, perfect for the festive occasion.
Step 9: Bake the Cake
Place the filled pans in your preheated oven and bake for about 20 minutes. Keep an eye on them, and when a toothpick inserted into the center comes out clean, your cakes are ready. This baking time creates a moist yet sturdy crumb that will hold up beautifully once layered and frosted.
Step 10: Cool and Release the Cakes
Once baked, allow the cakes to cool in the pans for 10 minutes. After that, carefully turn the cakes out onto wire racks to cool completely. This step is essential as it prevents them from becoming soggy, ensuring your Spooky Halloween Marble Cake has the perfect texture for layering and frosting.
Step 11: Prepare the Frosting
For the frosting, melt the 5 ounces of bittersweet chocolate in a microwave or double boiler and let it cool slightly. In a mixing bowl, beat 2 ¼ cups of softened butter until creamy, then gradually add 8 cups of powdered sugar, unsweetened cocoa powder, and enough milk to reach your desired consistency, making sure it’s spreadable.
Step 12: Color the Frosting
Once your frosting is smooth, add black gel icing color to achieve the desired spooky hue. Mix thoroughly, ensuring the color is evenly distributed throughout the frosting. This will provide a delightful contrast against the vibrant red and black marbling of your Spooky Halloween Marble Cake.
Step 13: Assemble the Cake
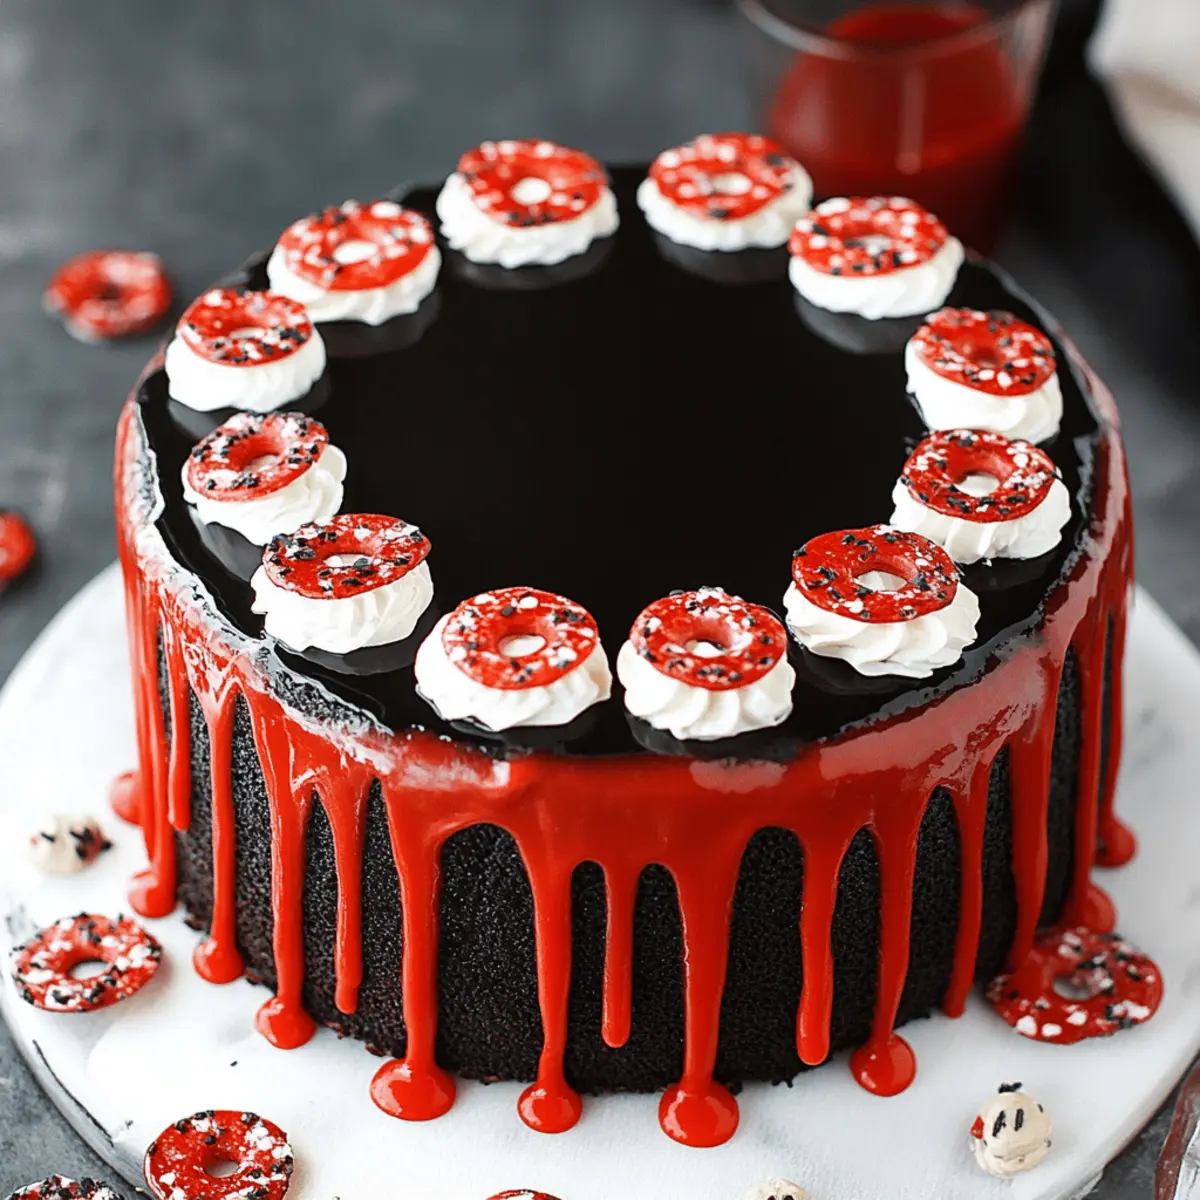
Place one layer of cake on your serving plate and spread a generous layer of frosting on top. Repeat this process with the second layer, adding frosting between each layer. Once all layers are stacked, use remaining frosting to coat the entire cake smoothly, ensuring a spooky, sleek finish.
Step 14: Add the Dripping Effect
Melt the ¼ cup of red candy melts, then carefully drizzle it over the top of the cake to create a chilling dripping effect. Let it flow down the sides a bit for that perfect Halloween vibe. This will give your Spooky Halloween Marble Cake that extra touch of eerie fun.
Step 15: Garnish and Decorate
To complete your cake, garnish with bloody bones and bloody eyeball sprinkles. Sprinkle them artfully around the top and sides for a festive, spooky look that will both thrill and delight your guests. Your beautifully decorated Spooky Halloween Marble Cake is now ready to impress!
How to Store and Freeze Spooky Halloween Marble Cake
Room Temperature: Store the cake in an airtight container lined with parchment paper, and it can last for up to 3 days without losing its moistness.
Fridge: If you need a longer shelf life, refrigerate the cake for up to a week in an airtight container. Allow it to come to room temperature before serving for the best flavor.
Freezer: For optimal freshness, freeze the unfrosted cake layers separately, wrapped tightly in plastic wrap, for up to 3 months. Thaw overnight in the fridge when ready to enjoy.
Reheating: If you prefer a warm slice, gently microwave individual pieces for about 10-15 seconds to warm them up without drying out, bringing back the magic of this Spooky Halloween Marble Cake!
Spooky Halloween Marble Cake Variations
Feel free to let your creativity shine and give this cake your own twist with these fun variations!
-
Gluten-Free: Use a 1:1 gluten-free flour blend instead of all-purpose flour for a cakelike texture that everyone can enjoy. It’s a fantastic way to make your spooky dessert accessible to friends with dietary restrictions.
-
Chocolate Lovers: Replace half of the vanilla batter with an additional chocolate batter for a double chocolate experience. The extra cocoa will satisfy those intense chocolate cravings.
-
Spiced Twist: Add a teaspoon of pumpkin pie spice or cinnamon to the vanilla batter for a warm, autumnal flavor that pairs perfectly with the season's essence. The addition of spices will elevate your cake's profile, making it even more comforting.
-
Fruit Filling: Inject a layer of fresh raspberries or a raspberry jam between the layers for a fruity burst of flavor. The tartness complements the rich chocolate beautifully, creating a delightful taste contrast.
-
Nutty Crunch: Fold in ½ cup of chopped walnuts or pecans into either batter before layering for an added crunch. This twist not only brings texture but also pairs wonderfully with the cake's flavors.
-
Lighter Frosting: For a lighter touch, whip up a cream cheese frosting instead of a buttercream. The tanginess of cream cheese adds an irresistible contrast to the sweetness of the cake.
-
Less Sweet: Reduce the sugar in the cake and frosting by 25% to make it less sweet but still delicious. This adjustment is perfect for those who prefer a subtler sweetness, allowing the flavors to shine through.
-
Spicy Heat: Throw in a pinch of cayenne pepper into your chocolate batter if you're feeling adventurous. This unexpected heat adds a thrilling kick that balances the sweetness in a surprising way.
Embrace the joy of baking by customizing your Spooky Halloween Marble Cake! For more spooky creations, you might also enjoy pairing this treat with my Halloween party treats for a full festive experience!
Expert Tips for Spooky Halloween Marble Cake
-
Batter Consistency: Ensure your batter is smooth but not overmixed. Overmixing can lead to a tough texture in your Spooky Halloween Marble Cake.
-
Swirling Technique: Use a gentle hand when swirling the batters. Too much swirling can blend them too much, losing the distinct marbling effect you want.
-
Oven Monitoring: Keep an eye on your cakes as they bake. Ovens can vary, and starting at 20 minutes, check for doneness with a toothpick to avoid overbaking.
-
Cooling Time: Don’t skip the cooling step before frosting! Allow the cakes to cool completely to avoid melting your frosting and creating a soggy mess.
-
Frosting Color: Add the black gel icing color gradually until you achieve the desired spooky hue. A little goes a long way, so start small to prevent it from becoming too dark.
Make Ahead Options
Preparing the Spooky Halloween Marble Cake ahead of time is a fantastic way to make your Halloween celebrations smoother and less hectic! You can easily make the cake layers and refrigerate them for up to 3 days before frosting. Allow the cakes to cool completely, then wrap them in plastic wrap to maintain their moisture and freshness. For the frosting, whip it up and store it in an airtight container in the fridge for up to 2 days. When you’re ready to serve, simply bring everything to room temperature, frost the cake, and add your spooky decorations. This way, your cake remains just as delicious, while you enjoy more quality time with your friends and family!
What to Serve with Spooky Halloween Marble Cake
Dive into delightful accompaniments that heighten the magic of your Halloween celebration while complementing this whimsical cake!
-
Vanilla Ice Cream: Creamy and smooth, it contrasts beautifully with the rich flavors of the marble cake, creating an irresistible combination. A scoop of vanilla ice cream melting atop each slice adds a delightful visual and textural element.
-
Chocolate Ganache: Drizzling warm chocolate ganache over your cake enhances its chocolatey notes while adding a luxurious glaze. Its glossy sheen is not only comforting but also elevates the spooky presentation.
-
Fresh Berries: Bright, tart berries like raspberries or strawberries offer a refreshing bite that balances the sweetness of the cake. The pop of color from fresh fruit also adds a fun twist to your Halloween spread!
-
Caramel Sauce: A drizzle of warm caramel sauce creates a sweet, gooey complement to the cake. The rich taste and sticky texture take the dessert experience to new levels of indulgence.
-
Pumpkin Spice Latte: Serve this classic fall beverage alongside your cake for a cozy pairing. The notes of cinnamon and nutmeg harmonize with the cake's flavors, creating a warm, inviting atmosphere.
-
Spooky Cheese Platter: Combine sharp cheddar and creamy brie with assorted crackers and spooky-themed decorations. This savory complement offers a balanced contrast to the cake and is a fun way to get the party started.
-
Hot Chocolate: Rich and creamy, a cup of homemade hot chocolate serves as a comforting drink that pairs delightfully with each slice of cake. Consider adding marshmallows for that extra spooky flair!
-
Candy Corn: Keep the Halloween spirit alive with this iconic treat! Its sweetness complements the rich flavors of the cake while providing that nostalgic touch to your party's dessert table.
Embrace these irresistible pairings and make your Spooky Halloween Marble Cake the star of your festive gathering!
Spooky Halloween Marble Cake Recipe FAQs
What type of flour is best for this cake?
Absolutely! All-purpose flour is perfect for this Spooky Halloween Marble Cake as it provides the right structure and stability. If you're looking for a gluten-free option, you may try a 1:1 gluten-free baking flour, but keep in mind that the texture may vary slightly.
How should I store the Spooky Halloween Marble Cake?
For room temperature storage, keep the cake in an airtight container lined with parchment paper, where it will stay moist for up to 3 days. If you want to keep it fresh for longer, refrigerate it in an airtight container for up to a week. Just remember to let it come to room temperature before serving, as this enhances the flavors beautifully!
Can I freeze the Spooky Halloween Marble Cake?
Absolutely! To freeze your cake, I recommend wrapping the unfrosted layers tightly in plastic wrap and then placing them in a heavy-duty freezer bag. This will preserve their freshness for up to 3 months. When you're ready to enjoy, simply thaw them overnight in the refrigerator and frost them afterward for the perfect treat!
What should I do if my cake layers are uneven?
No worries! If your cake layers turn out uneven, you can easily level them with a serrated knife after they've cooled. Gently slice off the domed tops of each layer for a flat surface, ensuring a neatly stacked cake. Plus, those trimmings can be turned into cake pops or crumbled over ice cream for a fun dessert!
Are there any dietary considerations for the Spooky Halloween Marble Cake?
If you need to accommodate allergies, consider using dairy-free alternatives, such as coconut milk yogurt instead of buttermilk and a dairy-free butter substitute. For gluten-sensitive friends, a gluten-free flour blend can work as a substitute. Always double-check your sprinkles if allergies are a concern, as some might contain gluten or allergens.
How can I enhance the spooky visual effects?
The more the merrier when it comes to decorations! You can get creative with your toppings. Add edible glitter, gummy worms, or even a splash of ghostly white chocolate shavings for extra Halloween flair! Just remember that the presentation is part of the fun, so don't hesitate to let your creativity run wild!
Spooky Halloween Marble Cake That’ll Thrill Your Taste Buds
Ingredients
Equipment
Method
- Preheat your oven to 350°F (175°C) and grease and flour three 8-inch round cake pans.
- In a large mixing bowl, whisk together all-purpose flour, baking powder, baking soda, and salt.
- In another bowl, cream together softened unsalted butter and granulated sugar until light and fluffy.
- Add eggs one at a time to the creamed mixture, mixing well after each addition, then stir in vanilla extract.
- Gradually add the dry ingredients to the creamed mixture in thirds, alternating with buttermilk.
- Divide your batter into two separate bowls and stir in unsweetened cocoa powder into one for the chocolate batter.
- Using a scoop, alternate dollops of the red and black batters in the center of each prepared pan.
- Gently swirl the two batters together in each pan to create a marbled effect.
- Bake for about 20 minutes until a toothpick comes out clean; allow to cool in pans for 10 minutes.
- Once cool, turn the cakes out onto wire racks to cool completely.
- For the frosting, melt bittersweet chocolate and let it cool slightly. Beat softened butter, then add powdered sugar and milk to reach desired consistency.
- Add black gel icing color to achieve the desired spooky hue.
- Assemble the cake by stacking the layers with frosting in between and covering the entire cake with frosting.
- Melt red candy melts and drizzle over the top of the cake for a chilling dripping effect.
- Garnish with bloody bones and bloody eyeball sprinkles for a festive, spooky look.


Leave a Reply