As I stood in my kitchen, the aroma of sizzling ground beef mingled with garlic and onions, instantly transporting me to my favorite taco joint. The Beefy Melt Burrito is my go-to remedy for those busy weeknights when fast food seems all too tempting. What sets this recipe apart is its comforting heartiness and the fact that you can whip it up in just 30 minutes, making it both time-efficient and deliciously satisfying. Packed with protein, fiber, and layers of flavor, these burritos are not only perfect for a family dinner but also a fantastic option for meal prepping over the weekend. Ready to create something that will have everyone asking for seconds? Let’s dive into it!
Why is the Beefy Melt Burrito a Crowd Favorite?
Simplicity is key: This Beefy Melt Burrito requires just a few basic ingredients and only 30 minutes to make.
Loaded with Flavor: The combination of savory ground beef, black beans, and melty cheese yields a taste sensation that's hard to resist.
Versatile: Customize your burrito with your favorite toppings like salsa and sour cream, or make it vegetarian by swapping beef for beans—perfect for accommodating all diets!
Meal Prep Dream: These burritos are great for batch cooking and come in handy on busy nights, making dinner a breeze.
Family-Friendly: Kids and adults alike adore these hearty burritos, ensuring everyone at the table leaves satisfied.
Beefy Melt Burrito Ingredients
Gather all the tasty components for your Beefy Melt Burrito!
For the Filling
• Ground beef – essential for a robust flavor; alternative: lean turkey for a lighter option.
• Small onion, finely chopped – adds sweetness and depth; yellow onions work beautifully.
• Garlic, minced – fresh garlic elevates the dish; you can use garlic powder in a pinch.
• Taco seasoning – infuses the mixture with classic Tex-Mex flavor; look for low-sodium versions for a healthier choice.
• Black beans – provide fiber and protein; substitute with pinto beans for a different texture.
• Cooked rice – helps to bind the filling; use cauliflower rice for a low-carb twist.
• Shredded cheese (cheddar or Mexican blend) – melts beautifully to create that gooey burrito experience; consider pepper jack for a spicy kick.
For the Wrap
• Large flour tortillas – the perfect vessel for your flavorful filling; corn tortillas can also be used for a gluten-free option.
For Serving
• Salsa – brightens up the dish with vibrant flavors; try homemade salsa for an extra touch.
• Sour cream – adds creaminess and tang; Greek yogurt is a healthy alternative.
• Fresh cilantro, chopped (optional) – brings freshness and color; if you're not a fan, omit it for a classic taste.
• Salt and pepper to taste – essential for enhancing flavors; adjust according to personal preference.
Step‑by‑Step Instructions for Beefy Melt Burrito
Step 1: Cook the Ground Beef
In a large skillet over medium heat, add 1 lb of ground beef. Use a spatula to break it apart as it cooks, ensuring it’s evenly browned and no pink remains, which should take about 6-8 minutes. Once done, let the beef rest briefly in the skillet while you prepare the next step.
Step 2: Sauté the Vegetables
Add the finely chopped onion and minced garlic to the skillet with the cooked beef. Sauté for an additional 2-3 minutes, stirring frequently, until the onion becomes translucent and fragrant. This aromatic base will elevate the flavors in your Beefy Melt Burrito.
Step 3: Season the Mixture
Drain any excess grease from the skillet, then sprinkle the taco seasoning over the beef mixture. Add a splash of water as directed on the seasoning packet, stirring to combine. Allow it to simmer for about 5 minutes, letting the spices meld perfectly with the beef.
Step 4: Combine Filling Ingredients
In a large bowl, mix together the cooked rice, black beans, and half of the shredded cheese. Season with salt and pepper to taste. This hearty combination builds the delicious filling for your Beefy Melt Burrito, providing a satisfying texture and flavor profile.
Step 5: Mix in Beef
Take the seasoned beef mixture and fold it into the bowl containing the rice and beans. Stir gently until everything is well combined, creating a cohesive filling that is bursting with flavor and perfect for the burritos.
Step 6: Warm the Tortillas
To facilitate easy wrapping, warm the large flour tortillas in the microwave or a skillet for about 10-15 seconds. This step ensures that they become pliable, making it easier to create your Beefy Melt Burrito without tearing.
Step 7: Fill the Tortillas
Spoon a generous portion of the filling mixture onto the center of each warm tortilla. Top each one with a bit of salsa and a dollop of sour cream for added flavor. This layering of ingredients is crucial to achieving the perfect burrito experience.
Step 8: Roll the Burritos
Fold in the sides of the tortilla and then roll it up tightly from the bottom to the top, forming a burrito shape. Ensure the filling is securely enclosed. Repeat this assembly for the remaining tortillas, savoring the anticipation of your Beefy Melt Burrito delight.
Step 9: Crisp the Burritos
In the same skillet you used earlier, place the rolled burritos seam-side down. Cook over medium heat for about 2-3 minutes on each side until they turn golden brown and crispy. This method adds a wonderful texture to your Beefy Melt Burrito that enhances the overall enjoyment.
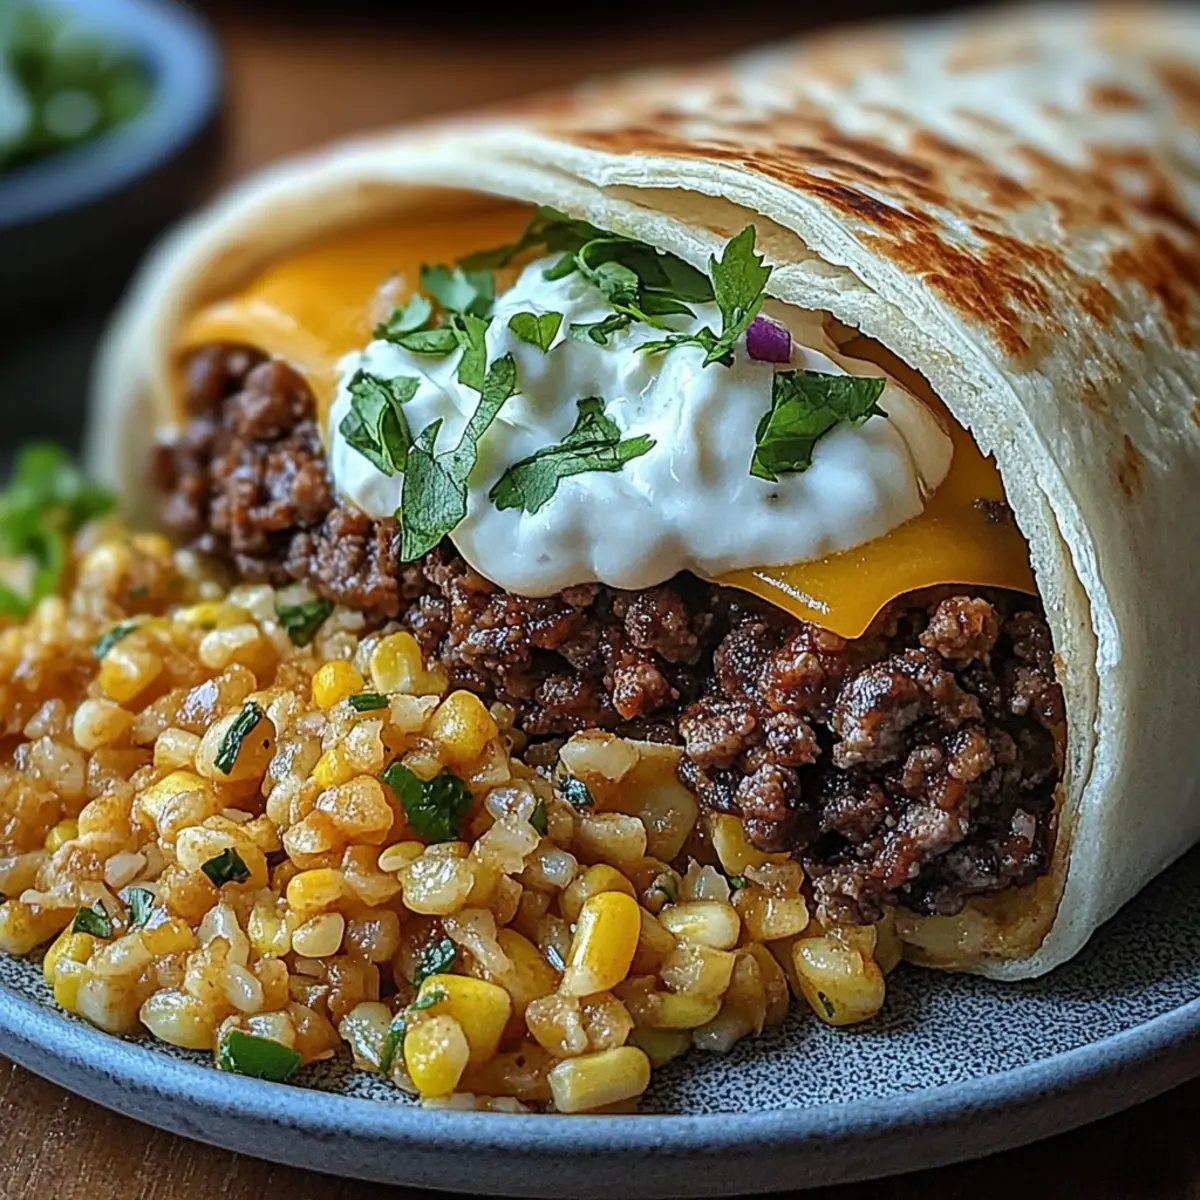
Step 10: Melt the Cheese
Once the burritos are golden, remove them from heat and sprinkle the remaining cheese on top of each burrito. Cover the skillet for about one minute to allow the cheese to melt beautifully, creating that cheesy goodness that defines the Beefy Melt Burrito.
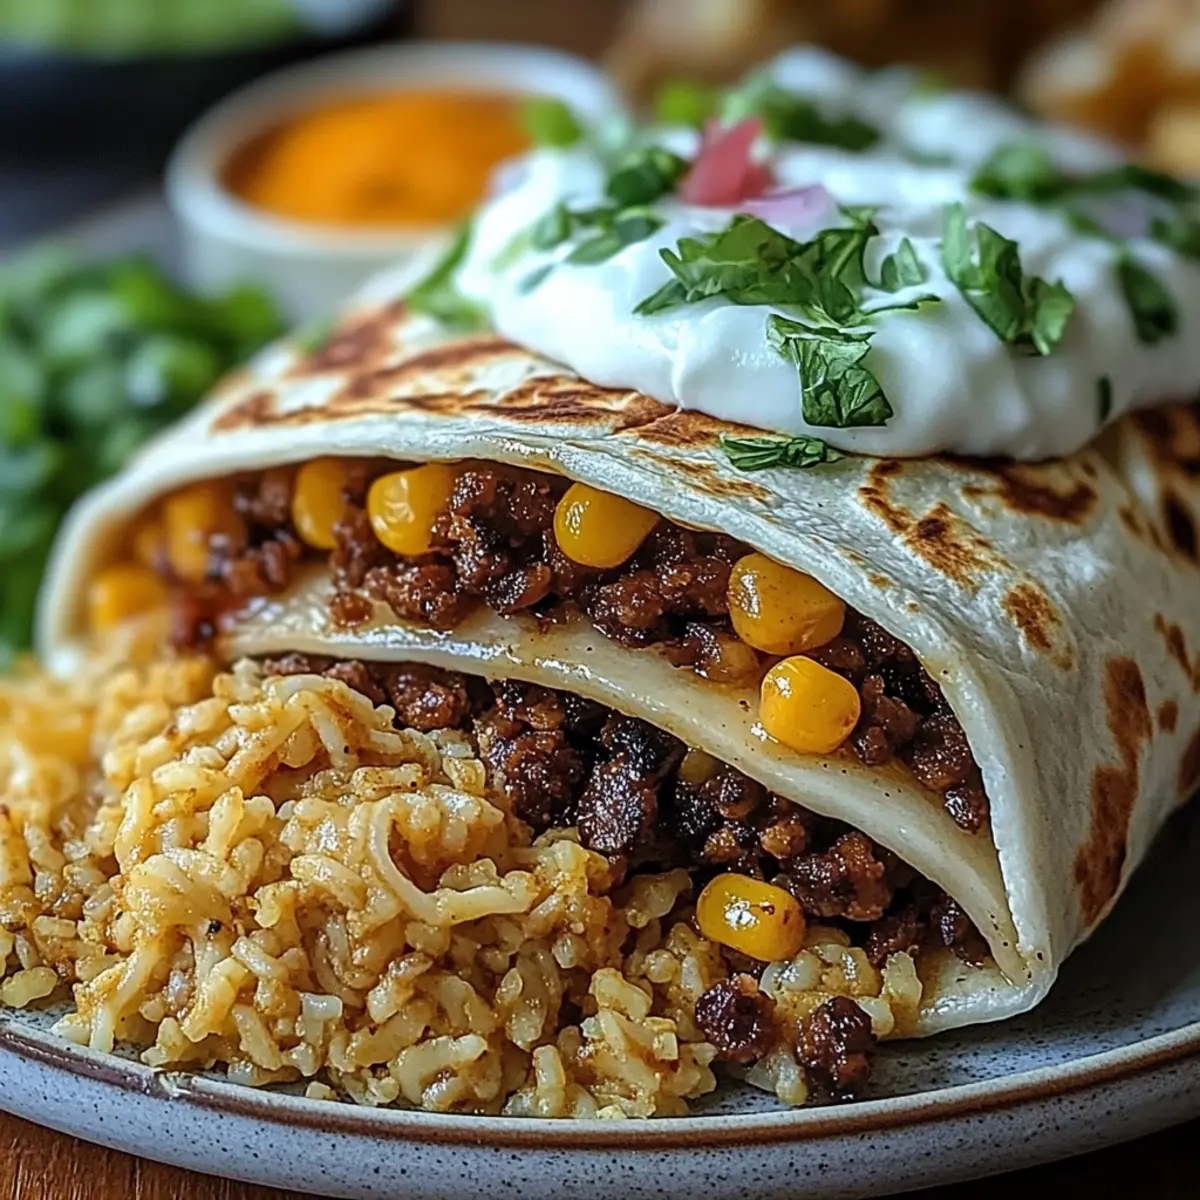
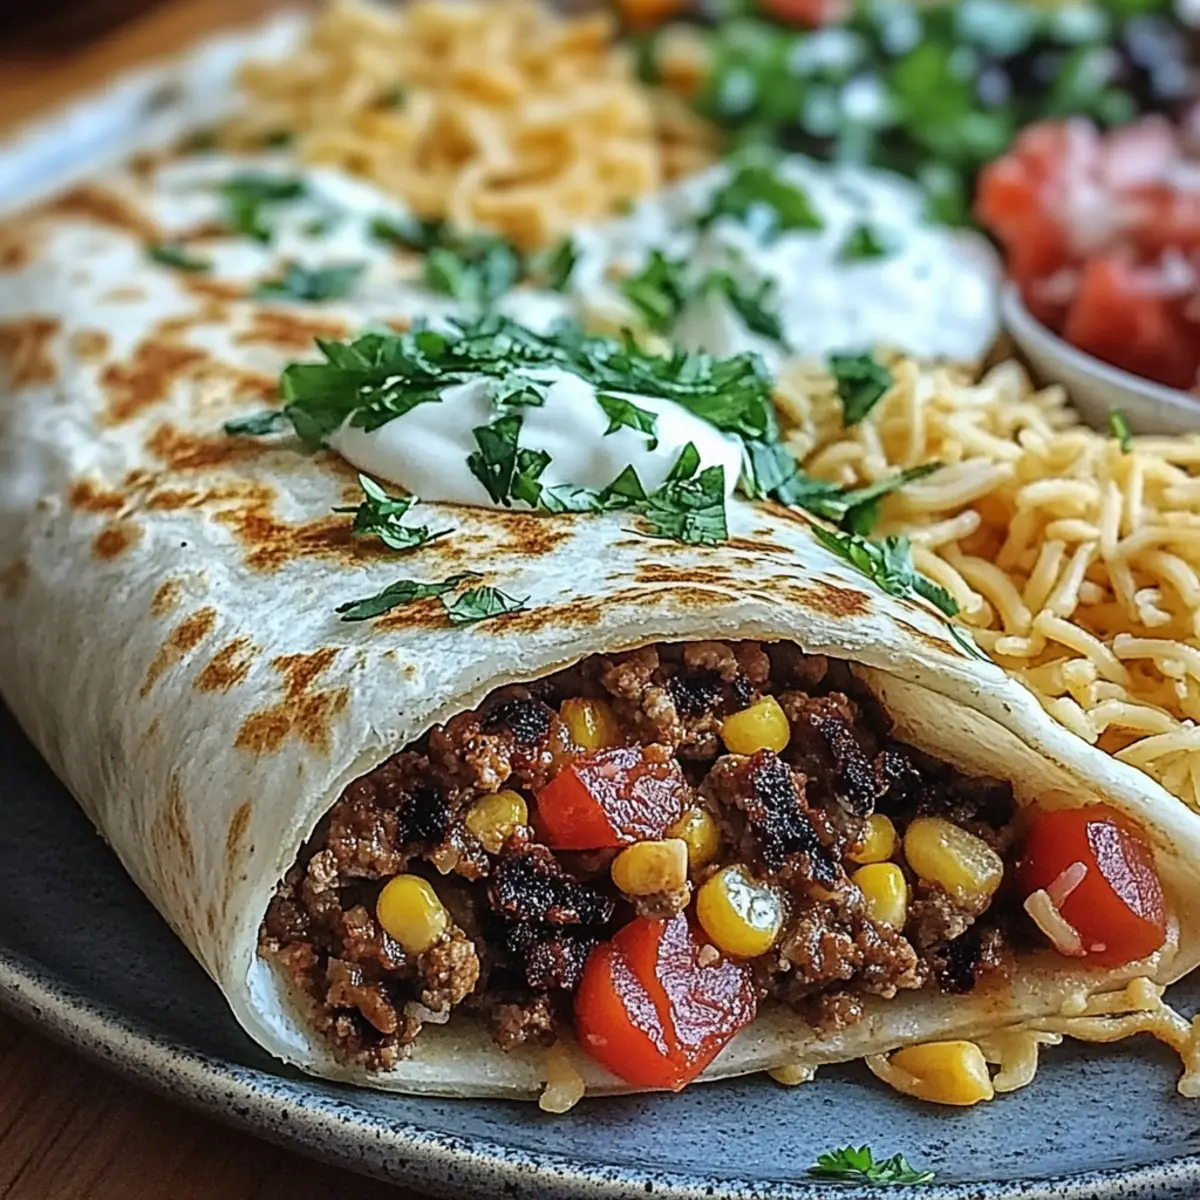
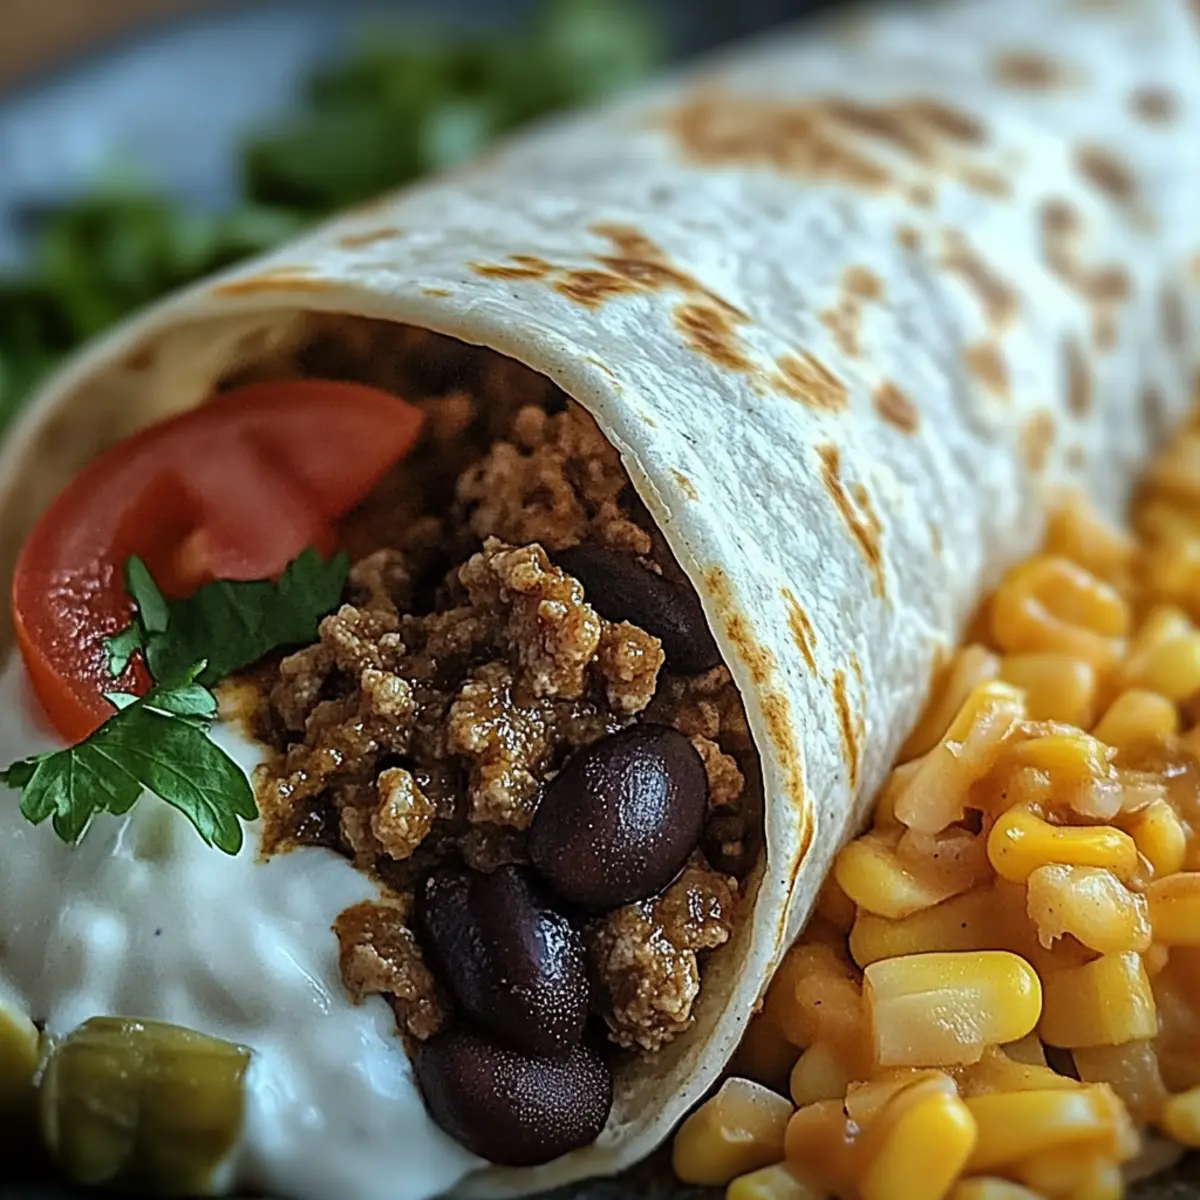
Step 11: Serve and Enjoy
Slice the burritos in half if desired, and serve hot with extra salsa, sour cream, and fresh cilantro on the side. This finishing touch adds freshness and color, ensuring your Beefy Melt Burrito is as visually appealing as it is delicious.
Make Ahead Options
These Beefy Melt Burritos are perfect for meal prep enthusiasts! You can prepare the filling up to 3 days in advance by cooking the ground beef with onions and garlic, mixing it with the cooked rice, black beans, and cheese. Just store the mixture in an airtight container in the refrigerator to keep it fresh and flavorful. When it's time to eat, simply warm the tortillas and fill them with your prepared mixture, adding salsa and sour cream before rolling them up. Finish by crisping them in a skillet for that golden touch, ensuring they are just as delicious as if you made them fresh!
What to Serve with Beefy Melt Burrito
Elevate your mealtime and create an unforgettable dining experience with these delightful pairings.
-
Creamy Guacamole: This rich and creamy dip complements the burrito's bold flavors, adding a smooth texture that enhances each bite.
-
Crispy Tortilla Chips: Perfect for scooping up any leftover salsa or guacamole, these chips provide an irresistible crunch alongside your burritos.
-
Fresh Mexican Street Corn: Sweet corn mixed with lime, chili, and cheese brings a refreshing contrast and celebrates that classic summer vibe.
-
Spicy Queso Dip: This ooey-gooey cheese dip amps up the indulgence and works beautifully with the savory elements of the Beefy Melt Burrito.
-
Zesty Taco Salad: A vibrant salad with lettuce, tomatoes, and crunchy tortilla strips offers a refreshing balance to the hearty burrito.
-
Cilantro Lime Rice: Bright and aromatic, this rice dish pairs perfectly, bringing out the zesty notes in the burrito's filling.
-
Chilled Horchata: This creamy beverage combines rice, cinnamon, and sweet milk, making for a delightful respite that cools and complements your meal.
-
Chocolate Flan: End on a sweet note with this rich, caramel dessert, providing a delicious contrast to the spiciness of the burrito.
Beefy Melt Burrito Variations
Feel free to get creative with your Beefy Melt Burrito! Each twist promises a delicious surprise.
-
Dairy-Free: Substitute cheese with a dairy-free blend or nutritional yeast for a cheeseless wonder. You'll still achieve a rich flavor!
-
Spicy Kick: Add sliced jalapeños or a dash of hot sauce to the filling for an extra layer of heat. Spice fans will revel in this zesty upgrade.
-
Green Goodness: Mix in chopped spinach or kale with the filling for a nutritional boost while adding a vibrant color. It's a delicious way to sneak in some greens!
-
Meatless Marvel: Swap the ground beef for lentils or chickpeas to turn your burritos vegetarian. The texture is just as satisfying, and it promotes plant-based eating!
-
Cauliflower Rice: For a low-carb option, replace regular rice with cauliflower rice. It gives a lighter feel without losing any of the flavors you love.
-
BBQ Twist: Mix some barbecue sauce with the ground beef for a smoky, sweet flavor. This creative take will have your taste buds dancing with joy!
-
Crunch Time: Add crushed tortilla chips inside the burrito for a delightful crunch that contrasts beautifully with the soft filling. It’s a playful twist to liven up your meal.
Explore these ideas and discover a new favorite variation of the classic Beefy Melt Burrito! For more meal inspiration, check out this taco recipe or try making some delicious homemade salsa to accompany your meal!
Expert Tips for the Best Beefy Melt Burrito
-
Perfectly Browned Beef: Ensure your ground beef is thoroughly browned and no pink remains. This adds a rich flavor and prevents a greasy filling.
-
Fresh Aromatics: Use fresh minced garlic and finely chopped onions for complex flavors. Avoid skimping on them to enhance the overall deliciousness of your Beefy Melt Burrito.
-
Moist Filling: Don’t neglect the splash of water when adding taco seasoning. It helps retain moisture in your filling, making each bite hearty and satisfying.
-
Warm Tortillas: Warming your flour tortillas beforehand is crucial. It makes them pliable, preventing tears and ensuring all that delicious filling stays wrapped inside.
-
Crispy Texture: For the ultimate crunch, cook the assembled burritos seam-side down first. This seals the filling and gives you that golden, crispy shell.
How to Store and Freeze Beefy Melt Burrito
Fridge: Store leftover Beefy Melt Burritos in an airtight container for up to 3 days. This helps maintain freshness and moisture, ensuring you can enjoy them later.
Freezer: Wrap individual burritos tightly in foil or plastic wrap, then place them in a freezer bag. They can be frozen for up to 3 months, perfect for easy meals anytime!
Reheating: To reheat, unwrap and place in the microwave for 2-3 minutes or in a preheated oven at 350°F for 15-20 minutes. Ensure they're heated through for the best taste experience.
Beefy Melt Burrito Recipe FAQs
How do I choose the right ground beef?
Absolutely! When selecting ground beef for your Beefy Melt Burrito, look for a blend that is 80/20 or 85/15 (meat to fat ratio). This ensures a flavorful yet not overly greasy filling. If you prefer a leaner option, ground turkey can be a great alternative without sacrificing too much flavor.
What’s the best way to store leftover burritos?
Very! Store any leftover Beefy Melt Burritos in an airtight container in the refrigerator for up to 3 days. Ensure they’re completely cooled before sealing to maintain the best texture. For longer storage, wrap the burritos tightly in foil or plastic wrap, then place them in a freezer bag. They can be frozen for up to 3 months, making for quick meal options in a pinch!
Can I freeze assembled burritos?
Definitely! To freeze your Beefy Melt Burritos, start by rolling them up tightly in foil or plastic wrap. Lay them flat in a freezer-safe bag, removing as much air as possible before sealing. Label the bag with the date and type, and they will be good for up to 3 months. When it’s time to enjoy them, simply unwrap and reheat in the microwave or oven!
What should I do if my burrito filling is too dry?
Oh, no problem! If you find your filling a bit too dry, it could be due to overcooking the beef or not adding enough moisture during seasoning. Here’s a quick fix: while mixing everything, add a splash of salsa, broth, or even a bit of water to restore moisture. Stir gently, and you should have a deliciously moist filling ready for your burritos!
Are there any dietary considerations for this recipe?
Yes, absolutely! If you or someone you're serving has dietary restrictions, look out for allergens such as gluten and dairy. For gluten sensitivity, substitute regular tortillas with gluten-free options. If you're avoiding dairy, a dairy-free cheese alternative works wonderfully in place of shredded cheese. Additionally, those who prefer plant-based options can easily swap out the ground beef for more black beans or lentils for a hearty vegetarian twist!
How do I know when the burritos are crispy enough?
Great question! To achieve that perfect crispy texture for your Beefy Melt Burrito, look for a golden-brown coloration on the tortilla. Cook each side for about 2-3 minutes over medium heat, and keep an eye on them to ensure they don't burn. You can gently press them down while cooking for a more even crisp! If they are golden and sound crunchy when gently tapped, you're good to go!
Savor the Flavor: Easy Beefy Melt Burrito Bliss
Ingredients
Equipment
Method
- In a large skillet over medium heat, add ground beef. Cook for about 6-8 minutes until evenly browned.
- Add the chopped onion and minced garlic to the skillet. Sauté for 2-3 minutes until the onion is translucent.
- Drain any excess grease, then sprinkle taco seasoning over the beef mixture. Add a splash of water and simmer for 5 minutes.
- In a large bowl, mix together the rice, black beans, and half of the shredded cheese. Season with salt and pepper.
- Fold the seasoned beef mixture into the rice and beans until well combined.
- Warm the tortillas in the microwave or skillet for about 10-15 seconds.
- Spoon a portion of the filling mixture onto the center of each tortilla. Top with salsa and sour cream.
- Fold in the sides of the tortilla and roll it up tightly.
- In the skillet, place the rolled burritos seam-side down and cook for 2-3 minutes on each side until golden.
- Sprinkle the remaining cheese on top of each burrito and cover the skillet for 1 minute to melt.
- Slice in half if desired, and serve hot with extra salsa, sour cream, and cilantro.


Leave a Reply