As I sat at my kitchen table, savoring the rich, creamy texture of my homemade dessert, I couldn't help but smile at how easy it was to transform a beloved classic into something extraordinary. This Oreo Cheesecake has become a family favorite, and I can see why: it blends the nostalgic crunch of Oreos with velvety cream cheese in a way that feels both indulgent and heartfelt. Whether you're in need of a crowd-pleaser for a special occasion or simply craving a sweet escape from takeout, this recipe offers great flexibility and is freezer-friendly for those busy days when you still want a touch of homemade magic. A lovely drizzle of chocolate ganache tops it all off, creating a treat that's as beautiful as it is delicious. Curious to dive into this delightful, creamy world of flavors? Let’s get started!
Why is this Oreo Cheesecake special?
Decadent, this dessert offers a rich blend of familiar flavors with a smooth creaminess that elevates the humble Oreo to new heights. Easy to prepare, you'll only need basic baking skills to create this masterpiece, making it perfect for both novice and experienced bakers alike. Impressive presentation with a luscious chocolate ganache and optional whipped cream makes it a showstopper at any gathering. Versatile and freezer-friendly, enjoy it whenever the craving strikes or surprise guests with an unforgettable treat. The balanced sweetness and creamy texture are sure to win everyone’s heart—truly a delicious escape from fast food!
Oreo Cheesecake Ingredients
• Everything you need for the perfect dessert awaits!
For the Crust
• 24 Oreo cookies – These are the star of the show, providing that classic crunch and flavor.
• 3 tablespoons unsalted butter, melted – Helps bind the crust together and adds richness.
For the Filling
• 16 oz cream cheese – The creamy base that gives the cheesecake its luscious texture.
• 3 large eggs – Help to set the filling and ensure a smooth consistency.
• 1 cup granulated sugar – Sweetens the cheesecake perfectly without overpowering its flavor.
• ½ cup sour cream – Adds a nice tang and creamy richness to the filling.
• 1 teaspoon vanilla extract – Enhances the dessert’s overall flavor profile.
• ½ teaspoon salt – Balances the sweetness and enhances all the flavors.
• 1 cup chocolate chips – For that decadent chocolate flavor mixed into the cheesecake.
For the Ganache
• ½ cup heavy cream – Creates a silky, dreamy ganache to pour over the cheesecake.
• Whipped cream (for topping, optional) – Adds a light, airy touch on top if desired.
• Halved Oreos (for garnish, optional) – A delightful decorative touch that adds extra crunch and flavor.
With these simple yet essential ingredients, you're well on your way to creating a delightful Oreo Cheesecake that promises to impress!
Step‑by‑Step Instructions for Oreo Cheesecake
Step 1: Preheat and Prepare the Pan
Begin by preheating your oven to 350°F (175°C). While the oven warms, line the bottom of a 7-inch springform pan with parchment paper. To prevent water from leaking during baking, wrap the outside of the pan tightly with heavy-duty aluminum foil. This prep ensures your Oreo Cheesecake stays moist and bakes evenly.
Step 2: Make the Crust
Crush 24 Oreo cookies in a food processor until they resemble fine crumbs. If you don’t have a processor, place them in a plastic bag and smash with a rolling pin. Combine the crumbs with 3 tablespoons of melted unsalted butter, mixing until the texture resembles wet sand. Press this mixture firmly into the bottom and slightly up the sides of the prepared pan. Bake for 8–10 minutes, then set aside before lowering the oven temperature to 325°F (163°C).
Step 3: Prepare the Filling
In a stand mixer or with a hand mixer, beat together 16 oz of cream cheese and 3 large eggs on medium-high speed. Gradually add in 1 cup of granulated sugar, ½ cup of sour cream, 1 teaspoon of vanilla extract, and ½ teaspoon of salt. Continue mixing until the filling is smooth and creamy, scraping down the bowl halfway through. Reduce the speed to low for an additional 1–2 minutes to make sure there are no large air bubbles.
Step 4: Fold in the Oreos
Take a handful of chopped Oreo cookies and gently fold them into the smooth cheesecake batter until evenly distributed. This adds delightful chunks of Oreo throughout your cheesecake, enhancing the flavor and providing texture. Ensure not to overmix; you want to keep that lovely creamy consistency intact.
Step 5: Assemble and Bake
Pour the cheesecake batter into the crust, smoothing the top with a spatula, and tap the pan lightly on the counter to release any trapped air bubbles. Place your springform pan in a larger roasting dish, then carefully pour hot water into the roasting dish until it reaches halfway up the sides of your pan. This water bath ensures a moist baking environment for your Oreo Cheesecake. Bake for about 75 minutes at 325°F (163°C).
Step 6: Cool Gradually
After 75 minutes, turn off the oven and crack the door open with a wooden spoon. Allow the cheesecake to cool in the oven for about an hour. This gradual cooling helps prevent cracks on the surface of your Oreo Cheesecake. Once cool, remove from the water bath and carefully discard the foil.
Step 7: Chill the Cheesecake
Let your cheesecake cool at room temperature for a bit, then loosely cover it and refrigerate for at least four hours, or preferably overnight. This chilling time helps set the creamy filling, enhancing the flavors and making it perfectly sliceable for serving.
Step 8: Make the Ganache
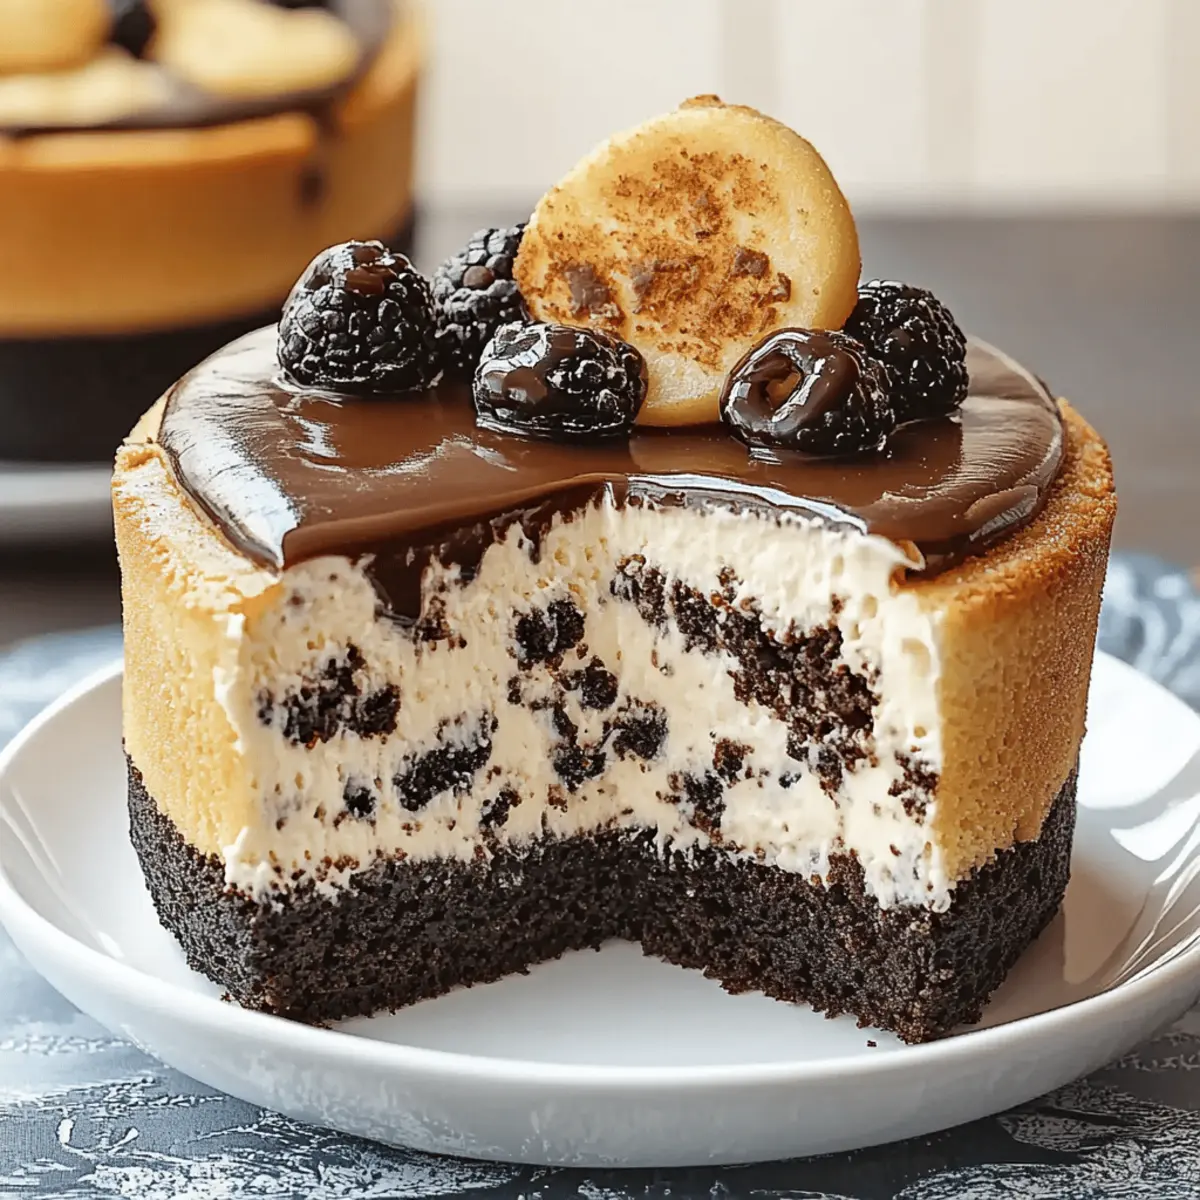
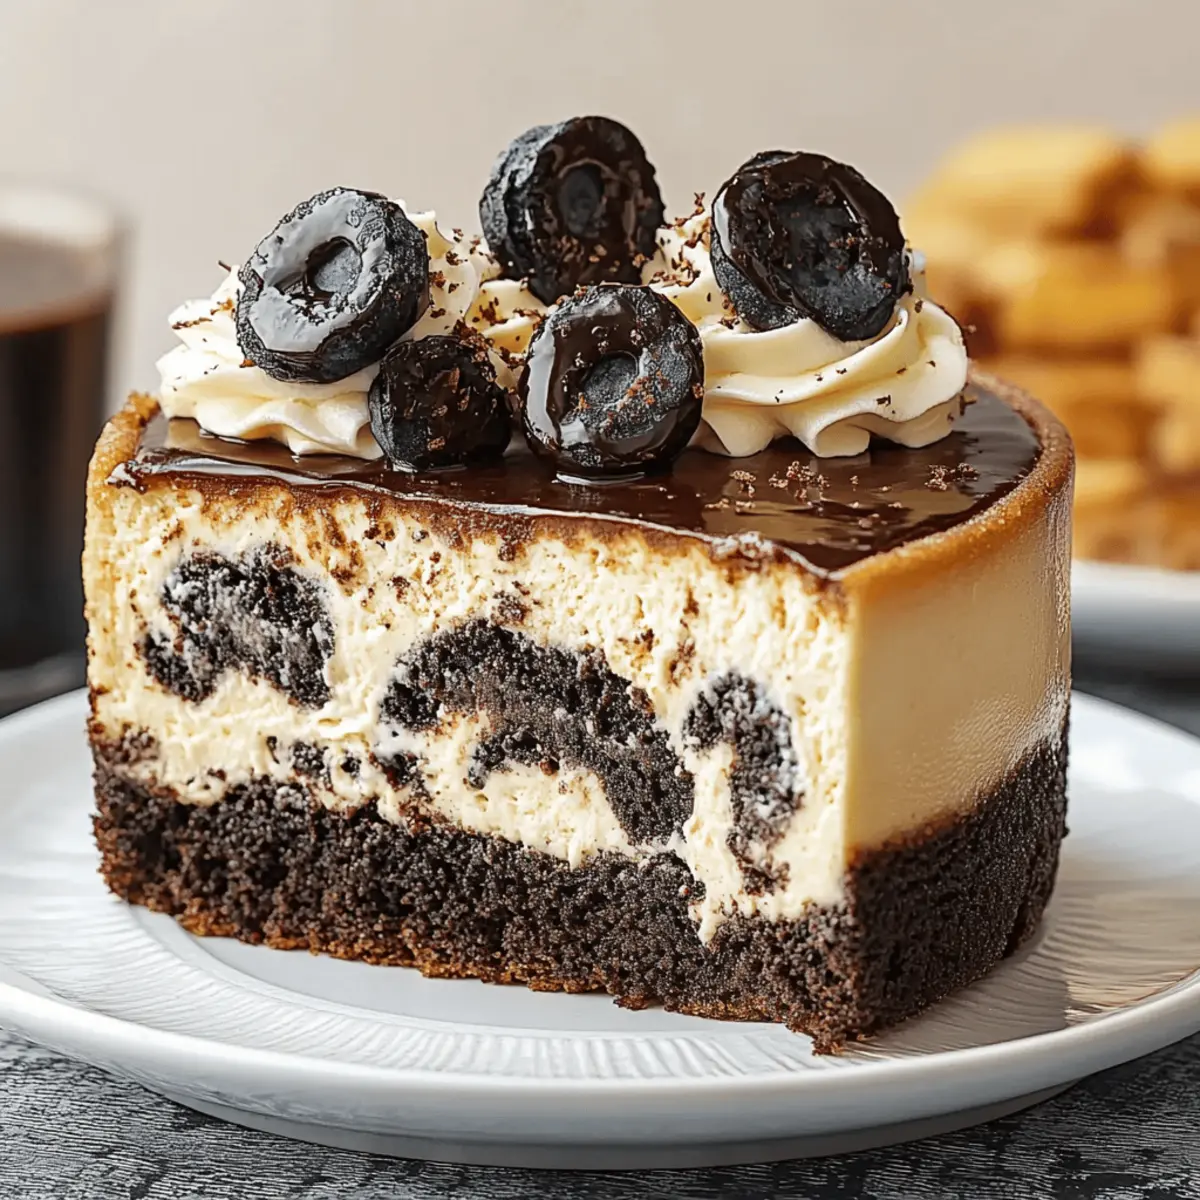
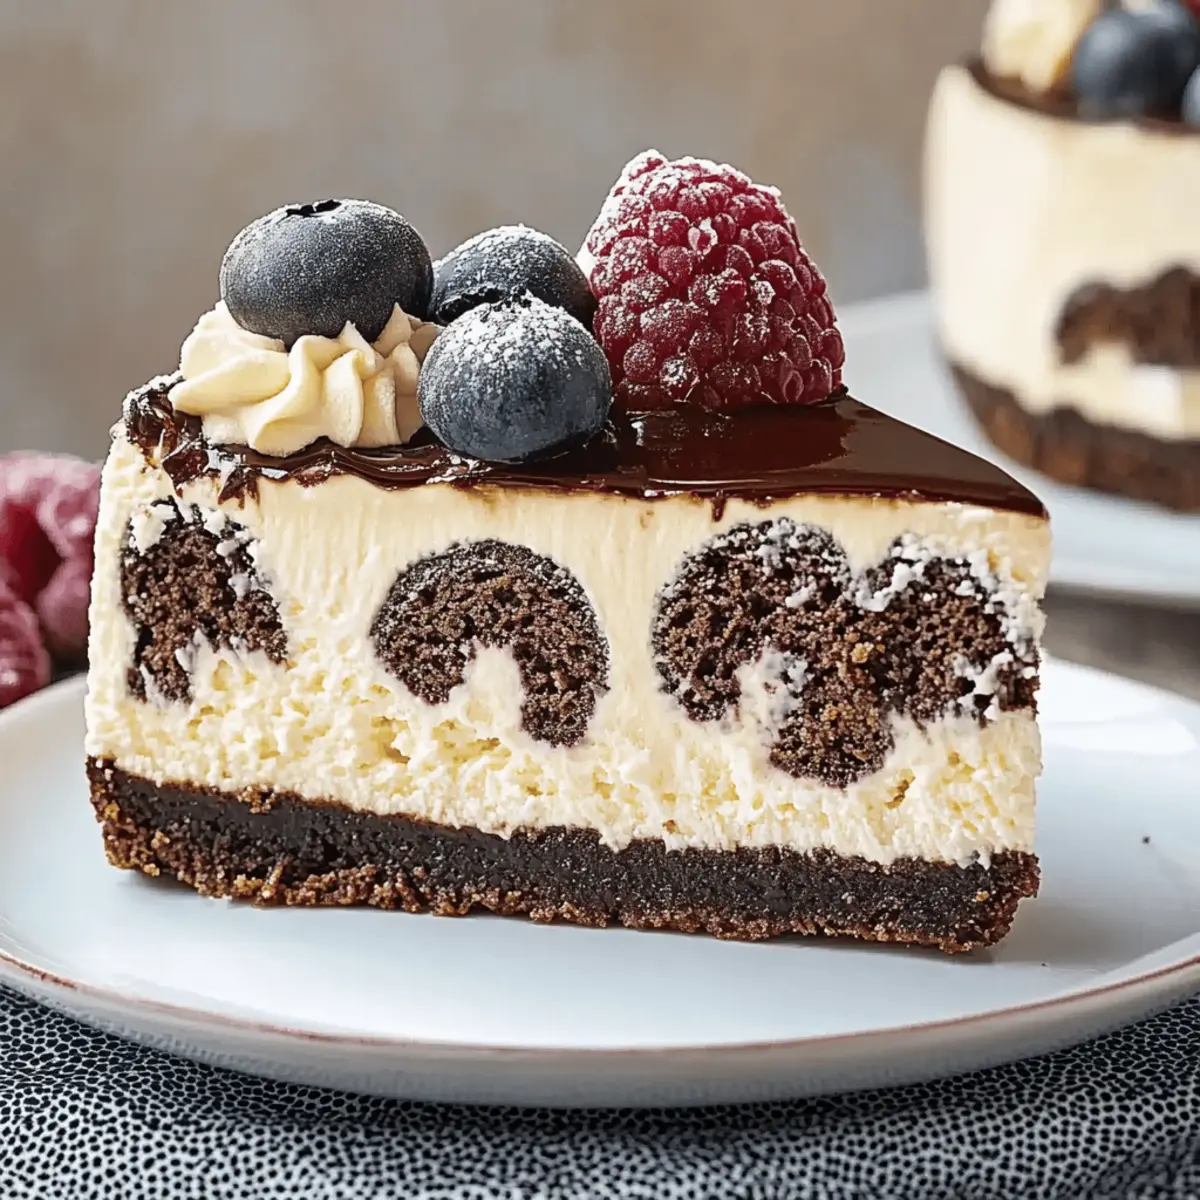
For the chocolate ganache, melt 1 cup of chocolate chips with ½ cup of heavy cream. You can do this using a double boiler or in the microwave in short intervals (about 30 seconds at half power), stirring after each session until smooth and shiny. Wait until your Oreo Cheesecake is fully chilled before pouring the ganache over the top, gently tilting the cheesecake to spread the chocolate evenly.
Step 9: Add Toppings and Serve
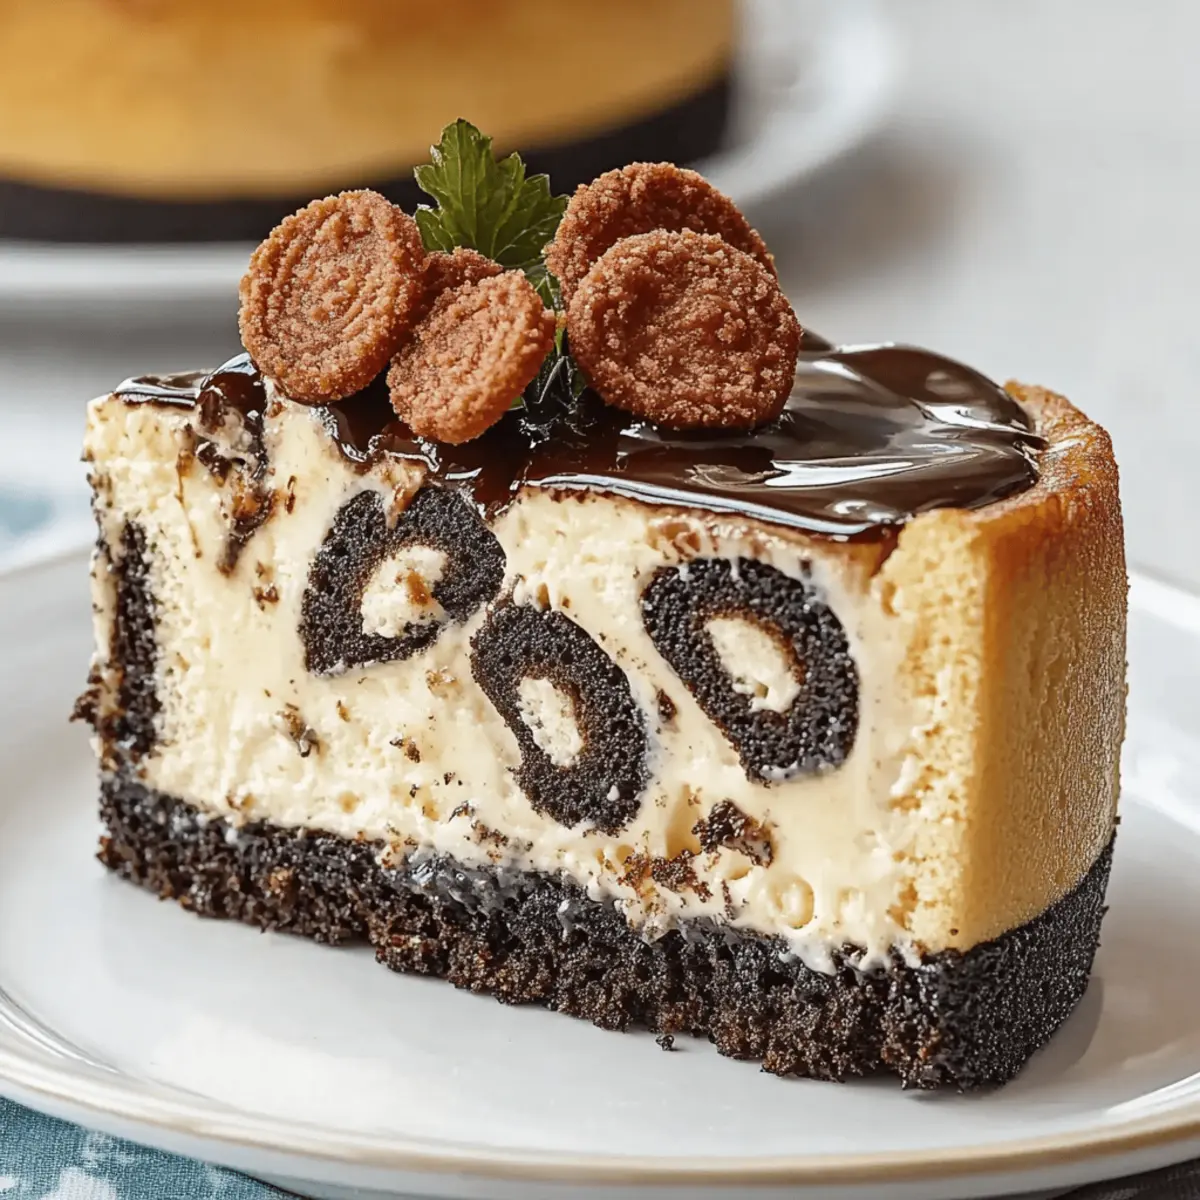
For a decorative touch, top your cheesecake with whipped cream and halved Oreos as desired. When it’s time to slice, dip a thin knife in hot water and wipe it dry between cuts for clean slices. Your delicious Oreo Cheesecake is now ready to serve chilled, bringing smiles to everyone’s faces!
What to Serve with Oreo Cheesecake?
Delight your taste buds with these perfect pairings that harmoniously enhance the rich, creamy experience of your dessert.
-
Fresh Berries: The natural tartness of strawberries or raspberries cuts through the sweetness, adding a refreshing contrast.
-
Vanilla Ice Cream: A scoop of creamy, velvety vanilla ice cream complements the cheesecake’s richness while providing a delightful temperature contrast.
-
Chocolate Drizzle: A simple drizzle of warm chocolate sauce over individual slices elevates the indulgence factor and adds a beautiful touch.
-
Espresso or Coffee: Enjoy a cup of aromatic espresso or coffee alongside your cheesecake. The bold flavors offer a perfect balance to the creamy sweetness.
-
Caramel Sauce: A rich caramel drizzle can add a luxurious touch and enhance the overall flavor profile with its deep sweetness.
-
Whipped Cream Topping: Light and airy, this adds a delightful finish on each slice while balancing the dense cheesecake texture.
-
Mint Leaves: A sprinkle of fresh mint leaves is a simple yet stylish garnish that offers a refreshing hint when paired with each bite.
How to Store and Freeze Oreo Cheesecake
Fridge: Keep your Oreo Cheesecake tightly covered in the refrigerator for up to 5 days. This helps preserve its rich creaminess while preventing any unwanted odors from affecting its flavor.
Freezer: Store wrapped slices of cheesecake individually in plastic wrap, then place them in an airtight container. It can be frozen for up to 3 months, making it easy to enjoy a slice of Oreo Cheesecake whenever the craving strikes!
Thawing: For best results, transfer the cheesecake from the freezer to the fridge and let it thaw overnight before serving. This gentle method ensures the texture remains smooth and delicious.
Serving After Freezing: Once thawed, add a fresh drizzle of chocolate ganache to revive the flavor. Your Oreo Cheesecake will taste as delightful as the day it was made!
Make Ahead Options
These Oreo Cheesecake preparations are perfect for busy home cooks looking to save time! You can make the cheesecake crust up to 24 hours in advance by preparing and baking it, then wrapping it tightly in plastic wrap once cooled to maintain its freshness. The filling can be prepared and stored separately in the refrigerator for up to 3 days. When you're ready to complete your dessert, simply pour the filling into the prepared crust and bake as directed. After baking, remember to cool the cheesecake in the oven for that perfectly smooth finish. This make-ahead approach ensures your Oreo Cheesecake remains just as delicious while providing peace of mind during hectic days!
Expert Tips for Oreo Cheesecake
Crust Consistency: Ensure your crushed Oreos mixed with melted butter resembles wet sand. This texture helps create a firm base that holds up well once baked.
Avoid Overmixing: When combining the filling ingredients, be careful not to overmix, as this can incorporate too much air, leading to cracks in your cheesecake.
Water Bath Technique: Always use a water bath for baking your Oreo Cheesecake. It prevents uneven baking and helps maintain that creamy texture.
Cooling Slowly: After baking, let your cheesecake cool gradually in the oven. This step is essential to avoid cracks on the surface and preserves the smooth appearance.
Chill Time Matters: Be patient! Refrigerating your cheesecake for at least four hours (or overnight) allows the flavors to meld beautifully and ensures perfect slicing.
Slice with Care: Use a thin knife dipped in hot water for clean cuts when serving your Oreo Cheesecake. This method gives each slice a professional finish, making it look as delightful as it tastes.
Oreo Cheesecake Variations & Substitutions
Feel free to explore these exciting twists and turns that can personalize your dessert experience!
- Gluten-Free: Substitute Oreo cookies with gluten-free chocolate sandwich cookies for a delightful alternative that everyone can enjoy.
- Sugar-Free: Use sugar-free cookies and a sugar substitute like erythritol for a guilt-free treat that’s just as satisfying.
- Chocolate Lovers: Add an extra layer of melted chocolate or chocolate syrup on top of the cheesecake before the ganache for an indulgent boost.
- Fruit-Infused: Incorporate fresh strawberries or raspberries into the filling for a vibrant flavor contrast that brightens each bite.
- Nutty Crunch: Fold in some chopped nuts like pecans or almonds to the crust for an added texture and nutty flavor that compliments the creamy filling.
- Spicy Kick: Add a pinch of cayenne or chili powder to the filling for a surprising spicy twist that beautifully contrasts with the sweet cheesecake.
- Dairy-Free: Substitute cream cheese with a dairy-free alternative and coconut cream instead of heavy cream for a rich, non-dairy version.
- Enhanced Vanilla: Boost the flavor by adding an extra teaspoon of vanilla extract in the filling, bringing warmth and depth to each mouthful.
Enjoy experimenting with these variations, and let your creativity lead the way to your very own signature Oreo Cheesecake! If you’re searching for more delightful cheesecake options, why not try a refreshing lemon cheesecake? It’s a tasty way to keep things exciting when the sweet cravings hit!
Oreo Cheesecake Recipe FAQs
How do I select the right Oreos?
Absolutely! When picking Oreos for your cheesecake, look for cookies that are fresh and intact. Check the package for expiration dates, and avoid any with broken cookies or dark spots indicating age. Picking the freshest cookies enhances the overall flavor and texture of your cheesecake.
What is the best way to store my Oreo Cheesecake?
Very important! Store your Oreo Cheesecake tightly covered in the refrigerator, where it will keep fresh for about 5 days. This method preserves the cake's creamy texture and prevents any unwanted odors from sneaking in. Make sure to use a cake carrier or wrap it in plastic wrap for optimal freshness.
Can I freeze leftover Oreo Cheesecake?
You bet! To freeze slices of your Oreo Cheesecake, first wrap each slice tightly in plastic wrap. Then, place them in an airtight container to prevent freezer burn. You can keep your cheesecake in the freezer for up to 3 months. When cravings hit, simply transfer a slice to the fridge to thaw overnight, ensuring it stays deliciously creamy.
Why is my Oreo Cheesecake cracking?
Don’t worry, it happens! If your cheesecake cracks, it’s usually due to overmixing or a sudden change in temperature. To prevent cracks, avoid beating the filling too vigorously and cool it gradually in the oven by leaving the door ajar after baking. This gentle approach helps maintain a smooth surface.
Can pets have Oreo Cheesecake?
Absolutely not! While your pet may be hoping for a taste, the sugar and cream cheese aren’t safe for dogs and cats. For a pet-friendly option, consider making a simple banana or pumpkin puree treat, keeping your furry friend safe while you enjoy this decadent Oreo Cheesecake!
What should I do if I can’t find sour cream?
No problem at all! If you’re out of sour cream, you can substitute it with Greek yogurt in equal proportions. The slight tang and creaminess of Greek yogurt will still give you that rich, delicious filling without compromising flavor or texture. I often do this when I'm out of sour cream and have always been pleased with the results!
Decadent Oreo Cheesecake That's Sure to Wow Your Guests
Ingredients
Equipment
Method
- Preheat your oven to 350°F (175°C) and prepare the springform pan by lining the bottom with parchment paper and wrapping the outside with foil.
- Crush 24 Oreo cookies in a food processor or by hand and mix with melted butter until it resembles wet sand. Press into the bottom of the pan and bake for 8-10 minutes.
- In a stand mixer, beat cream cheese and eggs on medium-high, gradually adding sugar, sour cream, vanilla, and salt until smooth.
- Gently fold in chopped Oreo cookies into the cheesecake batter.
- Pour the cheesecake batter into the crust and smooth the top. Place the springform pan in a roasting dish and add hot water halfway up the sides.
- Bake for about 75 minutes at 325°F (163°C). After baking, turn off the oven and let the cheesecake cool gradually for about an hour.
- Cool the cheesecake at room temperature, then refrigerate for at least four hours, preferably overnight.
- Melt chocolate chips with heavy cream and pour over the chilled cheesecake. Add toppings as desired.
- Use a hot knife to slice and serve the cheesecake.


Leave a Reply