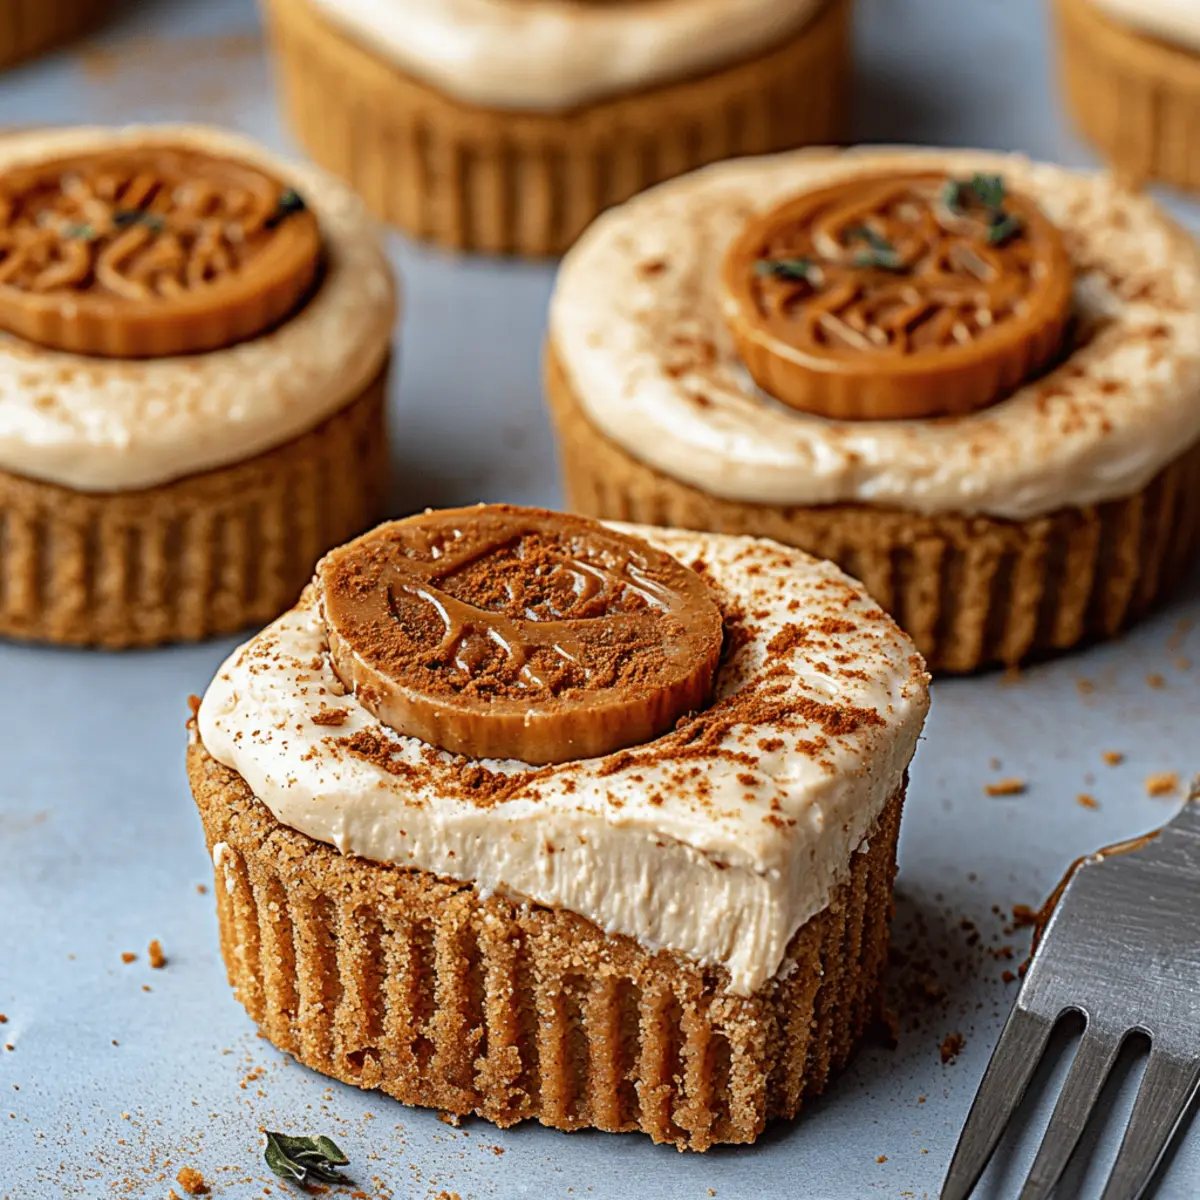
As I opened the pantry door, the sweet aroma of Biscoff cookies lingered in the air, reminding me of cozy afternoons spent in my kitchen. This inspired me to whip up a dessert that captures that comforting essence: No Bake Mini Biscoff Cheesecakes. These little creations are not only a feast for the senses but a breeze to prepare, making them an ideal choice for busy evenings when you crave something special without the fuss. With their creamy filling and buttery cookie crust, they strike the perfect balance between indulgence and simplicity, ensuring everyone at your table will be reaching for seconds. Ready to impress your friends and family with a delightful treat that requires no baking? Let’s get started on these irresistible mini cheesecakes!
Why Are These Cheesecakes So Irresistible?
Decadent Flavor: The combination of creamy cheese and Biscoff cookie butter creates a rich, heavenly flavor that no one can resist.
Breeze to Prepare: With just 20 minutes of prep, these No Bake Mini Biscoff Cheesecakes are a hassle-free way to end your day on a sweet note.
Crowd-Pleasing Dessert: Perfect for gatherings, these cheesecakes will have your friends begging for the recipe.
Versatile Toppings: You can personalize each dessert with drizzles of warm Biscoff or a dollop of whipped cream to elevate their charm.
No Oven Required: Say goodbye to complicated baking! These cheesecakes set in the fridge, saving you time and energy in the kitchen.
Transform your dessert game with these delightful bites that truly embody what it means to indulge while enjoying comforting homemade treats.
No Bake Mini Biscoff Cheesecakes Ingredients
Get ready to create a heavenly dessert!
For the Crust
• Biscoff cookie crumbs – grab about 20 cookies and crush them into crumbs for a rich, flavorful base.
• Unsalted butter – melted butter helps bind the crumbs together for a perfect crust.
• Brown sugar (optional) – adds extra richness and depth to your crust.
For the Filling
• Cream cheese – ensure it’s softened to create a smooth and creamy filling.
• Biscoff cookie butter – smooth variety for that deliciously sweet and spicy flavor.
• Powdered sugar – sweetens the mix and gives the cheesecake a creamy texture.
• Vanilla extract – a splash of vanilla enhances the overall flavor of the dessert.
• Heavy whipping cream – cold cream is whipped to add lightness and fluffiness to the filling.
For the Topping
• Biscoff cookie butter – melted slightly for drizzling adds an irresistibly delicious layer on top.
• Extra Biscoff cookie crumbs – for garnish, bringing a bit of crunch and visual appeal.
• Whipped cream (optional) – a light dollop serves as an airy companion to the rich cheesecakes.
Dive into this delightful dessert adventure with your No Bake Mini Biscoff Cheesecakes and delight in every creamy, cookie-infused bite!
Step‑by‑Step Instructions for No Bake Mini Biscoff Cheesecakes
Step 1: Prepare the Muffin Pan
Line a muffin pan with cupcake liners or opt for silicone molds, which will make removal easy. Ensure you have everything ready to avoid any delays when assembling your No Bake Mini Biscoff Cheesecakes. Prepping the pan first sets the stage for a smooth preparation process, so it’s all about efficiency from here!
Step 2: Make the Crust
In a medium bowl, mix together 1 ½ cups of Biscoff cookie crumbs, 5 tablespoons of melted unsalted butter, and 1 tablespoon of brown sugar, if using. Stir until the mixture takes on a texture reminiscent of wet sand, ensuring all crumbs are coated. This will be the delightful base of your cheesecakes, providing a rich flavor that sets the tone for the treat.
Step 3: Form the Crusts
Scoop about 1 ½ tablespoons of the crumb mixture into each muffin liner. Use the back of a spoon or a small cup to press the crumbs down firmly, creating a compact crust that holds its shape. Once you’ve completed this for all compartments, place the tray in the fridge while you prepare the cheesecake filling—this will help the crust set nicely.
Step 4: Beat the Cream Cheese
In a large mixing bowl, add 8 ounces of softened cream cheese and beat it with an electric mixer until it’s smooth and creamy, usually about 2 minutes. This foundational step ensures a velvety filling, essential for making your No Bake Mini Biscoff Cheesecakes truly irresistible.
Step 5: Combine Filling Ingredients
Add ½ cup of Biscoff cookie butter, ½ cup of powdered sugar, and 1 teaspoon of vanilla extract to the whipped cream cheese. Beat the mixture until fully combined and fluffy, about 1-2 minutes. This combination brings a sweet and nuanced flavor to the filling, creating a rich taste that pairs beautifully with the cookie crust.
Step 6: Whip the Heavy Cream
In a separate bowl, pour 1 cup of cold heavy whipping cream and whip it with a hand mixer until stiff peaks begin to form—this should take 3 to 5 minutes. The whipped cream adds the light and airy texture to your filling, ensuring every bite of your No Bake Mini Biscoff Cheesecakes is delightful and fluffy.
Step 7: Fold in the Whipped Cream
Gently fold the whipped cream into the Biscoff cheesecake mixture using a spatula. Take your time and continue folding until the mixture is smooth and well blended. This careful incorporation is key to achieving that luscious texture that makes these cheesecakes so special.
Step 8: Fill the Crusts
Spoon or pipe the cheesecake filling over the cold crusts in the muffin tray. Smooth the tops using a spoon or offset spatula to create an even surface. This is where your No Bake Mini Biscoff Cheesecakes start to take shape, so be sure to fill each liner generously to showcase the decadent filling.
Step 9: Chill the Cheesecakes
Cover the muffin tray with plastic wrap and refrigerate the cheesecakes for at least 4 hours, or overnight for the best results. The chilling time allows the flavors to meld and ensures the filling sets properly, creating the perfect texture for serving.
Step 10: Warm the Cookie Butter
Just before serving, gently warm the extra ½ cup of Biscoff cookie butter in the microwave for about 10–15 seconds until it becomes pourable. This step will create a luscious drizzle that enhances the cheesecakes, making them even more delectable and visually appealing.
Step 11: Drizzle and Garnish
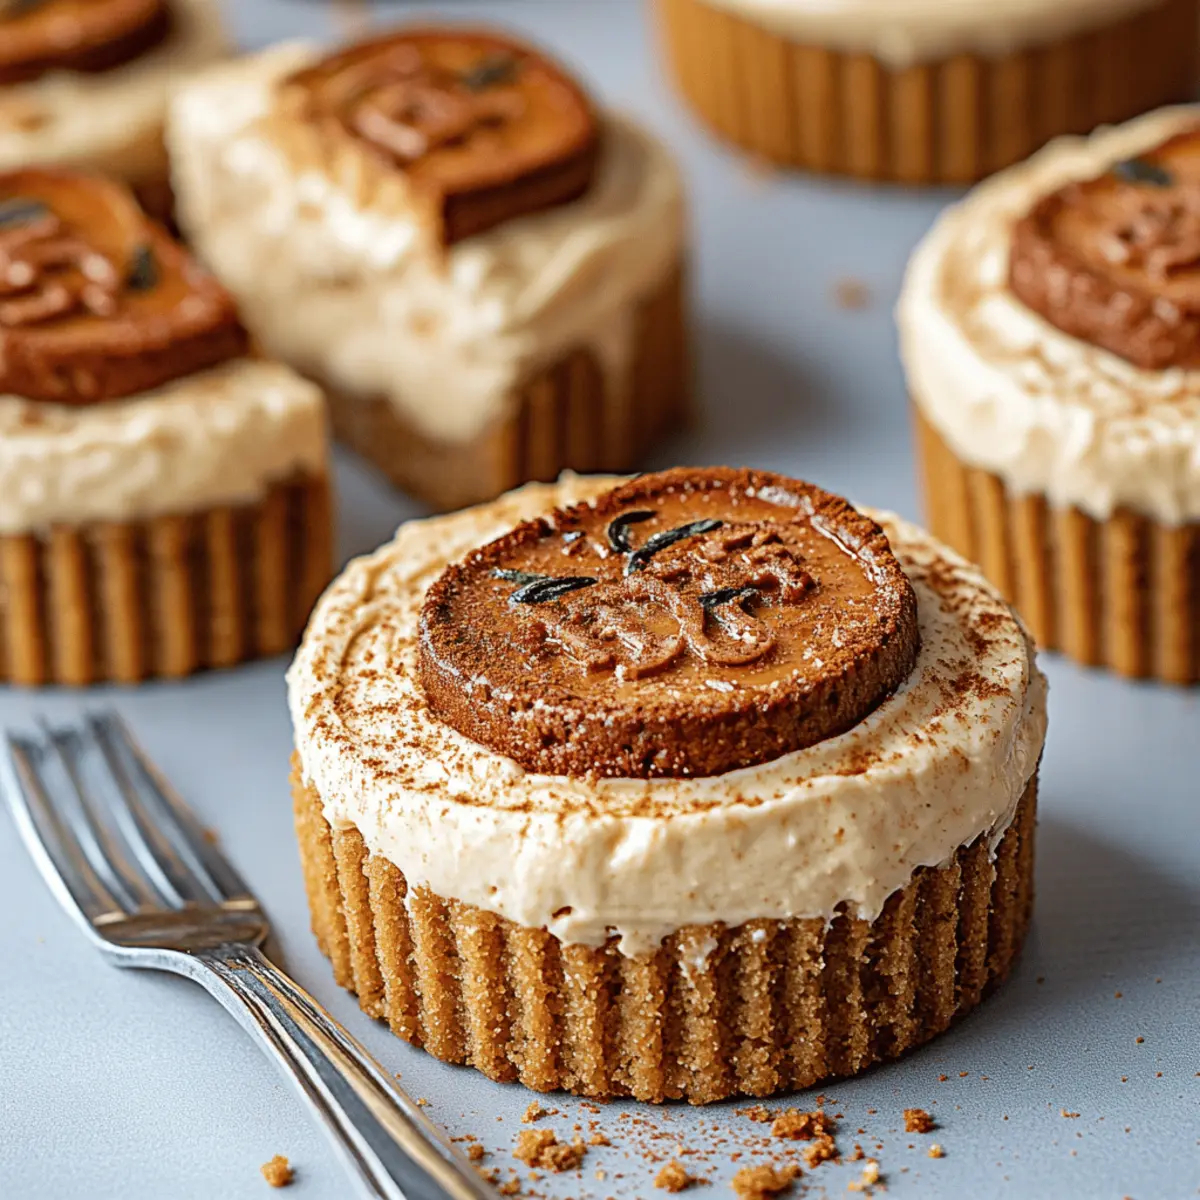
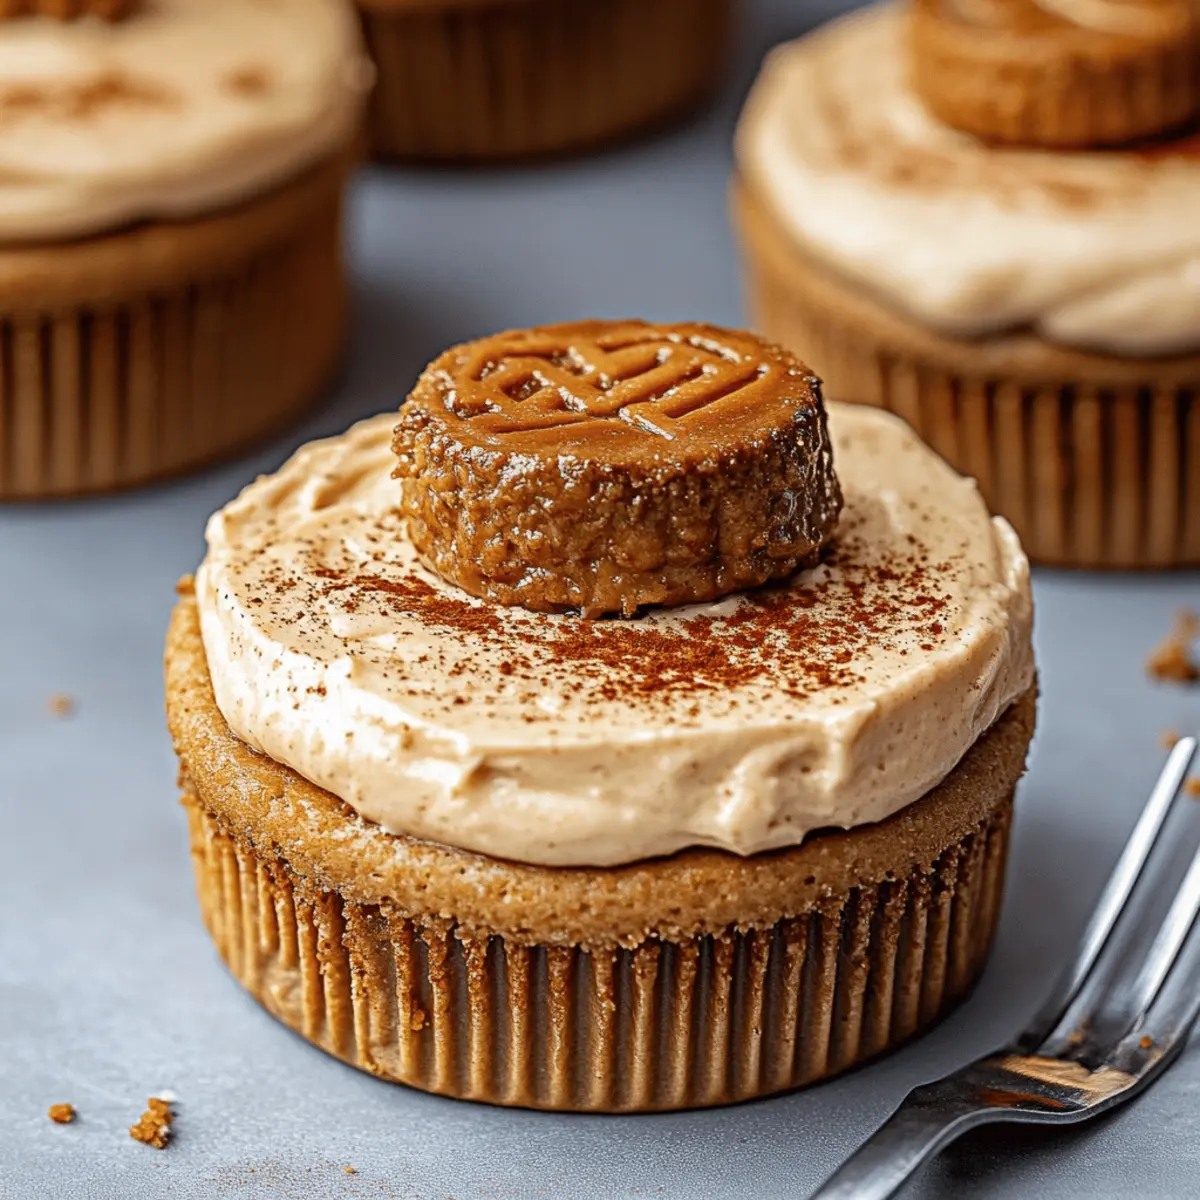
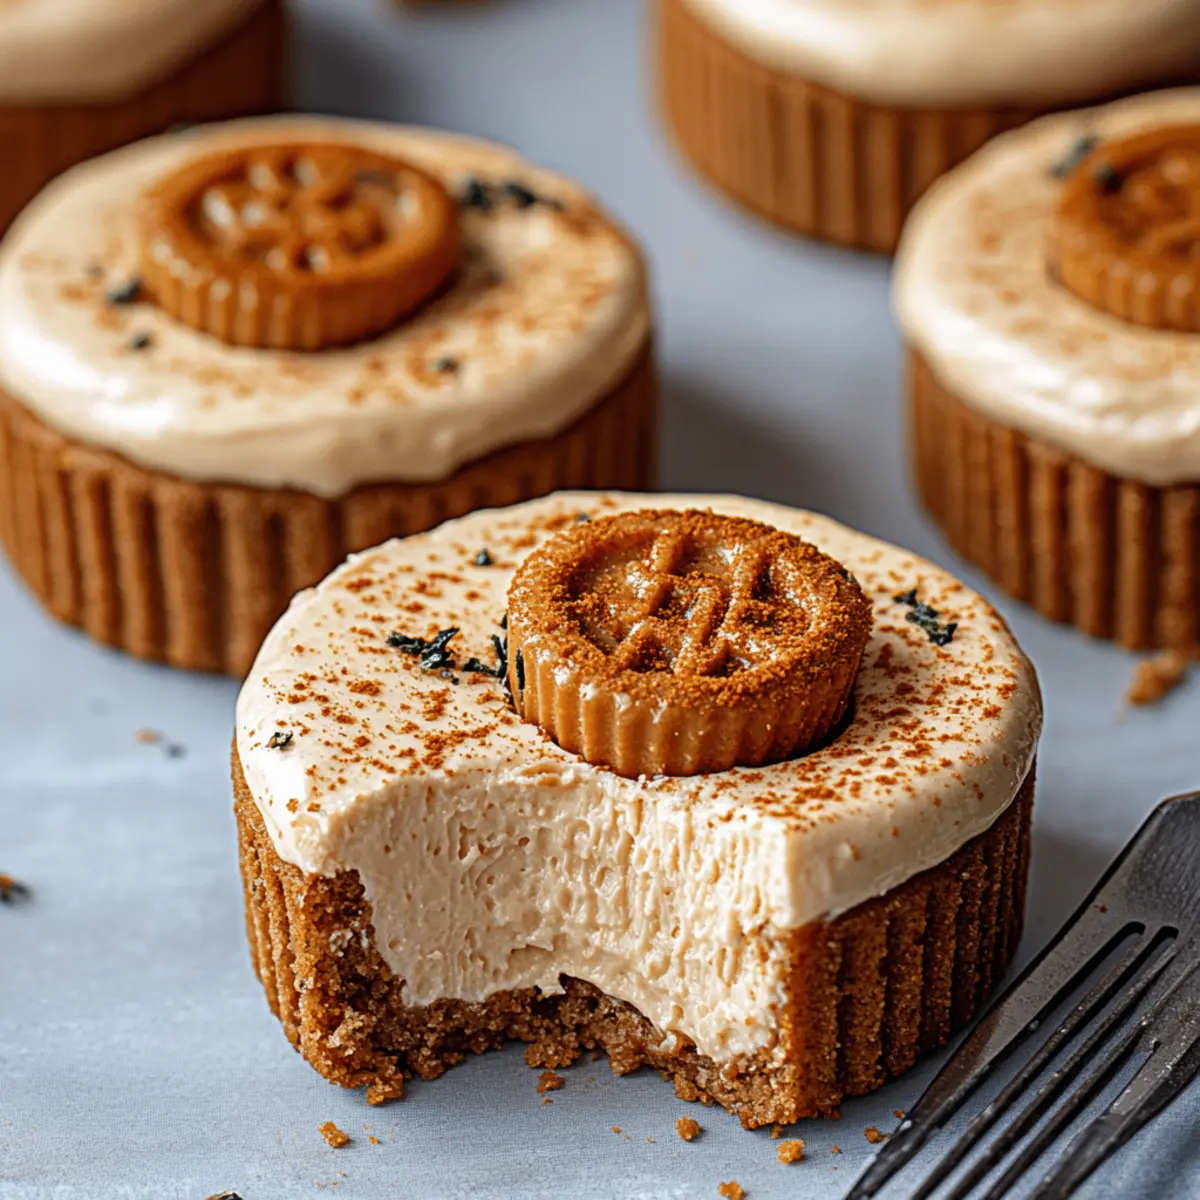
Drizzle or spread the warmed Biscoff cookie butter over each mini cheesecake. Garnish them with extra crushed Biscoff cookies and a dollop of whipped cream if desired. This final touch not only adds flavor but also makes each No Bake Mini Biscoff Cheesecake look enticing and festive for your guests.
Step 12: Serve and Enjoy
Carefully remove the cheesecakes from the muffin pan and serve them chilled. Each bite of your No Bake Mini Biscoff Cheesecakes will be a delightful explosion of creamy sweetness and cookie goodness, inviting everyone to savor the rich flavors and textures you’ve crafted in your kitchen!
Make Ahead Options
These No Bake Mini Biscoff Cheesecakes are perfect for meal prep enthusiasts! You can prepare the crust and filling up to 24 hours in advance, ensuring that you save time on busy days. To do this, simply make the crust and fill your muffin pan as directed, then cover and refrigerate. When you're ready to serve, just whip the cream and fold it into the cheesecake mixture, fill the crusts, and let them chill for at least 4 hours or overnight for best results. To maintain their quality, keep the cheesecakes covered and store them in the refrigerator. When it's time to impress your guests, drizzle the warmed Biscoff cookie butter over each cheesecake, and enjoy restaurant-quality results with minimal effort!
How to Store and Freeze No Bake Mini Biscoff Cheesecakes
Fridge: Store leftover No Bake Mini Biscoff Cheesecakes in an airtight container in the fridge for up to 3 days. This helps maintain their creamy texture and delicious flavor.
Freezer: For longer storage, these cheesecakes can be frozen for up to 2 months. Just make sure to wrap each one tightly in plastic wrap and place them in a freezer-safe container.
Thawing: When ready to enjoy, thaw the frozen cheesecakes in the fridge for several hours or overnight. This allows them to regain their lovely texture without becoming overly soft.
Reheating: There’s no need to reheat these cheesecakes; serve them chilled for the best taste experience. Enjoy every delightful bite!
No Bake Mini Biscoff Cheesecakes Variations
Feel free to let your creativity shine and customize these delightful cheesecakes to suit your taste and dietary preferences!
- Dairy-Free: Substitute the cream cheese with vegan cream cheese and use coconut cream instead of heavy whipping cream for a plant-based delight.
- Nutty Twist: Add finely chopped nuts to the crust for an extra crunchy texture and nutty flavor that complements the Biscoff.
- Chocolate Lovers: Drizzle melted dark chocolate over the top for a rich contrast that will wow your taste buds. Each bite becomes a chocolate dream, perfect for those indulgent moments.
- Fruit Flavors: Incorporate fresh berries or pureed fruits into the filling for a fruity burst. Strawberries or raspberries pair wonderfully, adding a refreshing tanginess.
- Spicy Kick: Add a pinch of cinnamon or a dash of cayenne pepper to the filling for a surprising warmth that complements the sweetness beautifully.
- Caramel Drizzle: Swap out the Biscoff cookie butter for a warm caramel sauce to create a different flavor profile that’s equally irresistible.
- Mini Size Changes: Use a tart pan instead of muffin liners for a larger cheesecake that serves more people while maintaining that lovely creamy texture.
- Frozen Treat: Pop these cheesecakes into the freezer for a cool summer treat. They’ll have a completely different texture that’s enjoyable in the heat!
Explore these variations and make this no bake gem truly your own! For more delightful recipes, check out my Expert Tips for No Bake Mini Biscoff Cheesecakes or discover how to Store and Freeze No Bake Mini Biscoff Cheesecakes.
What to Serve with No Bake Mini Biscoff Cheesecakes
Indulging in these mini cheesecakes is just the beginning; pairing them with delightful side dishes and drinks creates a full experience for your senses.
-
Fresh Berries: Juicy strawberries or raspberries provide a refreshing contrast to the rich cheesecakes, balancing sweetness with a tart zing. Their vibrant colors also make your dessert presentation pop!
-
Chocolate Drizzle: A simple melted chocolate drizzle adds a luscious touch, enhancing the indulgence of the Biscoff flavor. This extra layer of richness is sure to make every bite even more heavenly.
-
Mint Chocolate Chip Ice Cream: The coolness and flavor of mint bring a refreshing bite that cuts through the creamy cheesecakes, making for a fantastic flavor combination. This pairing adds a delightful twist that your guests will love.
-
Coffee or Espresso: A steaming cup of coffee or a shot of espresso enhances the flavors of the cheesecakes, delivering a cozy, warm experience. The slight bitterness of coffee perfectly complements the sweet and creamy bites.
-
Caramel Sauce: Drizzling warm caramel sauce over your mini cheesecakes adds a sweet, gooey element that enhances their richness, capturing everyone's attention with each delicious spoonful.
-
Whipped Cream Topping: Light and airy whipped cream is the perfect companion on the side, allowing your guests to customize their cheesecake experience. The contrasting texture and flavor elevate the dessert, making it even more inviting.
-
Chocolate-Covered Pretzels: A sweet and salty snack that adds a delightful crunch. The subtle saltiness of the pretzels contrasts beautifully with the rich sweetness of the mini cheesecakes, bringing a playful texture to your dessert spread.
Elevate your dining experience and make every bite an unforgettable treat by pairing these suggestions with your No Bake Mini Biscoff Cheesecakes!
Expert Tips for No Bake Mini Biscoff Cheesecakes
-
Choose Quality Ingredients: Using high-quality Biscoff cookie butter and cream cheese boosts flavor and texture, elevating your cheesecakes from good to outstanding.
-
Don’t Skip Chilling: Allow your No Bake Mini Biscoff Cheesecakes to chill for at least 4 hours. This step is crucial for setting and enhancing the flavor.
-
Folding Techniques: Be gentle when folding in whipped cream. Overmixing can deflate your filling, leading to a less airy texture.
-
Crust Consistency: Ensure your crust mixture resembles wet sand for the best structure. If it’s too dry, add a bit more melted butter.
-
Warm Cookie Butter: Warm your drizzling cookie butter just enough to become pourable. This makes it easy to spread and creates a beautiful finish.
-
Adapt Toppings: Feel free to get creative! Mix in your favorite toppings like chocolate shavings or fresh fruit to customize your No Bake Mini Biscoff Cheesecakes.
No Bake Mini Biscoff Cheesecakes Recipe FAQs
What should I look for when selecting Biscoff cookies?
Absolutely! When choosing Biscoff cookies, look for ones that are fresh and intact—no dark spots or signs of staleness. The cookies should have a crisp texture that will crumble beautifully into crumbs, creating a perfect crust for your No Bake Mini Biscoff Cheesecakes.
How do I store leftover cheesecakes?
No problem! You can store leftover No Bake Mini Biscoff Cheesecakes in an airtight container in the fridge for up to 3 days. This keeps them fresh and maintains their creamy texture. Just be sure to let them chill thoroughly before storing, so they stay firm and delicious!
Can I freeze these cheesecakes? If so, how?
Very much so! To freeze No Bake Mini Biscoff Cheesecakes, wrap each cheesecake tightly in plastic wrap, then place them in a freezer-safe container. They can be frozen for up to 2 months. When you’re ready to enjoy them, simply thaw them in the fridge for several hours or overnight to maintain their delightful texture.
How can I prevent my whipped cream from deflating?
Gently does it! When folding whipped cream into the cheesecake mixture, use a spatula and employ a gentle folding motion—this keeps the air in and ensures a light, fluffy texture. Overmixing can lead to deflation, resulting in a denser filling.
Are there any dietary considerations I should be aware of?
Indeed! If you’re serving these No Bake Mini Biscoff Cheesecakes to guests with dietary restrictions, keep in mind that they contain gluten from the cookies. There’s also dairy from the cream cheese and heavy cream. For allergies, always check the ingredients in the Biscoff cookie butter, as it may contain traces of nuts. Consider using gluten-free cookies for a variation that caters to gluten sensitivities.
Do I need to serve these cheesecakes immediately?
Not at all! These mini cheesecakes actually taste best when chilled for at least 4 hours or overnight. This allows the flavors to meld beautifully, making each bite of your No Bake Mini Biscoff Cheesecakes a delightful experience. Enjoy making them ahead of time for gatherings!
Delightful No Bake Mini Biscoff Cheesecakes in Minutes
Ingredients
Equipment
Method
- Line a muffin pan with cupcake liners or use silicone molds.
- In a medium bowl, mix together Biscoff cookie crumbs, melted butter, and brown sugar. Stir until resembling wet sand.
- Scoop about 1.5 tablespoons of the crumb mixture into each muffin liner and press down firmly.
- In a large mixing bowl, beat softened cream cheese until smooth and creamy.
- Add Biscoff cookie butter, powdered sugar, and vanilla extract. Beat until fluffy.
- In a separate bowl, whip heavy cream until stiff peaks form.
- Gently fold the whipped cream into the cheesecake mixture until smooth.
- Spoon or pipe the cheesecake filling over the cold crusts in the muffin tray.
- Cover the muffin tray and refrigerate for at least 4 hours or overnight.
- Warm the extra Biscoff cookie butter in the microwave until pourable.
- Drizzle the warmed Biscoff cookie butter over each mini cheesecake and garnish with extra crumbs and whipped cream if desired.
- Carefully remove cheesecakes from the muffin pan and serve chilled.


Leave a Reply