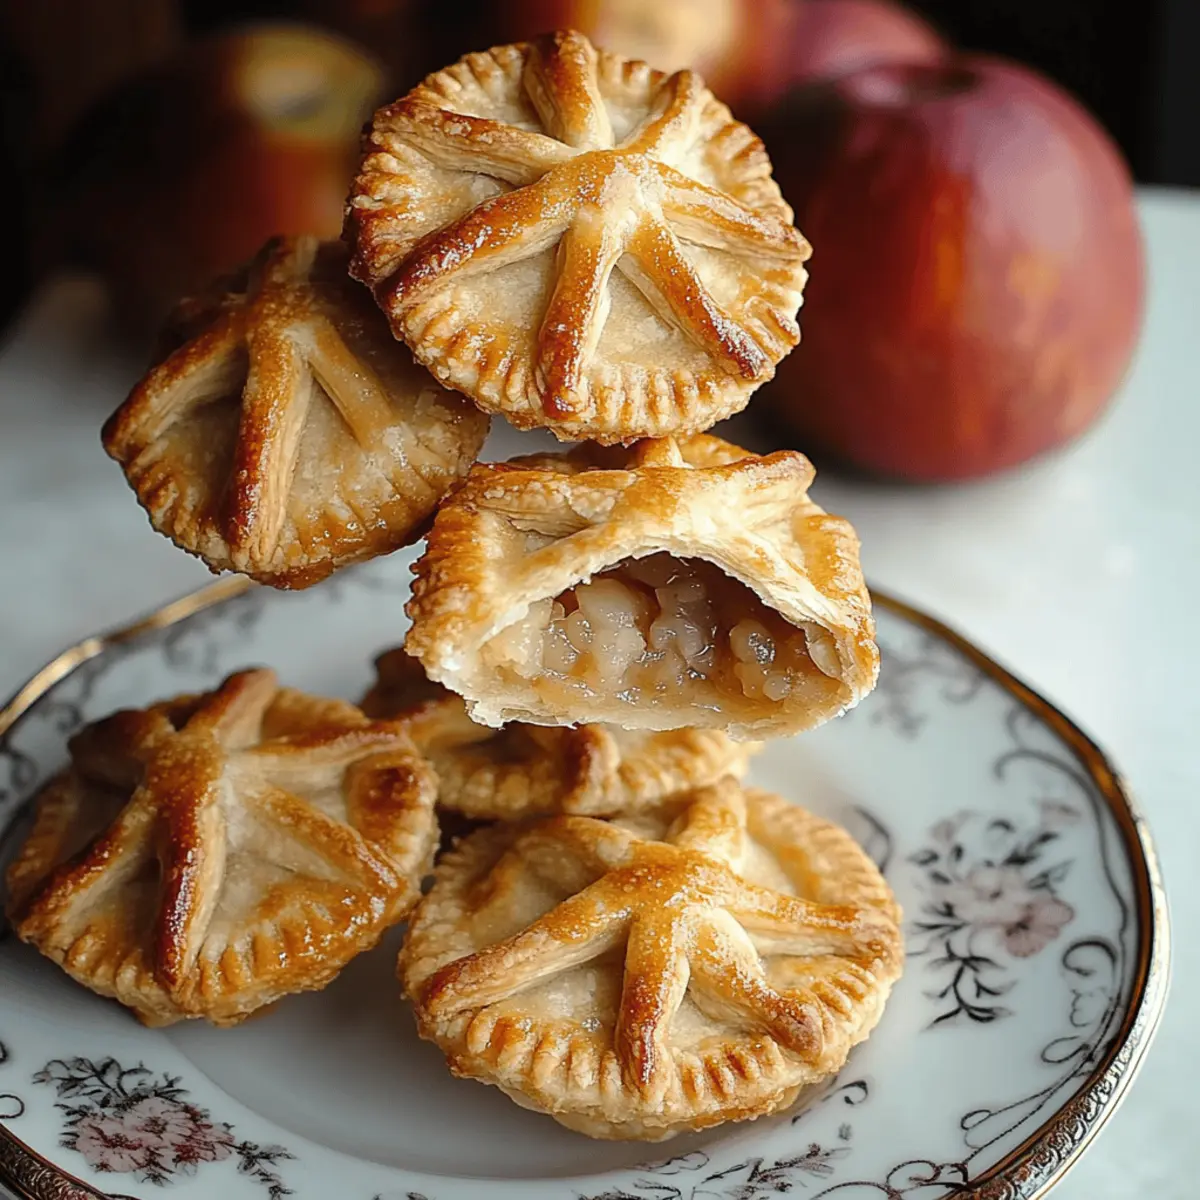
As I pulled the warm mini apple pies from the oven, the sweet aroma of cinnamon and nutmeg wrapped around me like a comforting hug. There's something undeniably magical about baking that brings back countless childhood memories, and these Mini Apple Pies embody that nostalgia perfectly. With just 15 minutes of prep and a mere 25 minutes in the oven, you can whip up a delightful dessert that’s not only impressive but also a crowd-pleaser. These little gems are packed with juicy apple filling and have a buttery crust that’s irresistible. Plus, they're perfect for sharing—or for sneaking a few bites all to yourself! Are you ready to indulge in some homemade goodness that will make your kitchen feel like a cozy bakery? Let’s dive into this recipe together!
Why are Mini Apple Pies so special?
Warm, Inviting Aroma: Your kitchen will fill with the comforting scent of baked apples and spices, instantly lifting everyone’s spirits.
Effortless Preparation: With just 15 minutes of prep time, these mini delights can be ready to bake, making them a quick dessert option for any occasion.
Perfectly Portion-Controlled: These mini servings are an ideal way to indulge, offering just the right amount of sweetness without overdoing it.
Versatile Treat: Whether enjoyed warm on their own or topped with a scoop of vanilla ice cream, these pies can easily adapt to your personal taste.
Crowd-Pleasing Goodness: Great for gatherings, parties, or just a cozy night in, these pies will surely impress your guests and spark conversations!
Don't forget to check out my tips on serving suggestions and storage tips to get the most out of your delicious treats!
Mini Apple Pie Ingredients
For the Apple Filling
• Diced apples – Use a mix of tart and sweet apples for a balanced flavor.
• Brown sugar – This adds depth and a caramel-like sweetness to the filling.
• Ground cinnamon – A must-have spice that amplifies the apple's natural flavors.
• Nutmeg – Just a pinch enhances the warm spices in this cozy dessert.
• Allspice – Adds a hint of clove and peppery warmth to the mix.
• Ground ginger – A touch of spice that plays beautifully with the sweetness of apples.
• Salt – Just a dash helps to balance the overall sweetness.
• Unsalted butter – Offers richness and helps bind the filling together.
• Vanilla extract – Imparts a comforting, sweet aroma to the pies.
• Cornstarch – This is essential for thickening the apple filling so it doesn’t ooze out.
For the Pie Assembly
• Beaten egg – This acts as a golden egg wash for a lovely finish.
• Milk, cream, or water – Use any of these to mix with the beaten egg for a shiny crust.
• Coarse brown sugar – Sprinkle on top for an added crunch and sweet kick.
• Premade pie dough – Perfect for convenience and speeds up the pie creation process.
With these ingredients on hand, let’s create those delightful mini apple pies that are sure to warm your heart and home!
Step‑by‑Step Instructions for Mini Apple Pies
Step 1: Preheat the Oven
Begin by preheating your oven to 375°F (190°C). While the oven warms up, line a baking sheet with parchment paper to catch any drips from the delicious Mini Apple Pies. This will help ensure an easy cleanup later and prevent any sticky messes.
Step 2: Prepare the Apple Filling
In a medium bowl, toss together the diced apples, brown sugar, ground cinnamon, nutmeg, allspice, ground ginger, and salt. Mix until all the apples are well-coated and the spices are evenly distributed. This fragrant mixture should be slightly sticky from the sugar, hinting at the sweet filling to come.
Step 3: Add Butter and Vanilla
Next, add the unsalted butter and vanilla extract to the apple mixture. Gently stir everything together until the butter begins to soften and blend into the apples. This step will enhance the aromas of your Mini Apple Pies and create a luscious filling that’s both sweet and flavorful.
Step 4: Thicken the Filling
Incorporate a tablespoon of cornstarch into the apple mixture, stirring well to combine. This will help thicken the filling as it bakes, preventing it from becoming runny. The mixture should feel thicker now, allowing the apple chunks to hold their shape as they bake.
Step 5: Assemble the Mini Pies
Roll out your premade pie dough and cut circles large enough to fit your muffin tin. Gently press each circle into the cups of the tin, allowing some overhang for a pretty edge. Spoon the apple filling into each dough shell, packing it slightly to ensure every pie is filled to perfection.
Step 6: Prepare the Egg Wash
In a small bowl, whisk together the beaten egg with milk, cream, or water. Using a pastry brush, gently apply the egg wash to the tops of each mini pie. This will give them a beautiful golden finish and a lovely sheen as they bake in the oven.
Step 7: Sprinkle with Sugar
For an extra touch of sweetness and a delightful crunch, sprinkle coarse brown sugar over the tops of each mini pie. The sugar will caramelize during baking, creating a deliciously crisp topping that enhances the flavor and presentation of your Mini Apple Pies.
Step 8: Bake to Perfection
Place the baking sheet with the mini pies in the preheated oven and bake for 20-25 minutes. Keep an eye on them; they’re ready when the tops are golden brown and the filling is bubbling slightly. The aromatic scent will fill your kitchen, making it hard to wait!
Step 9: Cool and Serve
Once baked, remove the mini apple pies from the oven and allow them to cool on the baking sheet for a few minutes. This brief cooling period lets the filling set, making them easier to handle. Serve them warm or at room temperature to enjoy the delightful flavors of your homemade mini treats.

Make Ahead Options
These Mini Apple Pies are perfect for meal prep, making them a delightful option for busy weeknights! You can prepare the apple filling up to 3 days in advance by mixing the diced apples with brown sugar and spices, then storing it in an airtight container in the refrigerator. The assembled mini pies can be refrigerated for up to 24 hours before baking. To maintain quality, cover them well to prevent the dough from drying out. When you’re ready to serve, brush the tops with egg wash, sprinkle with coarse brown sugar, and bake them straight from the fridge. This way, you’ll have delicious, warm mini apple pies ready with minimal effort!
How to Store and Freeze Mini Apple Pies
Fridge: Store leftovers in an airtight container in the refrigerator for up to 3 days to maintain freshness and flavor. Enjoy them warm or at room temperature!
Freezer: For longer storage, freeze mini apple pies in a single layer on a baking sheet until solid, then transfer to a freezer-safe container. They can be frozen for about 3 months.
Reheating: Reheat in a 350°F (175°C) oven for about 10-15 minutes until warmed through. This will help restore the crispiness of the crust while keeping the apple filling deliciously tender.
Thawing: If frozen, thaw in the fridge overnight before reheating for the best results. Enjoy your delightful mini apple pies just like freshly baked!
What to Serve with Mini Apple Pies
Imagine the joy of crafting a heartwarming meal, perfectly complemented by delightful side dishes that elevate your Mini Apple Pies!
-
Vanilla Ice Cream: A classic pairing, the creamy sweetness of vanilla ice cream melts into the warm pies, creating a dreamy dessert experience. This combination not only tempers the spices in the pies but also adds a luscious texture that dances on your tongue.
-
Fresh Whipped Cream: Light and airy, a dollop of whipped cream adds a cloud-like softness that beautifully contrasts with the warmth of the pies. You can even drizzle in a hint of vanilla or cinnamon for an extra layer of flavor.
-
Caramel Sauce: Drizzling warm caramel sauce over the top of each mini pie adds a lovely, indulgent touch. The richness of the caramel enhances the sweetness of the apples, creating a delightful harmony that feels truly decadent.
-
Spiced Chai Latte: To drink, a cozy spiced chai latte perfectly complements the flavors of the pies. The aromatic blend of spices mirrors the warm spices used in the filling, offering a comforting experience while you savor each bite.
-
Crisp Green Salad: To balance the sweetness, a fresh, crisp salad with mixed greens and a tangy vinaigrette introduces a refreshing contrast. The crunch of the veggies offers a delightful textural change that keeps the meal interesting.
-
Sugary Coffee: Enjoying your mini apple pies with a cup of sugary coffee makes for a delightful breakfast alternative. The coffee’s slightly bitter notes enhance the sweetness of the dessert, serving as a perfect companion to the warm, buttery crust.
Each of these pairings adds its own unique charm, creating a meal that not only satisfies the taste buds but also warms the heart!
Expert Tips for Mini Apple Pies
Choose the Right Apples: Use a mix of tart and sweet apples for a balanced flavor in your mini apple pies. Granny Smith and Fuji make a great combination!
Don’t Overfill: Be cautious not to overfill the dough cups; too much filling can cause them to spill over and make a mess. Aim for just enough to mound slightly.
Golden Finish: Make sure to brush the egg wash thoroughly for a beautifully golden crust. This gives your mini pies that enticing, bakery-fresh look!
Watch the Clock: Keep an eye on the baking time; ovens vary. Remove them when they’re golden brown, or you risk over-baking the crust.
Let Them Cool: Allow the mini apple pies to cool for a few minutes before serving. This helps the filling set and makes them easier to remove from the pan.
Delicious Leftovers: If you have any mini apple pies left, store them in the fridge for up to 3 days. Their delightful flavors will still impress on day two!
Mini Apple Pies Variations & Substitutions
Feel free to get creative and make these mini apple pies your own with these delightful twists!
-
Granny Smith Apples: Swap traditional apples for tart Granny Smith apples for a zesty flavor contrast.
-
Maple Syrup: Replace brown sugar with maple syrup for a rich, unique sweetness that adds depth to your filling.
-
Vegan Option: Use coconut oil instead of butter and a plant-based egg replacement for a vegan-friendly treat.
-
Nutty Crunch: Add chopped walnuts or pecans to the apple filling for a delightful crunch and nutty flavor.
-
Spicy Kick: Introducing a hint of cayenne or crushed red pepper flakes to the spice mix can elevate the flavor profile.
-
Gluten-Free: Opt for gluten-free pie dough to make these mini pies suitable for gluten-sensitive guests without sacrificing taste.
-
Berry Surprise: Toss in a handful of fresh or frozen berries with the apples for a burst of color and sweetness.
-
Chai Spice: Experiment with chai spices like cardamom and cloves for a warm, aromatic twist that pairs beautifully with the apples.
Elevate your baking experience with these variations, and don't forget to explore my tips on serving suggestions to create the perfect presentation!
Mini Apple Pies Recipe FAQs
How do I choose the best apples for my mini apple pies?
Absolutely! For the best flavor, I recommend using a mix of tart and sweet apples. Granny Smith apples add a nice tart balance, while Fuji or Honeycrisp provide sweetness. Aim for a combination that works for your palate—this way, you’ll get a delightful depth of flavor in each bite!
What’s the best way to store mini apple pies?
Very! To keep your homemade mini apple pies fresh, store them in an airtight container in the refrigerator. They’ll stay delicious for up to 3 days. If you prefer them warmed up, just pop them in the oven for a few minutes before enjoying!
Can I freeze mini apple pies?
Absolutely! To freeze, lay the mini apple pies in a single layer on a baking sheet until they're completely solid. Once frozen, you can transfer them to a freezer-safe container where they will last for about 3 months. When you're ready to enjoy, thaw them in the fridge overnight before reheating.
How can I reheat my frozen mini apple pies properly?
Definitely! Preheat your oven to 350°F (175°C) and place the mini apple pies on a baking sheet. Bake for about 10-15 minutes, or until warm throughout. This method helps restore their crispy crust while maintaining the tenderness of the apple filling.
Can I make mini apple pies ahead of time?
Absolutely! You can prepare the apple filling and assemble the pies, then refrigerate them for up to a day before baking. Just keep the pies covered to prevent them from drying out. This way, when you're ready, you can pop them in the oven and have fresh mini apple pies in no time!
Are mini apple pies safe for pets or those with allergies?
Yes! However, while mini apple pies are generally safe for humans, they aren't suitable for pets. The spices and sugar can be harmful to them. If anyone attending has allergies, ensure to check the ingredients—especially with cinnamon and any dairy products used in the egg wash or crust. Always prioritize safety and enjoyment!
Mini Apple Pies That Warm Your Heart and Home
Ingredients
Equipment
Method
- Preheat your oven to 375°F (190°C) and line a baking sheet with parchment paper.
- In a medium bowl, toss together the diced apples, brown sugar, ground cinnamon, nutmeg, allspice, ground ginger, and salt until the apples are well-coated.
- Add the unsalted butter and vanilla extract to the apple mixture, stirring until the butter softens and blends in.
- Incorporate the cornstarch into the apple mixture, stirring to combine and thicken the filling.
- Roll out your premade pie dough and cut circles to fit the muffin tin, pressing them into the cups with overhang.
- Spoon the apple filling into each dough shell, packing it slightly.
- Whisk together the beaten egg with milk, cream, or water, and apply the egg wash to the tops of each mini pie.
- Sprinkle coarse brown sugar on top of each mini pie.
- Bake for 20-25 minutes until the tops are golden brown and the filling is bubbling.
- Allow the mini pies to cool for a few minutes before serving them warm or at room temperature.


Leave a Reply