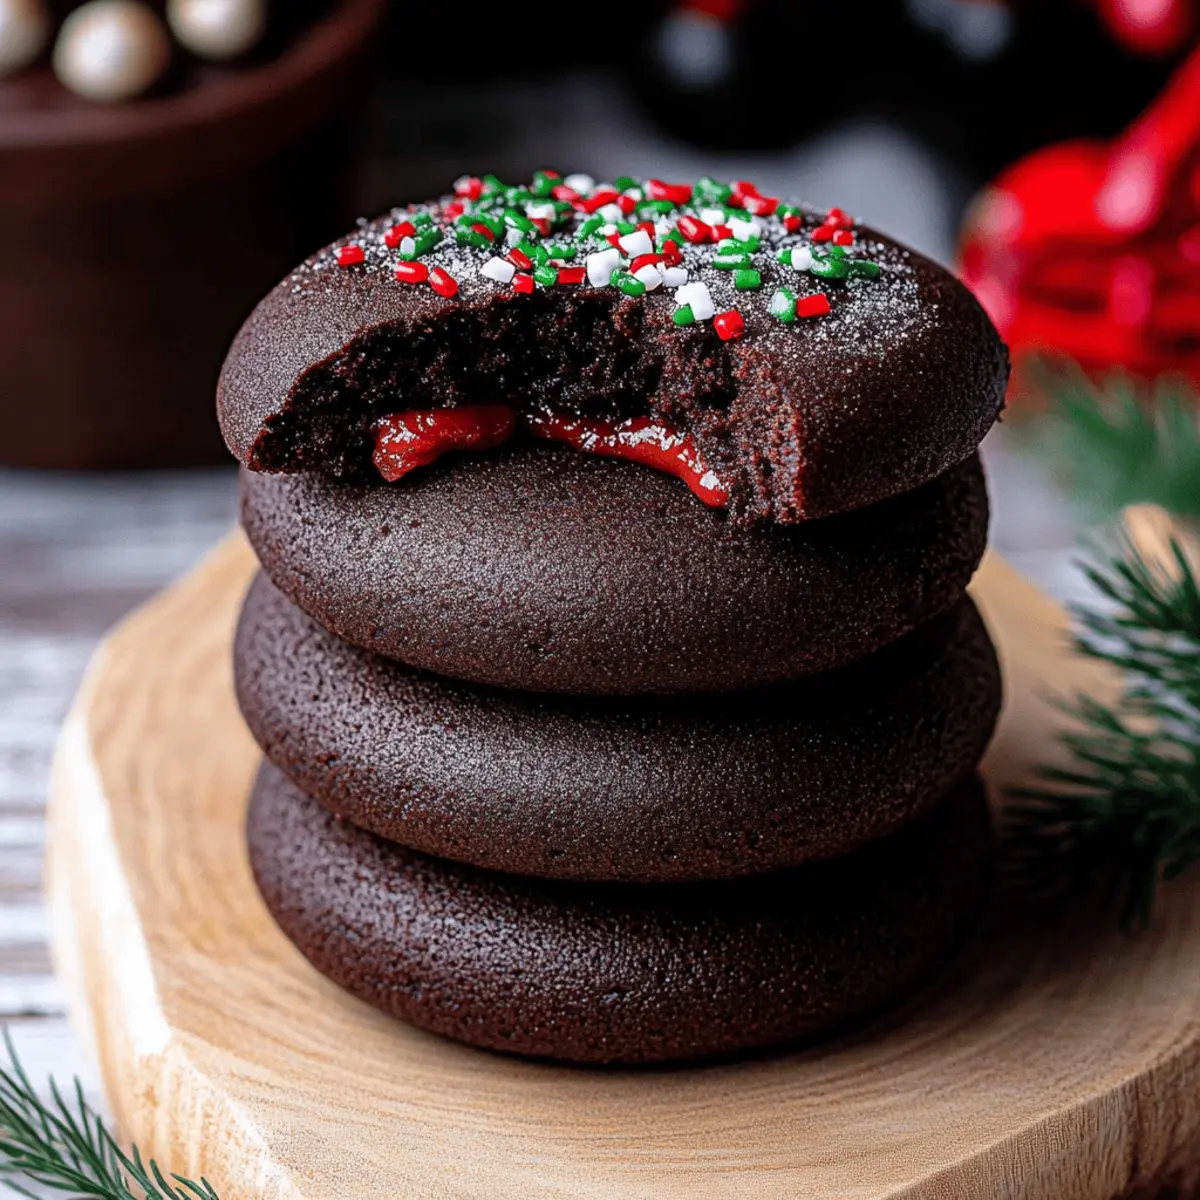
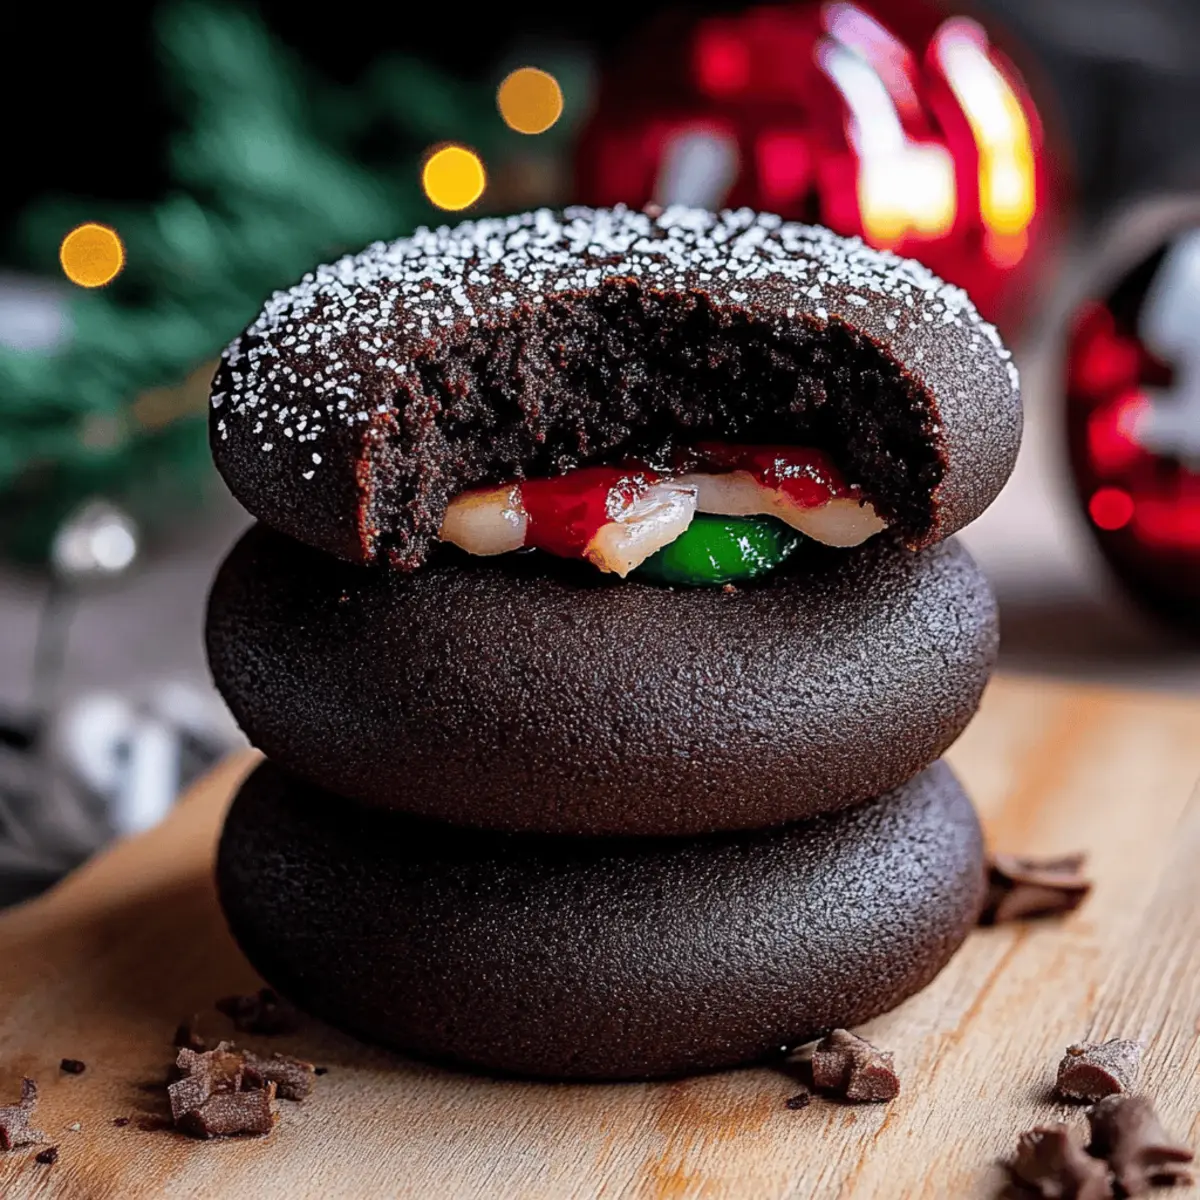
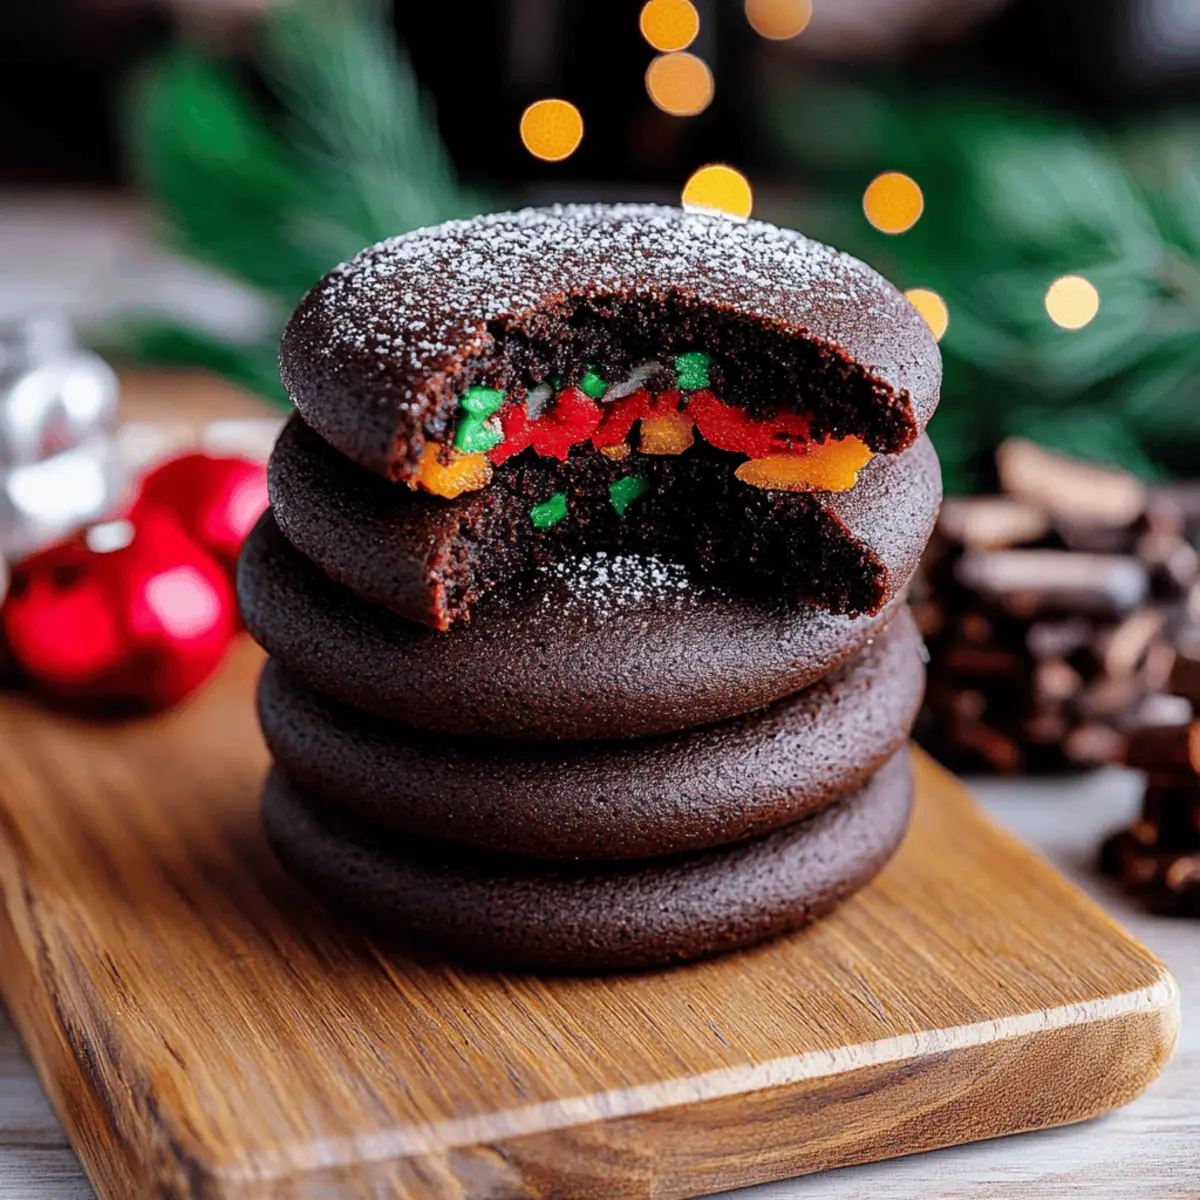
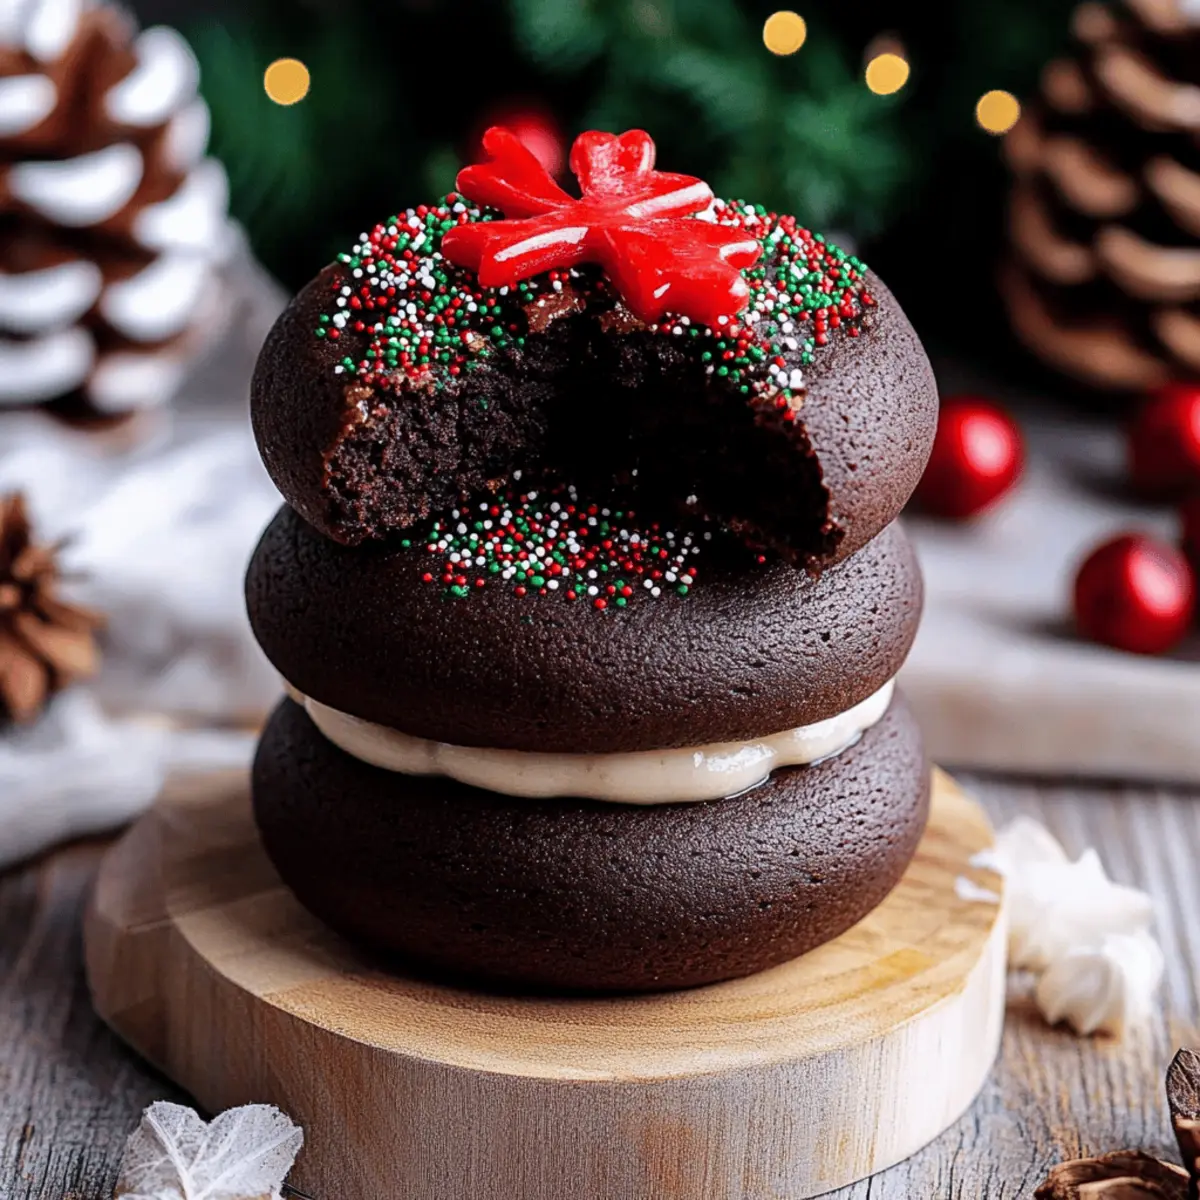
The aroma of freshly baked cookies wafted through the kitchen as I pulled my latest creation from the oven—Chocolate Thumbprint Cookies. With their rich cocoa undertones and luscious chocolate ganache filling, these cookies are an irresistible pairing of texture and flavor. Not only do they look gourmet, but they also provide a delightful break from traditional sweets, making them perfect for gatherings or simply indulging yourself. Plus, they’re surprisingly easy to whip up, ensuring you spend less time baking and more time enjoying the delicious results with family and friends. Ready to dive into this chocolaty adventure? Let’s create some magic together!
Why Are These Cookies So Irresistible?
Decadent and delicious, these Chocolate Thumbprint Cookies are the ultimate treat for any chocolate lover! Unique in flavor, the cocoa and chocolate ganache combination will leave your taste buds singing. Effortlessly made, with simple ingredients and straightforward steps, you can enjoy fresh cookies in no time. Perfect for gatherings, these cookies are sure to impress friends and family alike. Plus, they store well, meaning you can savor the delight for days! If you're feeling adventurous, why not explore more easy cookie recipes or consider experimenting with some fun toppings?
Chocolate Thumbprint Cookies Ingredients
• Dive into the delight of making your own Chocolate Thumbprint Cookies with these simple ingredients!
For the Cookie Dough
- All-purpose flour – Spoon and level for accuracy; this provides structure to your cookies.
- Cocoa powder – Dutch process adds a rich, chocolatey depth; you can use regular cocoa for a lighter taste.
- Salt – Enhances the sweetness; it’s a crucial contrast in flavor.
- Baking powder – Helps the cookies rise and maintain their shape during baking.
- Unsalted butter – Use softened for easy creaming; it creates a tender texture.
- Light brown sugar – Packed adds moisture and a hint of caramel flavor.
- Granulated white sugar – Balances the brown sugar and gives the cookies a slightly crisp edge.
- Egg yolks – Richness is key; room temperature yolks help with emulsification.
- Vanilla bean paste or extract – Adds depth and warmth to the cookie flavor.
For the Ganache Filling
- Semi-sweet chocolate chips – Provides a luscious, smooth filling; feel free to swap with dark chocolate for a more intense flavor.
- Heavy whipping cream – The magic duo with chocolate chips to create a creamy ganache; don’t skimp on the cream!
For Optional Topping
- Nonpareils – A fun sprinkle on top for added color and texture; completely optional but oh-so-fun!
Step‑by‑Step Instructions for Chocolate Thumbprint Cookies
Step 1: Prepare Your Baking Sheets
Start by lining two baking sheets with parchment paper, ensuring the sheets are ready for the cookies. This will help prevent sticking and make cleanup a breeze. Set the lined sheets aside while you mix the cookie dough, as the Chocolate Thumbprint Cookies will soon fill the air with their delicious aroma.
Step 2: Mix the Dry Ingredients
In a medium bowl, whisk together 1 ½ cups of all-purpose flour, ½ cup of Dutch cocoa powder, ½ teaspoon of salt, and ½ teaspoon of baking powder. This step is essential for flavor and texture, ensuring that your cookies will rise appropriately while maintaining their shape. Once well combined, set the bowl aside to focus on the wet ingredients.
Step 3: Cream the Butters and Sugars
In a large bowl, cream together ¾ cup of softened unsalted butter, ¾ cup of packed light brown sugar, and ¼ cup of granulated white sugar using an electric mixer. Beat the mixture for about two minutes until it's light and fluffy. This process incorporates air, which is vital for the texture of your Chocolate Thumbprint Cookies, so keep mixing until you see a pale color change.
Step 4: Combine Wet Ingredients
Add in the 2 room temperature egg yolks and 1 ½ teaspoons of vanilla bean paste or extract to the butter mixture. Mix on medium speed until all ingredients are fully incorporated and the mixture is pale and fluffy, taking about 1-2 minutes. This step adds richness and delicious vanilla flavor, enhancing the overall taste of your cookies.
Step 5: Gradually Add Dry Ingredients
Now, gradually mix in the dry ingredients from the previous bowl into the butter mixture. Do this until just combined, taking care not to overmix. The dough should come together nicely, forming a soft and slightly sticky texture perfect for shaping your Chocolate Thumbprint Cookies.
Step 6: Shape the Dough Balls
Scoop the dough into 34 portions using a tablespoon, then gently roll each portion into a ball using your hands. Each ball should be about one tablespoon of dough. Once rolled, transfer the dough balls to the prepared baking sheets, leaving space between them as they will spread slightly while baking.
Step 7: Create the Indents
Using a ¼ teaspoon, gently press down in the center of each dough ball to create an indent. Make sure the edges remain slightly raised, forming a well to hold the delicious ganache later. This small yet crucial step is what makes these cookies the delightful Chocolate Thumbprint Cookies they are.
Step 8: Chill the Dough
Chill the prepared indented dough balls in the refrigerator for at least one hour. This step is vital as it helps the cookies hold their shape while baking. If you're eager, use this time to clean up your workspace and get ready for the next steps!
Step 9: Preheat the Oven
While the dough is chilling, preheat your oven to 350 degrees Fahrenheit. This ensures that your cookies will begin to bake immediately once the dough is ready. A properly heated oven is essential for achieving the ideal texture of your Chocolate Thumbprint Cookies.
Step 10: Bake the Cookies
Once the oven is preheated, arrange the chilled dough balls on the baking sheets, spacing them about 1 ½ inches apart. Bake for 9-11 minutes, with the ideal time being around 10 minutes. The cookies should be set but slightly soft in the center, indicating they're ready to come out of the oven.
Step 11: Re-indent the Cookies
After baking, remove the cookies from the oven and immediately press down the centers again with the ¼ teaspoon for re-indenting. If any cookies have spread too much, you can also use a circular cookie cutter to reshape them gently. This ensures your Chocolate Thumbprint Cookies have the perfect well for the ganache.
Step 12: Cool the Cookies
Allow the cookies to cool on the baking sheet for about 5 minutes. This cooling period helps them firm up before transferring them. Once cooled slightly, move the cookies to a wire rack to cool completely. Make sure they are fully cooled before adding the ganache filling.
Step 13: Make the Ganache
In a small bowl, add 1 cup of semi-sweet chocolate chips. In a small saucepan, heat ½ cup of heavy whipping cream until it’s just about boiling, then pour it over the chocolate chips. Let it sit for 1 minute to soften the chocolate, then stir until smooth and combined. This luscious ganache will be the star of your Chocolate Thumbprint Cookies.
Step 14: Fill the Cookie Wells
Once your ganache is smooth, fill each cookie well with about 1 teaspoon of the chocolate mixture, adding more if desired. The warmth of the cookies will slightly melt the ganache, creating a beautiful filling. This step adds a rich chocolatey goodness that makes these cookies truly irresistible.
Step 15: Optional Topping
If you’d like, sprinkle nonpareils on top of the ganache for added texture and visual appeal. This optional step can make your Chocolate Thumbprint Cookies even more delightful and festive, perfect for celebrations or just to satisfy a sweet tooth.
Step 16: Chill to Set
Place the filled cookies in the fridge for 10-15 minutes to allow the ganache to set properly. This chilling time ensures that the filling firm up slightly, making it easier to enjoy every bite of your delectable cookies.
Step 17: Store Leftovers
If you have any leftovers (though unlikely!), store the cookies in an airtight container for up to three days. This keeps your Chocolate Thumbprint Cookies fresh, allowing you to indulge in their chocolaty goodness long after baking!
What to Serve with Chocolate Thumbprint Cookies
Satisfy your cravings and elevate your dessert experience by pairing these cookies with delightful complementing treats.
-
Rich Vanilla Ice Cream: The creamy texture of vanilla ice cream contrasts beautifully with the chocolatey depths of the cookies, creating a rich, indulgent experience.
-
Fresh Berry Medley: A vibrant mix of berries like raspberries and strawberries adds a burst of freshness and tartness, balancing the decadent sweetness of the cookies.
-
Coffee or Espresso: The deep, robust flavors of brewed coffee highlight the rich cocoa in the cookies, making it a perfect afternoon pairing.
-
Chocolate Dipped Strawberries: For an extra treat, serve chocolate thumbprint cookies alongside fresh strawberries dipped in chocolate for a double dose of sweetness.
-
Coconut Macaroons: These chewy, sweet bites provide a contrasting texture to the thumbprint cookies, making for a fun dessert platter.
-
Homemade Chocolate Sauce: Drizzle warm chocolate sauce over these cookies for a molten treat that chocolate lovers won't resist.
-
Nutty Biscotti: The crunchiness of biscotti adds varied textures and a delightful nutty flavor, enhancing the cookie experience.
-
Spiced Chai Latte: An aromatic chai latte pairs perfectly, as the spices elevate the chocolate flavor profile and add warmth to your treat moment.
-
Caramel Sauce: A drizzle of creamy caramel adds a sweet, buttery richness that pairs exceptionally well with the chocolatey thumbprint cookies.
-
Milk or Dark Chocolate Milkshake: A thick shake that mirrors the flavors of the cookies creates a nostalgic and satisfying dessert moment.
Chocolate Thumbprint Cookies Variations
Feel free to let your creativity soar with these delightful twists on Chocolate Thumbprint Cookies!
- Gluten-Free: Swap the all-purpose flour for a 1:1 gluten-free baking blend for a delicious alternative.
- Nutty Delight: Add ½ cup of finely chopped nuts, like walnuts or pecans, to the dough for a crunchy texture and rich flavor.
- Minty Fresh: Incorporate ½ teaspoon of peppermint extract into the dough for a refreshing twist on this classic recipe.
- Spicy Kick: Mix 1 teaspoon of cayenne pepper or cinnamon into the batter for a touch of heat that contrasts beautifully with the chocolate.
- Vegan Option: Use a vegan butter substitute and replace egg yolks with flaxseed meal or a store-bought egg replacer for cruelty-free cookies.
- Flavor Infusion: Experiment with flavored chocolate—try dark chocolate or white chocolate chips for a unique ganache experience.
- Coconut Bliss: Roll the cookie dough balls in shredded coconut before baking for a tropical twist that complements the chocolate beautifully.
- Drizzle Topping: Melt some additional chocolate and drizzle it over the cooled cookies for an elegant touch that enhances their appearance and flavor.
Whether you're leaning toward a vegan path or spicing things up, joyfully exploring these variations will only enrich your cookie-making adventure! If nuts, caramel, or other fun toppings catch your fancy, consider checking out other fan-favorite cookie recipes that can serve as delightful inspiration.
Make Ahead Options
These Chocolate Thumbprint Cookies are perfect for meal prep enthusiasts! You can prepare the dough up to 24 hours in advance by rolling the dough into balls, pressing center indents, and then chilling them in the refrigerator. When you're ready to bake, simply preheat the oven and bake the chilled cookie balls as directed for just 9-11 minutes. To maintain their delightful texture, avoid overbaking and allow them to cool completely before filling with ganache. Once filled, the cookies can also be stored in an airtight container for an additional up to 3 days, so you can enjoy freshly baked treats throughout the week without the fuss!
Expert Tips for Chocolate Thumbprint Cookies
-
Chill Time is Key: Chilling the dough for at least one hour ensures that your Chocolate Thumbprint Cookies maintain their shape while baking. Don’t skip this step!
-
Measuring Flour Properly: Spoon and level your flour for accuracy. Too much flour can lead to dry cookies, so this is crucial!
-
Avoid Overmixing: When combining dry ingredients with the wet mixture, mix just until combined. Overmixing can create tough cookies instead of the soft texture we love.
-
Cookie Indents Matter: Make sure your indents are adequate before baking. Press enough to create a well, but don’t flatten the dough completely.
-
Watch the Baking Time: Keep a close eye on your cookies while baking. They should be set but still soft in the center, so take them out around the 10-minute mark for optimal texture.
How to Store and Freeze Chocolate Thumbprint Cookies
Airtight Container: Store leftover Chocolate Thumbprint Cookies in an airtight container at room temperature for up to 3 days to maintain freshness.
Refrigerator: For extended freshness, keep them in the fridge for up to a week. Just be sure to seal them well to avoid drying out.
Freezer: If you'd like to store them longer, these cookies can be frozen for up to 3 months. Wrap individual cookies tightly in plastic wrap, then place them in a freezer-safe bag or container.
Reheating: To enjoy, simply thaw at room temperature or warm them slightly in the microwave for about 10-15 seconds. This helps revitalize the soft texture and makes the ganache irresistibly gooey again!
Chocolate Thumbprint Cookies Recipe FAQs
How do I select ripe ingredients for my Chocolate Thumbprint Cookies?
When choosing ingredients, look for unsalted butter that’s properly softened, meaning it's creamy but not melted. For the best flavor, use high-quality cocoa powder and chocolate chips; look for a deep rich color in the cocoa and chocolate without any dullness or chalkiness.
What’s the best way to store leftover cookies?
To keep your Chocolate Thumbprint Cookies fresh, store them in an airtight container at room temperature for up to 3 days. If you prefer to extend their shelf life, you can store them in the refrigerator for up to a week. Just be sure to seal them tightly to prevent them from drying out.
Can I freeze Chocolate Thumbprint Cookies?
Absolutely! To freeze your cookies, wrap each one tightly in plastic wrap or aluminum foil. Place the wrapped cookies into a freezer-safe zip-top bag or airtight container. They can last in the freezer for up to 3 months. When you're ready to enjoy them, simply thaw them at room temperature or pop them in the microwave for 10-15 seconds to revive their gooey ganache filling!
What should I do if my cookies spread too much while baking?
If you find that your Chocolate Thumbprint Cookies have spread out more than you'd like, there are a couple of potential solutions. First, make sure you've chilled the dough sufficiently before baking, as this helps them hold their shape. If they're already baked, you can re-indent the cookies while they're still warm using a spoon or a cookie cutter to reshape them gently.
Are Chocolate Thumbprint Cookies safe for people with nut allergies?
Yes, these cookies are nut-free as long as the chocolate chips and other processed ingredients do not contain nuts. However, always read labels to ensure there’s no cross-contamination, especially for those with severe allergies. If necessary, check with a physician to ensure that all ingredients align with dietary needs.
Can I use alternative sweeteners for Chocolate Thumbprint Cookies?
Certainly! If you're looking to reduce sugar or prefer a different flavor profile, you can substitute granulated or brown sugar with alternatives like coconut sugar or even stevia (if using stevia, follow the product guidelines for proper measurements). Just remember, this may slightly alter the texture and taste of your cookies, so feel free to experiment!
Irresistibly Soft Chocolate Thumbprint Cookies to Delight You
Ingredients
Equipment
Method
- Prepare Your Baking Sheets: Line two baking sheets with parchment paper.
- Mix the Dry Ingredients: Whisk together the flour, cocoa powder, salt, and baking powder in a medium bowl.
- Cream the Butters and Sugars: In a large bowl, cream together the softened butter, brown sugar, and white sugar.
- Combine Wet Ingredients: Add egg yolks and vanilla to the butter mixture and mix until incorporated.
- Gradually Add Dry Ingredients: Mix in the dry ingredients until just combined.
- Shape the Dough Balls: Scoop dough into 34 portions and roll into balls.
- Create the Indents: Press down in the center of each dough ball to create an indent.
- Chill the Dough: Chill the indented dough balls in the refrigerator for at least one hour.
- Preheat the Oven: Preheat your oven to 350 degrees Fahrenheit.
- Bake the Cookies: Arrange the chilled dough balls and bake for 9-11 minutes.
- Re-indent the Cookies: Press down the centers of the cookies again after baking.
- Cool the Cookies: Allow the cookies to cool on the baking sheet for about 5 minutes, then transfer to a wire rack.
- Make the Ganache: Heat cream and pour over chocolate chips, stir until smooth.
- Fill the Cookie Wells: Fill each cookie well with ganache.
- Optional Topping: Sprinkle nonpareils on top of the ganache if desired.
- Chill to Set: Refrigerate for 10-15 minutes to set the ganache.
- Store Leftovers: Store in an airtight container for up to three days.


Leave a Reply