As I whisked the ingredients together, the warm, comforting aroma of vanilla filled my kitchen, instantly transporting me back to my grandmother's baking sessions. This Creamy Yogurt Cake recipe is a delight that turns simple pantry staples into a moist, tender cake that's perfect for any occasion. Not only is it incredibly easy to whip up—taking just 15 minutes of prep time—but its clever use of yogurt means it stays wonderfully creamy and rich without being overly heavy. Plus, it’s the ideal dessert to impress friends and family, all while being quick enough to fit into a busy weeknight! Are you ready to indulge in this sweet slice of nostalgia with me?
Why is this Yogurt Cake a Must-Try?
Simplicity at its finest: With just a 15-minute prep time, you can whip up this delightful cake without any hassle, making it perfect for busy home cooks. Moist and Creamy: The yogurt ensures a rich consistency, giving your cake a luxurious texture that melts in your mouth. Endless Customization: You can easily add your favorite toppings, from fresh berries to a drizzle of chocolate; the possibilities are endless! Impressive Presentation: This cake is beautiful on its own but can be dressed up to shine at any gathering. Crowd-Pleaser: Both kids and adults will adore its tender crumb and comforting vanilla flavor. Dive into this Creamy Yogurt Cake and make sweet memories today!
Creamy Yogurt Cake Ingredients
• Ready to bake the most delightful Creamy Yogurt Cake? Let’s gather what you’ll need!
For the Cake
- All-purpose flour – essential for structure, making your cake tender yet sturdy.
- Baking powder – helps the cake rise to perfection, ensuring a light and airy texture.
- Baking soda – balances acidity from yogurt, promoting a wonderful rise.
- Salt – enhances sweetness and brings out all the flavors in the cake.
- Granulated sugar – sweetens beautifully while contributing to the cake's lovely crumb.
- Plain yogurt – gives the cake a moist, creamy richness; feel free to use Greek yogurt for a tangier flavor.
- Vegetable oil – keeps the cake incredibly moist; you can substitute with melted butter for extra flavor.
- Large eggs – bind the ingredients together and add to the cake’s lovely structure.
- Vanilla extract – infuses the cake with a warm, inviting aroma that’s hard to resist.
- Milk – adds creaminess and helps create that smooth batter we all crave.
Step‑by‑Step Instructions for Creamy Yogurt Cake
Step 1: Preheat Oven
Begin by preheating your oven to 350°F (175°C). While the oven warms, prepare a 9-inch round cake pan by greasing it generously with butter or oil, or lining it with parchment paper. This will ensure your Creamy Yogurt Cake comes out easily, showcasing its soft, tender crumb.
Step 2: Mix Dry Ingredients
In a medium-sized bowl, whisk together 1 ½ cups of all-purpose flour, 1 teaspoon of baking powder, ½ teaspoon of baking soda, and ¼ teaspoon of salt. Keep whisking until the mixture is well combined and fluffy; this will help create a light cake. Set aside as you move on to mixing the wet ingredients.
Step 3: Combine Wet Ingredients
In a separate large bowl, add ½ cup of granulated sugar, ½ cup of plain yogurt, ¼ cup of vegetable oil, 2 large eggs, and 1 teaspoon of vanilla extract. Using a whisk, blend the ingredients together until the mixture is smooth and creamy, with a lovely aroma of vanilla. This step is essential for achieving that deliciously rich taste in your Creamy Yogurt Cake.
Step 4: Incorporate Dry with Wet Ingredients
Gradually pour the dry mixture into the bowl of wet ingredients, folding gently with a spatula or whisk. Mix this together until just combined, avoiding overmixing to maintain tenderness in the cake. The batter should be slightly lumpy but well-integrated, creating that signature creaminess we love.
Step 5: Add Milk
Pour in ¼ cup of milk to the batter and stir gently until you achieve a smooth, homogenous mixture. This addition will enhance the cake's moisture and provide a velvety texture. Take a moment to admire the batter's glossy finish before moving on to the next step.
Step 6: Pour into Cake Pan
Carefully pour the batter into your prepared cake pan, ensuring it spreads evenly. Use a spatula to smooth the top so that it bakes uniformly. The vibrant batter should look inviting, promising a delightful Creamy Yogurt Cake once baked to perfection.
Step 7: Bake the Cake
Place the filled cake pan in the preheated oven. Bake for about 30-35 minutes, keeping an eye out for the magic moment when the top is lightly golden and a toothpick inserted into the center comes out clean. Your kitchen will be filled with a wonderful aroma, teasing your taste buds!
Step 8: Cool in the Pan
Once baked, carefully remove the cake from the oven and allow it to cool in the pan for about 10 minutes. This will help it set and make it easier to remove later. You can place the pan on a wire rack for better air circulation as it cools.
Step 9: Transfer to Wire Rack
After 10 minutes of cooling, gently flip the cake out of the pan onto a wire rack. Allow it to cool completely; this helps maintain the cake’s moistness and ensures it slices beautifully. The anticipation of enjoying your Creamy Yogurt Cake is almost at an end!
Step 10: Slice and Serve
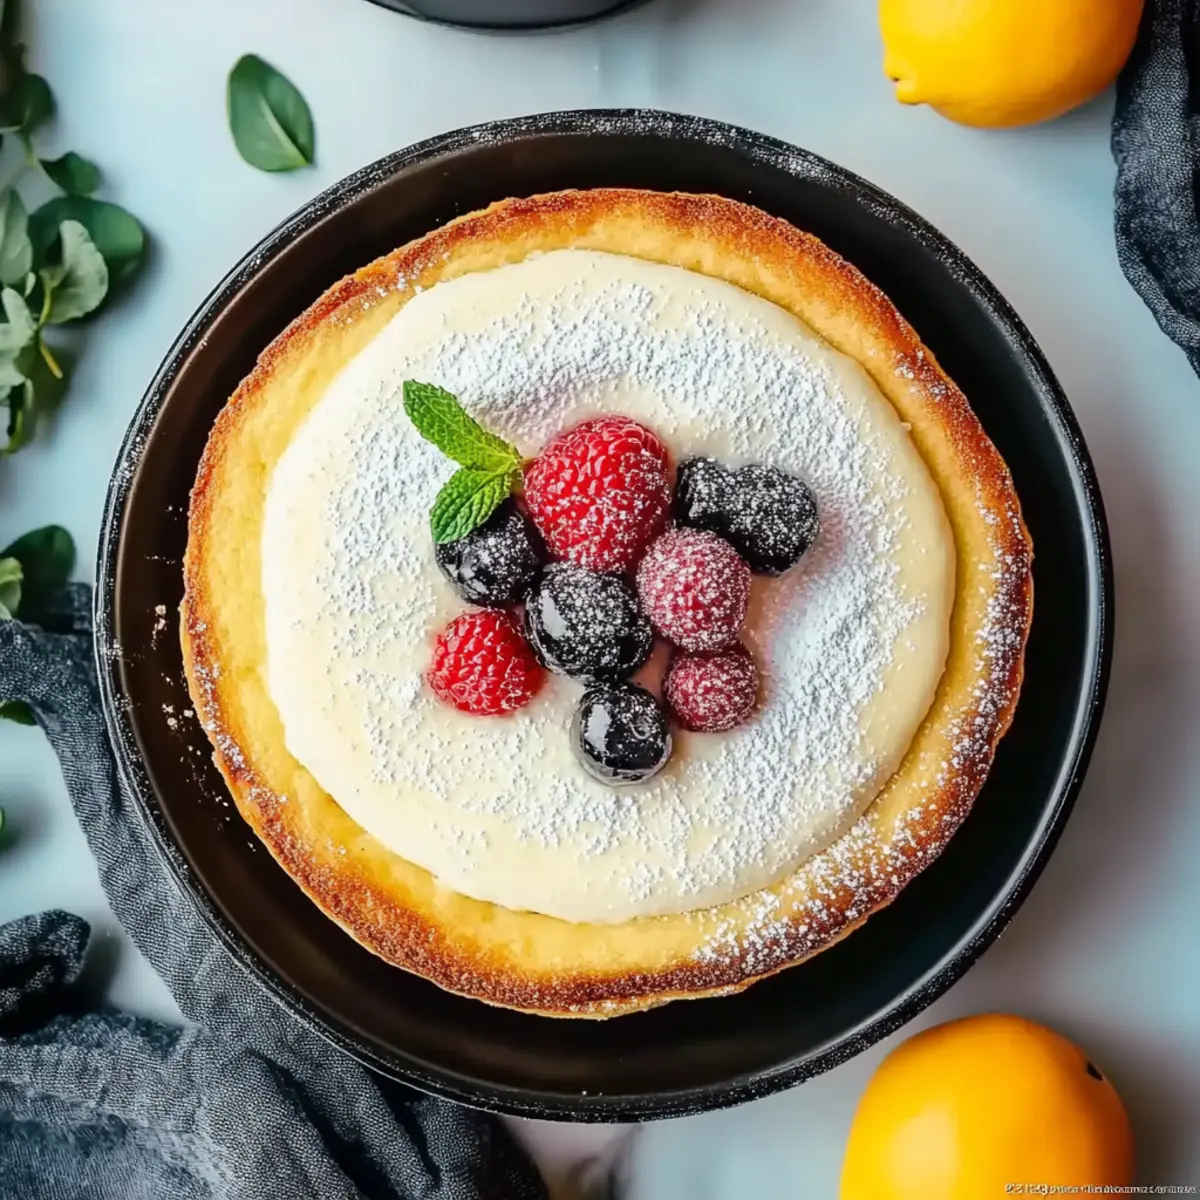
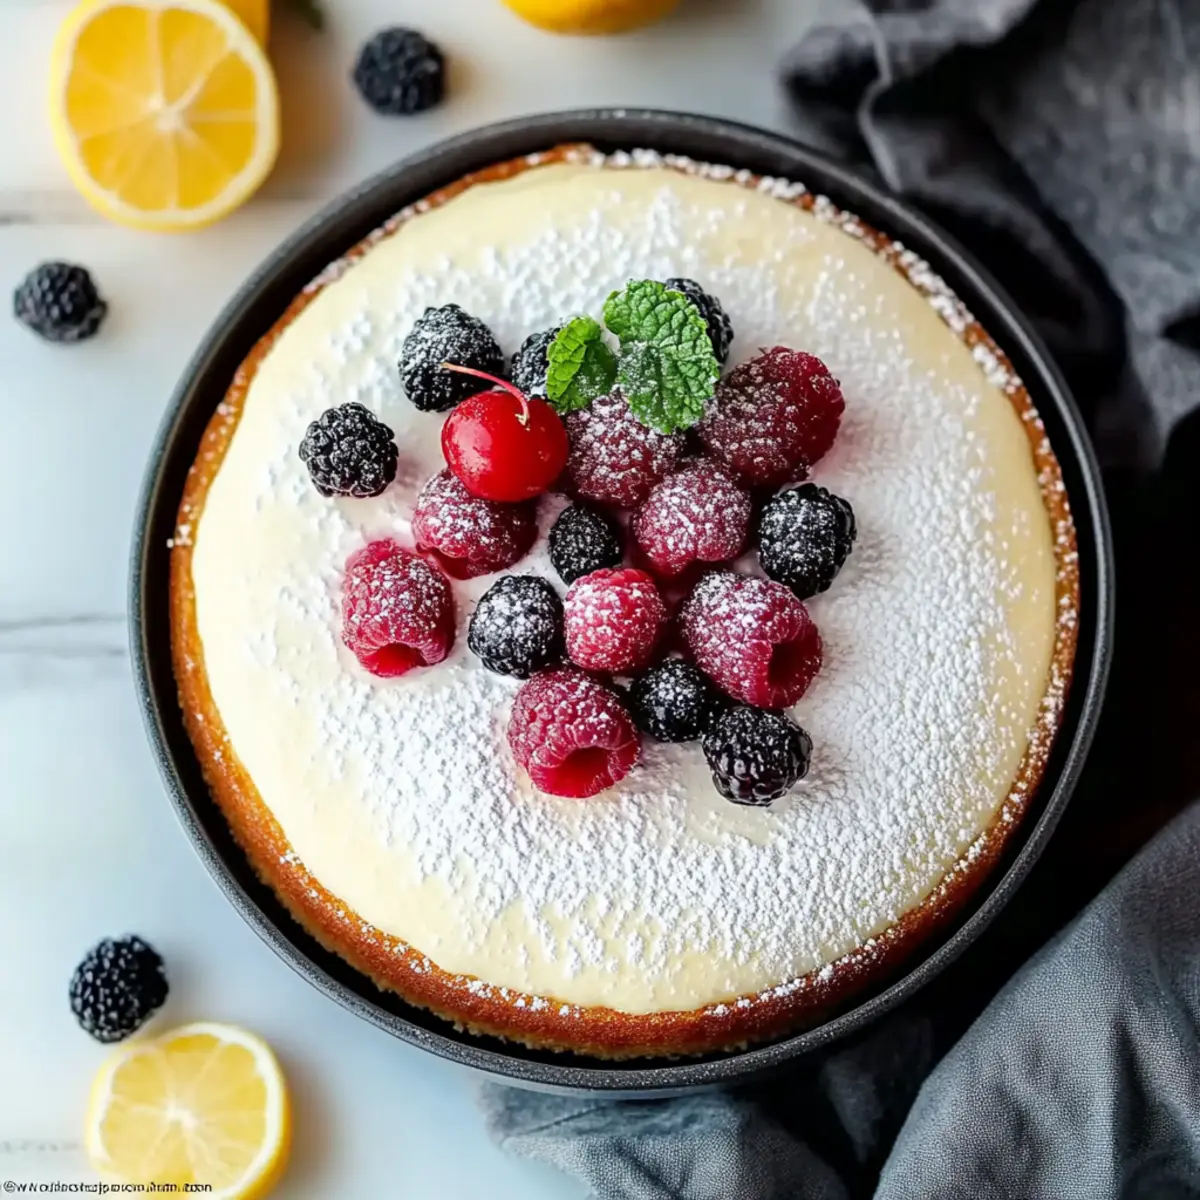
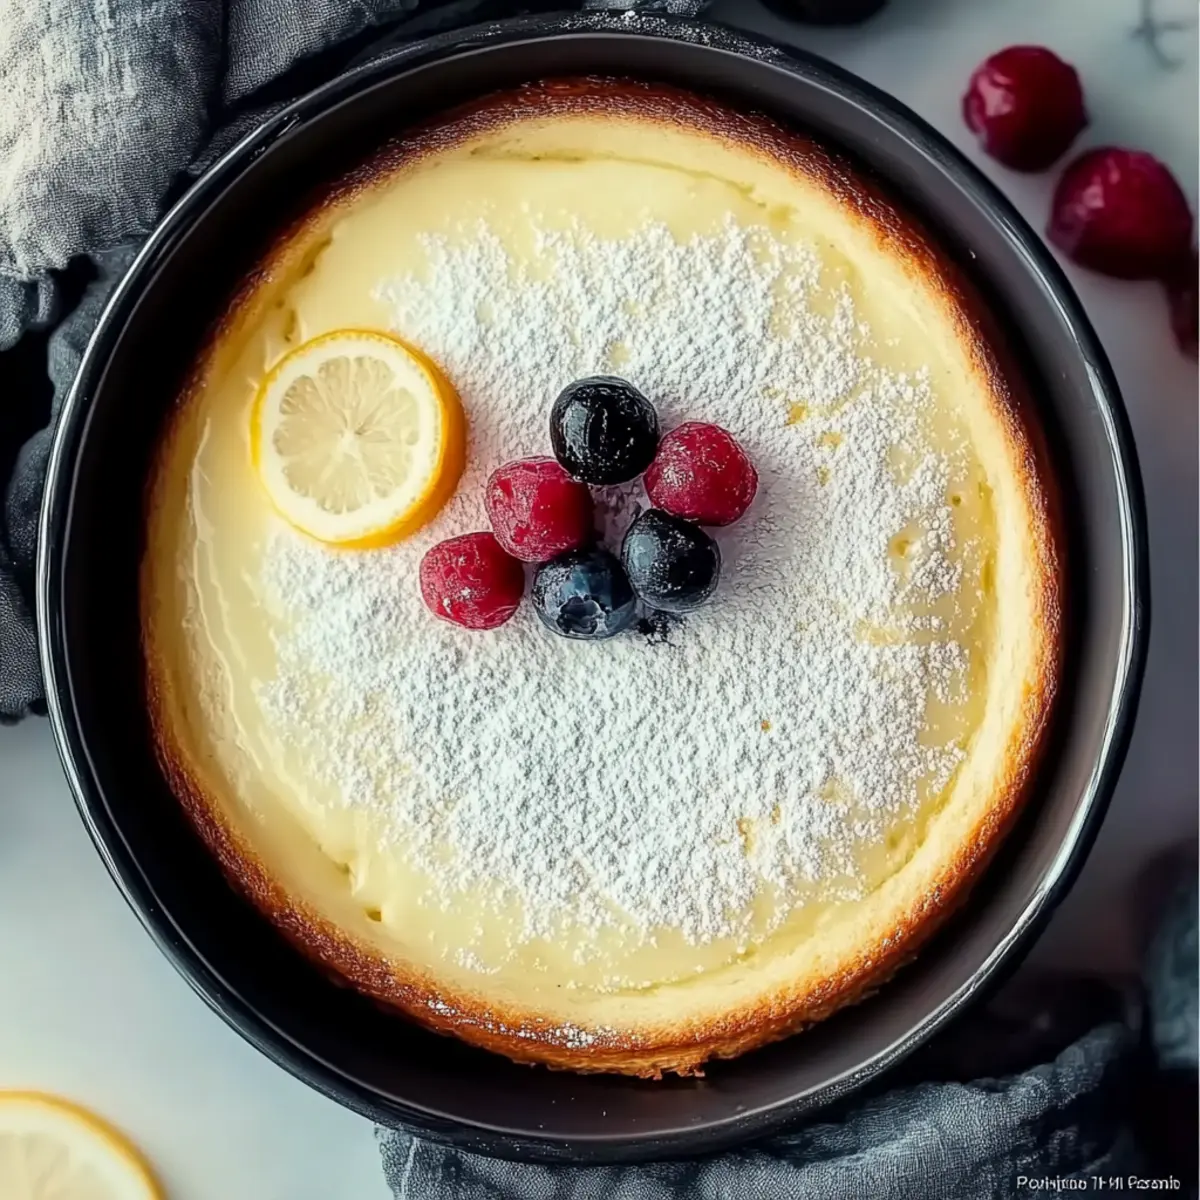
Once fully cooled, slice your Creamy Yogurt Cake into wedges and serve. Whether enjoyed plain or adorned with fresh fruit or a dusting of powdered sugar, each slice will bring warmth and comfort to any gathering, showcasing your culinary skills with ease.
How to Store and Freeze Creamy Yogurt Cake
Room Temperature: You can keep your Creamy Yogurt Cake at room temperature for up to 3 days, covered with plastic wrap or in an airtight container to maintain its moisture.
Fridge: For longer storage, place your cake in the refrigerator, where it will stay fresh for up to a week. Ensure it's wrapped well to prevent it from drying out.
Freezer: To freeze, wrap slices individually in plastic wrap and then in aluminum foil. Your cake can be frozen for up to 2 months, making it perfect for future cravings!
Reheating: When ready to enjoy, simply thaw the slices at room temperature for a few hours or reheat gently in the microwave for a few seconds to bring back that delightful creaminess.
Creamy Yogurt Cake Variations
Feel free to explore these delightful twists that’ll elevate your Creamy Yogurt Cake into something extraordinary!
- Gluten-Free: Substitute all-purpose flour with a gluten-free blend for a cake everyone can enjoy.
- Honey Sweetened: Replace granulated sugar with honey for a natural sweetness and a hint of floral flavor.
- Berry Bliss: Fold in a cup of fresh raspberries or blueberries for a burst of juicy flavor and lovely color.
- Zesty Citrus: Add the zest of a lemon or orange to the batter for a refreshing citrus twist that brightens each bite.
Imagine waking up to that invigorating scent wafting through your kitchen—pure bliss! - Nutty Crunch: Stir in chopped nuts like walnuts or almonds for added texture and a nutty flavor that compliments the creaminess.
- Chocolate Lovers: Incorporate cocoa powder into your dry ingredients for a chocolaty version that pairs beautifully with the yogurt's richness.
- Spiced Up: Mix in a teaspoon of cinnamon or nutmeg for a warm, comforting aroma that brings a cozy feel to your cake.
- Heat It Up: Add a pinch of cayenne or a splash of cinnamon for a surprising yet delightful kick that tantalizes the taste buds.
With these variations, your Creamy Yogurt Cake becomes a canvas for creativity, allowing each bite to tell a new story.
Expert Tips for the Best Creamy Yogurt Cake
- Use Room Temperature Ingredients: Ensure your eggs and yogurt are at room temperature for better mixing, which results in a fluffier cake.
- Don’t Overmix: Gently mix the batter until just combined. Overmixing can lead to a dense texture instead of the light, airy quality we all love.
- Check Doneness Carefully: Insert a toothpick into the center; if it comes out clean, your Creamy Yogurt Cake is ready. Avoid opening the oven too soon, as it can collapse.
- Cool Completely: Allow the cake to cool completely on a wire rack for the best texture and ease in slicing. A warm cake can crumble and lose its beautiful shape.
- Customize Flavors: Try adding zests, like lemon or orange, to elevate flavors, making your Creamy Yogurt Cake uniquely delightful!
Make Ahead Options
These Creamy Yogurt Cakes are perfect for meal prep enthusiasts! You can prepare the batter up to 24 hours in advance. Simply mix the wet and dry ingredients together, then store the uncooked batter in an airtight container in the refrigerator. This not only saves time but allows the flavors to meld beautifully. If you like, you can also bake the cake ahead of time and keep it wrapped in plastic wrap, refrigerated for up to 3 days. To maintain its moistness, ensure it is sealed well. When you’re ready to serve, simply slice and enjoy; it will be just as delicious and perfect for busy weeknights.
What to Serve with Creamy Yogurt Cake?
Elevate your dessert experience with delightful pairings that complement every slice of this tender, moist cake.
- Berry Compote: A spoonful of sweet-tart berry compote adds a refreshing contrast, enhancing the cake's creamy texture beautifully.
- Whipped Cream: Light and airy, whipped cream offers a classic topping that balances the cake's richness, perfect for those indulgent moments.
- Fresh Fruits: Sliced strawberries, raspberries, or blueberries not only add vibrant color but also introduce a burst of freshness to each bite.
- Chocolate Sauce: Drizzling warm chocolate sauce over the cake creates a luscious experience that chocolate lovers will adore; it's decadence personified!
- Vanilla Ice Cream: This harmonious pairing turns your dessert into an experience, with creamy ice cream melting gently against the warm cake.
- Nutty Crumble: A crunchy topping made from toasted almonds or walnuts adds a delightful texture and nutty flavor, offering a perfect contrast to the softness of the cake.
- Coffee or Tea: A cup of rich coffee or herbal tea serves as a soothing companion, enhancing the overall enjoyment with each soothing sip.
- Lemon Glaze: A light lemon glaze ignites brightness and a touch of zing, beautifully contrasting the cake's vanilla notes with citrusy sweetness.
- Coconut Whipped Cream: For a tropical twist, coconut whipped cream offers a delightful, creamy layer with its rich, subtle flavor profile that’s simply irresistible!
Creamy Yogurt Cake Recipe FAQs
How should I choose the yogurt for my Creamy Yogurt Cake?
Absolutely! For the best results, opt for plain yogurt with no added sugars or flavorings. Greek yogurt is excellent too, providing a tangy flavor and ultra-creamy texture, which works wonders in this recipe. Make sure it’s fresh, as expired yogurt can affect the cake's rise and taste.
How do I store my leftover Creamy Yogurt Cake?
Very simply! If you're keeping the cake at room temperature, cover it with plastic wrap or store it in an airtight container. It will stay delicious for up to 3 days. If you want to keep it longer, pop it in the fridge; it can last up to a week when well-wrapped. Just remember, keeping it covered is crucial for retaining moisture!
Can I freeze Creamy Yogurt Cake? If so, how?
Absolutely! Freezing this cake is an excellent way to preserve its delightful flavor. First, slice the cake into individual portions. Then, wrap each slice tightly in plastic wrap and place them in a freezer-safe bag or container. Your Creamy Yogurt Cake will be good for up to 2 months. When you're ready to enjoy, let the slices thaw at room temperature or pop them in the microwave for a few seconds for a quick indulgence.
What should I do if my cake doesn’t rise well?
If your cake doesn’t rise as expected, it might be due to old leavening agents. Make sure your baking powder and baking soda are fresh; they should be within 6 months of opening for optimal performance. Also, ensure you’re not overmixing the batter! Overmixing can lead to dense textures. Just gently combine until you no longer see dry flour.
Is this Creamy Yogurt Cake suitable for a gluten-free diet?
Very much so! You can easily transform this recipe into a gluten-free delight by substituting the all-purpose flour with a 1:1 gluten-free baking mix. This way, everyone can enjoy a delicious piece of your Creamy Yogurt Cake without any worry! Remember to double-check other ingredients to ensure they're gluten-free as well, especially the baking powder.

Irresistibly Moist Creamy Yogurt Cake Made Easy
Ingredients
Equipment
Method
- Preheat your oven to 350°F (175°C) and prepare a 9-inch round cake pan.
- In a bowl, whisk together flour, baking powder, baking soda, and salt.
- In another bowl, combine sugar, yogurt, oil, eggs, and vanilla extract; whisk until smooth.
- Fold the dry mixture into the wet ingredients until just combined.
- Add milk to the batter and stir gently until smooth.
- Pour the batter into the prepared pan and smooth the top.
- Bake for 30-35 minutes until golden and a toothpick comes out clean.
- Cool in the pan for 10 minutes, then transfer to a wire rack.
- Once cool, slice and serve the cake.


Leave a Reply