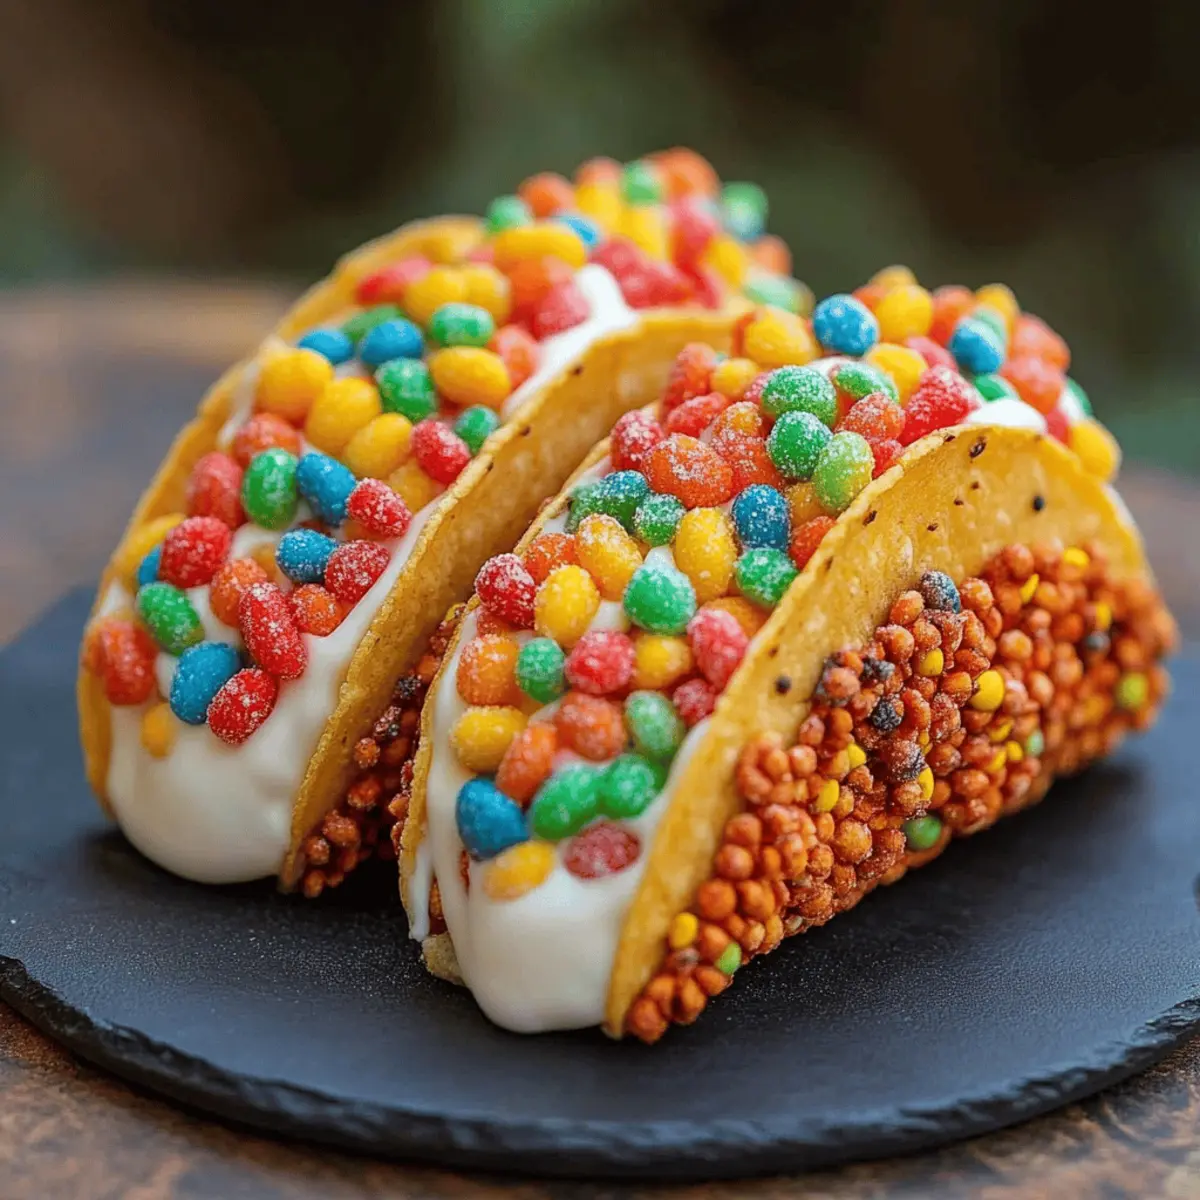
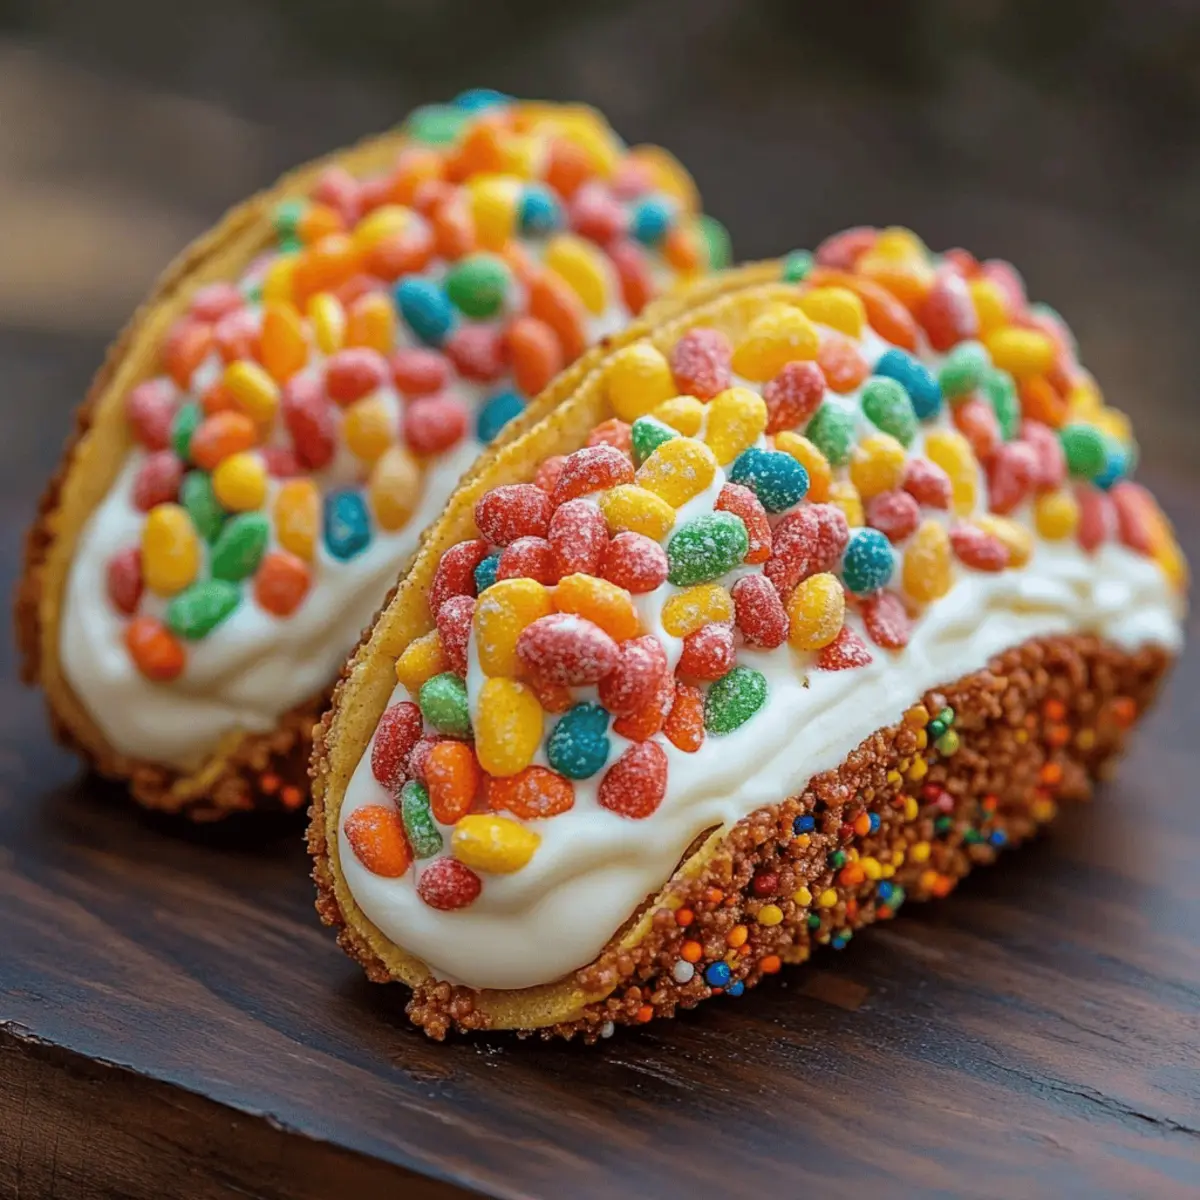
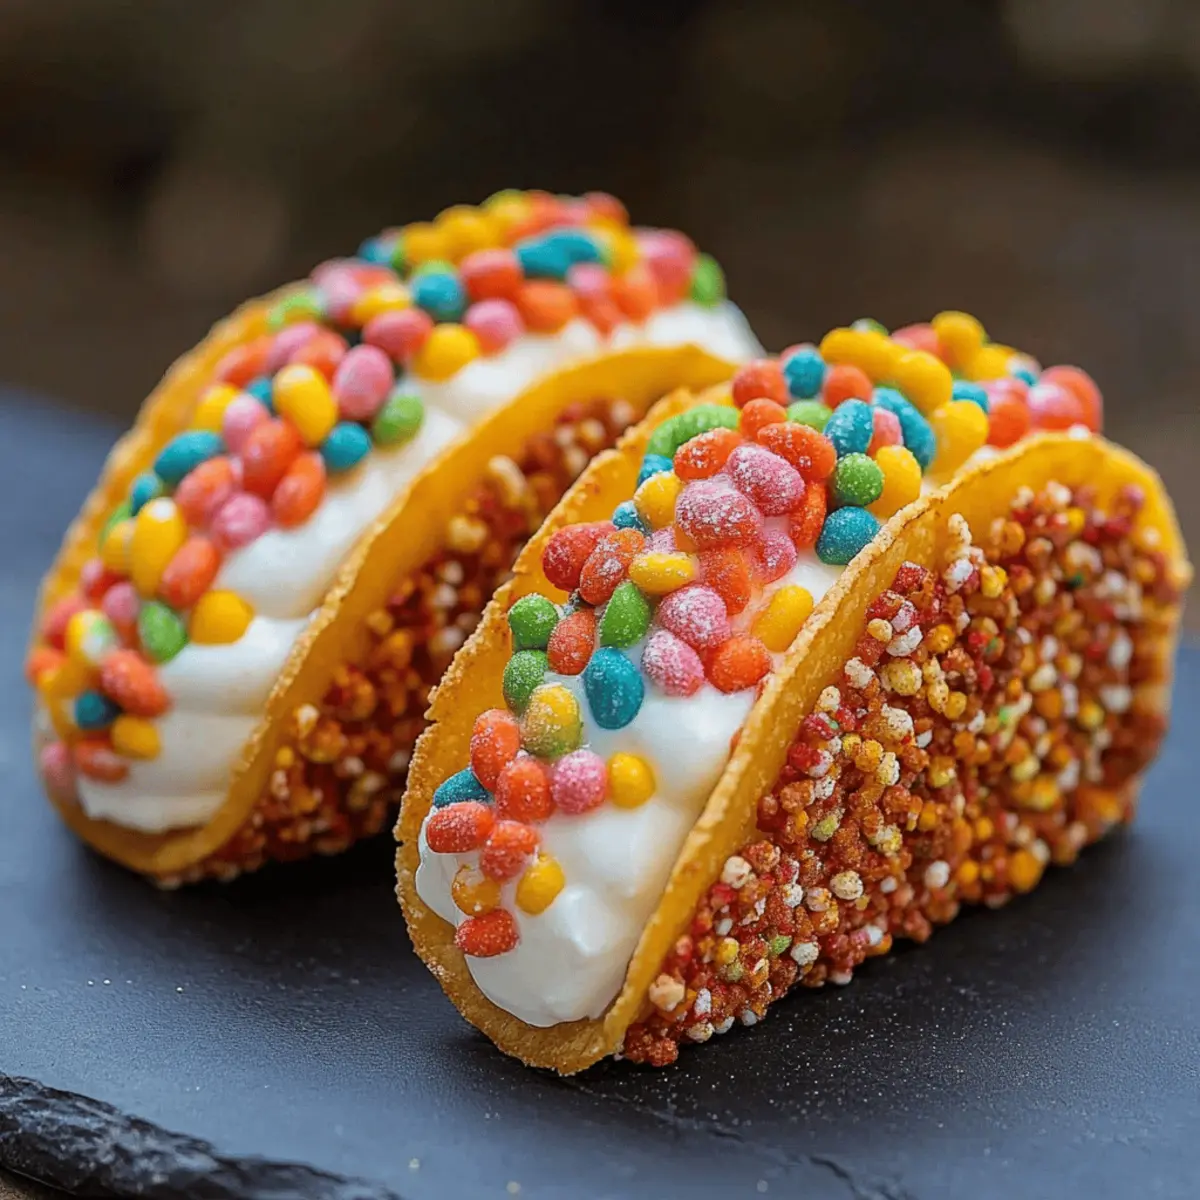
As I stood in my kitchen, a vivid flash of nostalgia struck me; those colorful cereal boxes we cherished as kids always sparked joy. This playful vibe inspired me to create the ultimate comfort fusion: Fruity Pebbles Cheesecake Tacos. It’s a delightful twist on traditional tacos, bringing together the nostalgia of a beloved breakfast treat with the creamy decadence of cheesecake. Not only are these tacos a quick prep that you can whip up in no time, but they’re also a guaranteed crowd-pleaser that'll impress guests of all ages. With each bite, you get to relive those carefree moments while indulging in something truly unique. Are you ready to take your dessert game to an exciting new level? Let’s dive in!

Why Are You Going to Love These?
Playful Experience: These Fruity Pebbles Cheesecake Tacos are a fun twist to your dessert table, merging nostalgia with indulgence.
Quick Preparation: With just 20 minutes prep, you can whip these up fast, making them perfect for unexpected guests or a sweet treat for yourself!
Crowd-Pleasing Delight: Kids and adults alike will love these colorful tacos, making them an instant favorite at any gathering.
Unique Texture: The crispy cereal shell provides a delightful crunch, contrasting beautifully with the creamy cheesecake filling.
Customize to Your Taste: Feel free to experiment! Swap out the fruity cereal for your favorite flavors or add toppings like chocolate drizzle for extra fun. If you enjoy easy no-bake recipes, you might also want to check out my Bake Strawberry Cheesecake or Burnt Basque Cheesecake.
Fruity Pebbles Cheesecake Tacos Ingredients
For the Taco Shells
- Fruity cereal – gives a sweet, colorful crunch that truly embodies the joyful essence of childhood.
- Unsalted butter – helps bind the cereal together while adding richness to the shells.
For the Cheesecake Filling
- Cream cheese – provides a creamy base that holds everything together, ensuring a smooth texture.
- Powdered sugar – sweetens the filling, creating that classic cheesecake flavor we all love.
- Pure vanilla extract – enhances the overall taste, adding a lovely aromatic quality to the filling.
For the Topping
- Whipped cream – adds lightness and a touch of elegance, making each taco a delightful treat.
- Additional fruity cereal – use this for garnish to bring some extra crunch and a pop of color!
These Fruity Pebbles Cheesecake Tacos are not only an innovative dessert, but they also offer a playful and nostalgic experience for dessert lovers of all ages. Enjoy!
Step‑by‑Step Instructions for Fruity Pebbles Cheesecake Tacos
Step 1: Prepare the Cereal Shells
In a large mixing bowl, combine 3 cups of fruity cereal with ½ cup of melted unsalted butter. Mix them thoroughly until all the cereal pieces are well-coated. The mixture should appear slightly sticky and clump together. This step will create the base for your Fruity Pebbles Cheesecake Tacos.
Step 2: Shape the Taco Shells
Press the cereal mixture firmly into small taco-shaped molds or muffin tins to form shells. Ensure you compact tightly to create a sturdy structure that holds its shape when chilled. Place the molds in the refrigerator and allow the shells to chill for at least 30 minutes until they're firm and set.
Step 3: Make the Cheesecake Filling
While the shells chill, use a hand mixer to beat 8 oz of softened cream cheese in a bowl until it becomes light and fluffy. Gradually add in ½ cup of sifted powdered sugar and 1 teaspoon of pure vanilla extract, blending until the mixture is smooth and creamy. This filling will bring the cheesecake element to your Fruity Pebbles Cheesecake Tacos.
Step 4: Fold in the Whipped Cream
Gently fold in 1 cup of whipped cream into the cream cheese mixture with a spatula. Be careful to maintain a light and airy texture; this is key to achieving a lovely cheesecake filling. The combined mixture should be light and well-blended, ready to fill your taco shells.
Step 5: Fill the Taco Shells
Once your cereal shells are firm, carefully spoon the cheesecake filling into each shell. Generous portions will ensure a delightful bite. If you'd like, use an offset spatula to create a smooth, appealing surface for each filled taco, making them as inviting as they taste.
Step 6: Add the Finishing Touches
Finally, sprinkle some additional fruity cereal over the filled Fruity Pebbles Cheesecake Tacos for an extra burst of color and crunch. You may serve them immediately for a playful dessert experience or chill them for a firmer texture, enhancing their delightful look and feel.
Expert Tips for Fruity Pebbles Cheesecake Tacos
Chill Time Matters: Ensure you refrigerate the taco shells for a minimum of 30 minutes. Skipping this step can lead to breaks when filling them.
Use Room Temperature Ingredients: Softened cream cheese blends easier with the sugar and helps create a smooth filling. Take it out of the fridge ahead of time.
Don't Rush the Mixing: When folding whipped cream, be gentle to keep that airy texture. Overmixing can deflate the filling, making it less delightful.
Taco Shell Size: If you don’t have taco molds, muffin tins work just as well! Ensure the shells are compact and hold their shape well.
Garnish Wisely: Add fruity cereal on top just before serving. This keeps it crunchy and visually appealing—perfect for your Fruity Pebbles Cheesecake Tacos!
How to Store and Freeze Fruity Pebbles Cheesecake Tacos
Fridge: Keep any uneaten Fruity Pebbles Cheesecake Tacos in an airtight container in the refrigerator for up to 3 days. This preserves the flavors and textures, though the shells may soften slightly.
Freezer: You can freeze the unfilled taco shells separately wrapped in plastic wrap for up to 2 months. When ready to eat, thaw and fill with the cheesecake mixture before serving.
Reheating: Avoid reheating the filled tacos, as this may affect the texture. Instead, enjoy them chilled or at room temperature for the best experience.
Garnish Tip: If storing with toppings, add fruity cereal just before serving for maximum crunch and freshness!
Make Ahead Options
These Fruity Pebbles Cheesecake Tacos are perfect for meal prep enthusiasts looking to save time during busy weeknights! You can prepare the cereal taco shells up to 24 hours in advance, just make sure to store them in an airtight container to maintain their crunch. The cheesecake filling can also be made up to 3 days ahead; simply refrigerate it in a sealed bowl to keep it fresh and fluffy. When you’re ready to serve, fill the chilled taco shells with the filling and top with additional fruity cereal right before serving for that delightful crunch. With these make-ahead options, you'll enjoy freshly assembled tacos without the stress!
What to Serve with Fruity Pebbles Cheesecake Tacos
Creating the perfect pairing for your playful dessert can elevate your dining experience to new heights.
-
Fresh Fruit Salad: A vibrant medley of seasonal fruits brings a refreshing balance, enhancing the sweetness of the cheesecake tacos. The natural juices can cleanse the palate beautifully.
-
Minty Mojito Mocktail: A zesty, non-alcoholic drink infused with mint and lime provides a refreshing contrast to the rich creaminess, making every bite feel exciting.
-
Whipped Cream Topping: Serve with an extra dollop of whipped cream for a luxurious, airy finish to your tacos. The light texture pairs wonderfully with fruity flavors.
-
Crunchy Snack Mix: A mix of nuts and pretzels adds a delightful crunch, contrasting the smoothness of your tacos, creating a fun variety of textures on the plate.
-
Chocolate-Covered Strawberries: These sweet treats bring a touch of indulgence, offering a romantic pairing where the fruity and rich flavors can dance together delightfully.
-
Vanilla Ice Cream: A scoop of creamy vanilla ice cream melts into your tacos, enhancing every bite with its cool, sweet flavor—a nostalgic element that complements the playful vibe beautifully.
Enjoy these pairings as you embark on a delightful journey through every bite of your Fruity Pebbles Cheesecake Tacos!
Fruity Pebbles Cheesecake Tacos Variations
Looking to spice up your Fruity Pebbles Cheesecake Tacos? Let's make it even more delicious and tailored to your taste!
-
Gluten-Free: Substitute fruity cereal with a gluten-free variety to accommodate dietary needs without sacrificing flavor.
-
Nutty Crunch: Stir in a handful of crushed toasted almonds or walnuts for a delightful crunch and an earthy flavor twist in each bite.
-
Chocolate Drizzle: Drizzle melted chocolate over the filled tacos before serving for an indulgent touch that will take your dessert to the next level!
-
Berry Burst: Fold in some fresh berries like strawberries or blueberries into the cheesecake filling for a refreshing twist of flavor and natural sweetness.
-
Minty Fresh: Add a few drops of mint extract to the cream cheese filling for a refreshing twist that pairs beautifully with fruity flavors.
-
Spiced Up: Sprinkle a pinch of cinnamon or nutmeg into the cheesecake filling for a warm, cozy flavor that enhances the overall taste.
-
Fruit Explosion: Top your tacos with sliced fruits like bananas or a medley of berries for a vibrant and colorful presentation that’s sure to impress.
-
Whipped Cream Flavor: Choose flavored whipped cream, like strawberry or chocolate, to amplify the dessert's taste and make each taco a surprise with every bite!
Feel free to get creative and mix and match these ideas! If you’re craving more sweet treats, don’t miss my 11-Minute Cheesy Pepperoni Pizza Roll-Ups that are sure to please a crowd as well!
Fruity Pebbles Cheesecake Tacos Recipe FAQs
How do I choose the best Fruity Pebbles for this recipe?
Absolutely! When choosing your Fruity Pebbles, look for boxes that have a good crunch and vibrant color—indicative of freshness. Avoid boxes with any signs of dark spots or that feel stale, as they can impact the texture of your taco shells. Fresh cereal will give you that delightful crunch that’s essential for an enjoyable dessert.
How should I store leftover Fruity Pebbles Cheesecake Tacos?
Very simple! Just store the assembled tacos in an airtight container in the refrigerator. They’ll stay fresh for up to 2 days. This helps maintain the crispiness of the taco shell and the creaminess of your filling. Just remember to keep them sealed tightly to avoid any moisture!
Can I freeze Fruity Pebbles Cheesecake Tacos? If so, how?
Yes, you can freeze them! To freeze, first wrap each taco individually in plastic wrap to prevent freezer burn. Then, place them in a freezer-safe container or a resealable freezer bag. They will stay good in the freezer for up to 1 month. When you're ready to enjoy, simply let them thaw in the refrigerator overnight. For best results, consume them within a month to maintain optimum flavor and texture.
What if my taco shells crumble when removing them from the molds?
No worries at all! If your taco shells crumble, it might be that they weren’t compacted enough in the mold. To avoid this, make sure to press the cereal mixture firmly into the molds, almost like working with dough. If you do experience crumbling, you can still salvage them by carefully pressing the pieces together and filling them as a deconstructed taco. They’ll still taste just as delightful!
Are there any dietary considerations I should be aware of?
Absolutely! If you're serving these Fruity Pebbles Cheesecake Tacos to guests, check for allergies, particularly to dairy from the cream cheese and whipped cream. For a variation, you can substitute the cream cheese with a dairy-free alternative and use coconut whipped cream for a delicious vegan option. This way, everyone can join in on the fun!
Fruity Pebbles Cheesecake Tacos: A Sweet, Fun Treat!
Ingredients
Equipment
Method
- In a mixing bowl, combine the fruity cereal with melted unsalted butter. Stir thoroughly until coated, then press into molds and chill for at least 30 minutes.
- Beat the softened cream cheese until light and fluffy, then gradually add powdered sugar and vanilla extract, mixing until smooth.
- Gently fold in the whipped cream to maintain an airy texture, ensuring a light and fluffy filling.
- Remove the taco shells from the refrigerator and fill each with the cheesecake mixture, packing it in slightly.
- Sprinkle additional fruity cereal over the filled tacos for garnish. Serve immediately or chill for another 15-20 minutes.


Leave a Reply