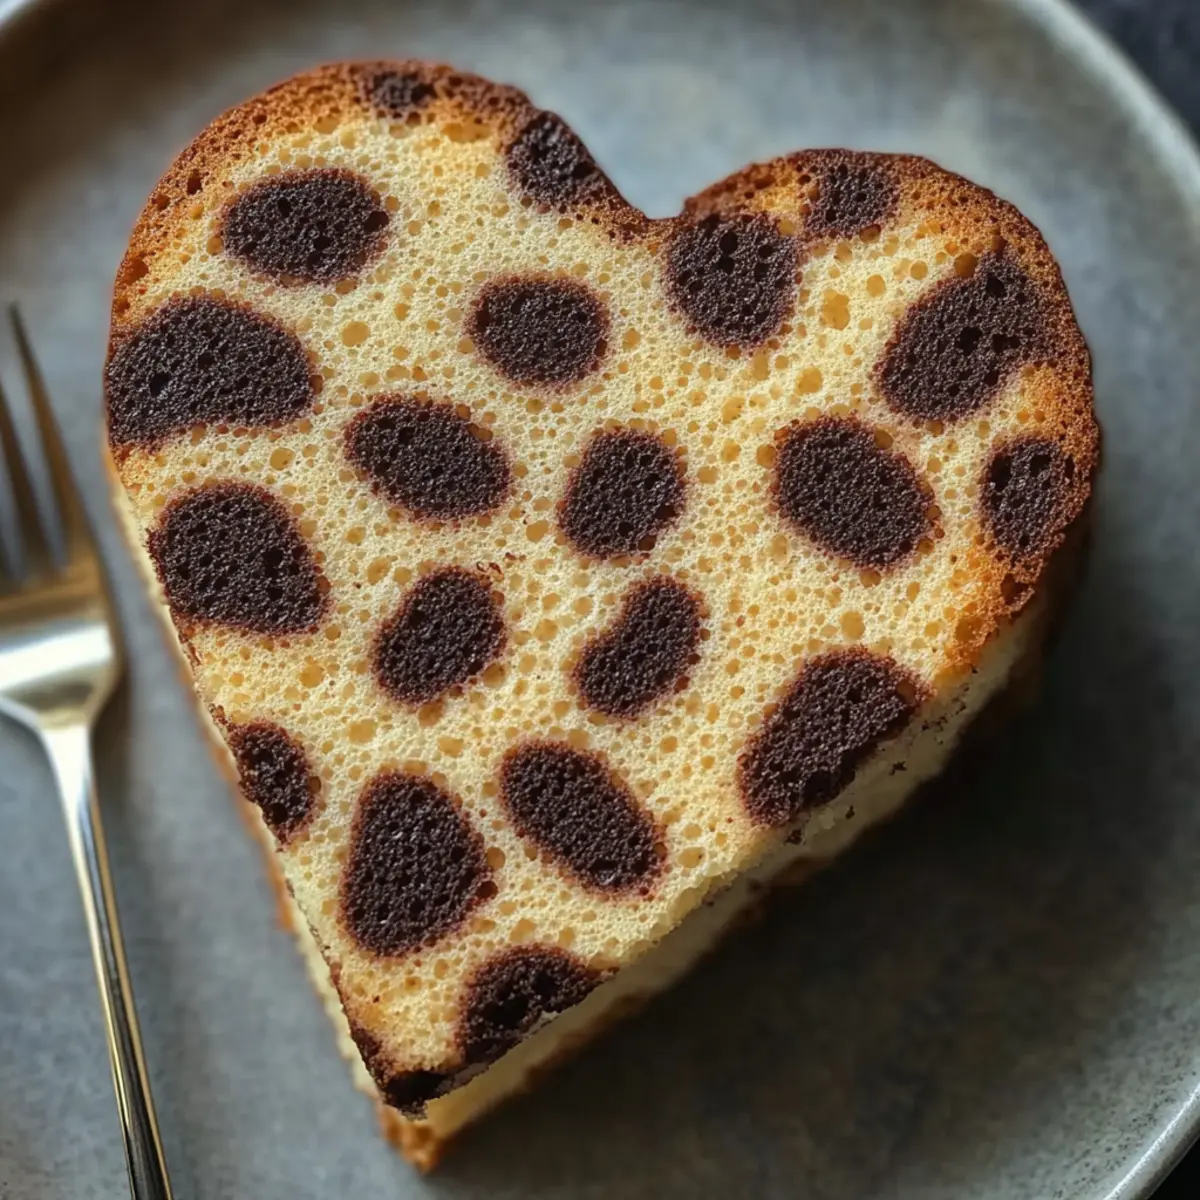
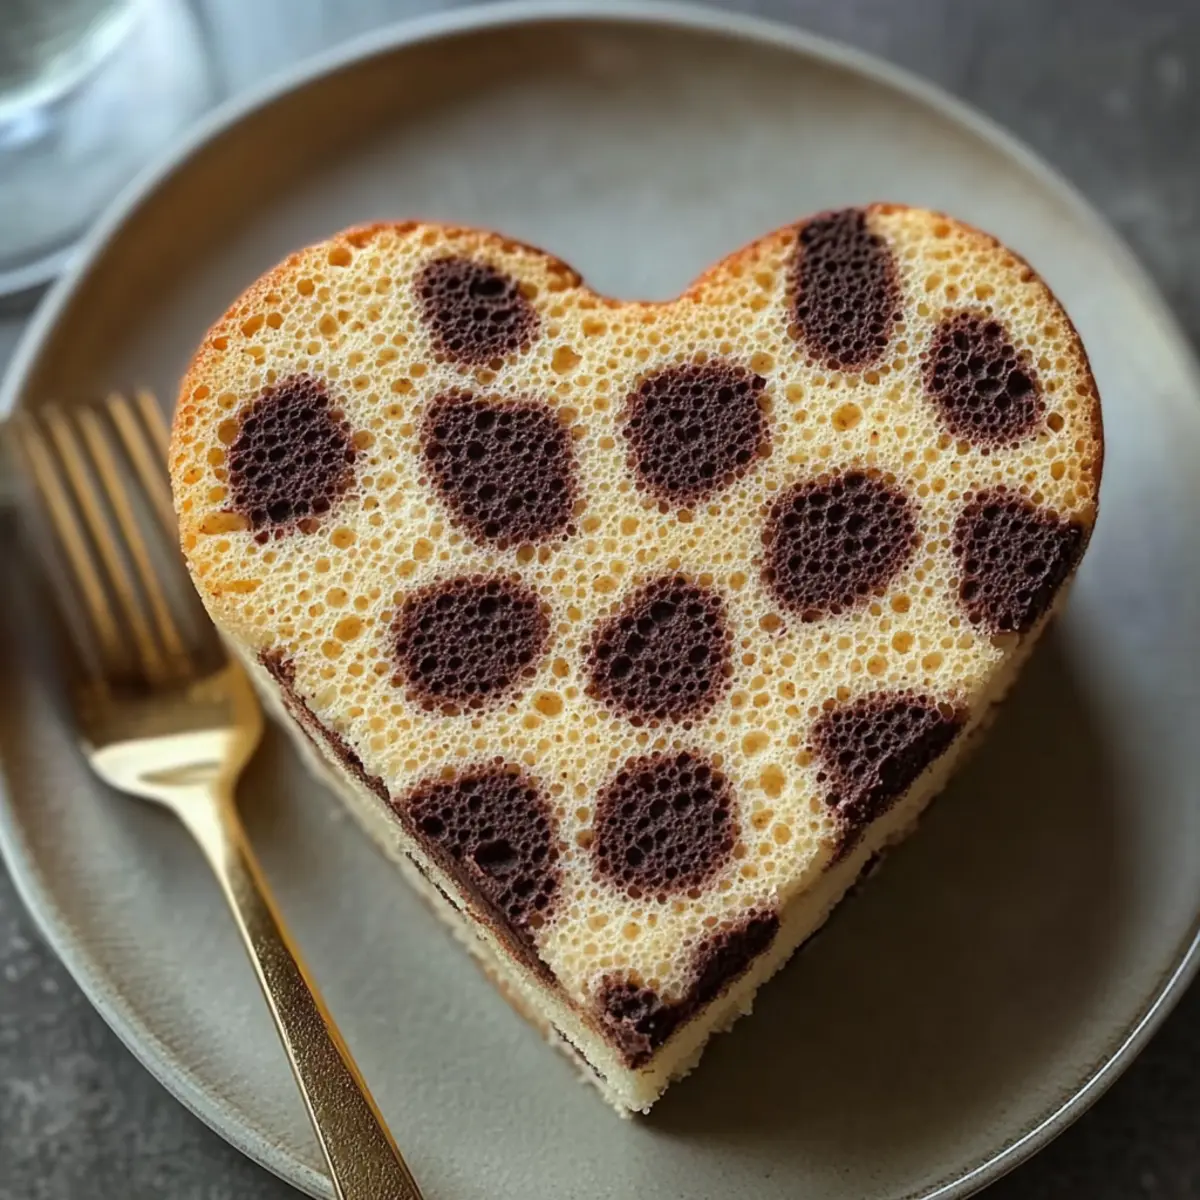
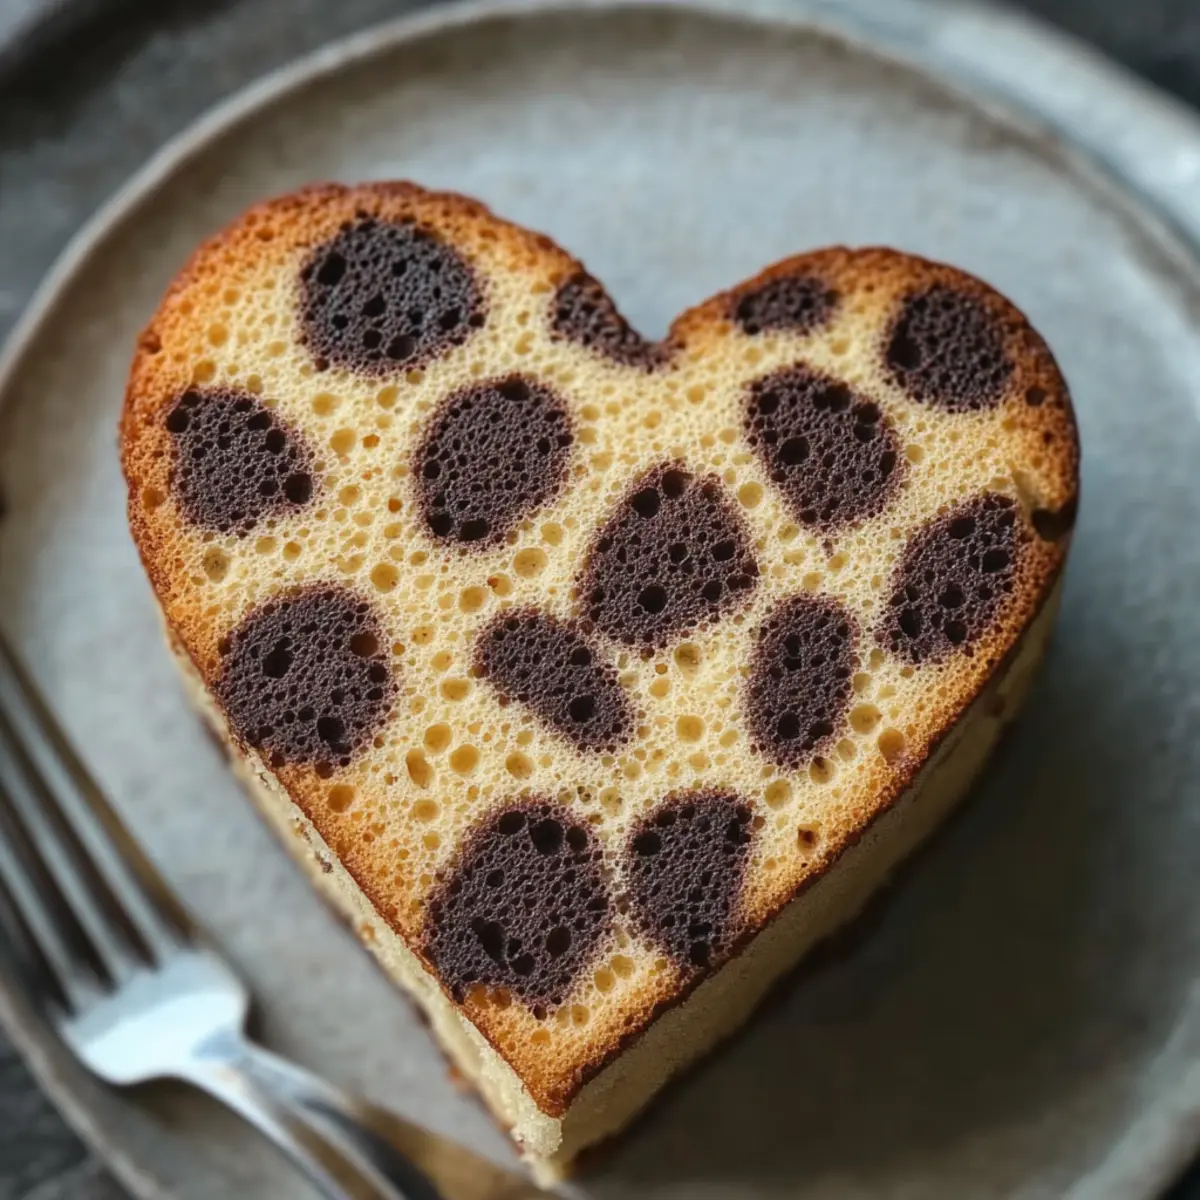
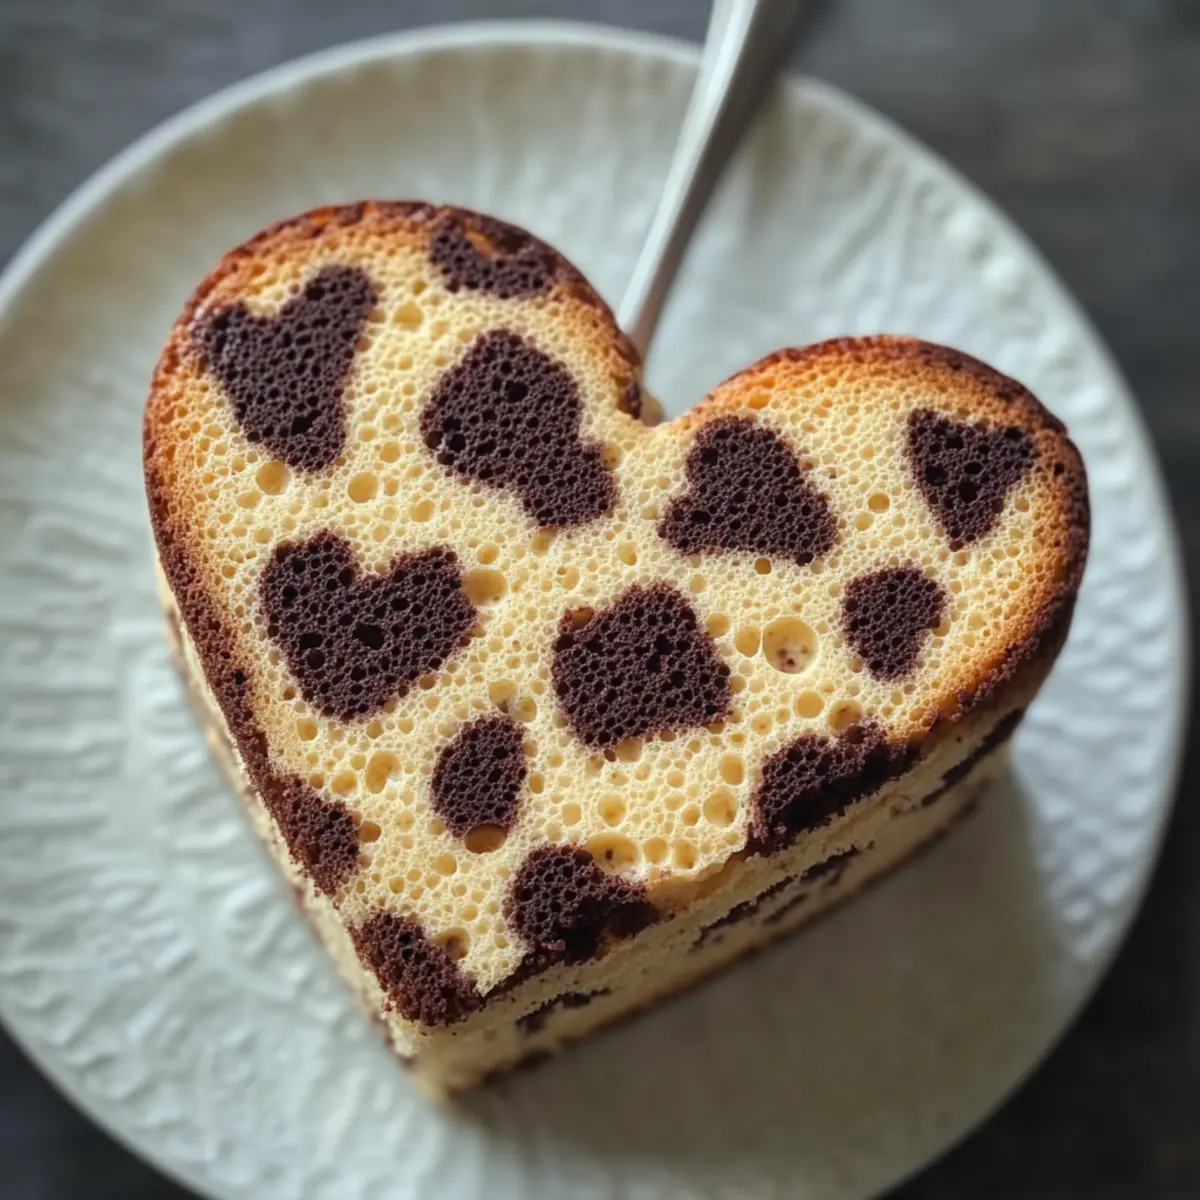
As I carefully unwrapped my favorite baking tools, a wave of nostalgia rushed over me, reminding me of childhood birthday parties filled with laughter and sweet indulgences. Today, I’m sharing my Cheetah Print Heart Cake, a showstopper that not only looks vibrant and playful but also offers a delightful surprise in every slice. This cake is incredibly perfect for celebrating special occasions or simply cheering up a gloomy day, and I promise it will transform any gathering into an event to remember. The best part? It’s surprisingly simple to make, allowing even novice bakers to impress their friends and family without the fuss. So, are you ready to embark on a fun baking adventure that’s as enchanting as it is delicious? Let's dive in and bring this visual masterpiece to life!
What makes this cake so special?
Visual Delight: The Cheetah Print Heart Cake isn’t just a dessert; it’s a stunning centerpiece that will wow your guests!
Easy Technique: Despite its intricate appearance, this cake is surprisingly simple to make, perfect for both novice and seasoned bakers alike.
Flavor Harmony: The rich, buttery layers paired with a creamy frosting create a flavor experience that everyone will adore.
Crowd-Pleasing Appeal: Perfect for birthdays, anniversaries, or any celebration, this cake brings joy and adds a festive atmosphere to your table.
Versatile Options: Want to switch it up? Experiment with different colors or flavors using our tips and tricks from other cake recipes on our blog. Get ready to impress!
Cheetah Print Heart Cake Ingredients
Here’s what you’ll need to create your stunning cake masterpiece!
For the Cake Batter
• All-purpose flour – 2 ¾ cups (345 g), spooned and leveled for the perfect texture.
• Cornstarch – 1 tbsp, helps create a tender crumb in your cake.
• Baking powder – 2 ¼ tsp, ensures that your cake rises beautifully and evenly.
• Baking soda – ½ tsp, provides extra lift for a fluffy texture.
• Fine sea salt – ½ tsp, balances the sweetness and enhances flavors.
• Unsalted butter – 1 cup (225 g), softened to room temperature for easy mixing.
• Granulated sugar – 1 ¾ cups (350 g), sweetens your cake to perfection.
• Large eggs – 4, at room temperature for a smoother batter.
• Pure vanilla extract – 2 tsp, infuses incredible flavor into your cake.
• Whole milk – 1 ¼ cups (300 ml), also at room temperature for a creamy texture.
• Sour cream – ½ cup (120 ml), adds moisture and richness.
• Gel food coloring: golden yellow – for a vibrant cheetah-print effect.
• Gel food coloring: brown – perfect for creating the spots.
• Gel food coloring: black – to add those striking outlines.
For the Buttercream Frosting
• Unsalted butter – 1 ½ cups (340 g), softened for a creamy consistency.
• Powdered sugar – 5-6 cups (600-720 g), sifted for a smooth frosting.
• Heavy cream or whole milk – ¼ cup (60 ml), plus extra as needed, for desired frosting consistency.
• Fine sea salt – ¼ tsp, enhances sweetness and flavor balance.
For Assembly
• Heart-shaped cookie cutter – a small to medium size, to create heart-shaped cake pieces.
With these ingredients at hand, you're all set to make a delightful Cheetah Print Heart Cake that will amaze everyone at your gathering! Happy baking!
Step‑by‑Step Instructions for Cheetah Print Heart Cake
Step 1: Preheat and Prepare
Preheat your oven to 350°F (175°C). While the oven warms up, prepare your heart-shaped cake pans by greasing them with butter and dusting them with flour, or lining the bottoms with parchment paper for easy release later.
Step 2: Mix Dry Ingredients
In a medium bowl, whisk together 2 ¾ cups of all-purpose flour, 1 tablespoon of cornstarch, 2 ¼ teaspoons of baking powder, ½ teaspoon of baking soda, and ½ teaspoon of fine sea salt until all ingredients are thoroughly blended. This will ensure an even rise and fluffy texture for your Cheetah Print Heart Cake, so set it aside once mixed.
Step 3: Cream Butter and Sugar
In a large bowl, using a hand mixer or stand mixer, beat 1 cup of softened unsalted butter until it’s smooth and creamy—about 2-3 minutes. Gradually add 1 ¾ cups of granulated sugar, beating until the mixture is light and fluffy. This step is crucial for incorporating air for a nice rise.
Step 4: Add Eggs and Vanilla
Add the 4 large eggs, one at a time, to the butter and sugar mixture, mixing well after each addition. Follow by mixing in 2 teaspoons of pure vanilla extract until fully incorporated. The batter should be smooth and glossy, creating a rich base for your Cheetah Print Heart Cake.
Step 5: Combine Wet and Dry Ingredients
In another container, whisk together 1 ¼ cups of whole milk and ½ cup of sour cream until smooth. Gradually add the dry ingredient mixture to the butter mixture in three parts, alternating with the milk mixture, beginning and ending with the dry ingredients. Mix until just combined to avoid overmixing.
Step 6: Color the Batter
Reserve about 2 cups of the plain batter for the base. Then, divide the remaining batter into three bowls: color one cup golden yellow, another cup medium brown, and ½ cup black using gel food coloring. Stir each until the colors are vibrant and even, setting the stage for the cheetah print design.
Step 7: Create the Cheetah Print
For a cheetah-print sheet cake, pour half of the plain batter into a lined 9×13 pan. Using the brown batter, pipe irregular blobs for the spots, outlining them with black. Finish by covering the design with a thin layer of yellow batter. Bake this for 12-16 minutes, until a toothpick inserted comes out clean, then allow it to cool.
Step 8: Bake the Main Cake
In prepared heart pans, dollop the colored batters randomly: start with small spoonfuls of each color to create a marbled effect. Use a knife to gently swirl the batters together, then bake at 350°F (175°C) for 25-50 minutes, based on your pan size, until a toothpick comes out clean and the cakes are lightly golden.
Step 9: Level and Chill
Once baked, let the cakes cool in the pans for 10 minutes before transferring them to wire racks. If needed, level the tops of the cooled cakes with a knife, then place layers in the refrigerator for 20-30 minutes to firm up, making assembly easier.
Step 10: Prepare Buttercream Frosting
For the buttercream, beat 1 ½ cups of softened unsalted butter in a large bowl until smooth. Gradually mix in powdered sugar, starting with 4 cups and adding more as needed, along with ¼ teaspoon of fine sea salt and ¼ cup of cream or milk until the frosting is fluffy and spreadable.
Step 11: Color the Frosting
Reserve some of the buttercream for filling, and color the remaining frosting golden tan for the base. Divide the remaining frosting for decoration, tinting part brown and another part black. This vibrant color palette will pull your Cheetah Print Heart Cake together beautifully.
Step 12: Assemble the Cake
Spread a layer of the reserved buttercream between the cooled layers of the cake, stacking them carefully. Once assembled, apply a thin crumb coat of frosting around the sides and top, sealing in any loose crumbs. Chill the cake for a short time, about 20-30 minutes.
Step 13: Frost with Base Coat
After chilling, take your golden tan buttercream and spread it evenly around the cake, smoothing it with an offset spatula. Chill the cake again for 15 minutes to help set the frosting before moving on to the fun cheetah pattern.
Step 14: Pipe the Cheetah Pattern
Using the brown frosting, pipe small spots on the cake, mimicking a cheetah’s fur, and outline these spots with black for depth. Be careful to clean your piping tip between colors for sharp, clean lines that enhance the heart shape.
Step 15: Chill and Serve
Allow your beautifully decorated Cheetah Print Heart Cake to chill in the refrigerator for 30-45 minutes. This will set the buttercream, making it easier to slice. Once ready, serve your stunning cake to wow friends and family at your next celebration!
Expert Tips for Cheetah Print Heart Cake
-
Choose Room Temperature Ingredients: Make sure your butter, eggs, milk, and sour cream are at room temperature for a smoother batter that incorporates air easily.
-
Don’t Overmix: Once you combine the wet and dry ingredients, mix just until incorporated. Overmixing can lead to a dense cake instead of a light, airy Cheetah Print Heart Cake.
-
Coloring Techniques Matter: Use gel food coloring for vibrant and even colors. Liquid food coloring can affect the batter's consistency, so stick with gel for the best results.
-
Swirling for Effect: When dolloping colored batters, be gentle while swirling. Over-swirling may muddy your colors instead of creating distinct spots.
-
Cooling is Key: Don’t skip the chilling phase after leveling your cakes. This ensures that they’re firm enough to frost without shifting and helps the buttercream to set perfectly.
-
Plan for Decoration: When decorating, clean your piping tools between colors to maintain sharp edges. This attention to detail elevates the look of your cake!
Make Ahead Options
These delightful Cheetah Print Heart Cakes are perfect for busy home cooks looking to save time! You can prepare the cake layers up to 3 days in advance by baking and then wrapping each layer tightly in plastic wrap and storing them in the refrigerator. The buttercream frosting can also be made up to 2 days ahead; just store it in an airtight container at room temperature. When you’re ready to serve, simply assemble the chilled cake layers with the frosting and let the cake sit at room temperature for about 30 minutes before adding the final cheetah pattern and serving. This method ensures that your cake remains just as delicious and visually stunning, with minimal effort on the day of your celebration!
Cheetah Print Heart Cake Variations
Feel free to get creative with these delightful twists; customizing your cake will make it even more special!
-
Gluten-Free: Use a 1:1 gluten-free flour blend instead of all-purpose flour for a delicious alternative.
-
Dairy-Free: Substitute unsweetened almond milk and coconut cream for a rich, dairy-free option. Your guests will love this twist on flavor!
-
Vegan-Friendly: Replace eggs with flaxseed meal (1 tablespoon flaxseed meal + 2.5 tablespoon water = 1 egg), and use vegan butter and plant-based milk for a completely vegan cake.
-
Chocolate Lover's Dream: Add ½ cup of cocoa powder to the dry ingredients for a chocolaty twist on your Cheetah Print Heart Cake that chocolate lovers will adore.
-
Citrus Zest: For a fresh flavor boost, mix some lemon or orange zest into the batter. This will add a lovely brightness that complements the sweet frosting beautifully.
-
Nutty Flavors: Fold in ½ cup of finely chopped nuts, like pecans or walnuts, for added texture and a rich, nutty flavor that contrasts nicely with the cake.
-
Spicy Kick: Stir in 1 teaspoon of cinnamon or cayenne pepper into your vanilla frosting for a warm spice that nicely contrasts with the sweetness of the cake.
-
Layer it Up: Create an exciting layered version by adding a fruit filling, such as raspberry or strawberry jam, between layers for a fruity surprise in each slice!
No matter what variations you try, your cake will surely turn out spectacular. And if you’re looking for other frosting ideas, check out my post on Creamy Buttercream Variations. Ready to impress your special someone with a unique twist? Happy baking!
What to Serve with Cheetah Print Heart Cake
Elevate your cake experience with these delightful accompaniments that enhance the joy of every slice.
-
Fresh Berries: A medley of strawberries, blueberries, and raspberries adds a burst of freshness, balancing the cake’s sweetness.
-
Vanilla Ice Cream: This classic pairing melts beautifully, creating a rich and creamy contrast to the textured cake.
-
Whipped Cream: Light and airy, a dollop of homemade whipped cream offers a fluffy touch that enhances the cake's decadent nature.
-
Chocolate Sauce: Drizzling warm, velvety chocolate sauce adds an indulgent richness that pairs perfectly with the cake's flavors.
-
Coffee or Tea: A warm cup of your favorite brew complements the sweetness, adding a cozy vibe to your dessert experience.
-
Sparkling Lemonade: The citrusy fizz cuts through the richness, refreshing your palate and making each bite feel like a celebration.
-
Chilled Milk: A glass of cold milk is a timeless classic that enhances the cake’s buttery notes, perfect for both kids and adults alike.
-
Cheesecake Brownies: For those who desire more sweetness, pairing a rich cheesecake brownie can create a delightful dessert tower that impresses.
-
Fruit Tart: For a more sophisticated touch, a fruit tart offers elegant flavors while maintaining a lightness that balances the richness of the cake.
How to Store and Freeze Cheetah Print Heart Cake
Fridge: Keep any leftover Cheetah Print Heart Cake in an airtight container in the fridge for up to 3 days. This ensures the cake stays moist and delicious.
Freezer: For longer storage, wrap slices tightly in plastic wrap followed by aluminum foil, and freeze for up to 3 months. When ready to enjoy, let thaw in the fridge overnight.
Reheating: If you prefer your cake warm, you can gently reheat slices in the microwave for about 10-15 seconds, just until soft. Enjoy each sweet bite!
Room Temperature: If serving the same day, keep the cake at room temperature, covered lightly with a cake dome or plastic wrap, for up to 6 hours to maintain freshness.
Cheetah Print Heart Cake Recipe FAQs
How do I select the best ingredients for my Cheetah Print Heart Cake?
Absolutely! When choosing your ingredients, look for all-purpose flour that is freshly opened to ensure the best texture. For butter, select unsalted versions as they allow better control over the sugar's sweetness. Eggs should be at room temperature; this not only helps with mixing but also contributes to a fluffier batter. As for the gel food colorings, higher quality brands will yield more vibrant results.
What is the best way to store leftover Cheetah Print Heart Cake?
Very! To keep your cake fresh, store any leftovers in an airtight container in the fridge. This will help maintain its moisture for up to 3 days. If you want to prolong its shelf life, wrap slices in plastic wrap followed by aluminum foil, and freeze for up to 3 months, allowing you to enjoy your delightful cake later.
Can I freeze the Cheetah Print Heart Cake?
Absolutely! For freezing, after the cake has completely cooled, wrap individual slices tightly in plastic wrap and then in aluminum foil. This two-layer method helps prevent freezer burn. When you're ready to enjoy it, simply transfer a slice to the fridge the night before to thaw slowly, or heat it in the microwave for about 10-15 seconds if you're short on time.
What if my cake sinks in the center after baking?
If your Cheetah Print Heart Cake sinks in the center, don't worry! This usually happens if the cake batter was overmixed or overloaded with liquid ingredients. Make sure to mix just until combined and be mindful of your oven temperature—it's best to use an oven thermometer to ensure it's accurate. If you do find yourself in this situation, try adding a layer of frosting to even things out; it can still look great with a deliciously rich buttercream topping!
Can I make this cake ahead of time for an event?
Very! You can absolutely prepare the cake layers a day in advance. Just bake and cool them completely, then wrap them tightly in plastic wrap and refrigerate. This will make assembly easier as the chilled cakes are less likely to crumble. You can frost it the next day, making it a perfect stress-free option for events.
Are there any dietary considerations I should be aware of for the Cheetah Print Heart Cake?
Indeed! When planning to serve this cake to guests, consider potential allergies. The cake contains common allergens such as wheat (from the flour), dairy (from butter, milk, and sour cream), and eggs. For a gluten-free version, you can substitute all-purpose flour with a gluten-free blend. Similarly, if you need a dairy-free option, consider using plant-based butter and milk alternatives. Enjoy baking with care and consideration!
Delightful Cheetah Print Heart Cake to Wow Your Loved Ones
Ingredients
Equipment
Method
- Preheat your oven to 350°F (175°C). Prepare your heart-shaped cake pans by greasing them with butter and dusting them with flour, or lining with parchment paper.
- In a medium bowl, whisk together all-purpose flour, cornstarch, baking powder, baking soda, and salt until blended.
- In a large bowl, beat softened unsalted butter until smooth, gradually add sugar, and beat until light and fluffy.
- Add eggs one at a time, mixing well after each, followed by vanilla extract. The batter should be smooth and glossy.
- In another container, whisk together milk and sour cream. Gradually add dry ingredients to butter mixture in three parts, alternating with milk mixture.
- Reserve about 2 cups of plain batter. Color remaining batter into golden yellow, brown, and black.
- Pour half of the plain batter into a lined pan, pipe brown batter for spots, outline with black, and cover with yellow batter. Bake for 12-16 minutes and cool.
- For the main cake, dollop colored batters randomly and swirl together. Bake until a toothpick comes out clean.
- Cool cakes in pans for 10 minutes, then transfer to wire racks. Level the tops if needed and chill for 20-30 minutes.
- Beat butter for frosting until smooth. Gradually mix in powdered sugar and milk until fluffy.
- Reserve some frosting for filling. Color the rest golden tan for base; divide for decoration (brown and black).
- Spread a layer of reserved buttercream between cooled layers and stack. Apply a thin crumb coat, chill for 20-30 minutes.
- Spread golden tan buttercream evenly around the cake and chill again for 15 minutes to set.
- Pipe small brown spots and outline with black frosting for a cheetah pattern.
- Chill cake for 30-45 minutes to set frosting before serving.


Leave a Reply