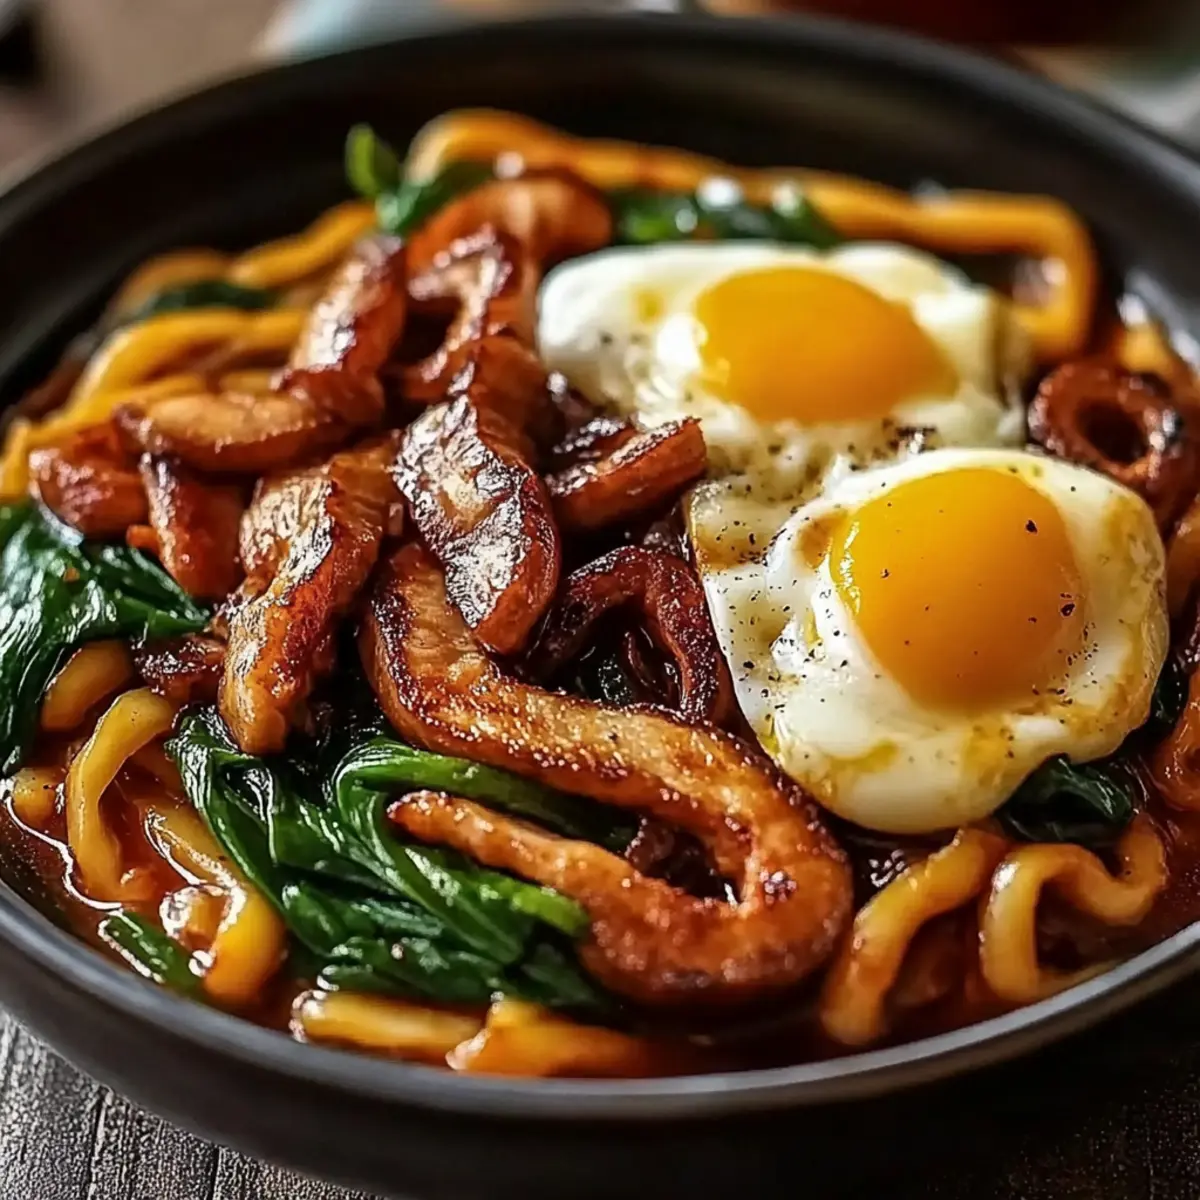
The unmistakable scent of garlic and ginger sizzling in the pan can transform any ordinary day into a culinary escape. Today, I'm excited to share my take on Yaki Udon, a dish that strikes the perfect balance between convenience and delight. In just 30 minutes, you can whip up a vibrant feast that pleases both the palate and the soul. This recipe not only caters to your cravings but is also highly customizable—whether you prefer succulent chicken, fresh shrimp, or hearty tofu, the choice is yours! Plus, it's a fantastic way to use up those veggies lurking in the fridge. What’s your favorite protein to throw into a quick stir-fry?
Why is Yaki Udon a must-try?
Quick and Easy: In just 30 minutes, you’ll have a delicious meal ready to serve. Perfect for busy weeknights!
Flavor Explosion: The blend of garlic, ginger, and umami-rich sauces makes every bite packed with robust flavors.
Customizable: Whether you go with chicken, shrimp, or tofu, you can easily tailor this dish to your taste. Try pairing it with a side of homemade spring rolls for a complete meal!
Vegetable Power: Use up that produce in your fridge—this recipe lets you add your favorite veggies for an extra nutrient boost.
Crowd-Pleaser: Whether for a family dinner or a casual get-together, Yaki Udon is sure to impress your guests!
Unleash your inner chef and elevate simple ingredients into something extraordinary!
Yaki Udon Ingredients
• Dive into the delightful components that make Yaki Udon a hit!
For the Noodles
• Udon noodles – These thick noodles provide a beautiful chewy texture that absorbs flavors wonderfully.
For the Stir-Fry
• Vegetables – Choose a mix like snow peas, bok choy, cabbage, or mushrooms for a colorful and nutritious dish.
• Cooking oil – Use a neutral oil like vegetable or canola for frying without impacting flavor.
• Garlic, minced – Adds a fragrant base layer of flavor that lifts the entire dish.
• Ginger, minced – Brings warmth and zing, enhancing the overall taste profile.
For the Sauces
• Soy sauce – Essential for that salty, umami kick that Yaki Udon is known for.
• Oyster sauce – Adds depth and a slight sweetness to the overall flavor.
• Mirin – This sweet rice wine balances the saltiness of the soy sauce beautifully.
• Sesame oil – A finishing touch that gives a nutty aroma and rich flavor.
For the Protein
• Protein options – Select from chicken, shrimp, or tofu to suit your dietary preference and taste.
Elevate your Yaki Udon experience with these carefully chosen ingredients!
Step‑by‑Step Instructions for Yaki Udon
Step 1: Cook the Noodles
Begin by bringing a large pot of water to a rolling boil over high heat. Add 14 ounces of udon noodles and cook them according to the package instructions, usually around 5–8 minutes, until they are tender but still firm to the bite. Once cooked, drain the noodles in a colander, then set them aside, ensuring they are not sticky.
Step 2: Heat the Skillet
In a large skillet or wok, heat 2 tablespoons of cooking oil over medium-high heat until shimmering, about 1–2 minutes. The oil should be hot enough to sizzle when the garlic hits the pan. Make sure to swirl the oil around to coat the surface evenly for optimal cooking of the Yaki Udon.
Step 3: Sauté Garlic and Ginger
Add 1 teaspoon of minced garlic and 1 teaspoon of minced ginger to the hot oil, stirring constantly for about 30 seconds. The moment you smell the aromatic blend filling the air, it’s time to move to the next step. Keep an eye on the garlic to ensure it doesn't burn, as it can turn bitter.
Step 4: Cook the Protein
Introduce your choice of protein—whether it’s chicken, shrimp, or tofu—into the skillet. Cook for approximately 4–6 minutes, stirring frequently, until the protein is nicely browned and cooked through. If using chicken or shrimp, look for a golden color, while tofu should be golden and crisp on the edges.
Step 5: Add the Vegetables
Once the protein is cooked, toss in 1 cup of your chosen vegetables, such as snow peas or bok choy. Stir-fry the mixture for about 2–3 minutes until the vegetables are vibrant and tender-crisp. They should still retain some bite for that perfect crunch in your Yaki Udon.
Step 6: Combine the Noodles
Gently add the cooked udon noodles to the skillet, incorporating them with the protein and vegetables. Use tongs or a spatula to toss everything together for about 1–2 minutes, ensuring that the noodles are evenly distributed and warmed through.
Step 7: Add the Sauces
Drizzle in 2 tablespoons of soy sauce, 1 tablespoon of oyster sauce, 1 tablespoon of mirin, and 1 teaspoon of sesame oil. Toss the Yaki Udon again for about 2–3 minutes until every ingredient is well-coated and heated thoroughly, making sure to pick up any bits stuck to the bottom of the skillet.
Step 8: Serve and Garnish
After everything is beautifully intertwined and sizzling, remove the skillet from heat. Plate your delicious Yaki Udon, and feel free to garnish with sesame seeds, sliced scallions, or chili flakes for added flavor. Serve hot and enjoy the delightful taste of home-cooked goodness!
Make Ahead Options
Yaki Udon is a fantastic dish for meal prep, saving you precious time on busy nights! You can chop your vegetables and marinate your protein (like chicken, shrimp, or tofu) up to 24 hours in advance, storing them in airtight containers in the refrigerator to maintain their freshness. Additionally, you can cook the udon noodles ahead of time, but to prevent them from becoming sticky, toss them lightly in a bit of oil before refrigerating. When you're ready to serve, simply reheat your prepped ingredients in a skillet, add the cooked noodles, and stir in the sauces as per the recipe. This way, you’ll have a delicious homemade meal ready to enjoy in no time!
Expert Tips for Yaki Udon
Prep Ingredients First: Gather and chop all ingredients beforehand to ensure a smooth cooking process, preventing overcooked vegetables or burnt garlic.
Watch the Heat: Maintain medium-high heat while cooking; too low can lead to soggy noodles, while too high can burn your ingredients.
Don't Overcrowd the Pan: Cook protein and vegetables in batches if necessary, allowing for even cooking, especially for your Yaki Udon.
Taste as You Go: Always sample and adjust seasonings to suit your palate before serving; each ingredient adds its own unique flavor.
Garnish for Flair: Striking garnishes like sesame seeds or scallions not only enhance presentation but also add exciting new flavors to your dish.
Storage Tips for Yaki Udon
Fridge: Keep any leftover Yaki Udon in an airtight container in the fridge for up to 3 days. This helps maintain freshness and flavor.
Freezer: For longer storage, freeze portions of Yaki Udon in freezer-safe bags or containers for up to 1 month. Be sure to separate ingredients if possible for even thawing.
Reheating: When ready to enjoy, reheat in a skillet over low heat, adding a splash of water or soy sauce to keep it moist. Stir frequently until heated through.
Prep Ahead: If you’re planning to enjoy Yaki Udon later, feel free to prep your ingredients in advance, storing them in the fridge for up to a day to save time!
What to Serve with Yaki Udon
Enjoying a dish as vibrant as Yaki Udon opens up a world of delicious pairings that can elevate your meal.
- Crispy Spring Rolls: These crunchy delights offer a perfect contrast to the chewy noodles, delivering a satisfying crunch with every bite.
- Steamed Edamame: Lightly salted and buttery, these pop-in-your-mouth snacks maintain a fresh and clean flavor, balancing the savory noodles beautifully.
- Miso Soup: A warm bowl of this traditional soup brings umami depth, making for a heartwarming starter before diving into your Yaki Udon.
- Asian Cucumber Salad: This refreshing dish adds a cool and crisp touch to your meal, rounding out the flavors nicely with its tangy dressing.
- Teriyaki Chicken Skewers: Juicy and sweet, these skewers add a delightful protein option that complements the Asian-inspired themes beautifully.
- Cold Green Tea: A calming drink that refreshes your palate, keeping the focus on the delicious flavors of your Yaki Udon.
- Chocolate Mochi: For dessert, these chewy rice cakes filled with sweet surprises offer a delightful end, contrasting the main’s savory profile.
Dive into these pairings, and create a delightful dining experience bursting with flavor and variety!
Yaki Udon Variations & Substitutions
Feel free to explore every delightful possibility with your Yaki Udon to create a dish that's uniquely yours!
- Gluten-Free: Substitute regular udon noodles with gluten-free rice noodles for a gluten-free option.
- Vegetarian Delight: Skip the meat and load up on a variety of colorful vegetables for a vibrant vegetarian version.
- Spicy Kick: Add a tablespoon of chili paste or fresh sliced chilies during stir-frying for a fiery twist.
- Herb Infusion: Toss in fresh herbs like basil or cilantro at the end for an aromatic freshness.
- Nutty Flavor: Incorporate crushed peanuts or cashews as a topping for added crunch and a nutty undertone.
- Crispy Tofu: For extra texture, pan-fry your tofu until golden brown before adding it to the mixture.
- Coconut Milk: For a creamier sauce, stir in a splash of coconut milk along with your sauces for a tropical flair.
- Protein Boost: Mix up your protein with slices of beef or pork to give this dish a hearty twist!
Yaki Udon is all about your taste! Adding a side of homemade spring rolls could elevate your dining experience, too! Enjoy the journey of flavors—your kitchen is your playground!
Yaki Udon Recipe FAQs
How do I choose the right vegetables for Yaki Udon?
Absolutely! Look for fresh, vibrant vegetables that add both color and nutrition. Snow peas, bok choy, and mushrooms work beautifully and provide a crunch that complements the soft noodles. Just avoid any veggies with dark spots or wilted leaves – those aren’t going to enhance your dish!
How should I store leftovers of my Yaki Udon?
After enjoying your delightful meal, transfer any leftover Yaki Udon to an airtight container and pop it in the fridge. It will stay fresh for up to 3 days. Ensure it’s completely cooled before sealing to keep condensation at bay, which can cause sogginess.
Can I freeze Yaki Udon? How?
Yes, you can absolutely freeze Yaki Udon! Portion the cooled dish into freezer-safe bags or containers. To prevent clumping, it's a solid idea to freeze the noodles and protein separately from the veggies. This way, when you thaw, everything can be heated evenly. You can keep it in the freezer for up to 1 month. When you’re ready to enjoy it, you can thaw it in the fridge overnight before reheating.
What should I do if my noodles are too sticky?
If your cooked udon noodles become sticky, don’t worry! Simply rinse them under cold water after cooking to cool them down and loosen them. If you’re working with leftovers, try reheating them with a splash of water in a skillet to help break them apart. That should solve any stickiness!
Can my Yaki Udon be made vegetarian or vegan?
Very! You can easily make Yaki Udon vegetarian or vegan by substituting chicken or shrimp with tofu or mushrooms. For the sauces, ensure that your oyster sauce is the vegetarian version available in stores. This dish offers a delightful balance of flavors whether you go vegetarian or not!
Can I use other types of noodles in Yaki Udon?
Of course, the more the merrier! While udon noodles are traditional, feel free to experiment with other noodle varieties such as soba or even rice noodles. Just keep an eye on cooking times, as different noodles have different textures and cooking requirements, but the flavor will still pack a punch!
Deliciously Easy Yaki Udon: A Flavorful Homemade Delight
Ingredients
Equipment
Method
- Bring a large pot of water to a boil, add udon noodles and cook for 5-8 minutes until tender. Drain and set aside.
- Heat cooking oil in a large skillet over medium-high heat for 1-2 minutes until shimmering.
- Sauté minced garlic and ginger in the oil for about 30 seconds until fragrant.
- Add protein and cook for 4-6 minutes, stirring until browned and cooked through.
- Toss in vegetables and stir-fry for 2-3 minutes until vibrant and tender-crisp.
- Add cooked noodles and gently toss everything together for 1-2 minutes.
- Drizzle in soy sauce, oyster sauce, mirin, and sesame oil, tossing for another 2-3 minutes until well-coated.
- Serve hot, garnished with sesame seeds, scallions, or chili flakes.


Leave a Reply