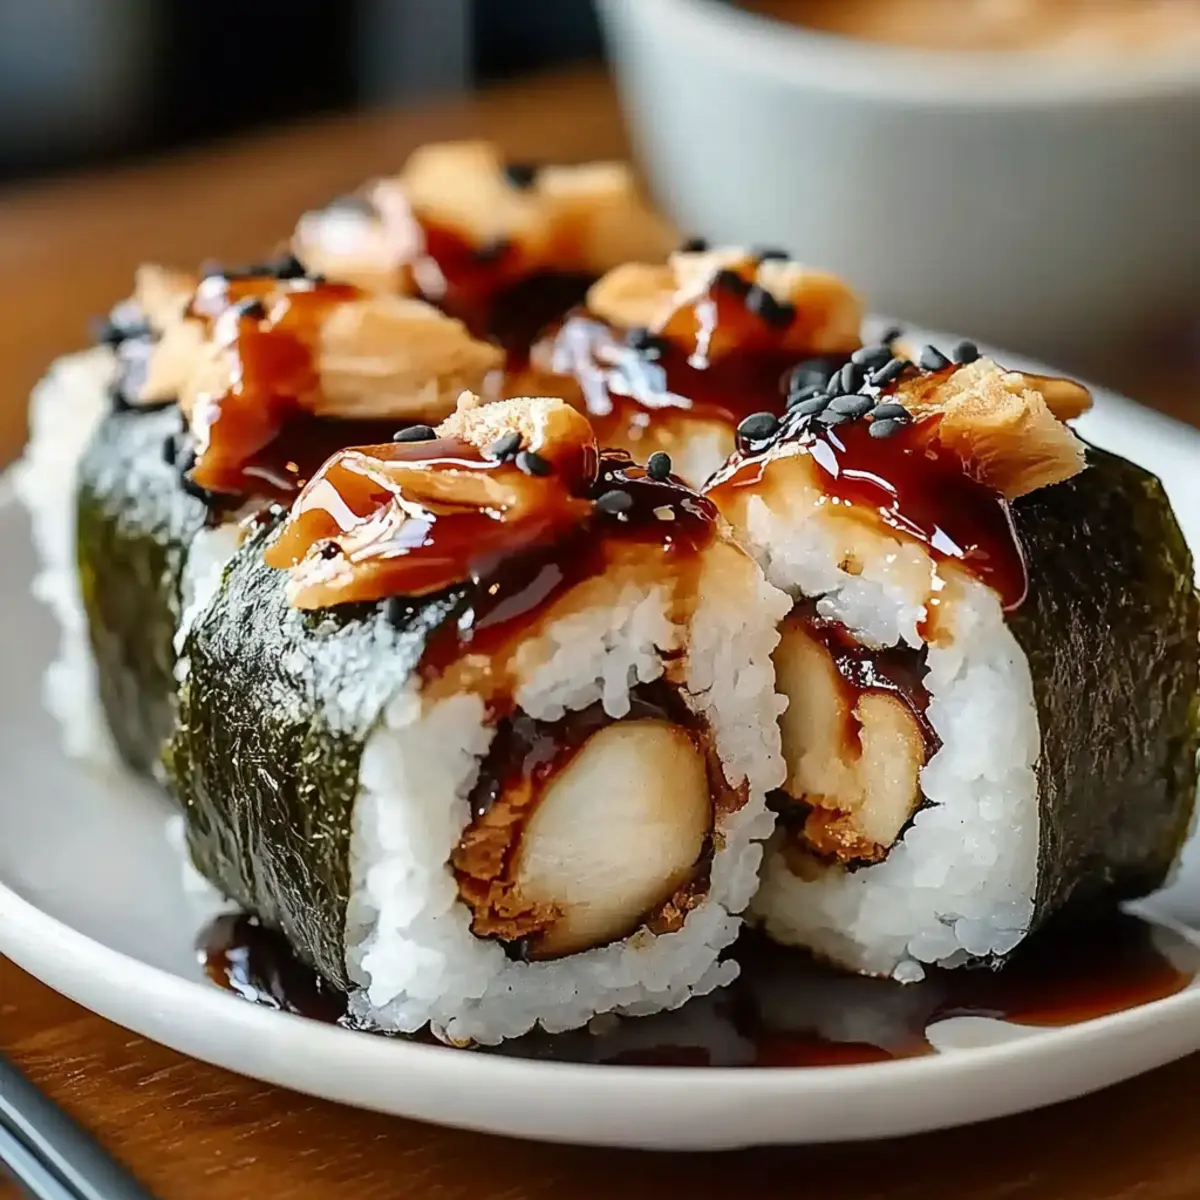
As I delicately shaped the rice into little triangles, the kitchen filled with the comforting aroma of sesame oil and tender chicken. Today, I'm excited to share my Chicken Onigiri recipe, a delightful Japanese treat that's not only fun to make but also a perfect way to liven up your lunch or dinner. With just a handful of simple ingredients and about 35 minutes to spare, you can transform plain sushi rice into these delicious, hand-held bites. Whether you're packing lunch for the kiddos or impressing friends at a casual gathering, these onigiri are sure to be a hit. Plus, they're easily customizable—just swap in your favorite proteins or veggies! Ready to roll up your sleeves and learn how to make this culinary gem? Your taste buds will thank you!

Why is Chicken Onigiri a must-try?
Handheld delight: These Chicken Onigiri are perfectly portioned, making them ideal for on-the-go meals or picnics.
Flavor-packed: The savory combination of chicken marinated in soy sauce and sesame oil mingles beautifully with the seasoned rice.
Customizable: Feel free to experiment! Add your favorite veggies or even swap in different proteins for a personal touch.
Quick to prepare: With just 35 minutes from start to finish, you can whip up a satisfying meal without much fuss.
Crowd-pleasing: These bites are sure to impress, whether for a casual dinner or a fun lunch with friends. They'll have everyone asking for the recipe!
Don’t forget to try making other Japanese recipes for a complete culinary adventure!
Chicken Onigiri Ingredients
• Dive into creating your homemade Chicken Onigiri with these essential ingredients!
For the Rice
- 2 cups sushi rice – This specific rice has the perfect stickiness to hold your onigiri together.
- 2 ½ cups water – Essential for cooking the sushi rice until tender.
- 1 teaspoon salt – Adds flavor to the rice for a mouthwatering base.
- 1 tablespoon rice vinegar – Balances the flavor of the rice and enhances its taste.
- 1 tablespoon sugar – A hint of sweetness complements the savory notes of the dish.
For the Filling
- 1 cup cooked chicken, shredded – Use leftover rotisserie chicken or freshly cooked for a delightful, protein-packed center.
- 2 tablespoons soy sauce – Infuses the chicken with rich, umami flavors.
- 1 tablespoon sesame oil – Provides a nutty richness that enhances the overall taste.
For Serving (Optional)
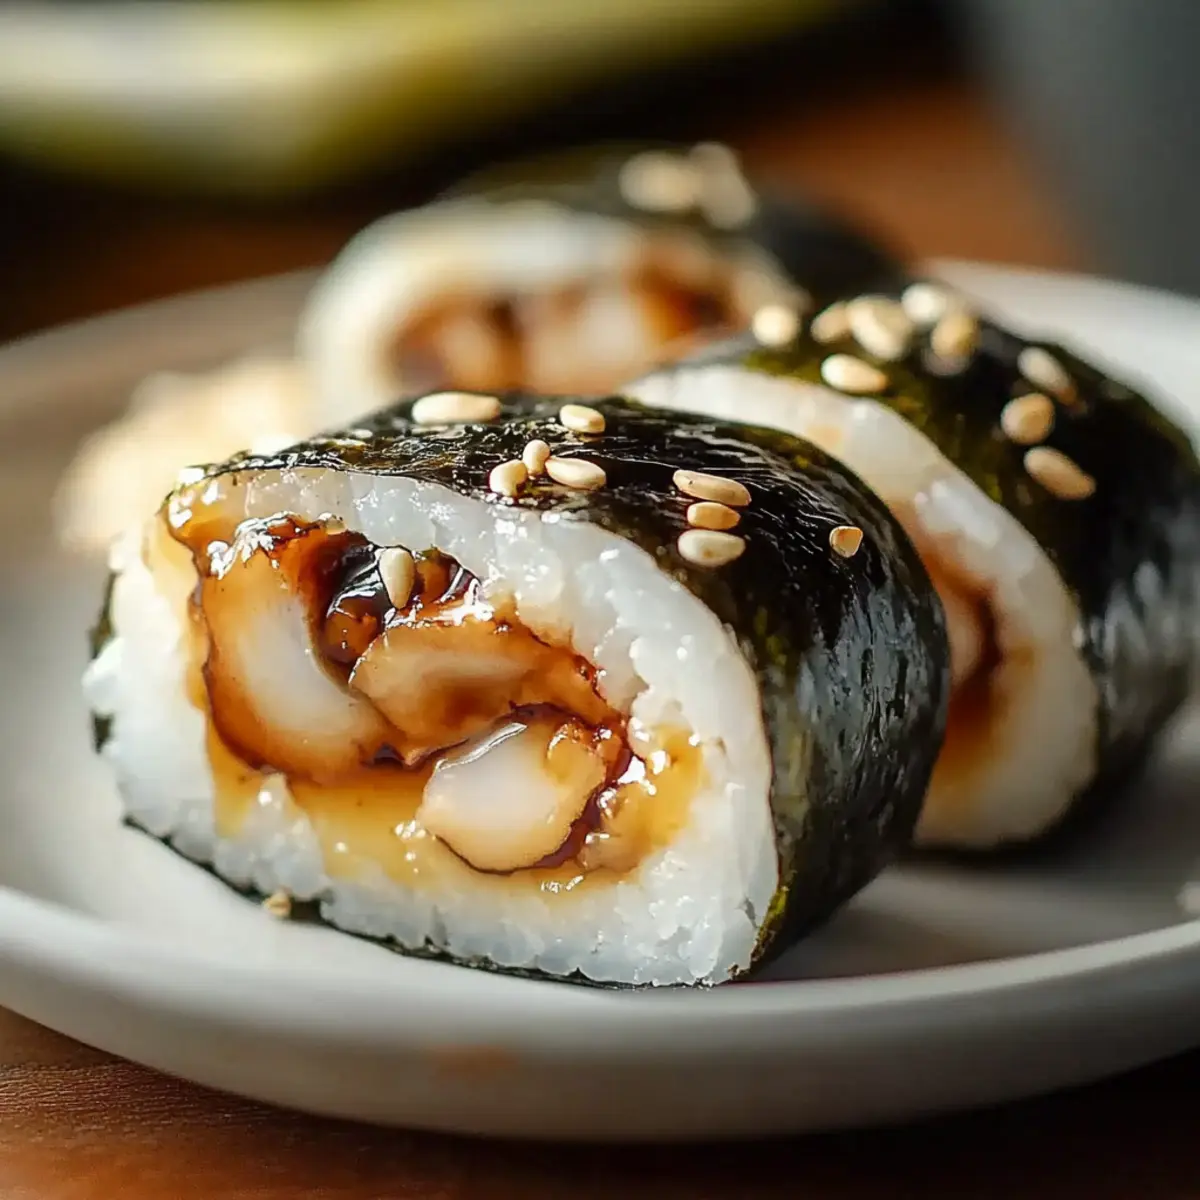
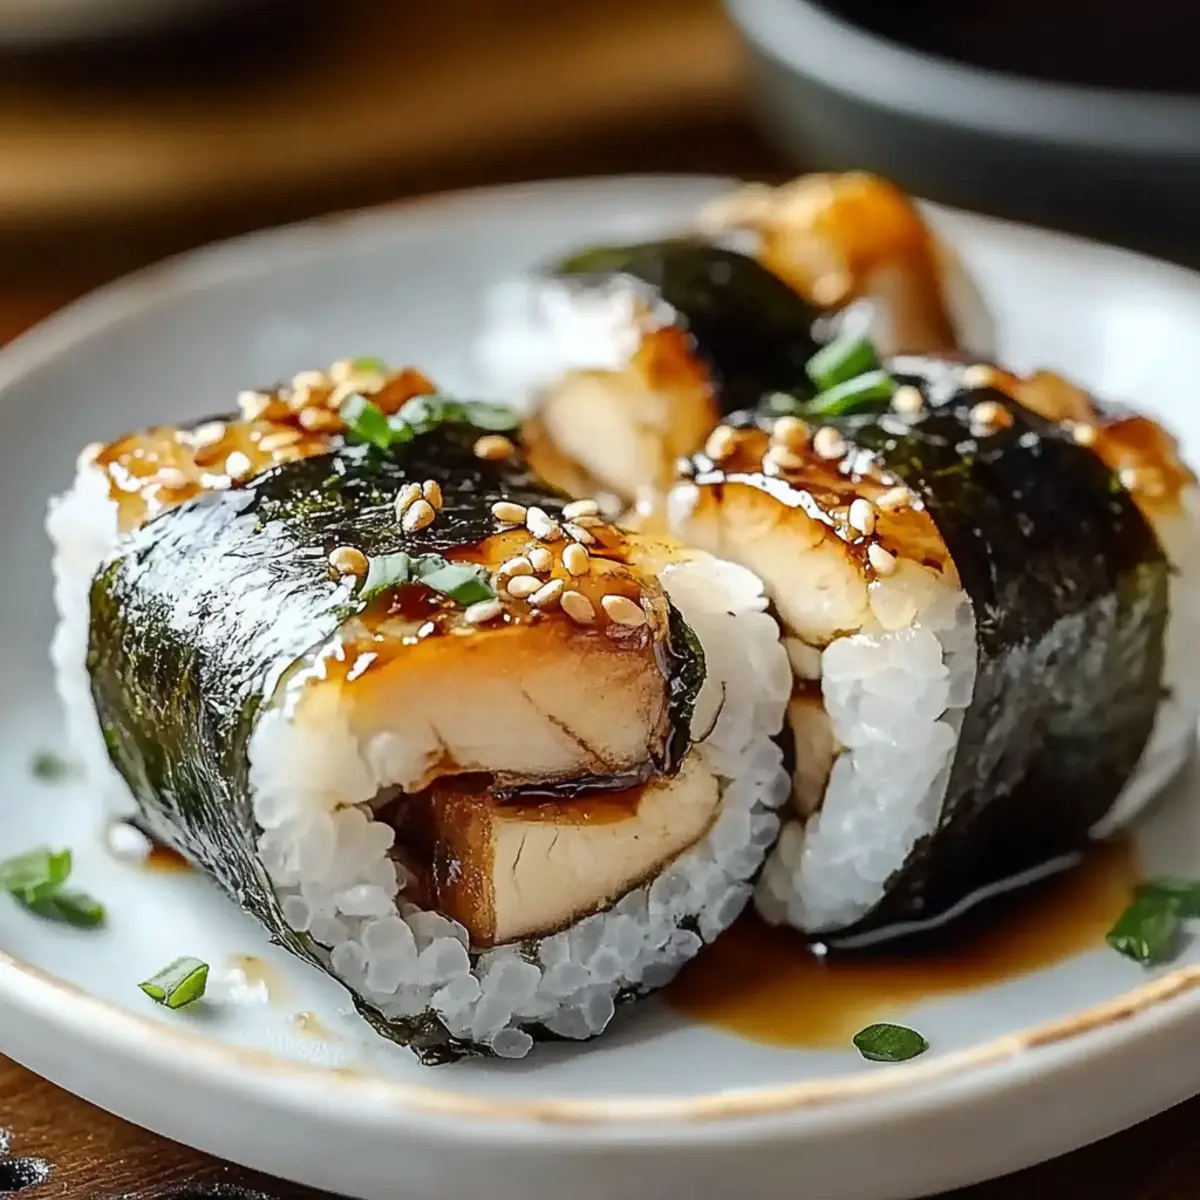
- 4 sheets nori, cut into strips – Adds a crispy texture and traditional touch when wrapping the onigiri.
Now that you have your ingredients ready, let’s roll up our sleeves and create these irresistible Chicken Onigiri that will surely light up your meal times!
Step‑by‑Step Instructions for Chicken Onigiri
Step 1: Rinse the Rice
Begin by rinsing 2 cups of sushi rice under cold water in a fine mesh sieve until the water runs clear. This process removes excess starch, ensuring your rice is fluffy. Set a medium-sized pot on the stove and combine the rinsed rice with 2 ½ cups of water.
Step 2: Cook the Rice
Bring the mixture in the pot to a boil over high heat, then reduce the heat to low and cover with a lid. Allow the sushi rice to simmer for about 20 minutes or until all the water has been absorbed. The rice should become tender and sticky, perfect for forming Chicken Onigiri.
Step 3: Season the Rice
While your rice cooks, prepare the seasoning mixture in a small bowl by stirring together 1 tablespoon of rice vinegar, 1 teaspoon of salt, and 1 tablespoon of sugar until it dissolves. Once the rice is cooked, remove it from heat and gently fold this mixture into the rice using a wooden spatula, letting it cool slightly.
Step 4: Prepare the Chicken Filling
In another bowl, mix together 1 cup of shredded cooked chicken with 2 tablespoons of soy sauce and 1 tablespoon of sesame oil. Ensure the chicken is well-coated to infuse the filling with flavor. Set this aside as your filling for the Chicken Onigiri.
Step 5: Shape the Onigiri
Moisten your hands with a little water to prevent sticking, then scoop a handful of the seasoned rice into your palm. Flatten the rice slightly to make a pocket for the filling. Add a spoonful of the chicken mixture right in the center of the rice.
Step 6: Mold the Onigiri
Carefully mold the rice around the chicken filling, shaping it into a ball or triangle—your choice! Press gently but firmly to ensure the Chicken Onigiri holds together. Repeat this process with the remaining rice and chicken filling to create a delightful batch of onigiri.
Step 7: Optional Nori Wrap
If desired, cut sheets of nori into strips and wrap each onigiri for added flavor and a traditional touch. The nori not only enhances the taste but also makes these Chicken Onigiri easier to handle and more visually appealing.
Step 8: Serve and Enjoy
Your Chicken Onigiri is now ready! Arrange the onigiri on a serving platter and enjoy them as a tasty snack or meal. They make for a lovely addition to lunches or casual gatherings, offering a delightful taste of homemade comfort food.
What to Serve with Chicken Onigiri
Nothing elevates your Chicken Onigiri experience like the right side dishes and drinks to complement these tasty bites.
-
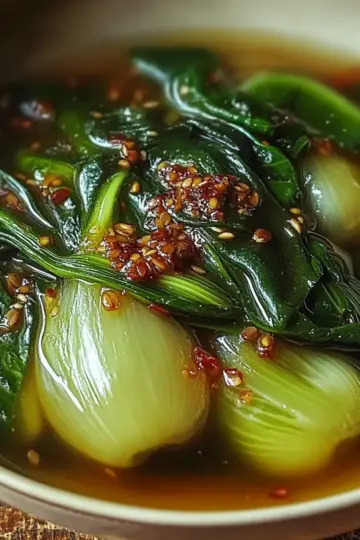
Refreshing Cucumber Salad: A crisp, cool salad with sesame dressing balances the warmth of the onigiri, adding a fresh crunch to your meal.
-
Miso Soup: This comforting bowl of miso soup offers a rich, umami flavor that pairs beautifully with the savory chicken, enhancing the entire dining experience.
-
Teriyaki Vegetables: Stir-fried seasonal veggies glazed with teriyaki sauce bring a sweet and savory profile that complements the onigiri's flavors perfectly.
-
Pickled Ginger: Adding a touch of zesty pickled ginger aids digestion and cleanses the palate so you can fully enjoy each delicious bite.
-
Green Tea: Pair with a warm cup of green tea for a calming beverage that balances out the dish and adds depth to your meal.
-
Fruit Platter: A selection of fresh fruits like strawberries and melon not only adds a hint of sweetness but also brings color and vibrancy to your dining table.
Enjoy crafting a complete meal that showcases your Chicken Onigiri and enhances your culinary adventure!
Expert Tips for Chicken Onigiri
Perfect Rice: Use high-quality sushi rice to achieve the ideal stickiness for molding your Chicken Onigiri. Remember, rinsing is essential to remove excess starch.
Cooling Time: Allow the rice to cool slightly after seasoning. This helps prevent burns and makes it easier to handle while shaping the onigiri.
Moisten Hands: Always wet your hands before handling the rice to prevent it from sticking. This little trick makes forming the onigiri a breeze!
Filling Variations: Get creative! You can easily substitute chicken with tuna, tofu, or even veggies, making your Chicken Onigiri unique every time.
Press Firmly: When shaping the rice, ensure you're pressing it firmly enough to hold together without crushing it. This balance keeps your onigiri intact and delicious.
How to Store and Freeze Chicken Onigiri
Fridge: Store Chicken Onigiri in an airtight container for up to 3 days. To maintain freshness, avoid adding nori until just before serving to prevent sogginess.
Freezer: You can freeze Chicken Onigiri by placing them in a single layer on a baking sheet until solid, then transferring them to a freezer-safe bag for up to 1 month.
Reheating: To enjoy your frozen Chicken Onigiri, simply thaw them in the fridge overnight, then reheat in the microwave for about 30 seconds. Avoid overheating to prevent rice from becoming dry.
Serving Tips: Serve onigiri cold or at room temperature for the best flavor and texture, and garnish with fresh nori if desired!
Make Ahead Options
These Chicken Onigiri are perfect for meal prep enthusiasts! You can prepare the sushi rice and season it up to 24 hours in advance. Simply refrigerate the cooled rice in an airtight container to maintain its texture. The chicken filling can also be mixed and stored in the fridge for up to 3 days—just make sure it's well-sealed to avoid drying out. When you're ready to serve, mold the rice around the filling and shape into onigiri during mealtime. This way, you can enjoy freshly formed onigiri while saving time, making your busy weeknights a little easier and just as delicious!
Chicken Onigiri Variations & Substitutions
Feel free to mix it up and create your own version of Chicken Onigiri with these delicious twists!
-
Spicy Twist: Add a teaspoon of sriracha to the chicken mixture for an exciting kick! This brings a delightful heat that elevates the dish.
-
Vegetarian Option: Substitute cooked chicken with marinated tofu for a plant-based treat. The flavors will still shine, making this a satisfying choice.
-
Savory Add-ins: Toss in some finely chopped green onions or shredded carrots into the rice to enhance texture and flavor. This adds color and freshness in every bite.
-
Umami Boost: Sprinkle a bit of furikake seasoning on the finished onigiri for an extra burst of flavor. This traditional Japanese topping will have your taste buds dancing with joy!
-
Fusion Flavor: Try using BBQ pulled pork as the filling instead of chicken for a fun American twist. The smoky flavors create an irresistible combination that everyone will love.
-
Crispy Coating: Lightly pan-fry the shaped onigiri for a crunchy texture on the outside. This adds a delightful contrast to the soft rice and savory filling.
-
Fruit Infusion: Mix in small pieces of mango or avocado for a unique sweet touch. This unexpected flavor pairing brings a refreshing surprise to every mouthful.
-
Low-Carb& Zucchini Rice: Replace sushi rice with riced cauliflower or zucchini for a low-carb alternative. It’s a fantastic way to enjoy this dish while cutting down on carbs.
Now that you're inspired, it's time to get creative! You might also enjoy trying these Japanese recipes like sushi rolls or miso soup for a full culinary experience.
Chicken Onigiri Recipe FAQs
How do I know when my sushi rice is ripe or good?
Absolutely! The best sushi rice should be slightly sticky and shiny after cooking. Look for grains that are plump and firm. If you notice the rice is too dry or hard, it may have been undercooked, while mushy rice indicates overcooking. Rinsing the rice until the water runs clear is key for the perfect texture!
How should I store leftover Chicken Onigiri?
Very! Keep your Chicken Onigiri in an airtight container in the fridge for up to 3 days. To keep the nori crispy, wait to add it until you're ready to serve. Placing a small piece of paper towel in the container can also help absorb any excess moisture, making for a better eating experience later.
Can I freeze Chicken Onigiri? If so, how?
Definitely! To freeze your Chicken Onigiri, lay them out in a single layer on a baking sheet and freeze for about 2 hours until solid. Then transfer them to a freezer-safe bag, where they can last up to 1 month. When you're ready to enjoy them, thaw overnight in the fridge and microwave for about 30 seconds until warm—this keeps the rice moist and delicious!
What if my Chicken Onigiri keeps falling apart?
Don’t worry, it happens to the best of us! If your onigiri is falling apart, it might be due to not using enough rice or not pressing the rice firmly enough while shaping. Make sure to mold the rice around the filling with gentle but firm pressure and use the right ratio of rice to filling. Try adding a bit more rice or even a small drizzle of water if needed to help it stick better.
Are there any dietary considerations for Chicken Onigiri?
Absolutely! Keep in mind potential allergens like soy sauce, which contains gluten. For a gluten-free option, choose tamari instead. If serving to pets or small children, consider the seasoning levels—high sodium can be harmful to pets, so avoid giving them any soy sauce. Always double-check for food sensitivities when hosting friends or family.
Can I customize the filling for my Chicken Onigiri?
Very much! The beauty of Chicken Onigiri is in its versatility. You can substitute the chicken with tuna, seasoned tofu, or sautéed vegetables to suit your taste. Just keep the flavor balance in mind, ensuring anything you add is well-seasoned and complements the rice nicely. Enjoy the adventure of trying out new combinations!
Delicious Chicken Onigiri: Tasty Homemade Comfort Bites
Ingredients
Equipment
Method
- Begin by rinsing 2 cups of sushi rice under cold water in a fine mesh sieve until the water runs clear. Set a medium-sized pot on the stove and combine the rinsed rice with 2 ½ cups of water.
- Bring the mixture in the pot to a boil over high heat, then reduce the heat to low and cover with a lid. Allow the sushi rice to simmer for about 20 minutes or until all the water has been absorbed.
- Prepare the seasoning mixture in a small bowl by stirring together 1 tablespoon of rice vinegar, 1 teaspoon of salt, and 1 tablespoon of sugar until it dissolves. Fold this mixture into the rice once cooked.
- In another bowl, mix together 1 cup of shredded cooked chicken with 2 tablespoons of soy sauce and 1 tablespoon of sesame oil.
- Moisten your hands with water, scoop a handful of seasoned rice into your palm, flatten it slightly, and add a spoonful of the chicken mixture in the center.
- Mold the rice around the chicken filling, shaping it into a ball or triangle.
- If desired, wrap each onigiri with strips of nori for added flavor and a traditional touch.
- Your Chicken Onigiri is now ready! Serve on a platter and enjoy as a tasty snack or meal.
Leave a Reply