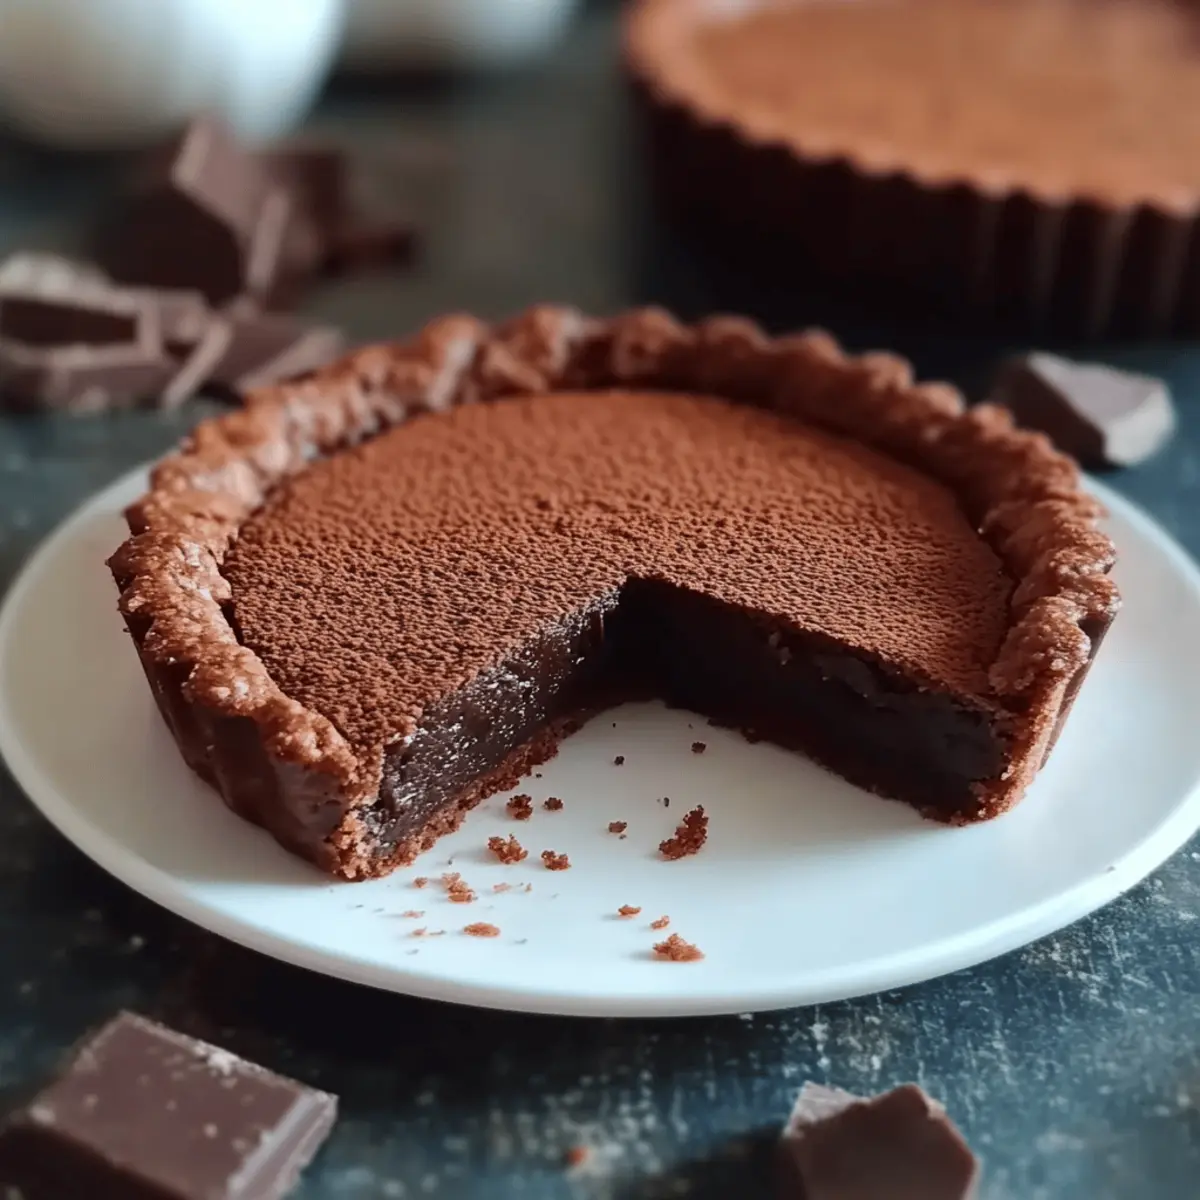
As I stood in my kitchen, a sweet craving washed over me—a longing for something rich, comforting, and utterly indulgent. That's when I decided to whip up this Italian Chocolate Tart. This delightful dessert is not only a celebration of deep chocolate flavors but also a canvas for my creativity. With its buttery cocoa crust and a luscious chocolate filling, this recipe is both a quick triumph and an impressive centerpiece for any gathering. Whether it's a Sunday family dinner or a special occasion, this Italian Chocolate Tart is sure to be a crowd-pleaser that pleases both the palate and the eye. Plus, it’s freezer-friendly, making it easy to have an elegant dessert at the ready. Curious to see how this masterpiece comes together? Let's dive into the deliciousness!
Why is this Italian Chocolate Tart irresistible?
Decadent flavors: The rich chocolate filling combines perfectly with a buttery cocoa crust, creating a dessert that feels truly indulgent.
Easy to make: With simple ingredients and straightforward steps, you can whip this up even if you're a beginner.
Versatile dessert: Perfect for any occasion, from casual family dinners to elegant gatherings. Pair it with whipped cream or fresh berries for a delightful twist!
Make-ahead friendly: Prepare it a day in advance and chill, so you're ready to impress your guests without last-minute fuss.
Crowd-pleaser: Get ready for smiles and compliments, as this tart is sure to be the highlight at any event! Celebrate with a slice alongside a comforting cup of coffee or try it with our Banana Bread Chocolate for the ultimate treat.
Italian Chocolate Tart Ingredients
For the Tart Crust
- Flour – 200 g – Essential for the base, providing structure and texture.
- Granulated sugar – 100 g – Sweetens the crust, balancing the dark chocolate filling.
- Cocoa powder – 40 g – Adds rich chocolate flavor to the crust, complementing the filling.
- Salt – ¼ teaspoon – Enhances the sweetness and balances flavors.
- Cold butter – 120 g – Creates a tender, flaky texture in the tart crust.
- Egg – 1 – Binds the crust ingredients together for a stable structure.
- Egg yolk – 1 – Enriches the dough, helping it achieve a delightful richness.
For the Chocolate Filling
- Milk – 400 ml – Provides a creamy base for the filling; use whole milk for best results.
- Egg yolks – 4 – Adds richness and helps set the filling as it thickens.
- Granulated sugar – 80 g – Sweetens the filling, enhancing the chocolate's depth.
- Flour – 40 g – Thickens the filling for a luscious texture without being too dense.
- Dark chocolate – 200 g – The star of the show, delivering that irresistible chocolate flavor for the Italian Chocolate Tart.
Now that you have all the ingredients ready, let’s bring this scrumptious dessert to life in your kitchen!
Step‑by‑Step Instructions for Italian Chocolate Tart
Step 1: Prepare the Tart Crust
In a large mixing bowl, whisk together 200 g of flour, 100 g of granulated sugar, 40 g of cocoa powder, and ¼ teaspoon of salt until well combined. Then, cut in 120 g of cold butter using a pastry cutter or your fingers until the mixture resembles coarse crumbs, with no large chunks of butter visible.
Step 2: Form the Dough
Add 1 whole egg and 1 egg yolk to the dry mixture. Stir until a dough begins to form, pulling it together with your hands if necessary. Once combined, wrap the dough tightly in plastic wrap and refrigerate for at least 30 minutes, allowing it to firm up and making it easier to handle later.
Step 3: Roll Out the Dough
Preheat your oven to 180°C (350°F). On a lightly floured surface, remove your chilled dough and roll it out with a rolling pin until it’s about ¼ inch thick, ensuring it’s large enough to fit your 9-inch tart pan. Look for a round shape that will neatly cover the bottom and sides of the pan.
Step 4: Fit and Puncture the Dough
Gently transfer the rolled dough into the tart pan, pressing it into the edges and trimming any excess hanging over the sides. To prevent bubbling during baking, use a fork to prick the bottom of the tart shell at regular intervals, ensuring an even and aesthetically pleasing crust.
Step 5: Pre-Bake the Crust
Place the tart shell in the preheated oven and bake for 15 minutes, or until the crust appears set and slightly firm to the touch. Once done, remove it from the oven and let it cool while you prepare the rich chocolate filling for your Italian Chocolate Tart.
Step 6: Heat the Milk
In a medium saucepan, heat 400 ml of milk over medium heat, stirring occasionally, until it reaches just below boiling. Keep your eyes on it to prevent scorching. You’ll want it warm enough to combine smoothly with the next ingredients.
Step 7: Prepare the Egg Mixture
While the milk is heating, whisk together 4 egg yolks, 80 g of granulated sugar, and 40 g of flour in a separate bowl until very smooth and fully combined. This mixture will add richness and help thicken the filling when combined with the hot milk.
Step 8: Combine Milk and Egg Mixture
Slowly pour the hot milk into the egg mixture, whisking constantly to temper the eggs and prevent scrambling. Once well combined, return the whole mixture back to the saucepan and cook over medium heat, stirring continuously until it thickens and coats the back of a spoon—this should take about 5-7 minutes.
Step 9: Add Chocolate
Immediately remove the saucepan from the heat and stir in 200 g of chopped dark chocolate until melted and smooth. The warmth from the mixture will help the chocolate dissolve perfectly, creating a luxurious filling for your Italian Chocolate Tart.
Step 10: Fill the Tart Shell
Pour the thickened chocolate filling carefully into the cooled tart shell, smoothing the top with a spatula to achieve an even layer. The filling should look glossy and inviting, showcasing the rich flavor you’re about to enjoy.
Step 11: Chill the Tart
Place your filled tart in the refrigerator and let it chill for at least 30 minutes, allowing the filling to set up properly. This is a perfect time to tidy your kitchen or prepare any serving accompaniments like whipped cream or fresh berries.
Step 12: Serve and Enjoy
Once chilled, slice the Italian Chocolate Tart into generous pieces, serving it with optional whipped cream or fresh berries for added elegance and flavor. Enjoy the delightful contrast between the crumbly crust and silky chocolate as you savor each bite!
Make Ahead Options
These Italian Chocolate Tart components can be prepped ahead of time, making your dessert game a breeze! You can prepare the tart crust (steps 1-5) up to 24 hours in advance. Simply wrap the cooled tart shell tightly in plastic wrap and store it in the refrigerator to maintain its freshness. For the filling, it’s best to make it the same day, but you can mix the egg and sugar components (step 7) and refrigerate them for up to 3 days. When you’re ready to complete your Italian Chocolate Tart, heat the milk, combine with the prepped egg mixture (steps 6-9), fill the crust, and chill for that perfect set. This way, you’ll have an indulgent dessert ready with minimal last-minute work!
Expert Tips for Italian Chocolate Tart
Chill the Dough: Ensure your dough is well-chilled before rolling it out; this prevents it from shrinking during baking.
Avoid Overmixing: When forming the crust dough, mix just until combined to keep it tender. Overmixing can result in a tough crust.
Proper Ganache Technique: When adding chocolate to the warm milk mixture, remove it from heat to control melting and achieve a smooth filling for your Italian Chocolate Tart.
Cool the Crust Completely: Let the tart crust cool fully before adding the filling to keep it from becoming soggy.
Serving Suggestion: Enhance flavors by serving with a dollop of whipped cream or fresh berries, adding brightness and texture.
Storage Tips for Italian Chocolate Tart
Fridge: Store the Italian Chocolate Tart covered in plastic wrap or an airtight container for up to 3 days to retain its rich flavor and texture.
Freezer: If you want to keep the tart longer, freeze it wrapped tightly in plastic wrap and then in foil for up to 2 months. Thaw it overnight in the fridge before serving.
Reheating: For an exquisite dessert experience, serve it chilled or at room temperature. Avoid reheating in the microwave, as it may alter the texture of the filling.
Make-Ahead: Prepare the tart a day in advance and store it in the refrigerator to allow the flavors to deepen and set nicely.
What to Serve with Italian Chocolate Tart
Indulging in a slice of this rich dessert is only the beginning; let’s create a delightful meal around it!
- Whipped Cream: This airy delight adds a light, creamy texture, perfectly balancing the dense tart. It’s a classic pairing that never disappoints!
- Fresh Berries: Juicy raspberries or strawberries provide a zesty contrast, enhancing the chocolate's richness while bringing a pop of color to your dessert plate.
- Roasted Nuts: Toasted almonds or hazelnuts introduce a satisfying crunch, offering a nutty flavor that complements the chocolate beautifully.
- Espresso: A strong cup of coffee cuts through the tart's richness, creating an exquisite duet for every bite. The warmth of the brew also enhances the chocolate experience.
- Vanilla Ice Cream: Creamy ice cream melts gradually over the tart, adding an indulgent touch to each mouthful while keeping everything refreshingly cool.
- Chocolate Sauce: A drizzle of homemade chocolate sauce over the tart intensifies its flavor, inviting every chocolate lover to delve deeper into this divine dessert.
- Mint Leaves: Fresh mint can brighten up each slice, providing a refreshing finish after the luxurious richness of the tart, making every bite feel like a new discovery!
- Fruit Sorbet: A scoop of raspberry or lemon sorbet offers a refreshing contrast with its coolness and tangy flavor, cleansing the palate between bites.
Italian Chocolate Tart Variations
Feel free to put your unique spin on this tantalizing tart—your creativity can shine in delicious ways!
-
Gluten-Free: Substitute flour with a gluten-free blend or almond flour for a gluten-free version without compromising flavor.
-
Nutty Addition: Add 100 g of ground nuts (like almonds or hazelnuts) to the crust for a delightful crunch and rich taste.
-
Minty Twist: Incorporate a few drops of peppermint extract into the chocolate filling for a refreshing mint chocolate experience.
-
Spicy Kick: For a little heat, add a pinch of cayenne pepper to the chocolate filling. The warmth complements the sweet chocolate beautifully!
-
Fruit Fusion: Fold in 100 g of finely chopped fresh raspberries or cherries into the filling for a fruity surprise with every bite.
-
Vegan Version: Swap out dairy and eggs with plant-based milk and aquafaba, using a vegan chocolate for the filling to create a rich vegan delight.
-
Cheesecake Layer: Spread a thin layer of cream cheese mixed with powdered sugar before adding the chocolate filling. It adds creaminess and a tangy flavor twist.
Feeling inspired? Don’t forget to pair this dessert with a side of whipped cream or even our delightful Crustless Zucchini Quiche for a well-rounded meal experience!

Italian Chocolate Tart Recipe FAQs
What should I look for when selecting my chocolate?
Absolutely, quality matters when it comes to chocolate! Look for dark chocolate with at least 70% cocoa content for a rich, deep flavor. Make sure there are no visible blemishes on the bar, and it should snap cleanly when broken. This ensures you’re getting a premium treat that will elevate your Italian Chocolate Tart.
How should I store leftover tart?
Store your Italian Chocolate Tart in the refrigerator, wrapped tightly in plastic wrap or placed in an airtight container. It will stay fresh for up to 3 days. If you're planning to enjoy it later, freezing is a great option; just wrap it well in plastic and then foil, keeping it fresh for up to 2 months.
Can I freeze the Italian Chocolate Tart?
Yes, you can absolutely freeze this tart! After it has chilled and set, wrap it tightly in plastic wrap and then in aluminum foil. When you're ready to enjoy, simply thaw it overnight in the refrigerator. For best results, serve it chilled or at room temperature, as reheating in the microwave can affect the texture.
What should I do if my filling doesn’t thicken properly?
If the filling doesn't thicken as expected, don't worry! Ensure you've cooked it long enough after adding the milk—this usually takes about 5-7 minutes over medium heat. If it still seems too runny, you can return it to the heat, whisking continuously until it reaches the desired consistency. Remember, patience is key on this sweet journey!
Is this recipe suitable for those with dietary restrictions?
While this Italian Chocolate Tart contains ingredients that may not suit everyone, you can definitely make adjustments. For a gluten-free version, substitute the all-purpose flour with a gluten-free blend. If allergies are a concern, consider using dairy-free chocolate and almond milk for the filling. Always check labels for ingredient safety!
What do I do if my tart crust shrinks during baking?
That can happen, but fear not! To prevent shrinking, ensure the dough is well-chilled before rolling it out. Additionally, avoid overworking the dough when mixing; this creates gluten that can lead to a tough crust. If you do encounter shrinking, simply use a fork to press the edges down gently after baking, reshaping it back into place.
Decadent Italian Chocolate Tart to Satisfy Your Sweet Cravings
Ingredients
Equipment
Method
- In a large mixing bowl, whisk together flour, granulated sugar, cocoa powder, and salt until well combined.
- Cut in cold butter using a pastry cutter or your fingers until the mixture resembles coarse crumbs.
- Add whole egg and egg yolk to the dry mixture. Stir until a dough begins to form, pulling it together with your hands if necessary.
- Wrap the dough tightly in plastic wrap and refrigerate for at least 30 minutes.
- Preheat your oven to 180°C (350°F). Roll out the chilled dough on a lightly floured surface.
- Transfer the rolled dough into the tart pan, pressing it into the edges and trimming any excess.
- Prick the bottom of the tart shell with a fork to prevent bubbling during baking.
- Bake the tart shell in the preheated oven for 15 minutes, then let it cool.
- Heat the milk in a saucepan over medium heat, stirring occasionally until just below boiling.
- In a separate bowl, whisk together egg yolks, granulated sugar, and flour until smooth.
- Slowly pour the hot milk into the egg mixture, whisking constantly. Return to the saucepan and cook until thickened.
- Remove from heat and stir in chopped dark chocolate until melted and smooth.
- Pour the chocolate filling into the cooled tart shell, smoothing the top with a spatula.
- Chill the tart in the refrigerator for at least 30 minutes, then slice and serve with whipped cream or berries.


Leave a Reply