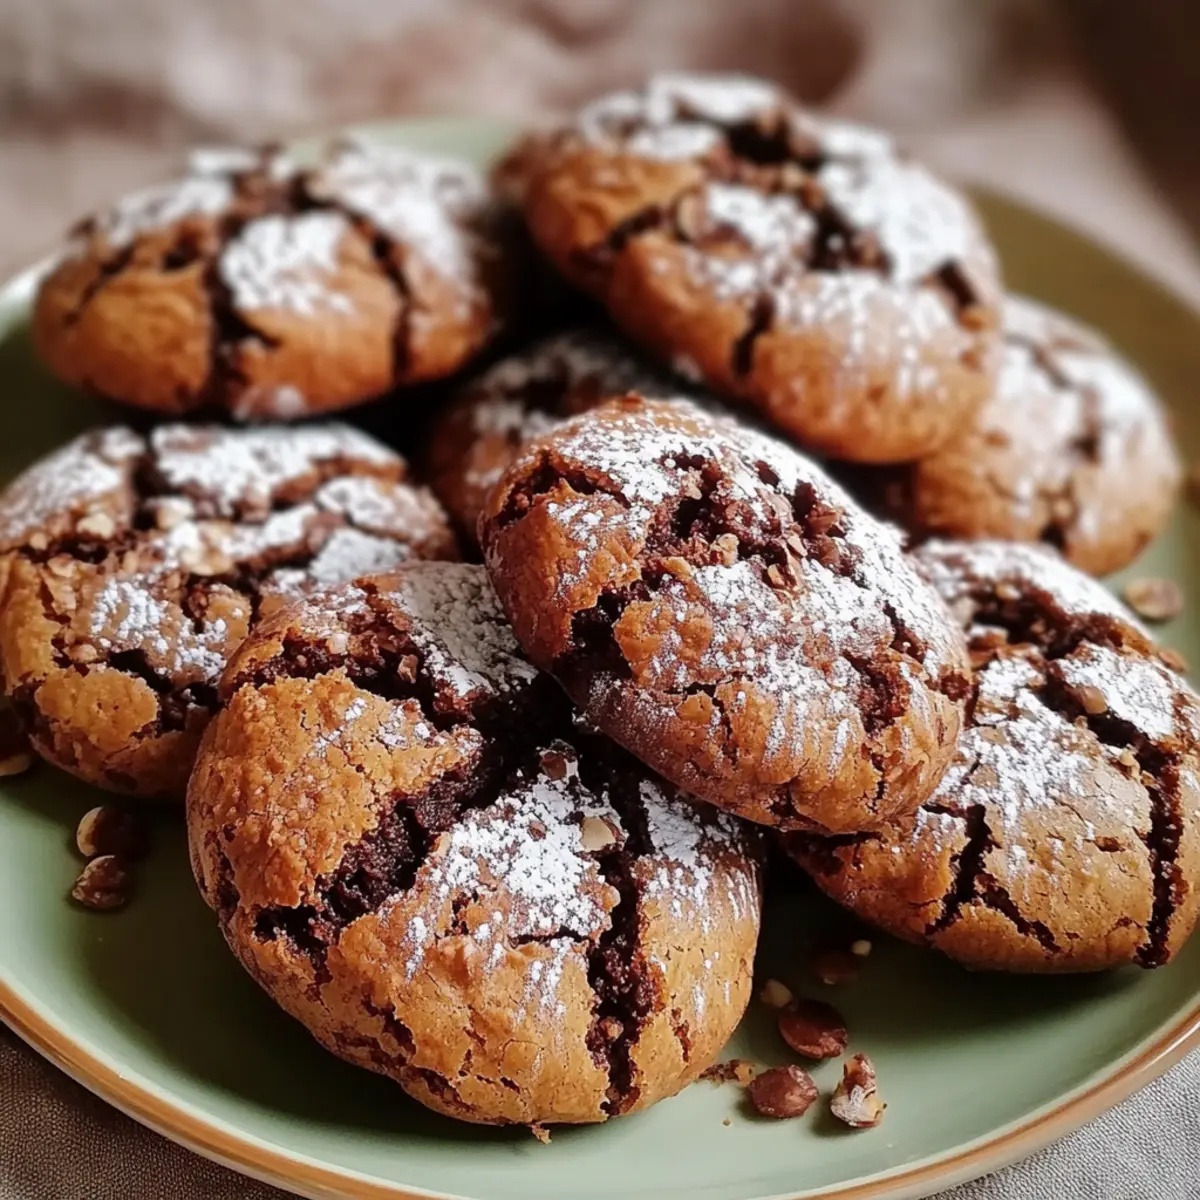
As I stood in my kitchen, the aroma of rich cocoa and sweet vanilla wafted through the air, transporting me back to cozy winter evenings filled with laughter and warmth. These Hot Cocoa Cookies are not just a delightful treat; they bring the same joy as sipping a mug of hot chocolate by the fireplace. What I love most about this recipe is how effortlessly they come together, making them perfect for a last-minute dessert or a fun family baking activity. With their quick prep time and the added surprise of gooey mini marshmallows, you'll find yourself reaching for these cookies over and over again. Curious how to create these delicious bites of nostalgia? Let’s dive in!
Why are Hot Cocoa Cookies a must-try?
Decadent flavors: The rich combination of cocoa, chocolate chips, and mini marshmallows delivers an irresistible taste sensation that will warm your heart.
Easy to make: With just a handful of simple ingredients and quick prep time, you can whip up these cookies in about 32 minutes!
Nostalgic experience: They evoke feelings of cozy nights and holiday gatherings, making them perfect for any occasion.
Versatile treat: Enjoy them as-is or dust with powdered sugar for a festive touch! Pair them with a glass of milk or a cup of coffee for the ultimate indulgence.
Crowd-pleaser: These cookies are sure to impress friends and family, bringing smiles to both kids and adults alike.
Hot Cocoa Cookies Ingredients
Here’s what you need to create these delightful treats:
For the Cookie Dough
• Unsalted butter – 1 cup, softened; it creates a rich and creamy base for the dough.
• Granulated sugar – 1 cup; it adds sweetness that complements the cocoa.
• Brown sugar – 1 cup, packed; its moisture gives the cookies a chewy texture.
• Large eggs – 2; they help bind the ingredients together for a perfect cookie structure.
• Vanilla extract – 2 teaspoons; it enhances the overall flavor and brings warmth.
For the Dry Ingredients
• All-purpose flour – 2 ¾ cups; it provides the foundation for your Hot Cocoa Cookies.
• Unsweetened cocoa powder – ½ cup; this gives the cookies their signature chocolatey goodness.
• Baking soda – 1 teaspoon; it helps the cookies rise and become soft and fluffy.
• Salt – ½ teaspoon; a small amount helps to balance the sweetness.
For the Add-ins
• Chocolate chips – 1 cup (semi-sweet or milk chocolate); they melt slightly during baking for a gooey filling.
• Mini marshmallows – 1 cup; they add an unexpected burst of sweetness and a cozy hot cocoa vibe.
Optional
• Powdered sugar – for dusting; use it to create a snowy effect on top of your cookies.
Gather all these ingredients, and get ready to bake your batch of warm, delectable Hot Cocoa Cookies that will bring joy to your taste buds!
Step‑by‑Step Instructions for Hot Cocoa Cookies
Step 1: Preheat the Oven
Start by preheating your oven to 350°F (175°C). While the oven heats, prepare your baking sheets by lining them with parchment paper. This ensures that your Hot Cocoa Cookies bake evenly and don’t stick, resulting in perfectly chewy treats that are easy to transfer once baked.
Step 2: Cream the Sugars and Butter
In a large mixing bowl, combine 1 cup of softened unsalted butter with 1 cup each of granulated sugar and packed brown sugar. Using an electric mixer, cream the mixture on medium speed for about 2-3 minutes until it’s light and fluffy. You’ll want to see a pale color change, indicating that air has been incorporated, creating a rich texture for your cookies.
Step 3: Incorporate the Eggs and Vanilla
Add 2 large eggs to the creamed sugar mixture, one at a time, ensuring you mix well after each addition. This should take about 30 seconds for each egg. Then, stir in 2 teaspoons of vanilla extract. The batter will be smooth and creamy, infusing your Hot Cocoa Cookies with that delightful flavor.
Step 4: Mix the Dry Ingredients
In a separate bowl, whisk together 2 ¾ cups of all-purpose flour, ½ cup of unsweetened cocoa powder, 1 teaspoon of baking soda, and ½ teaspoon of salt. This step is crucial as it ensures that your dry ingredients are evenly distributed, which helps achieve a balanced flavor and perfect texture in your Hot Cocoa Cookies.
Step 5: Combine Wet and Dry Ingredients
Gradually add the dry ingredients to the wet mixture, mixing on low speed until just combined. This should only take about 30 seconds; be careful not to overmix. You want the dough to be thick and slightly sticky, which is a sign that your Hot Cocoa Cookies are on the right track for that rich, chocolatey goodness.
Step 6: Fold in the Chocolate Chips and Marshmallows
Gently fold in 1 cup of chocolate chips and 1 cup of mini marshmallows using a spatula or wooden spoon. Mix just until they are evenly distributed throughout the dough. You should see delightful chunks of chocolate and little puffs of marshmallow peeking through, promising a sweet treat in every bite.
Step 7: Scoop the Dough onto Baking Sheets
Using a cookie scoop or tablespoon, drop rounded balls of dough onto the prepared baking sheets, making sure to leave about 2 inches of space between each cookie. This spacing will help them spread as they bake, resulting in beautifully shaped Hot Cocoa Cookies that have room to puff up without merging together.
Step 8: Bake the Cookies
Place the baking sheets in the preheated oven and bake for about 10-12 minutes. Look for edges that are set while the centers remain soft and slightly gooey. This contrast is key to achieving the perfect texture that will make your Hot Cocoa Cookies utterly irresistible.
Step 9: Cool the Cookies
After baking, remove the cookies from the oven and let them cool on the baking sheets for about 5 minutes. This resting period allows them to firm up slightly, making it easier to transfer them without falling apart. Then, carefully move the cookies to wire racks to cool completely.
Step 10: Dust with Powdered Sugar
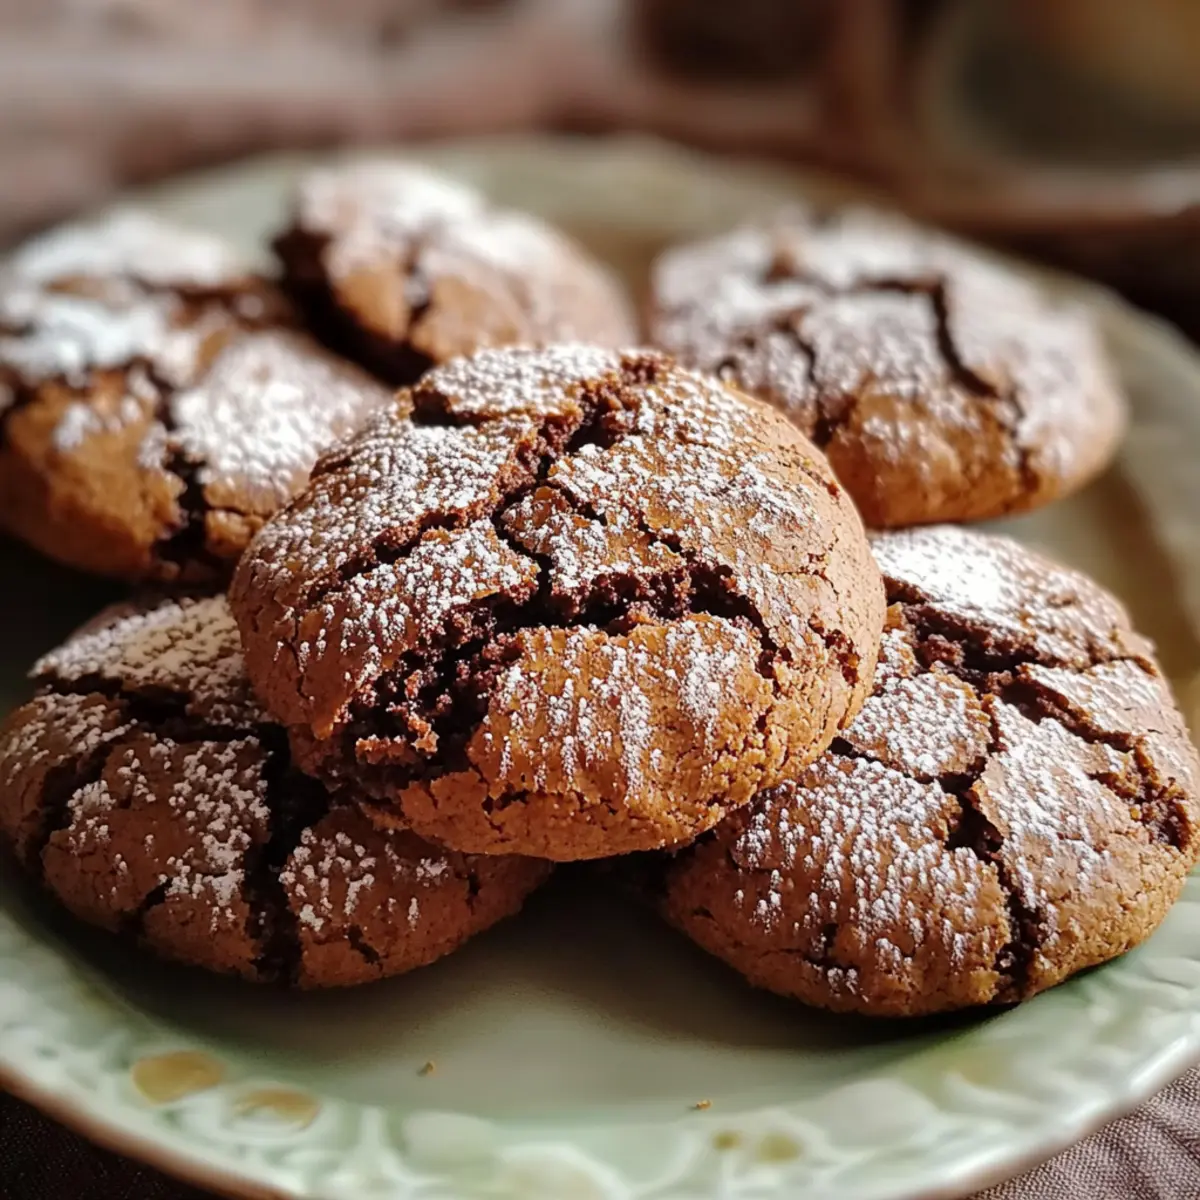
If you desire a festive touch, lightly dust your cooled Hot Cocoa Cookies with powdered sugar just before serving. This optional step adds a delightful snowy effect, reminiscent of winter treats, enhancing both the appearance and sweetness of your cookies.

How to Store and Freeze Hot Cocoa Cookies
Airtight Container: Store cooled Hot Cocoa Cookies in an airtight container at room temperature for up to one week to maintain their soft, chewy texture.
Freezer Instructions: For longer storage, freeze the cookies in a single layer on a baking sheet, then transfer them to a freezer-safe bag for up to 3 months; this helps preserve their delicious flavor.
Reviving Firm Cookies: If the cookies start to firm up, add a slice of bread to the container overnight; this keeps them soft without making them soggy.
Reheating Tips: To enjoy them warm, microwave the cookies for 10-15 seconds; this revives their gooey chocolatey bliss, making them feel freshly baked again!
What to Serve with Hot Cocoa Cookies?
Imagine a table adorned with sweet and savory delights that enhance the joy of each rich bite, creating a truly blissful gathering.
-
Creamy Hot Chocolate: A warm mug of homemade hot chocolate echoes the cookies' flavor, making for a comforting pairing during chilly evenings.
-
Milkshake Madness: A thick vanilla milkshake complements the chocolatey goodness with its creamy texture, creating a fun mix of flavors that will delight the family.
-
Chocolate Chip Ice Cream: The perfect balance of warmth from the cookies meets the cold of chocolate chip ice cream, providing a delightful contrast that feels indulgent.
-
Peanut Butter Brownies: The rich, nutty flavor of fudgy peanut butter brownies not only pairs well but also introduces a delightful texture variation that your guests will love.
-
Fresh Berries: A side of juicy strawberries or raspberries adds a burst of fresh, tart flavor, lightening the sweetness of the cookies while enhancing their color.
-
Nutty Biscotti: Pair their crunchy texture against the soft, chewy cookies for a delightful snack experience; they make for excellent dunkers in coffee or tea.
-
Spiced Chai Latte: The aromatic spices in a warm chai latte offer a comforting contrast to the sweet cookies, creating a cozy, inviting atmosphere.
-
Classic Vanilla Ice Cream: Drizzling warm cookies over a scoop of vanilla ice cream creates a student yet classic dessert, perfect for family gatherings or parties.
-
Homemade Whipped Cream: A dollop of fresh whipped cream enhances the indulgence and mellows the sweetness, making each bite even more delightful.
Hot Cocoa Cookies Variations & Substitutions
Feel free to let your creativity shine by customizing these cookies to match your tastes and dietary needs!
- Gluten-Free: Substitute all-purpose flour with a 1:1 gluten-free flour blend for equally delicious cookies.
- Dairy-Free: Use coconut oil or dairy-free butter to keep the cookies creamy without the dairy. Pair them with dairy-free chocolate chips for a completely dairy-free treat!
- Nutty Flavor: Add ½ cup of finely chopped nuts, such as walnuts or pecans, for a delightful crunch that enhances the chocolate experience.
- Minty Fresh: Mix in ½ teaspoon of peppermint extract for a refreshing twist that screams holiday spirit. These minty cookies might just become a new favorite!
- Extra Chocolate: Double the chocolate by using chocolate chunks in place of chocolate chips for an even more indulgent experience. Your chocolate-loving friends will thank you!
- Spicy Kick: For those who enjoy a bit of heat, add a pinch of cayenne pepper or chili powder to your dough for a surprising spicy finish. It gives a whole new meaning to “hot cocoa!”
- Chunky Cookies: For a heartier texture, replace some flour with oats to create a cookie that’s chewy and satisfying. They feel like a cozy hug!
- Fruity Touch: Throw in some dried cherries or cranberries to the mix for a lovely tart contrast against the rich cocoa. They add an unexpected burst of flavor that everyone will adore!
Explore these variations and make your Hot Cocoa Cookies uniquely yours! And if you're looking for more delicious inspiration, check out my tips for creating the perfect gooey texture in chocolate chip cookies or discover flavorful twists in my recipe for peppermint brownies.
Expert Tips for Hot Cocoa Cookies
Double Check Measurements: Ensure you measure your ingredients accurately; improper measurements can lead to cookie discrepancies. A kitchen scale for flour is particularly handy!
Don’t Overmix: When combining wet and dry ingredients, mix only until just incorporated. Overmixing can make your Hot Cocoa Cookies tough instead of tender.
Chill the Dough: For thicker cookies, consider chilling the dough for 30 minutes before scooping. This helps them maintain their shape and enhances the flavors.
Keep an Eye on Baking Time: Ovens can vary, so check your cookies a minute or two before the recommended bake time. The edges should be set, but the centers can remain soft for that gooey texture.
Experiment with Mix-ins: Feel free to customize! Swap mini marshmallows for crushed peppermint candies or switch up the chocolate chips for butterscotch or white chocolate, making your Hot Cocoa Cookies uniquely yours.
Make Ahead Options
These Hot Cocoa Cookies are ideal for busy home cooks looking to save time in the kitchen! You can prepare the cookie dough up to 3 days in advance by mixing all the ingredients (up to step 6) and refrigerating it in an airtight container. This not only enhances the flavors but also keeps the dough fresh. When you're ready to bake, simply scoop the chilled dough onto baking sheets and follow the baking instructions. For even easier meal prep, you can also freeze shaped dough balls for up to 3 months. Just drop them directly into the oven from the freezer, adding an extra minute or two to the baking time. Enjoy the warm, nostalgic aromas of freshly baked Hot Cocoa Cookies with minimal effort!
Hot Cocoa Cookies Recipe FAQs
What should I look for when selecting cocoa powder?
Absolutely! When choosing cocoa powder, aim for a high-quality unsweetened cocoa that is dark and rich in color. This ensures maximum flavor in your Hot Cocoa Cookies. If you spot a cocoa with an intense aroma and a smooth texture, you’re on the right track!
How long can I store Hot Cocoa Cookies?
You can keep your cooled Hot Cocoa Cookies in an airtight container at room temperature for up to one week. If they begin to harden, simply add a slice of bread to the container overnight. This little trick helps to soften the cookies while preventing them from becoming soggy.
Can I freeze Hot Cocoa Cookies?
Definitely! To freeze your Hot Cocoa Cookies, begin by placing them in a single layer on a baking sheet. Put the sheet in the freezer for about 1 to 2 hours until they are solid. Once frozen, transfer the cookies to a freezer-safe bag, where they can remain good for up to 3 months. When you're ready to enjoy them, just let them thaw at room temperature or briefly microwave them for that fresh-baked warmth.
What should I do if my cookies come out too hard?
If your Hot Cocoa Cookies end up being too hard, it could be due to overbaking or mixing too much. Next time, aim for the edges to be just set while the centers stay soft. If they’re already baked, consider adding a slice of bread to your storage container; it helps to soften them over time, restoring some moisture.
Are there any allergy considerations for Hot Cocoa Cookies?
Absolutely! When baking these cookies, be mindful of allergies. This recipe contains common allergens such as gluten (from flour) and dairy (from butter). Always double-check that your chocolate chips and other ingredients are allergy-friendly, especially if you're sharing these treats with others or have small children and pets in mind. You can also explore gluten-free flour or dairy-free butter alternatives to customize this recipe to suit various dietary needs.
Can I add different ingredients to the dough?
Very! Feel free to get creative! You might swap out the mini marshmallows for crushed peppermint or change the chocolate chips to butterscotch or white chocolate. Add ins like nuts can also give a delightful crunch, ensuring your Hot Cocoa Cookies are a unique treat every time!

Decadent Hot Cocoa Cookies Bursting with Chocolate Bliss
Ingredients
Equipment
Method
- Preheat your oven to 350°F (175°C) and line your baking sheets with parchment paper.
- In a large mixing bowl, cream together the softened butter, granulated sugar, and brown sugar until light and fluffy.
- Add the eggs one at a time, mixing well after each addition, then stir in the vanilla extract.
- In a separate bowl, whisk together the flour, cocoa powder, baking soda, and salt.
- Gradually add the dry ingredients to the wet mixture, mixing on low speed until just combined.
- Fold in the chocolate chips and marshmallows until evenly distributed within the dough.
- Scoop rounded balls of dough onto the prepared baking sheets, leaving about 2 inches of space between each cookie.
- Bake for about 10-12 minutes, until the edges are set but centers remain soft.
- Allow the cookies to cool on the baking sheets for about 5 minutes before transferring to wire racks to cool completely.
- Optionally, dust cooled cookies with powdered sugar before serving.


Leave a Reply