The kitchen transforms into a winter wonderland during the holiday season; the scent of melting chocolate and spices fills the air, while festive music hums softly in the background. Among my favorite creations are these delightful No-Bake Christmas Treats, perfect for busy days when time is of the essence. What's better than mixing up a batch of Biscoff Truffles that are not only quick to prepare but also satisfyingly indulgent? With gluten-free and vegan options included, these treats cater to every festive palate, making them a joyous addition to your holiday spread. Imagine impressing friends and family with minimal effort while indulging in the rich flavors of the season. Are you ready to elevate your holiday treats with these easy, no-bake recipes? Let's dive in!
Why are no-bake treats a holiday favorite?
Simplicity: These No-Bake Christmas Treats are effortlessly quick and require minimal prep, making them ideal for busy holiday schedules.
Versatile Options: With gluten-free and vegan alternatives, everyone can enjoy the delightful flavors.
Rich Flavors: Indulge your taste buds with the sweet and creamy combinations, like the Biscoff Truffles that offer an irresistible crunch.
Fun to Assemble: Create unique shapes like snowman cookies or festive reindeer, turning treat-making into a fun activity for the whole family.
Crowd-Pleaser: Impress guests at gatherings with these stunning yet simple desserts, ensuring there's something for every palate. Discover more delightful recipes, like Peanut Butter Chocolate Bars and Holiday Peppermint Bark to round out your celebration!
Biscoff Truffles Ingredients
For the Truffles
- Biscoff cookies – these provide a delightful caramel flavor that pairs perfectly with chocolate.
- Cream cheese – adds a smooth, creamy texture that binds the truffles together.
- Chocolate coating – a rich outer layer that complements the sweetness of the truffles beautifully.
- Crushed Biscoff cookies – sprinkle on top for an added crunch and visual appeal.
For the Drizzle
- Chocolate chips – use semi-sweet or dark for a contrasting flavor profile over the truffles.
- Biscoff spread – drizzle on top for an extra layer of Biscoff goodness that elevates the treat.
Indulge in these Biscoff Truffles to bring joy to your holiday gatherings, effortlessly satisfying everyone with their rich flavors!
Step‑by‑Step Instructions for Biscoff Truffles
Step 1: Prepare the Cookie Crumbs
Start by crushing the Biscoff cookies into fine crumbs using a food processor or a resealable bag and a rolling pin. You want a sandy texture that easily mixes with the other ingredients. Once crushed, pour the crumbs into a large mixing bowl to prepare for the creamy filling.
Step 2: Mix the Cream Cheese
In the bowl with the Biscoff cookie crumbs, add the softened cream cheese. Using a spatula or your hands, mix the ingredients until they’re well combined and form a soft, cohesive dough. The mixture should easily hold together, so continue mixing for about 2-3 minutes.
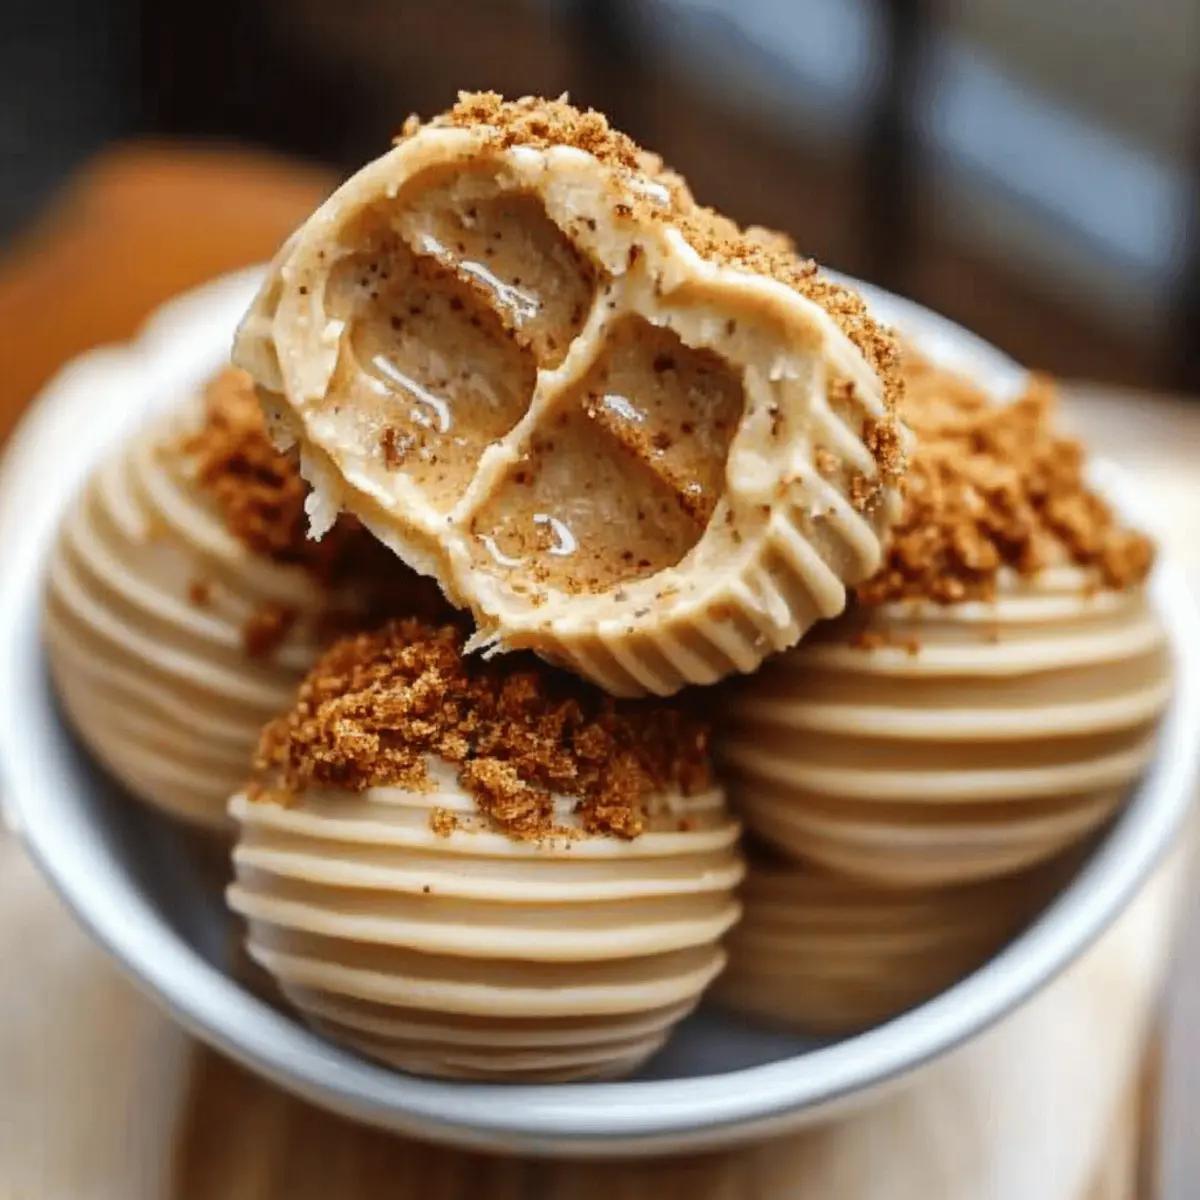
Step 3: Shape the Truffles
With your hands, scoop out small portions of the mixture and roll them into smooth balls, roughly 1 inch in diameter. Place each formed truffle onto a parchment-lined baking sheet. Ensure the truffles are evenly shaped and place them in the refrigerator to chill for about 30 minutes; this will help them firm up nicely.
Step 4: Melt the Chocolate Coating
While the truffles chill, melt your chocolate coating of choice in a microwave-safe bowl. Heat in 30-second intervals, stirring between each session until completely smooth and glossy. Aim for a slightly warm temperature that is not too hot, as this will ensure an even coating on your Biscoff Truffles.
Step 5: Coat the Chilled Truffles
Once the truffles are firm, dip each one into the melted chocolate, ensuring they’re fully coated. Use a fork to lift them out, gently tapping the side of the bowl to remove any excess chocolate. Place the coated truffles back onto the parchment paper to set for about 10-15 minutes.
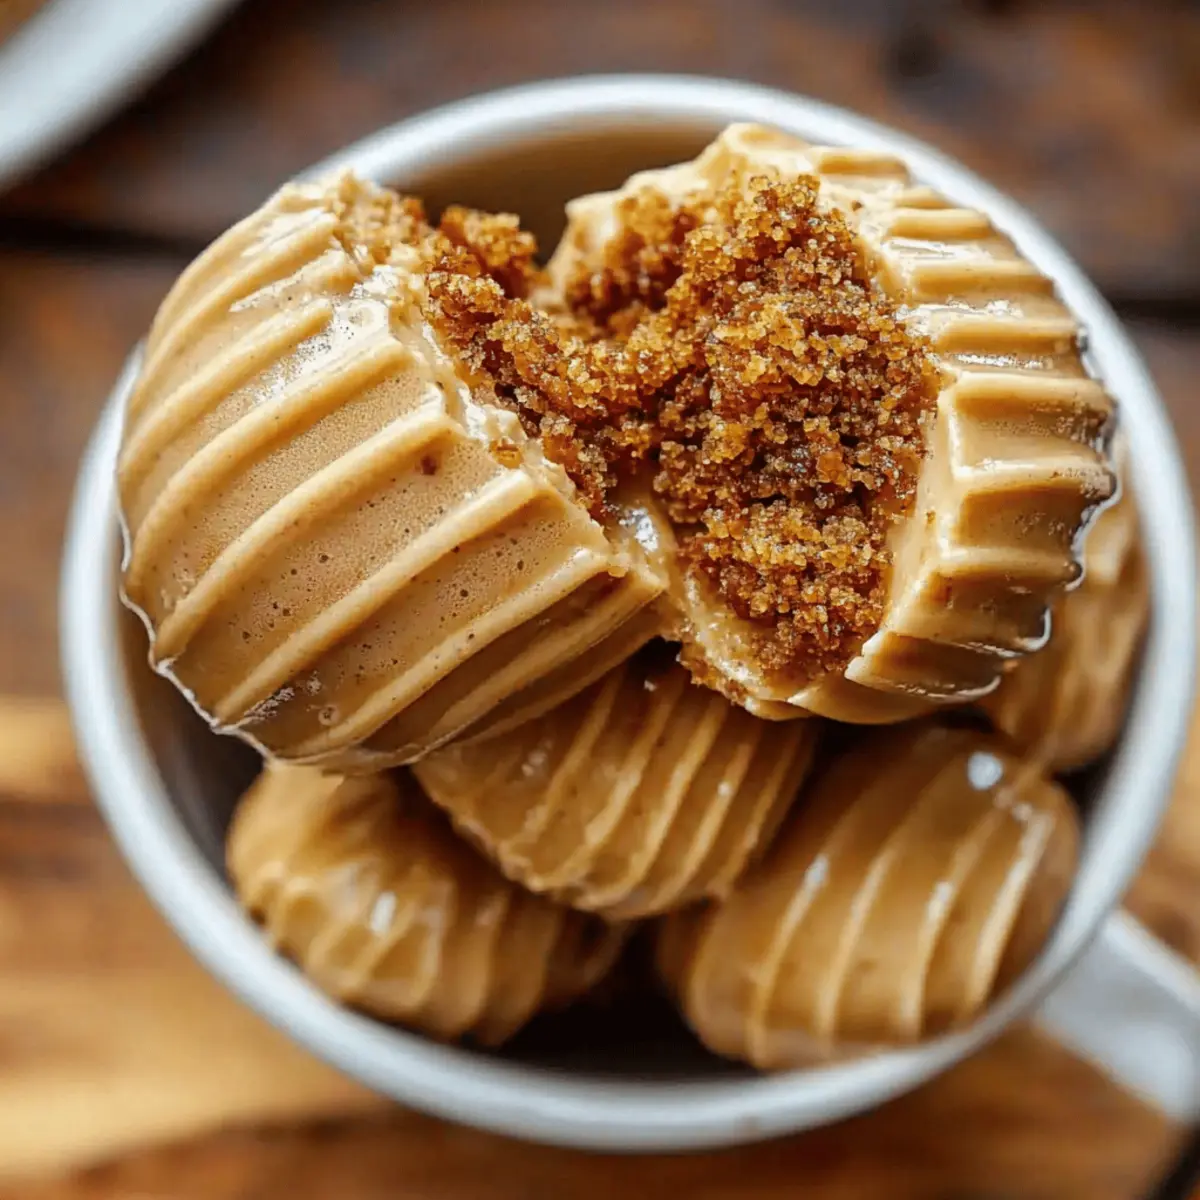
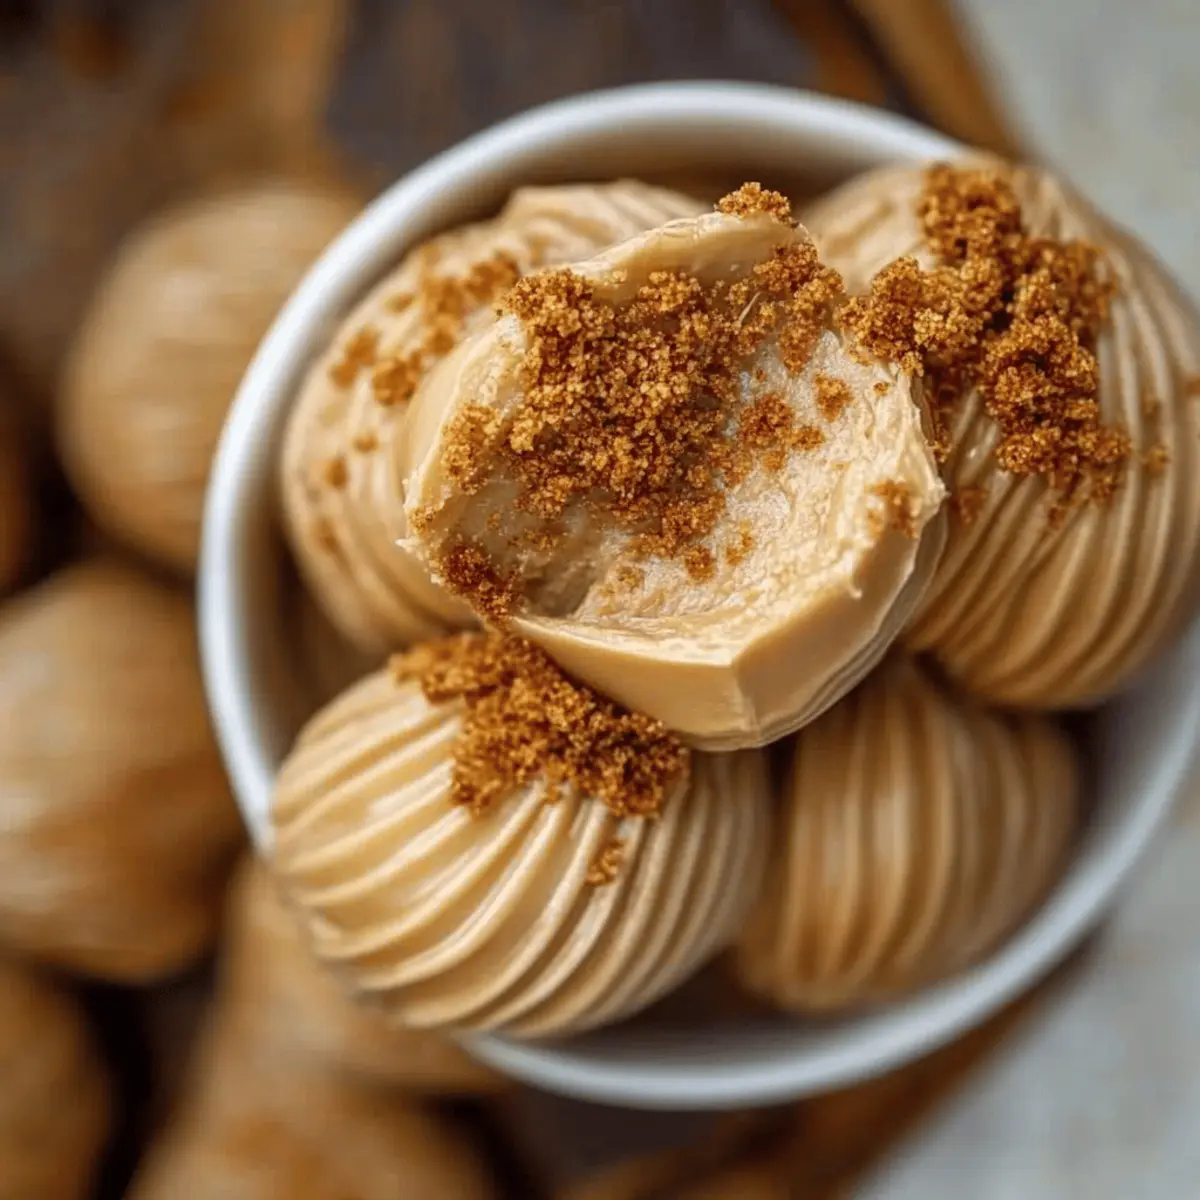
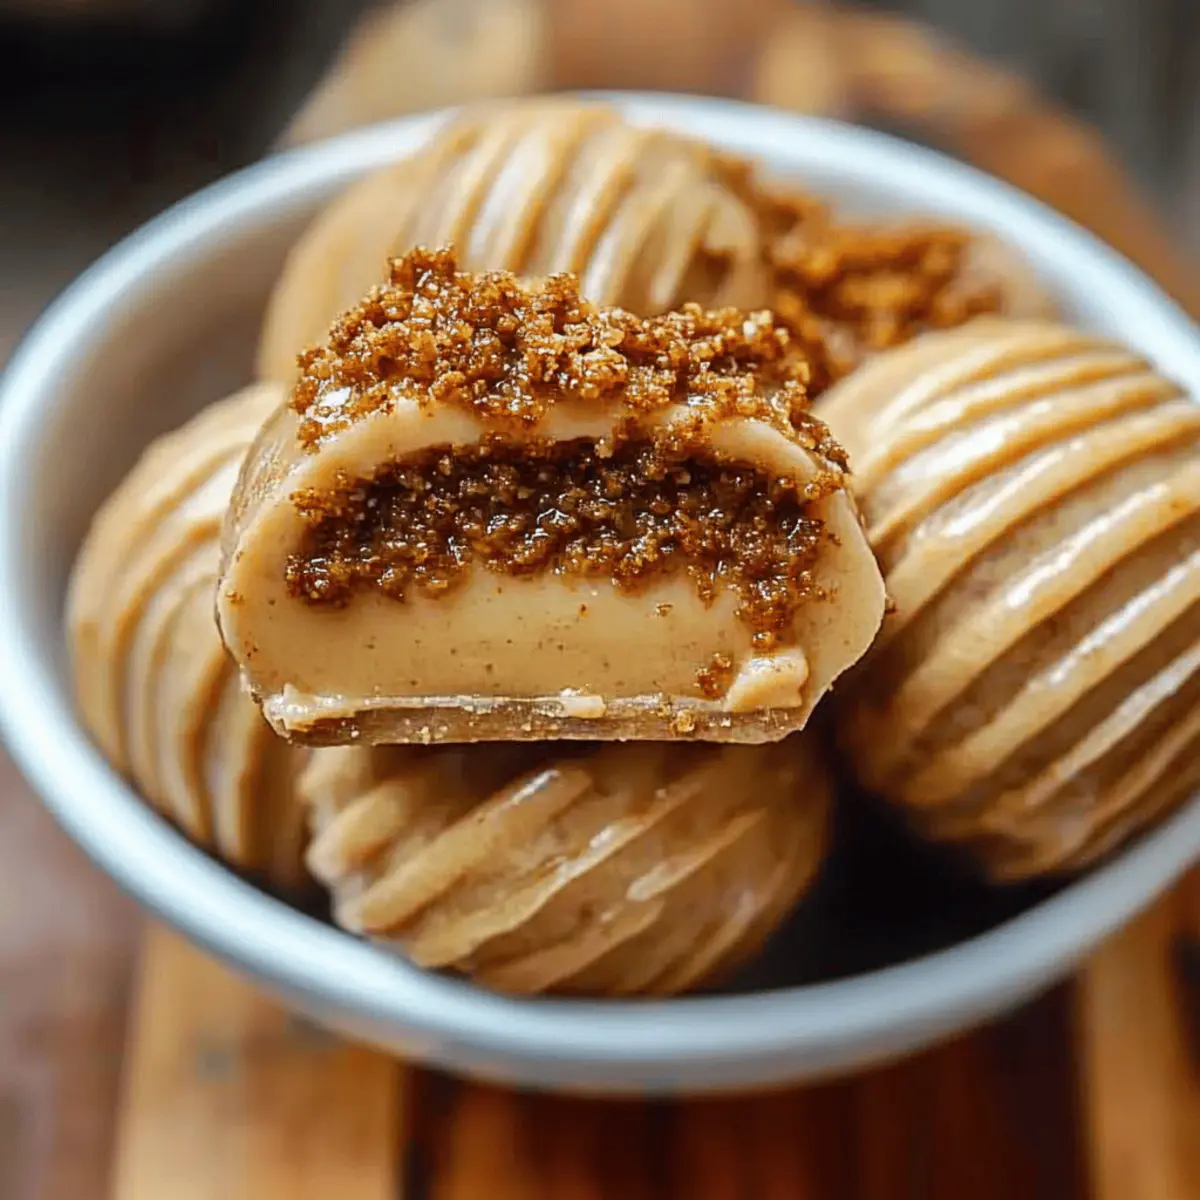
Step 6: Add the Crunchy Topping
As the chocolate coating begins to set, sprinkle crushed Biscoff cookies over the top of each truffle before the coating hardens completely. This step adds an extra layer of flavor and visual appeal, making your Biscoff Truffles simply irresistible.
Step 7: Drizzle the Final Touch
Melt some chocolate chips in a small bowl. Once melted, drizzle over the truffles for an appealing finish. You can also drizzle a bit of Biscoff spread if desired, enhancing the flavor profile. Allow the decorative drizzles to set for another 10 minutes.
Step 8: Serve and Enjoy
Now your Biscoff Truffles are ready to impress! Arrange them on a festive platter and share them with family and friends. These delightful no-bake treats are perfect for celebrating the holiday season, bringing sweetness and joy to your gatherings.
Make Ahead Options
These No-Bake Christmas Treats are perfect for busy home cooks looking to save time during the holiday rush! You can prepare the Biscoff Truffles up to 24 hours ahead of time by making the truffle mixture and rolling them into balls. Simply store them in an airtight container in the refrigerator to maintain their quality and consistency. When you're ready to serve, just coat them in chocolate and add your garnishes, finishing with the Biscoff drizzle. This way, you’ll have a delectable treat ready to impress your guests with minimal effort, ensuring your holidays are filled with joy and deliciousness without the last-minute stress!
No-Bake Christmas Treats Variations
Feel free to get creative with these delightful no-bake treats, making them uniquely yours—each bite a flavorful surprise!
-
Nut-Free: Substitute walnuts with sunflower seeds and use almond butter instead of peanut butter for a delightful crunch.
-
Gluten-Free: Swap Rice Krispies with gluten-free rice cereal or puffed quinoa to ensure everyone can indulge.
-
Vegan Delight: Replace cream cheese with vegan cream cheese and use coconut cream for a luscious texture without dairy.
-
Flavor Boost: Add a splash of vanilla extract or a hint of cinnamon to the marshmallow mixture for a warm, aromatic twist.
-
Spicy Kick: Introduce a pinch of cayenne pepper or chili powder to the chocolate for a thrilling flavor adventure.
-
Candy Coated: For extra sweetness, dip half the treats in melted caramel or chocolate drizzle before chilling for added decadence.
-
Fruity Addition: Incorporate dried fruits like apricots or cherries in the mix for a pleasant chewy texture that balances the rich flavors.
-
Textural Contrast: Mix in crushed pretzels for a salty, crunchy surprise that complements the sweetness of the treats beautifully.
While you’re mixing and experimenting, why not explore other easy recipes like Holiday Peppermint Bark that pair wonderfully with these delights? Your family and friends will enjoy every seasonal creation you bring to the table!
What to Serve with No-Bake Christmas Treats?
The holiday season calls for delicious pairings that elevate your no-bake creations into a delightful feast for the senses.
-
Festive Fruit Salad: A colorful medley of seasonal fruits adds a fresh contrast, balancing the richness of the treats perfectly. Juicy citrus and berries will brighten your table and palate.
-
Creamy Hot Chocolate: This indulgent beverage, rich and frothy, complements the sweetness of your treats wonderfully. Consider adding a sprinkle of peppermint for a cozy, seasonal twist.
-
Gingerbread Cookies: The spiced warmth of gingerbread adds nostalgic charm to your dessert spread while enhancing the holiday spirit with every bite. These cookies are sure to be a hit with kids and adults alike!
-
Vanilla Ice Cream: A scoop of vanilla ice cream will create a delightful contrast with the dense textures of the treats, providing a creamy indulgence perfect for warm flavors. Drizzle with chocolate syrup for added decadence!
-
Peppermint Bark: This crunchy, chocolatey treat is like a burst of holiday cheer in every bite, bringing together the classic flavors of the season!
-
Nutty Biscotti: Crunchy biscotti pairs beautifully with a cup of coffee or tea, providing a delightful crunch against the tender bites of your no-bake creations.
-
Spiced Mulled Wine: The warmth of mulled wine with hints of cinnamon and clove adds a festive flair to your gathering. This aromatic drink enhances the sweet flavors of your holiday treats.
-
Sweet Potato Casserole: Adding this creamy and slightly sweet side will bring a comforting, earthy flavor that works surprisingly well with your no-bake treats.
-
Chocolate-Dipped Strawberries: Beautiful and romantic, these treats not only taste heavenly but also add a touch of elegance to your holiday table.
Expert Tips for Biscoff Truffles
-
Use Softened Cream Cheese: Ensure your cream cheese is at room temperature for easy mixing, creating a smooth and creamy filling for the Biscoff Truffles.
-
Chill for Firmness: Don’t skip the chilling step after shaping your truffles; this crucial part helps them hold their shape and makes coating them easier.
-
Evenly Coat Chocolate: When melting chocolate, heat gradually, and dip the truffles quickly for a thin, even coating without overheating the chocolate.
-
Add Texture with Toppings: Sprinkle crushed Biscoff cookies or nuts on top of the truffles before the chocolate sets to add an appealing crunchy texture.
-
Experiment with Flavors: Feel free to customize your Biscoff Truffles by adding mini chocolate chips or a dash of cinnamon to the cream cheese mixture for additional flavor.
-
Storage Tips: Keep your truffles in an airtight container in the fridge; they’ll stay fresh for up to a week, making them an ideal no-bake treat to prepare in advance.
Storage Tips for Biscoff Truffles
-
Room Temperature: Keep Biscoff Truffles at room temperature for up to 1 day if you're serving them immediately; however, they taste best chilled.
-
Fridge: Store truffles in an airtight container in the fridge for up to 1 week. This helps maintain their freshness and creamy texture, so you can enjoy them whenever you crave a sweet treat.
-
Freezer: For long-term storage, Biscoff Truffles can be frozen for up to 3 months. Place them in a single layer on a baking sheet to freeze them first, then transfer to an airtight container or freezer bag.
-
Reheating: No need to bake or reheat these truffles! Just take them out of the fridge or freezer and let them sit at room temperature for a few minutes before serving for the best flavor.
No-Bake Christmas Treats Recipe FAQs
How do I know if my ingredients are ripe or fresh?
Absolutely! For fruits like cranberries, look for vibrant, bright colors without any dark spots or wrinkling. Walnuts should smell nutty, avoiding any rancid odors. Always check the expiration dates on packaged items like marshmallows or chocolate to ensure maximum freshness for your holiday treats.
What are the best storage methods for No-Bake Christmas Treats?
Very! Store your treats in an airtight container at room temperature for up to 3 days if you'll eat them quickly. For longer storage, keep them in the fridge where they can stay fresh for up to a week. Just make sure to layer parchment paper between treats to prevent sticking!
Can I freeze my No-Bake Christmas Treats?
Absolutely! To freeze, arrange the treats in a single layer on a baking sheet and place them in the freezer until solid. Once frozen, transfer them to an airtight container or a freezer bag, separating layers with parchment paper, for up to 3 months. Just thaw in the fridge before serving for the best texture!
What should I do if my treat mixture is too sticky?
Oh no! If your mixture is too sticky, don’t fret! You can either add a bit more crushed cookies or Rice Krispies to absorb the excess moisture or refrigerate the mixture for 15-20 minutes. This will help firm it up, making it easier to shape into bars or balls.
Are there any dietary considerations I should keep in mind?
Very! For gluten-free options, ensure all processed ingredients, like marshmallows and chocolate, are labeled gluten-free. If you're accommodating allergies, substitute peanut butter with almond or sunflower seed butter. You can even replace dairy products with coconut cream to make this recipe vegan-friendly!
How can I troubleshoot if my treats are too crumbly?
That’s a common issue! If your No-Bake Christmas Treats turn out crumbly, try mixing in a bit of melted butter or a spoonful of any liquid sweetener, like maple syrup. This should help bind the mixture together. Additionally, ensure your mixture is well combined and compacted when you’re shaping it into bars or cookie forms.
Decadent Biscoff Truffles to Sweeten Your Day
Ingredients
Equipment
Method
- Start by crushing the Biscoff cookies into fine crumbs using a food processor or a resealable bag and a rolling pin. Pour the crumbs into a large mixing bowl.
- In the bowl with the cookie crumbs, add the softened cream cheese. Mix until well combined to form a cohesive dough.
- Scoop out small portions and roll them into smooth balls, placing each onto a parchment-lined baking sheet. Chill for about 30 minutes.
- Melt the chocolate coating in a microwave-safe bowl, heating in 30-second intervals. Stir until smooth.
- Dip each truffle into the melted chocolate to coat, and tap off excess before placing them back on the parchment paper.
- Sprinkle crushed Biscoff cookies on top of the coated truffles before the chocolate sets.
- Melt chocolate chips and drizzle over the truffles, optionally adding Biscoff spread. Allow to set for 10 minutes.
- Arrange the truffles on a platter and enjoy your festive treat!


Leave a Reply