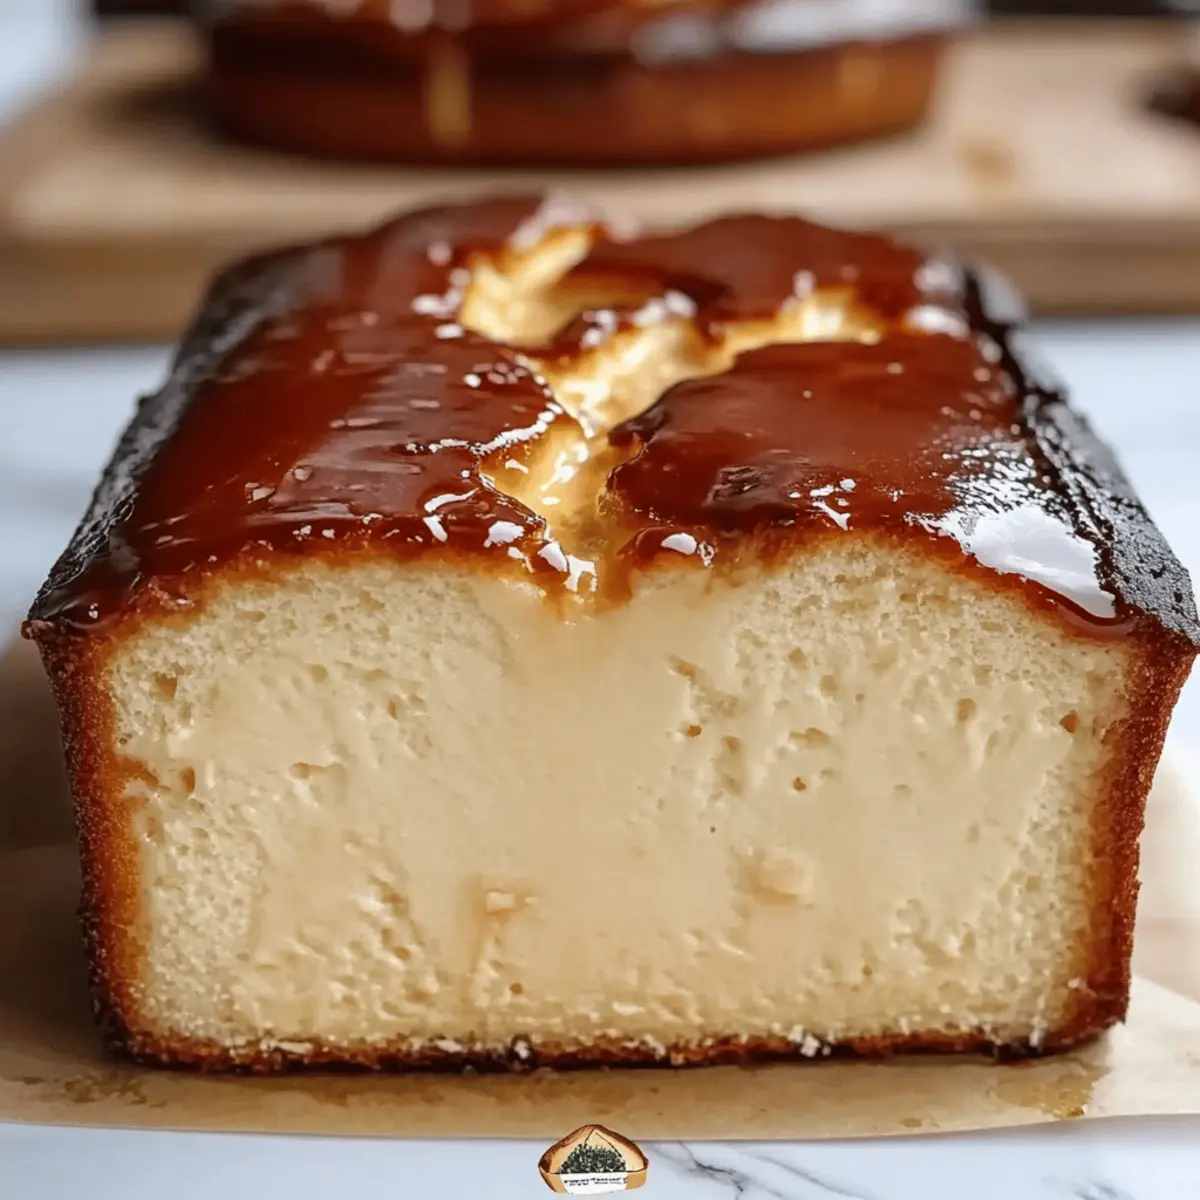
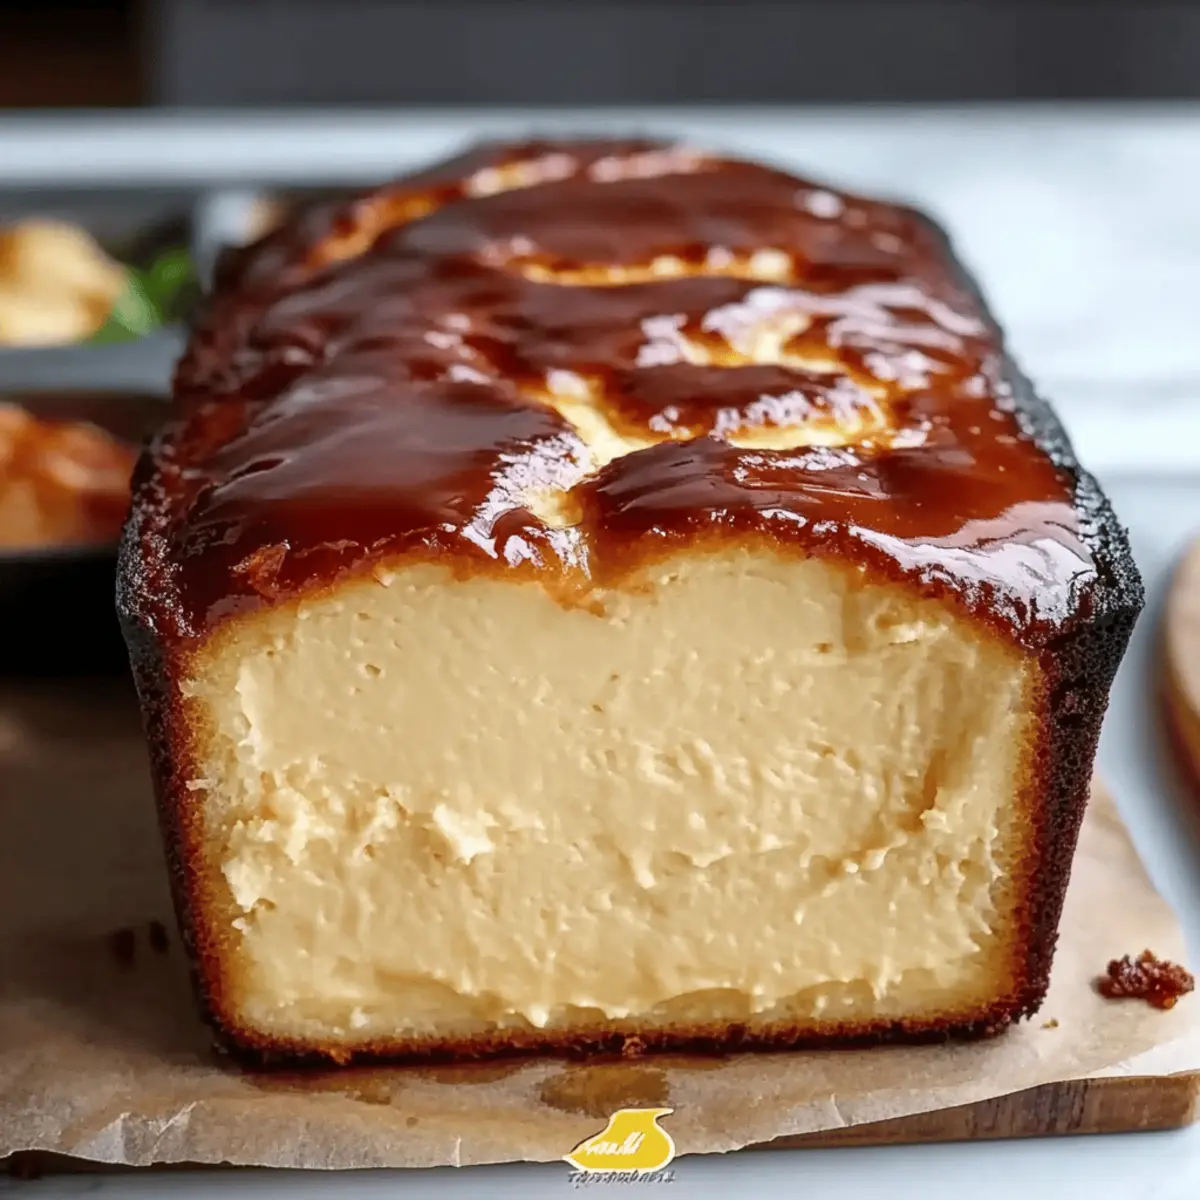
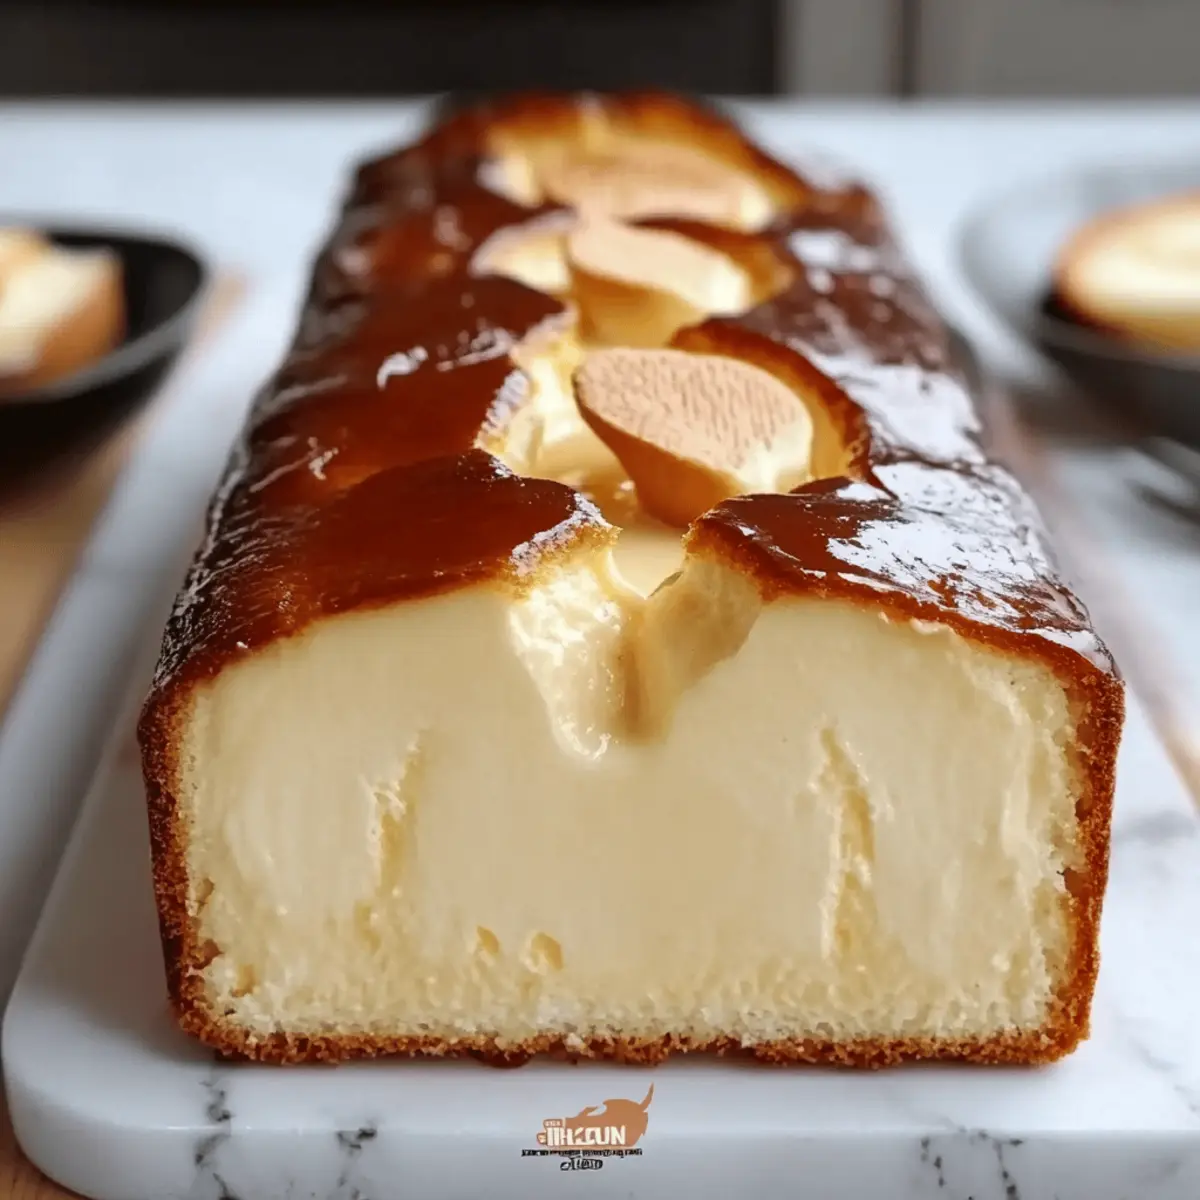
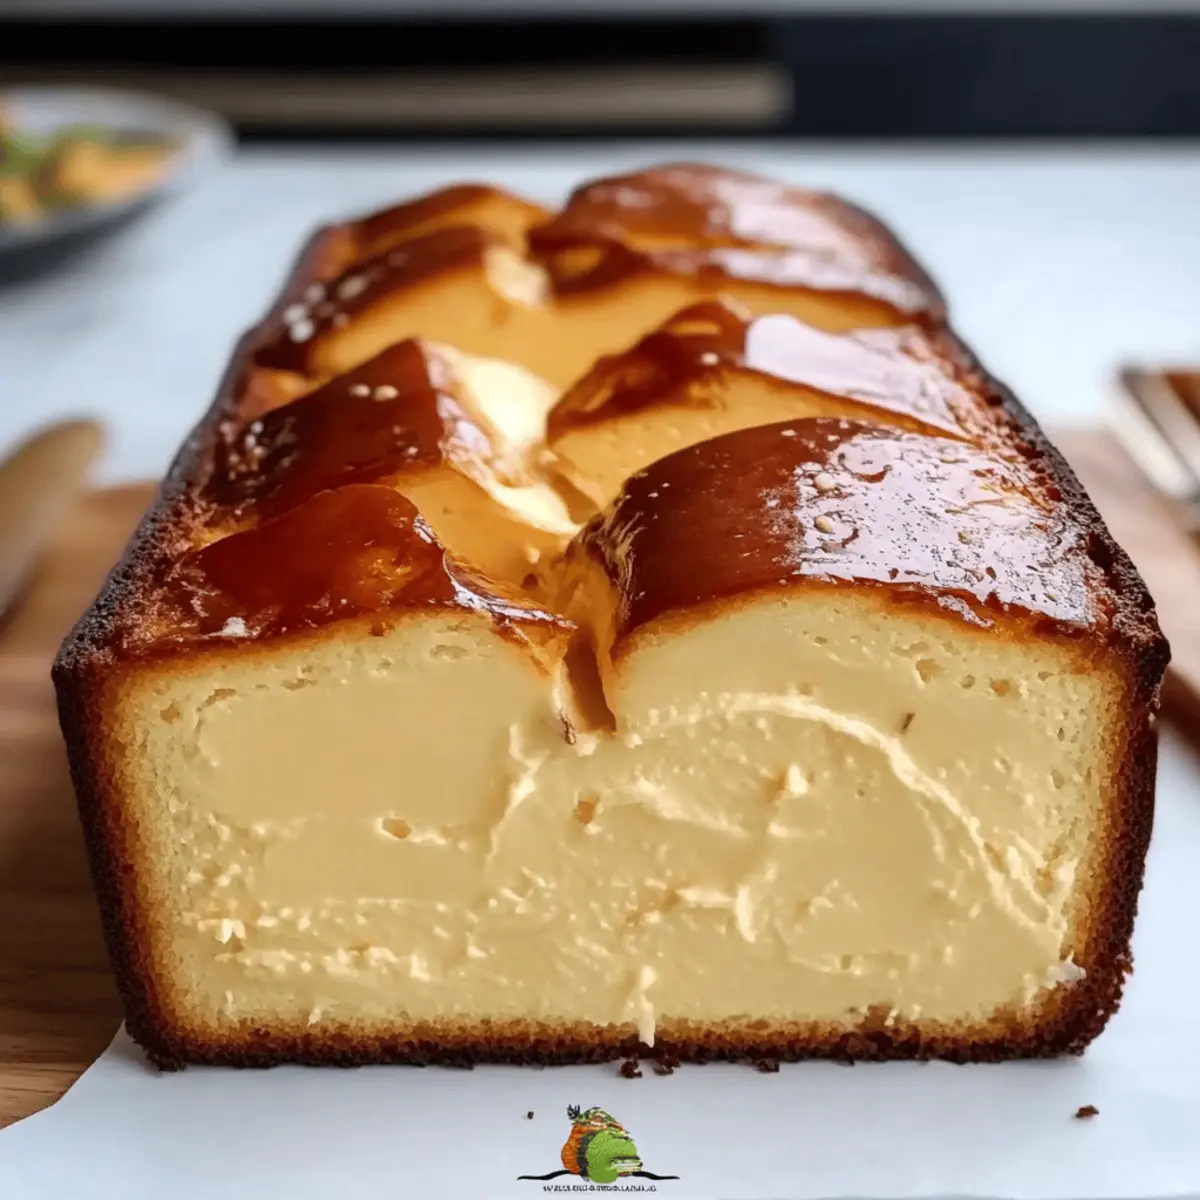
There’s something truly magical about the first bite of a Burnt Basque Cheesecake—its dramatic, caramelized top giving way to a silky, custard-like center is a culinary experience like no other. The beauty of this recipe lies in its simplicity: it’s baked in a loaf pan, making it perfect for small gatherings or an intimate weekend treat. Not only is this cheesecake delightful, but it also offers a gluten-free option, so everyone can enjoy its rich, creamy goodness. Whether you savor it chilled for the ultimate indulgence or serve it alongside fresh berries, this version of Burnt Basque Cheesecake promises to impress your friends and family. Can you imagine the joy on their faces as you unveil this surprisingly easy-to-make dessert? Let’s dive into the recipe and bring a little Basque flair to your kitchen!
Why is this cheesecake so beloved?
Irresistible Creaminess: This Burnt Basque Cheesecake delivers a luscious, custard-like texture that melts in your mouth.
Simple Preparation: Made in a loaf pan, this recipe simplifies your baking experience without sacrificing flavor—perfect for novice bakers!
Gluten-Free Option: Adaptable to suit various dietary needs, you can easily swap in gluten-free flour for a delicious version everyone can enjoy.
Impressive Presentation: Those beautiful, caramelized edges paired with a silky interior make this dessert a showstopper at any gathering.
Versatile Flavor Profiles: Serve it plain or topped with fresh berries or a drizzle of caramel for a personalized touch that impresses every time!
Enjoy the decadence of this classic and watch it become a favorite in your recipe collection!
Burnt Basque Cheesecake Ingredients
• Here’s everything you need to create this creamy delight!
For the Cheesecake Batter
- Full-fat Cream Cheese – Provides that luscious texture and creaminess; low-fat options can be used but may alter the final result.
- Granulated Sugar – Adds just the right amount of sweetness; no substitutions suggested for best flavor.
- Eggs – Acts as a binding agent, creating the structure needed; ensure they’re at room temperature for optimal mixing.
- Heavy Cream – Ensures the cheesecake has a rich mouthfeel; can substitute with a lighter cream for a lighter version.
- All-Purpose Flour – Aids in thickening the batter; can be replaced with a gluten-free flour blend for a gluten-free Burnt Basque Cheesecake.
- Salt – Enhances flavor; no substitutions suggested to maintain balance.
- Vanilla Extract – Adds depth of flavor; optional, but highly recommended for a more robust taste.
Step‑by‑Step Instructions for Burnt Basque Cheesecake
Step 1: Preheat the Oven
Start by preheating your oven to 400°F (200°C). This high temperature is key to achieving that beautifully burnt top on your Burnt Basque Cheesecake. While the oven heats, you can prepare the loaf pan, ensuring it’s ready for the batter.
Step 2: Prepare the Loaf Pan
Line a standard 9x5 inch loaf pan with parchment paper, allowing some overhang for easy removal later. This step is vital for ensuring your cheesecake slides out cleanly after baking. Butter the sides of the pan slightly for extra assurance against sticking.
Step 3: Mix the Cream Cheese
In a large mixing bowl, use an electric mixer to beat the full-fat cream cheese until it is completely smooth and creamy—about 2–3 minutes. Scraping down the sides of the bowl ensures an even consistency, making your Burnt Basque Cheesecake rich and luscious.
Step 4: Add Sugar Gradually
Slowly add granulated sugar to the cream cheese while mixing on low speed until fully incorporated. Keep mixing until the sugar dissolves completely and the mixture is light and creamy, which should take another 2–3 minutes. This step enhances the sweetness of your cheesecake.
Step 5: Incorporate the Eggs
Next, add the eggs into the mixture one at a time, mixing well after each addition. Ensure each egg is fully combined before adding the next, helping create a smooth and homogenous batter. This method promotes a light and airy texture in your Burnt Basque Cheesecake.
Step 6: Add Heavy Cream
Pour in the heavy cream and continue to mix at medium speed until the batter is completely homogeneous—about 2 minutes will do. The cream's richness is essential for that silky mouthfeel. Stop to scrape the bowl to reach all the creamy goodness stuck on the sides.
Step 7: Sift in the Flour
Sift the all-purpose flour over the cheesecake batter, mixing gently until just combined. Avoid overmixing to maintain the cake's delicate texture. The flour helps create structure, making sure your Burnt Basque Cheesecake is dense without losing its signature creaminess.
Step 8: Pour the Batter
Carefully pour the batter into the prepared loaf pan, ensuring it fills the pan evenly. Use a spatula to smooth the top, which contributes to a nice surface for that beautiful burnt finish. It’s important not to overfill the pan to allow space for rising.
Step 9: Bake the Cheesecake
Place the loaf pan in the preheated oven and bake for approximately 45 minutes. Keep an eye on it; the top should become a deep, dark brown, almost burnt, while the center remains jiggly. This contrast is what makes the Burnt Basque Cheesecake so incredible.
Step 10: Cool Gradually
Once baked, turn off the oven and leave the cheesecake inside with the door slightly ajar for about 1 hour. This gradual cooling helps prevent it from sinking. Then, remove the cheesecake from the oven, and let it cool completely on a wire rack.
Step 11: Chill Before Serving
After cooling to room temperature, cover the cheesecake with plastic wrap and refrigerate for at least 4 hours, or preferably overnight. Chilling enhances its flavor and texture, allowing the signature silky custard to firm up beautifully before you serve your Burnt Basque Cheesecake.
Expert Tips for Burnt Basque Cheesecake
-
Temperature Matters: Ensure your eggs are at room temperature; this helps create a smoother batter and enhances the cheesecake's texture.
-
Don't Rush Cooling: Allow the cheesecake to cool gradually in the oven with the door ajar. This prevents sinking and preserves that beautiful shape.
-
Use Parchment Paper: Line your loaf pan with parchment paper for easy removal, ensuring that the edges are well-buttered to avoid sticking.
-
Jiggly Center is Key: A slightly jiggly center means your Burnt Basque Cheesecake is perfectly done. It will firm up beautifully after chilling.
-
Chill Overnight: For the best flavor and texture, chill the cheesecake overnight before serving. This step is crucial for enhancing the creamy custard-like quality.
What to Serve with Burnt Basque Cheesecake
Prepare for a delightful journey of flavors as you complement this indulgent dessert with delicious side dishes that enhance its charm.
-
Fresh Berries: Juicy strawberries, raspberries, or blueberries add a tart contrast that brightens each bite of creamy cheesecake.
-
Whipped Cream: A dollop of lightly sweetened whipped cream offers a lovely airy texture that pairs beautifully with the dense cheesecake.
-
Fruit Compote: A homemade compote made of seasonal fruits introduces a sweet and tangy element, enhancing the cheesecake's richness; spoon it generously on top.
-
Chocolate Ganache: Drizzle silky chocolate ganache for a luxurious touch that melds perfectly with the burnt caramel notes.
-
Espresso or Coffee: Serve with a warm cup of espresso or coffee to elevate the dessert experience, adding a wonderful depth to the cheesecake's flavors.
-
Lemon Zest: Grating fresh lemon zest over the cheesecake brightens the flavor, cutting through its richness with a refreshing twist.
-
Vanilla Ice Cream: A scoop of smooth vanilla ice cream provides a contrasting temperature and creaminess that enhances the cheesecake's velvety texture.
-
Sweet Red Wine: Pair with a glass of sweet red wine for a sophisticated delight that complements the cheesecake's flavors and enhances the dining experience.
Make Ahead Options
These Burnt Basque Cheesecakes are perfect for meal prep enthusiasts! You can prepare the batter up to 24 hours in advance; simply store it in an airtight container in the refrigerator. To maintain the cheesecake's exquisite texture, make sure to cover it tightly to prevent the cream from absorbing any odors. When you're ready to bake, pour the mixture into your lined loaf pan and pop it in the oven—just like magic, you'll have a stunning dessert ready with minimal last-minute effort! Remember, the cheesecake even benefits from chilling overnight, enhancing its flavors for a more delicious result when serving.
Burnt Basque Cheesecake Variations
Explore these delightful twists to customize your Burnt Basque Cheesecake and make it truly your own!
- Fruit Topping: Top your cheesecake with fresh berries for a refreshing contrast that adds a burst of flavor and vibrant color.
- Chocolate Swirl: Fold in melted dark chocolate before pouring the batter into the pan for an indulgent chocolaty version that will surely impress.
- Honey Drizzle: Drizzle honey over the chilled cheesecake for a touch of natural sweetness that enhances its rich, creamy texture.
- Citrus Zest: Add lemon or orange zest to the batter for a bright, zesty flavor that balances the cheesecake’s sweetness beautifully.
- Spicy Kick: Sprinkle in a dash of cayenne pepper or cinnamon for a surprising heat that will intrigue the taste buds.
- Nutty Flavor: Incorporate crushed nuts like almonds or walnuts into the cheesecake batter for added crunch and delightful nutty undertones.
- Lighter Cream Option: Swap heavy cream for a half-and-half mixture to reduce calories while still keeping a satisfying richness.
- Caramel Finish: Drizzle homemade or store-bought caramel sauce over the top for an extra sweet finish that takes your dessert to the next level.
Embrace your creativity and let these variations inspire a new favorite in your dessert repertoire! If you're also looking for ways to enjoy your cheesecake with a side, consider pairing it with a rich fruit compote or a drizzle of chocolate sauce for an indulgent experience.
How to Store and Freeze Burnt Basque Cheesecake
Fridge: Store your Burnt Basque Cheesecake in an airtight container in the refrigerator for up to 5 days. It’s best enjoyed chilled or at room temperature after a brief rest.
Freezer: For longer storage, you can freeze the cheesecake, wrapped snugly in plastic wrap and then aluminum foil. It will keep in the freezer for up to 2 months.
Thawing: To enjoy your frozen cheesecake, simply transfer it to the fridge and let it thaw overnight before serving.
Reheating: If desired, you can gently warm individual slices in the microwave for about 10-15 seconds, but it’s best to savor it chilled for that creamy texture!
Burnt Basque Cheesecake Recipe FAQs
What should I look for when selecting cream cheese?
Absolutely! For the best results, choose full-fat cream cheese since it provides a richer texture and creaminess. Be sure to check for freshness; avoid packages with dark spots or any signs of expiration. If you absolutely must use low-fat cream cheese, keep in mind that it may not achieve the same lusciousness!
How should I store my Burnt Basque Cheesecake after making it?
You can store your Burnt Basque Cheesecake in an airtight container in the refrigerator for up to 5 days. It's best when served chilled or at room temperature after letting it rest for about 20 minutes. Just make sure it’s covered to prevent it from absorbing any odors from the fridge.
Can I freeze Burnt Basque Cheesecake?
Very! To freeze your cheesecake, wrap it tightly in plastic wrap and then wrap it again in aluminum foil to prevent freezer burn. It can be stored in the freezer for up to 2 months. When you're ready to enjoy, transfer it to the fridge to thaw overnight. Patience pays off with this dreamy dessert!
What if my cheesecake sinks in the middle?
Don’t worry; it happens! To prevent sinking, make sure to cool your cheesecake gradually in the oven with the door slightly ajar for about 1 hour after baking. If it does sink, you can enjoy it as is; the creamy texture will still be delicious. To avoid this in the future, ensure you’re following the cooling steps to the letter!
Is this cheesecake suitable for anyone with gluten allergies?
Absolutely! You can easily adapt this Burnt Basque Cheesecake to be gluten-free by substituting the all-purpose flour with a gluten-free flour blend. Just ensure that the blend you choose has xanthan gum or another binding agent to help maintain the cheesecake's structure.
Can I make this cheesecake ahead of time?
Definitely! In fact, chilling the cheesecake overnight not only enhances its flavor but also helps achieve that velvety custard-like texture. Prepare it in advance and impress your guests with minimal last-minute effort—your secret will be safe with me!
Indulge in Burnt Basque Cheesecake Bliss in a Loaf Pan
Ingredients
Equipment
Method
- Preheat your oven to 400°F (200°C).
- Line a standard 9x5 inch loaf pan with parchment paper and butter the sides.
- Beat the full-fat cream cheese until smooth and creamy, about 2-3 minutes.
- Gradually add granulated sugar to the cream cheese, mixing until light and creamy.
- Incorporate the eggs one at a time, mixing well after each addition.
- Pour in the heavy cream and mix until homogeneous, about 2 minutes.
- Sift in the all-purpose flour and mix gently until just combined.
- Pour the batter into the prepared loaf pan, smoothing the top.
- Bake for approximately 45 minutes until the top is dark brown and the center is jiggly.
- Let the cheesecake cool in the oven with the door ajar for 1 hour.
- Chill the cheesecake in the refrigerator for at least 4 hours, or overnight.


Leave a Reply