As I stood in the kitchen, the aroma of warm pastry wafted through the air, instantly transporting me to a cozy café on a bustling street. That's the magic behind these Ham and Cheese Sticks—an effortless delight that brings comfort and a touch of gourmet flair to any gathering. With just a few simple ingredients and only 45 minutes from start to finish, you can whip up a batch that’s perfect for parties or a quick snack when hunger strikes. These tasty treats are not only an amazing crowd-pleaser, but they also give a delightful homemade spin to traditional finger food. Are you ready to take your taste buds on a delicious adventure? Let’s dive into making these irresistible Ham and Cheese Sticks together!

Why Are Ham and Cheese Sticks So Irresistible?
Easy Preparation: The steps to create these delightful bites are simple, making them perfect for both novice and seasoned cooks.
Flavor Explosion: The combination of savory ham, melty cheese, and a hint of Dijon mustard offers a mouthwatering experience that you won't forget.
Versatile Snack: Customize the filling with your favorite cheeses or add roasted veggies to suit any palate.
Quick Cooking: In just 45 minutes, you'll have golden-brown, crispy snacks that are ready to impress!
Crowd Favorite: These Ham and Cheese Sticks are always a hit at gatherings, making them your go-to recipe for parties – just like these delicious puff pastry appetizers.
Perfect for Any Occasion: Whether it’s a family movie night or a festive gathering, these treats are sure to elevate any meal!
Ham and Cheese Sticks Ingredients
• Get ready to assemble these crispy delights!
For the Pastry
- Puff pastry – Thaw it beforehand for easy rolling and shaping.
For the Filling
- Deli ham – Choose your favorite variety; sweet or smoky ham adds unique flavor!
- Cheese – Use cheddar, mozzarella, or your preferred mix for gooey goodness.
For Assembly
- Egg – A beaten egg works wonders as an egg wash for that golden finish.
- Dijon mustard – Just a touch gives a delightful zing to balance the richness.
- Fresh parsley (optional) – Adds a pop of color and freshness to each bite.
- Salt and pepper – Season to taste for the perfect savory edge in your Ham and Cheese Sticks!
Step‑by‑Step Instructions for Ham and Cheese Sticks
Step 1: Preheat the Oven
Begin by preheating your oven to 400°F (200°C). As the oven warms up, line a baking sheet with parchment paper to prevent sticking and ensure an easy cleanup later. The exciting aroma of baking will soon fill your kitchen, setting the stage for these scrumptious Ham and Cheese Sticks.
Step 2: Roll Out the Pastry
On a lightly floured surface, take the thawed puff pastry and roll it out with a rolling pin until it reaches about ⅛ inch thickness. This thinness will give your Ham and Cheese Sticks that delightful crispiness. Make sure the pastry is even to ensure uniform cooking, and be gentle to avoid tearing.
Step 3: Cut the Pastry
Once rolled out, use a knife or pizza cutter to slice the puff pastry into rectangles, approximately 3 inches by 5 inches. Aim for about 12-16 rectangles depending on how generous you want your portions. As you cut, envision the delicious ham and cheese filling ready to nestle within these lovely pockets.
Step 4: Add Dijon Mustard
Take one rectangle of puff pastry and spread a thin layer of Dijon mustard over one half. The mustard adds a zesty flavor that perfectly complements the savory ham and cheese. Make sure to keep within the edges to prevent overflow when rolling; you'll want each bite to burst with flavor.
Step 5: Layer the Ham and Cheese
On top of the mustard, layer a slice of deli ham, followed by a slice or sprinkle of cheese. The combination of melted cheese and savory ham will create a harmonious filling for your Ham and Cheese Sticks. Feel free to mix different cheeses for added depth and richness in flavor.
Step 6: Optional Fresh Parsley
If you’re using fresh parsley, add a sprinkle over the cheese layer at this stage. This adds a touch of color and freshness that elevates your snack. It's an optional step, but it can enhance both the visual appeal and the taste of your delicious Ham and Cheese Sticks.
Step 7: Season the Filling
Lightly season the filling with a pinch of salt and pepper to enhance the flavors. This small step is key to leveraging the savory aspects of the ham and cheese without overpowering their delightful taste. The seasoning will bring everything together, creating a comforting and delicious bite.
Step 8: Seal the Sticks
Fold the other half of the puff pastry rectangle over the filling, creating a sealed pocket. Make sure to press down the edges firmly to seal in all the goodness. For an extra layer of security and style, use a fork to crimp the edges and add a decorative touch to your Ham and Cheese Sticks.
Step 9: Prepare for Baking
Carefully place the assembled Ham and Cheese Sticks on your prepared baking sheet, ensuring that they're spaced apart to allow for puffing up. This way, they won’t stick together as they bake, giving each stick room to develop that lovely, golden-brown crust.
Step 10: Egg Wash the Sticks
Using a pastry brush, gently brush the tops of the sticks with the beaten egg. This egg wash gives your Ham and Cheese Sticks a beautiful, shiny finish as they bake. It also enhances the golden brown color, making them even more inviting and delicious when they're out of the oven.
Step 11: Bake Until Golden
Place the baking sheet in the preheated oven and bake for 15-20 minutes. Keep an eye on the sticks as they bake; they should puff up beautifully and turn golden brown. The delightful aromas of crispy pastry and melting cheese will fill your kitchen, signaling that your treats are nearly ready.
Step 12: Cool and Serve
Once baked, remove your Ham and Cheese Sticks from the oven and allow them to cool slightly on the baking sheet. This resting period helps the filling set, making them easier to handle. After a few minutes, serve them warm and enjoy the delightful crunch and savory flavor that awaits!

Make Ahead Options
These Ham and Cheese Sticks are fantastic for meal prep! You can assemble the sticks up to 24 hours ahead of time. To prep, follow the assembly instructions until the final egg wash, then cover the tray tightly with plastic wrap and refrigerate them. This keeps the pastry from drying out and ensures they're just as flaky and delicious when baking. When you're ready to serve, simply brush with the beaten egg and bake them straight from the fridge—there's no need to thaw! Enjoy these delightful bites with minimal effort, perfectly suited for busy weeknights or unexpected guests.
Ham and Cheese Sticks Variations
Feel free to get creative with these Ham and Cheese Sticks and customize them to your taste!
-
Dairy-Free: Substitute cheese with a vegan cheese alternative to make a delightful dairy-free version. Enjoy the same crispy texture without the dairy!
-
Spicy Kick: Add diced jalapeños or a sprinkle of crushed red pepper flakes inside for a zesty twist. This will give you a warm kick in every bite!
-
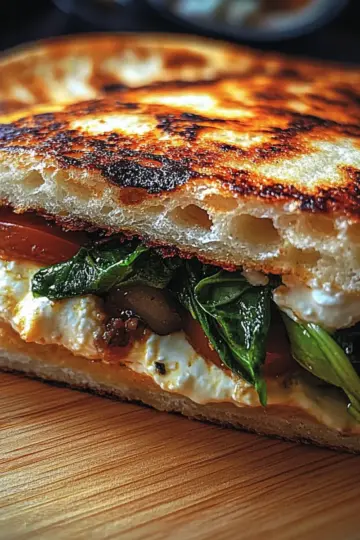
Veggie Packed: Incorporate sautéed spinach, mushrooms, or roasted bell peppers into the filling for added nutrients and flavor. This variation makes them even heartier and colorful.
-
Herbed Delight: Mix in fresh herbs like basil or thyme with the cheese for an aromatic infusion. These herbs will elevate each bite to a new level of flavor!
-
Bacon Lover: For an extra savory treat, add crispy bacon bits along with the ham. The combination of crispy and creamy will be a hit at any gathering!
-
Sweet Surprise: Try using honey or fig jam on the puff pastry before adding your ham and cheese for a sweet and savory contrast. This surprising flavor will have everyone talking.
-
Gluten-Free Option: Use gluten-free pastry dough instead of regular puff pastry for a gluten-friendly version that's just as enjoyable. These will surprise even your gluten-loving friends!
-
Cheesy Varieties: Experiment with different cheeses like pepper jack for heat, smoked gouda for depth, or feta for a tangy twist. The possibilities are endless!
For more tasty snack ideas, check out these delicious puff pastry appetizers that can elevate your next gathering!
Expert Tips for Ham and Cheese Sticks
Use Cold Pastry: Always start with cold puff pastry for optimal flakiness. If it gets too warm, it will be hard to roll and puff properly.
Avoid Overfilling: It's tempting to add lots of filling, but overstuffing can lead to leaks while baking. Keep it moderate to ensure a good seal.
Golden Finish: For an extra shiny top, brush the sticks again halfway through baking. This also helps achieve that perfect golden-brown color on your Ham and Cheese Sticks.
Experiment with Cheese: Mix different types of cheese like gouda or pepper jack to elevate the flavor profile. Don't be afraid to try new combinations!
Cool Before Serving: Allow the Ham and Cheese Sticks to cool slightly before serving. This helps set the filling and makes handling easier.
How to Store and Freeze Ham and Cheese Sticks
Room Temperature: Keep freshly baked Ham and Cheese Sticks at room temperature for up to 2 hours. Ensure they’re covered with a kitchen towel to maintain some moisture and warmth.
Fridge: Store leftover Ham and Cheese Sticks in an airtight container for up to 3 days in the fridge. This keeps them fresh without losing that delightful crunch.
Freezer: For longer storage, freeze unbaked Ham and Cheese Sticks. Place them in a single layer on a baking sheet, freeze until solid, then transfer to a freezer bag for up to 2 months.
Reheating: To reheat, place sticks in a preheated oven at 350°F (175°C) for about 10-15 minutes, until heated through and crisp. Enjoy the warm, cheesy goodness again!
What to Serve with Ham and Cheese Sticks
A delightful array of sides can transform your crispy treats into a full-fledged feast.
-
Fresh Salad: A mixed greens salad with a zesty vinaigrette adds a refreshing crunch that balances the rich flavors. Think of every bite being a delightful contrast, making your meal light yet satisfying.
-
Creamy Tomato Soup: The warm, velvety texture of tomato soup is perfect for dipping and complements the savory ham and cheese beautifully. It’s comfort food at its finest!
-
Garlic Bread: Perfectly toasted with a hint of butter and garlic, this crunchy accompaniment enhances the meal with its addictive flavors. A delightful pairing for those cozy evenings.
-
Pickles or Olives: A selection of pickled vegetables or olives introduces a tangy burst that cuts through the richness, keeping every bite exciting. Their briny goodness provides a lively contrast to the savory sticks.
-
Stuffed Mushrooms: These tender little bites filled with cheese and herbs offer a gourmet touch that makes your gathering feel special. They're always a showstopper on any platter!
-
Sparkling Water or Lemonade: A refreshing drink like sparkling water or a homemade lemonade keeps the meal light. The effervescence or tartness creates a lovely palate cleanser between each bite of cheesy goodness.
-
Dessert Platter: A small dessert platter with cookies or fruit tarts adds a sweet end to your meal. It offers a balance of flavors and leaves your guests happily satisfied.

Ham and Cheese Sticks Recipe FAQs
What type of ham is best for Ham and Cheese Sticks?
Absolutely! Choosing the right ham can elevate your Ham and Cheese Sticks. I recommend using deli ham, like honey-baked or smoked varieties, as they add a touch of sweetness and depth. Feel free to experiment with different types based on your preference or what you have on hand—each variety brings its own unique flavor!
How should I store leftover Ham and Cheese Sticks?
For sure! You can keep leftover Ham and Cheese Sticks in an airtight container in the fridge for up to 3 days. Just be sure to let them cool completely before sealing to maintain their crispy texture. If you want them to last longer, consider freezing them!
Can I freeze Ham and Cheese Sticks?
Yes, you can! To freeze Ham and Cheese Sticks, assemble them first but do not bake. Place them in a single layer on a baking sheet and freeze until solid—about 2-3 hours. Then transfer them to a freezer bag or airtight container. They can be frozen for up to 2 months! When you're ready to enjoy, bake them directly from frozen at 400°F (200°C) for 20-25 minutes.
What if my puff pastry is too warm while working with it?
Very important! If your puff pastry becomes too warm or sticky while rolling it out, it’s best to pop it back in the fridge for about 15-20 minutes. Cold pastry puffs up beautifully, giving you those flaky layers we crave! Don’t hesitate to work on a well-floured surface to reduce sticking.
Can I make Ham and Cheese Sticks for pets?
Definitely! While Ham and Cheese Sticks are great for us, they aren't ideal for pets due to the cheese and seasoning. Instead, consider making a simple version for your furry friends using plain cooked ham (without any seasonings) and wrapping them in a thin layer of pastry. Just keep portions small and be mindful of any dietary restrictions your pet might have.

Crispy Ham and Cheese Sticks You'll Crave Again and Again
Ingredients
Equipment
Method
- Preheat your oven to 400°F (200°C) and line a baking sheet with parchment paper.
- Roll out the thawed puff pastry on a lightly floured surface to about ⅛ inch thickness.
- Cut the rolled-out pastry into rectangles, approximately 3 inches by 5 inches, aiming for about 12-16 rectangles.
- Spread a thin layer of Dijon mustard over one half of each pastry rectangle.
- Layer a slice of deli ham and a slice or sprinkle of cheese over the mustard.
- If using, sprinkle fresh parsley over the cheese layer.
- Season the filling lightly with salt and pepper.
- Fold the other half of the pastry over the filling, pressing down the edges to seal.
- Place the assembled sticks on the baking sheet, spaced apart, to allow for puffing up.
- Brush the tops of the sticks with the beaten egg for a shiny finish.
- Bake in the preheated oven for 15-20 minutes until they are golden brown.
- Allow to cool slightly on the baking sheet, then serve warm.


Leave a Reply