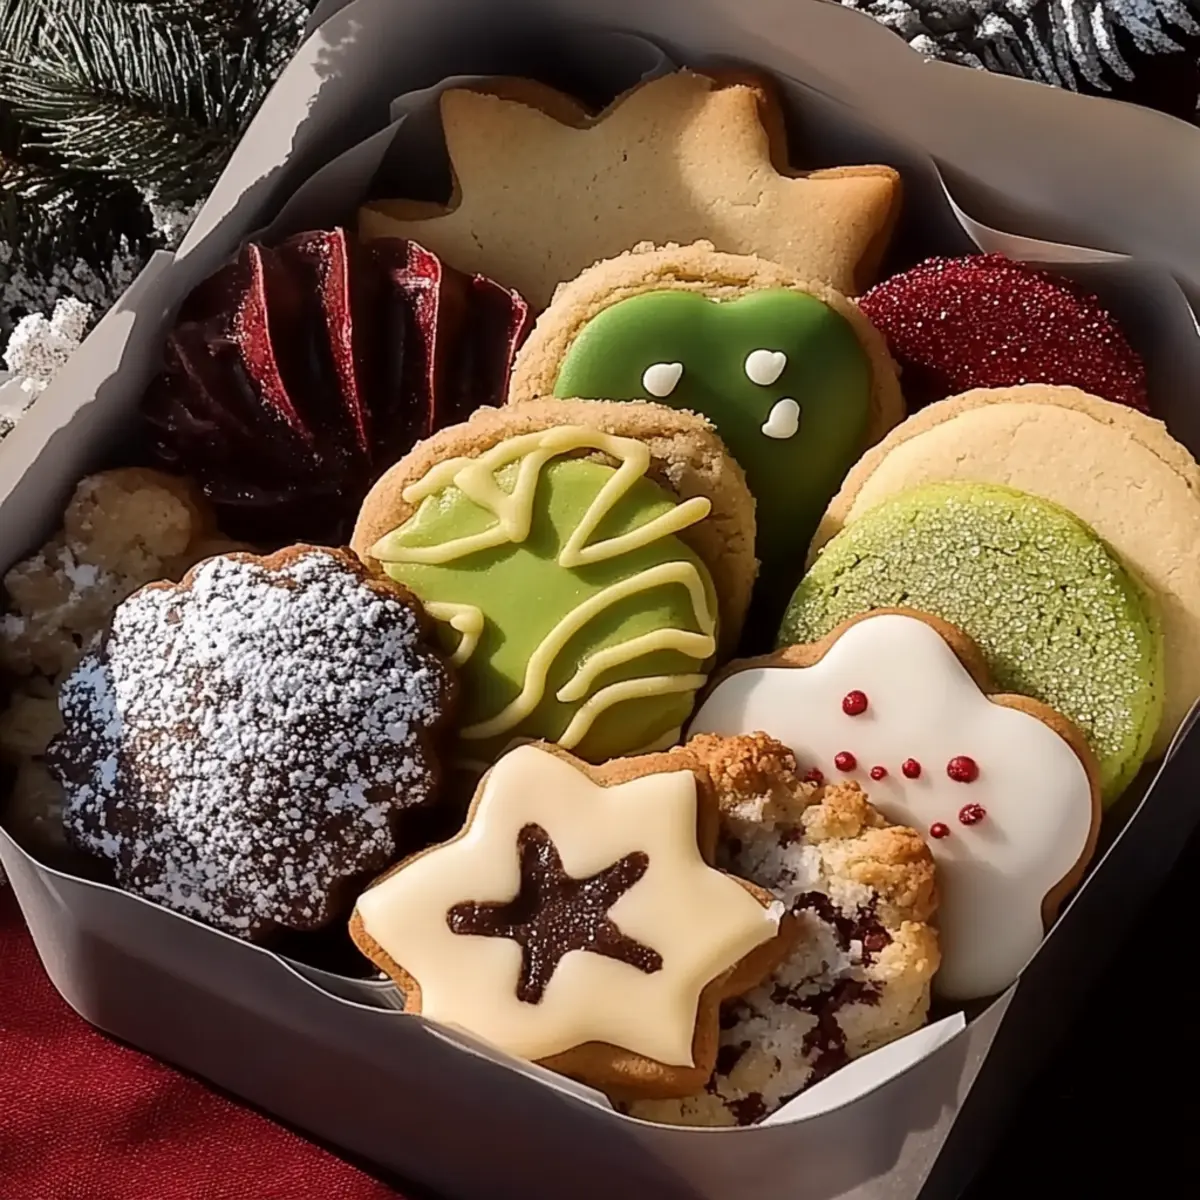
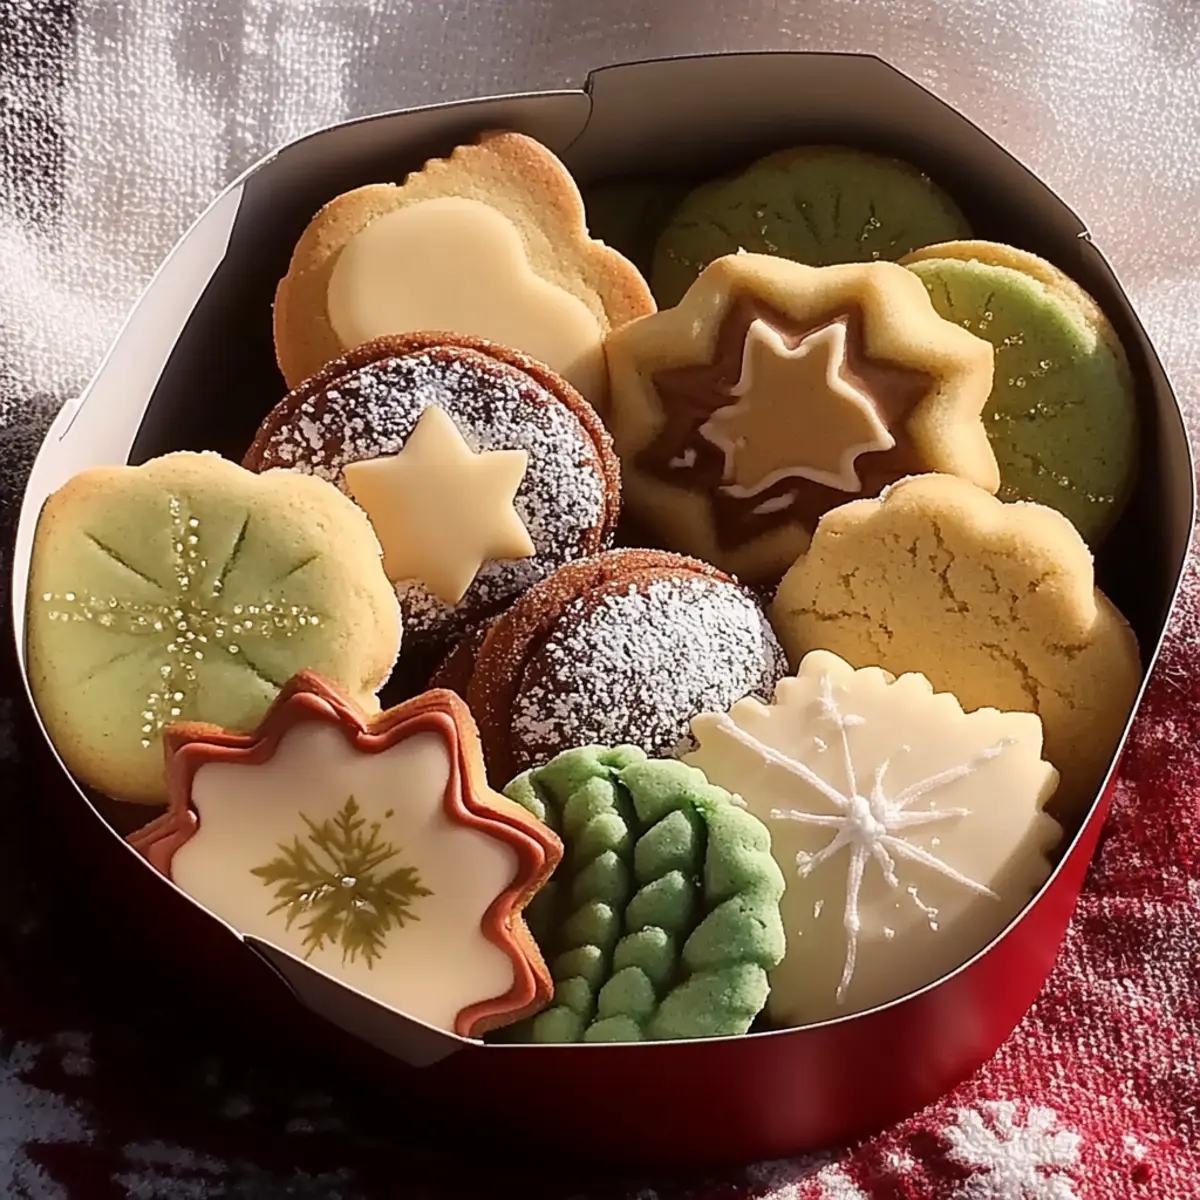
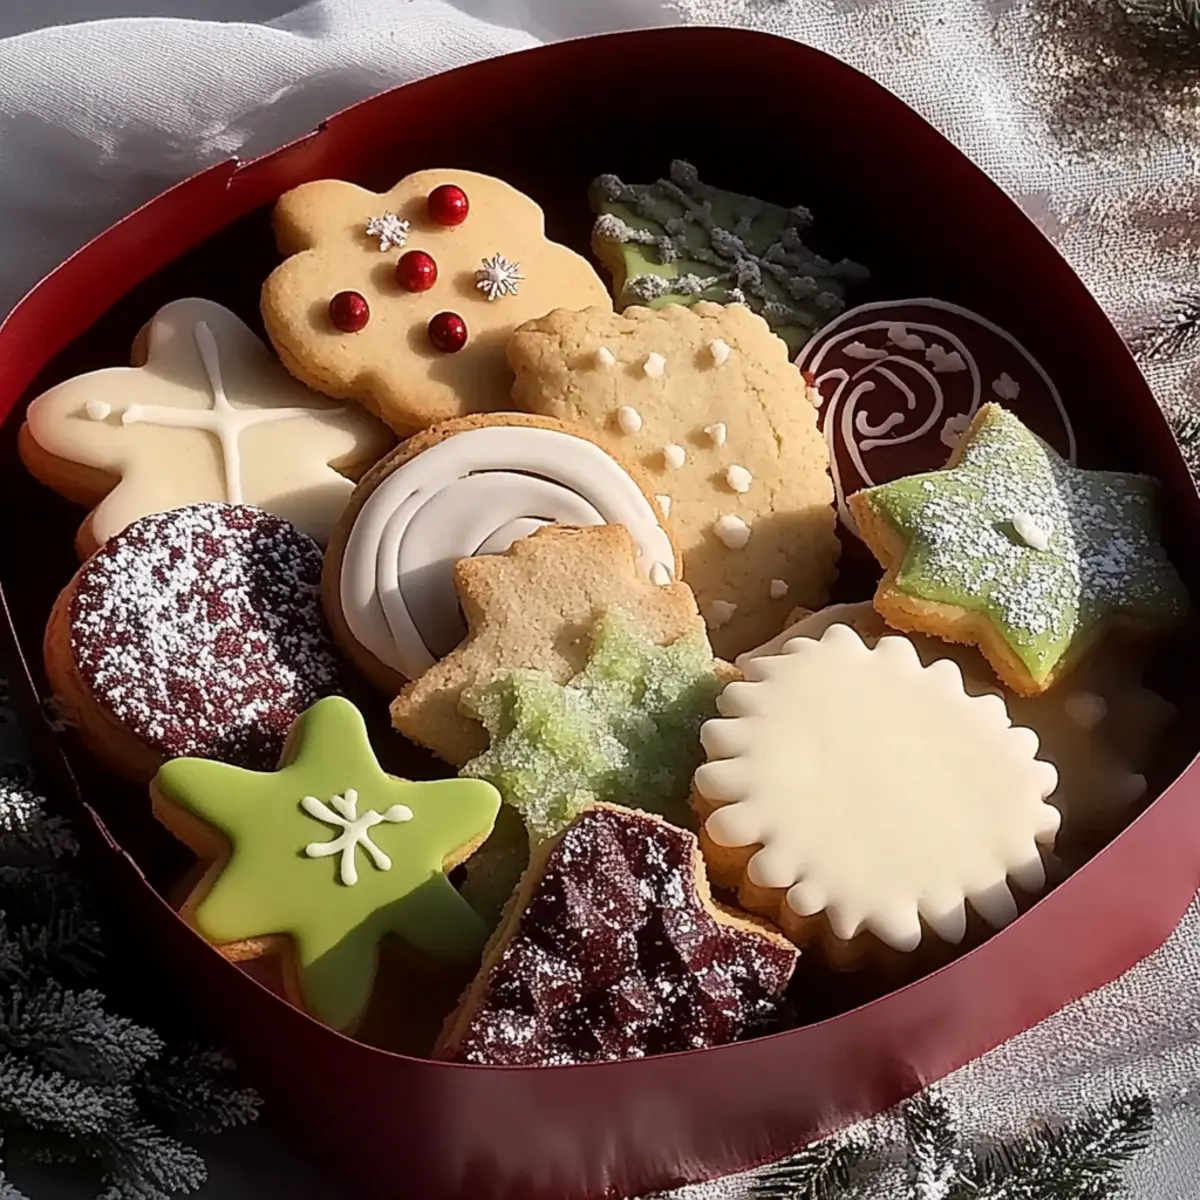
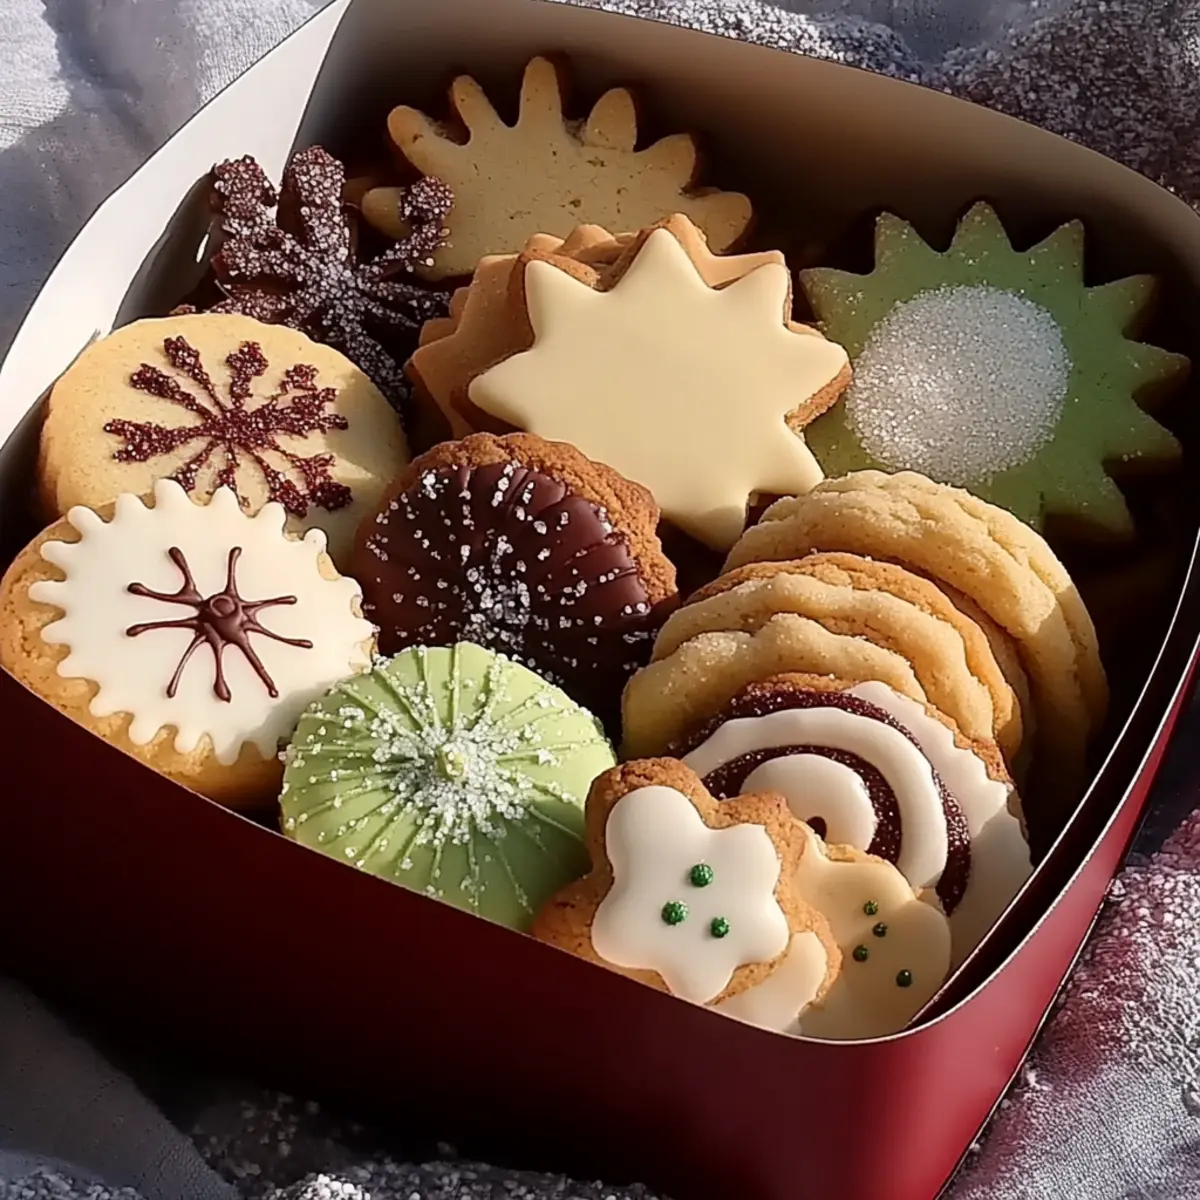
The holidays are upon us, and that familiar aroma of freshly baked cookies wafts through the air! There's something truly magical about making a Holiday Butter Cookie Box—it’s not just about the cookies themselves, but also the joy they bring to gatherings and family traditions. What I love most about these butter cookies is their delightful simplicity: they come together in just 15 minutes, making them perfect for busy holiday schedules. Plus, with options to customize them with chocolate chips or vibrant sprinkles, they become a festive treat everyone will adore. As you roll the dough into cute little balls and watch them transform into golden bites of happiness, I guarantee you’ll feel the spirit of the season warming your heart. Ready to create memories and share these delightful cookies with your loved ones? Let’s dive into baking!
Why Are Holiday Butter Cookies So Special?
Quick and Easy: These delightful cookies come together in just 15 minutes, making them perfect for festive baking marathons.
Customizable: Whether you add chocolate chips or decorative sprinkles, these cookies can be tailored to your taste, making them a unique treat for everyone.
Perfect for Gifting: Pack them in a decorative box for a thoughtful homemade gift that’s sure to impress family and friends this season. For more fun gifting ideas, check out my Oreo Cookie Balls recipe!
Sweet, Buttery Flavor: The rich combination of vanilla and almond extracts creates a delightful flavor that’s simply irresistible.
Crowd Pleaser: With every bite, you'll see smiles all around—these cookies are a guaranteed crowd favorite at any holiday gathering!
Elevate your holiday spirit and let these cookies spread joy as you enjoy baking them from the comfort of your kitchen!
Holiday Butter Cookie Box Ingredients
• Here are the essentials for a delightful baking experience!
For the Dough
- 2 cups all-purpose flour – a key ingredient that provides the cookies with their structure.
- 1 cup granulated sugar – adds sweetness and helps create that lovely texture.
- ½ cup powdered sugar – ensures a melt-in-your-mouth finish that's unique to butter cookies.
- ½ cup butter, softened – the heart of the cookies, bringing rich flavor and a tender crumb.
- 1 large egg yolk – enhances the richness while helping bind the ingredients together.
- 1 teaspoon vanilla extract – for a classic cookie flavor that complements the butter beautifully.
- ½ teaspoon almond extract – adds a lovely hint of nuttiness that elevates the overall taste.
- ½ teaspoon salt – balances the sweetness and enhances the cookie flavors.
Optional Add-ins
- 1 cup chocolate chips – a delightful twist for chocolate lovers who want to add a little extra richness.
- Sprinkles or decorative sugar – perfect for giving your Holiday Butter Cookie Box a festive pop of color!
With these ingredients, you're all set to create a Holiday Butter Cookie Box that will warm hearts and bring smiles to every gathering!
Step‑by‑Step Instructions for Holiday Butter Cookie Box
Step 1: Cream the Butters and Sugars
In a large mixing bowl, use a hand mixer or stand mixer to cream together ½ cup softened butter, 1 cup granulated sugar, and ½ cup powdered sugar on medium speed until the mixture is light and fluffy, about 3-4 minutes. You’re looking for a soft, pale cream that’s airy, which sets the foundation for your delightful Holiday Butter Cookie Box.
Step 2: Add Wet Ingredients
Next, add in 1 large egg yolk, 1 teaspoon vanilla extract, ½ teaspoon almond extract, and ½ teaspoon salt. Mix on low until everything is well incorporated, taking care to scrape down the sides of the bowl. The batter will transform into a smooth and creamy texture, ensuring each bite of your butter cookies bursts with flavor.
Step 3: Combine Dry Ingredients
Gradually add in 2 cups all-purpose flour, mixing on low speed until a soft dough forms. If desired, fold in 1 cup of chocolate chips at this point for a rich twist. The dough should come together nicely, feeling soft but not sticky, making it perfect for shaping those adorable cookie balls.
Step 4: Chill the Dough
Wrap the dough tightly in plastic wrap and refrigerate for at least 1 hour. This chilling period is essential for firming up the dough, making it easier to handle and ensuring that your cookies retain their delightful shape as they bake to perfection in the Holiday Butter Cookie Box.
Step 5: Preheat the Oven
While the dough chills, preheat your oven to 350°F (175°C). Line your baking sheets with parchment paper to prevent sticking. You’ll know your oven is ready when it reaches the optimal temperature, filling your kitchen with a warm, inviting atmosphere for baking your delicious cookies.
Step 6: Shape the Cookies
Once chilled, take the dough out and roll it into small balls, approximately 1 inch in diameter. Place the balls about 2 inches apart on your prepared baking sheets, ensuring enough space for the cookies to spread as they bake. The sight of these cute dough balls is sure to get you excited for the scrumptious Holiday Butter Cookie Box ahead!
Step 7: Add Toppings
Gently press down slightly on each cookie ball with the palm of your hand, then sprinkle with your choice of colorful sprinkles or decorative sugar if desired. This step not only adds a festive pop but also enhances the appeal of your Holiday Butter Cookie Box, making each cookie feel special.
Step 8: Bake the Cookies
Slide the baking sheets into the preheated oven and bake for 10-12 minutes. Keep an eye on the cookies; they are done when the edges are lightly golden while the centers remain soft. The enticing aroma wafting through your home will be a clear indication that your delicious butter cookies are nearly ready.
Step 9: Cool the Cookies
After baking, allow the cookies to cool on the baking sheets for 5 minutes. This cooling period helps them set, making them easier to transfer. Use a spatula to gently move the cookies to wire racks, where they can cool completely and develop that perfect texture for your Holiday Butter Cookie Box.
Step 10: Package the Cookies
Once the cookies have cooled, arrange them neatly in a decorative box or gift tin, layering them with parchment paper for a beautiful presentation. Your Holiday Butter Cookie Box will not only look inviting but also be a heartfelt gift to share with friends and family during the festive season!
What to Serve with Holiday Butter Cookies
The warmth and sweetness of these butter cookies create the perfect backdrop for a memorable holiday gathering.
-
Hot Cocoa: Rich and creamy, hot cocoa balances the sweetness of the cookies and embraces the spirit of the season. Add a sprinkle of cinnamon for extra warmth!
-
Coffee: A fresh brew enhances the buttery flavors, offering a wonderful contrast that’s perfect for enjoying an afternoon treat or a post-dinner delight.
-
Milk: Classic and comforting, a cold glass of milk provides the perfect dip for cookies, making every bite reminiscent of childhood holidays.
-
Fruitcake: This festive and flavorful cake complements the simplicity of the cookies, adding a rich burst of fruit and nuts that balances sweetness.
-
Cheese Platter: Spreadable cheeses, like brie, bring a savory touch to your cookie box, creating an inviting mix of sweet and savory for your holiday table.
-
Holiday Fruit Salad: Bright and refreshing, a mix of citrus and berries adds a zesty touch to the cookie experience, making for a light and lively pairing.
-
Miniature Tartlets: Bite-sized dessert tarts filled with chocolate or fruit provide a delicious counterpart, creating a delightful dessert platter for guests.
Embrace the essence of the season and create treasured moments around these tasty pairings alongside your holiday butter cookies!
Holiday Butter Cookie Box Variations
Feel free to unleash your creativity and make these cookies truly your own with a few fun tweaks!
- Gluten-Free: Substitute all-purpose flour with a 1:1 gluten-free flour blend for a perfect texture without the gluten.
- Vegan: Use vegan butter in place of regular butter and substitute the egg yolk with flaxseed meal mixed with water for a plant-based alternative.
- Coconut Bliss: Add ½ cup shredded coconut to the dough for a tropical twist that elevates the flavor profile.
- Spice it Up: Incorporate 1 teaspoon of cinnamon or ginger to bring warmth and spice, giving your Holiday Butter Cookie Box a cozy touch.
- Nutty Addition: Mix in ½ cup chopped walnuts or pecans for a crunchy contrast to the tender cookies. The nuts will add delightful flavor and texture in every bite.
- Double Chocolate: For a chocolate lover's dream, swap out ½ cup of the flour with unsweetened cocoa powder and include chocolate chips for extra decadence!
- Peppermint Twist: Add ½ teaspoon of peppermint extract for a refreshing holiday flavor or sprinkle crushed candy canes on top for a festive finish.
- Jam-Filled: Create a thumbprint in the center of each cookie ball and fill with your favorite jam before baking—this tasty surprise will delight cookie lovers!
By savoring the process and exploring these variations, you’ll discover endless possibilities, turning your Holiday Butter Cookie Box into a cherished family favorite. And for anyone interested in more cookie ideas, don't miss my delightful Zucchini Oatmeal Cookies. Happy baking!
How to Store and Freeze Holiday Butter Cookies
Room Temperature: Keep cookies in an airtight container at room temperature for up to 5 days to maintain freshness and deliciousness.
Fridge: If you prefer them chilled, store cookies in an airtight container in the fridge for up to 2 weeks, where they stay moist and flavorful.
Freezer: For longer storage, freeze the cookies in an airtight container or freezer bag for up to 3 months. Thaw at room temperature before enjoying.
Reheating: To revive your cookies, pop them in the microwave for 10-15 seconds or warm them in a preheated oven at 350°F (175°C) for a few minutes. These Holiday Butter Cookies are perfect for sharing at any time!
Expert Tips for Holiday Butter Cookies
• Chill Time is Key: Chilling the dough for at least 1 hour makes it easier to handle and ensures cookies hold their shape while baking.
• Avoid Overmixing: When adding flour, mix just until combined. Overmixing can lead to tough cookies instead of the tender texture we love in a Holiday Butter Cookie Box.
• Watch the Bake Time: Keep a close eye on the cookies as they bake. They should be lightly golden on the edges but still soft in the middle.
• Customize with Toppings: Feel free to experiment! Add different toppings or mix-ins like nuts or dried fruits to create a unique Holiday Butter Cookie Box that reflects your family's tastes.
• Storage Matters: Store cooled cookies in an airtight container to keep them fresh for up to a week. They make for a delightful treat anytime!
Make Ahead Options
These Holiday Butter Cookies are perfect for busy home cooks who want to enjoy festive treats without the last-minute rush! You can prepare the cookie dough up to 3 days in advance by wrapping it tightly in plastic wrap and refrigerating it. To maintain their delicious flavor and texture, ensure the dough is well-wrapped to prevent drying out. When you're ready to bake, simply remove the dough from the fridge, let it sit for about 10 minutes to soften, roll into balls, and proceed with the normal baking instructions. This way, you'll have warm, freshly baked cookies ready to share with loved ones, making your holiday baking effortless and delightful!
Holiday Butter Cookies Recipe FAQs
How do I choose the best butter for my cookies?
Absolutely! For the best flavor, use unsalted butter that’s been softened to room temperature. This not only enhances the taste but also helps in achieving that perfectly creamy consistency when creaming with sugars. Avoid margarine as it lacks the richness that butter provides.
How can I store my Holiday Butter Cookies?
After your cookies are completely cool, store them in an airtight container at room temperature for up to 5 days. This keeps them fresh and delicious. If you want to keep them longer, you can refrigerate them for up to 2 weeks. Just make sure they are sealed well to prevent them from drying out!
Can I freeze Holiday Butter Cookies?
Very! To freeze your cookies, place them in a single layer on a baking sheet and freeze for about 1-2 hours until solid. After freezing, transfer them to an airtight container or a freezer bag, separating layers with parchment paper. They can be stored for up to 3 months. When you’re ready to enjoy, simply thaw them at room temperature.
Why are my cookies spreading too much while baking?
If you find your cookies spreading more than expected, it’s likely due to the butter being too warm or not chilling the dough long enough. Make sure to chill the dough for at least 1 hour. Also, consider using a bit more flour, or check the accuracy of your measurements. A precise kitchen scale can make this easier!
Can I make these cookies gluten-free?
Absolutely! To make gluten-free Holiday Butter Cookies, substitute the all-purpose flour with a 1:1 gluten-free flour blend. Just double-check that your other ingredients, like the baking powder, are gluten-free. This way, everyone can enjoy the festive spirit with their own version of a Holiday Butter Cookie Box!
Are there any common allergies to consider with these cookies?
Yes, it’s important to be mindful of common allergens. These cookies contain dairy (butter) and eggs, which may not be suitable for those with lactose intolerance or egg allergies. You can substitute the butter with a vegan alternative and use a flax egg (1 tablespoon ground flaxseed mixed with 2.5 tablespoons water) for the egg yolk. Always check labels on chocolate chips and add-ins too, as they may contain allergens!
Irresistible Holiday Butter Cookie Box for Festive Joy
Ingredients
Equipment
Method
- Cream the butter, granulated sugar, and powdered sugar on medium speed for 3-4 minutes until light and fluffy.
- Add the egg yolk, vanilla extract, almond extract, and salt. Mix on low until well incorporated.
- Gradually add the all-purpose flour, mixing until a soft dough forms. Fold in chocolate chips if desired.
- Wrap the dough in plastic wrap and refrigerate for at least 1 hour.
- Preheat the oven to 350°F (175°C) and line baking sheets with parchment paper.
- Shape the dough into small balls, placing them 2 inches apart on the baking sheets.
- Press down slightly on each ball and sprinkle with colorful sprinkles if desired.
- Bake for 10-12 minutes until the edges are lightly golden and the centers remain soft.
- Allow cookies to cool on the baking sheets for 5 minutes before transferring to wire racks.
- Once cooled, package cookies in a decorative box or gift tin.


Leave a Reply