As I stood in my kitchen, the rich aroma of freshly brewed coffee filled the air, instantly transporting me to cozy cafés in Italy. Today, I’m excited to share my delightful Pistachio Tiramisu recipe, a twist on the classic dessert that will elevate your home dining experience. This indulgent treat not only boasts a unique flavor profile but also requires only 30 minutes of prep time, making it an easy yet impressive crowd-pleaser for any gathering. With layers of creamy mascarpone mingling with the crunch of crushed pistachios, this dessert is the perfect way to satisfy your sweet cravings while creating lasting memories around the table. So, who’s ready to indulge in a scoop of creamy goodness that’s both decadent and accessible? Let’s dive into this pistachio-infused delight!
Why is Pistachio Tiramisu a Must-Try?
Indulgent flavor meets effortless preparation: This Pistachio Tiramisu redefines dessert with its creamy mascarpone blend and delightful crunch of pistachios. Versatile enough for any occasion, it’s perfect for dinner parties or a quiet night in. Quick prep time means you’ll be ready to impress in just 30 minutes! Make-ahead friendly, this treat tastes even better the next day, ensuring you can savor every bite without the rush. Plus, it’s suitable for vegetarians, allowing everyone to indulge in a slice of heaven!
Pistachio Tiramisu Ingredients
Discover the delightful components of this decadent dessert.
For the Cream Mixture
- Mascarpone cheese – lends a rich and creamy texture essential for classic tiramisu.
- Heavy cream – helps create a light and fluffy consistency when whipped.
- Sugar – balances the flavors and adds just the right hint of sweetness.
- Vanilla extract – enhances the overall flavor with aromatic notes.
For Assembly
- Brewed coffee – use your favorite blend, cooled to soak ladyfingers and infuse flavor into the dessert.
- Ladyfinger cookies – the traditional base that soaks up the coffee and complements the creamy layers.
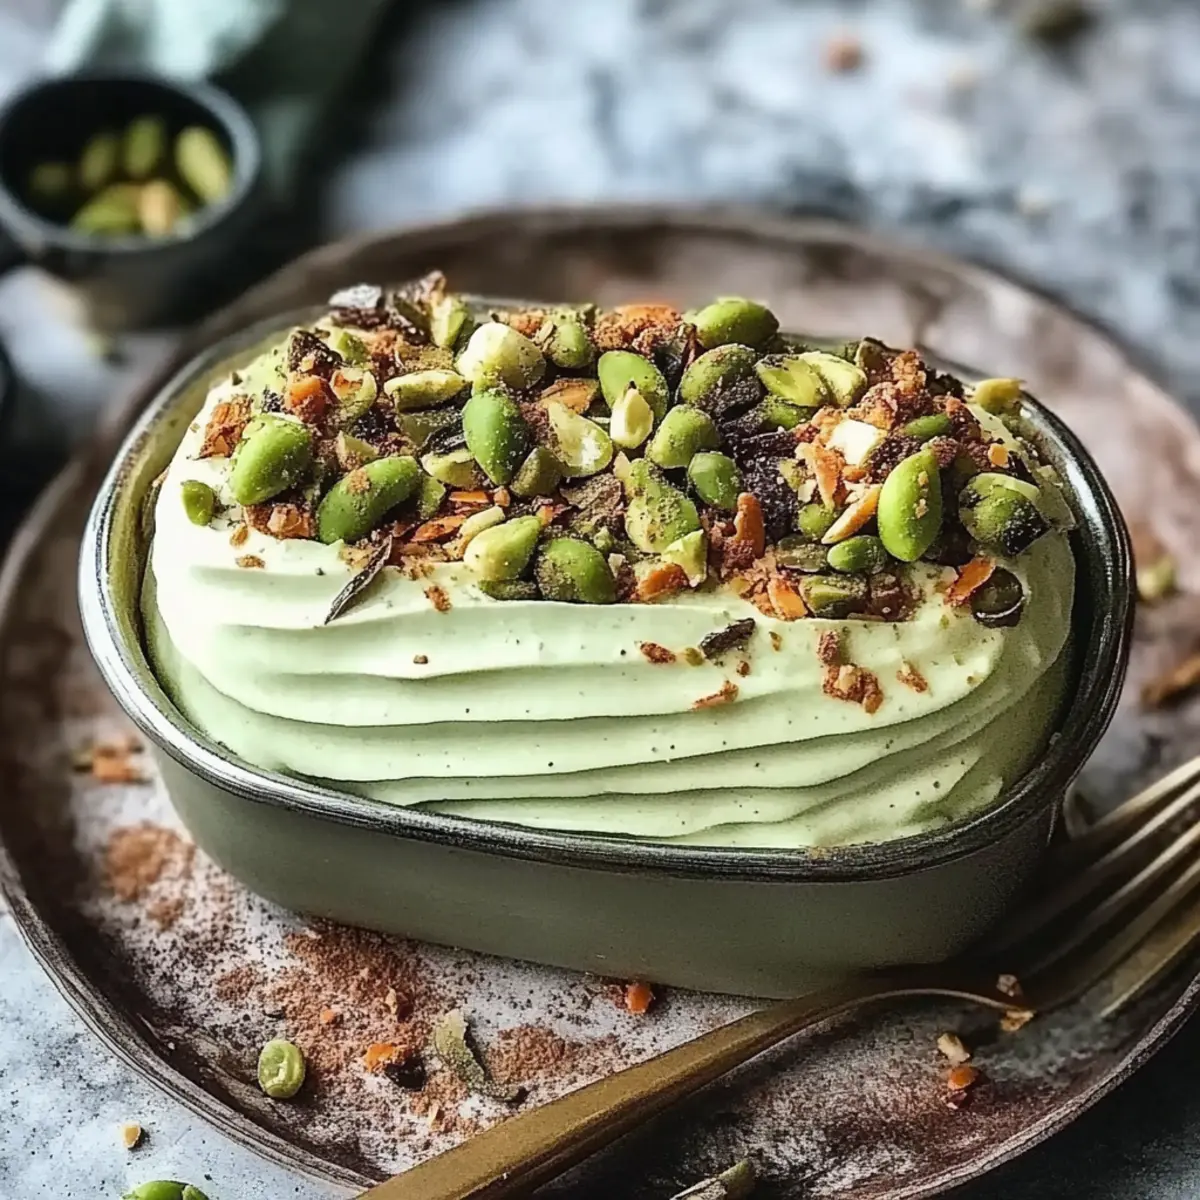
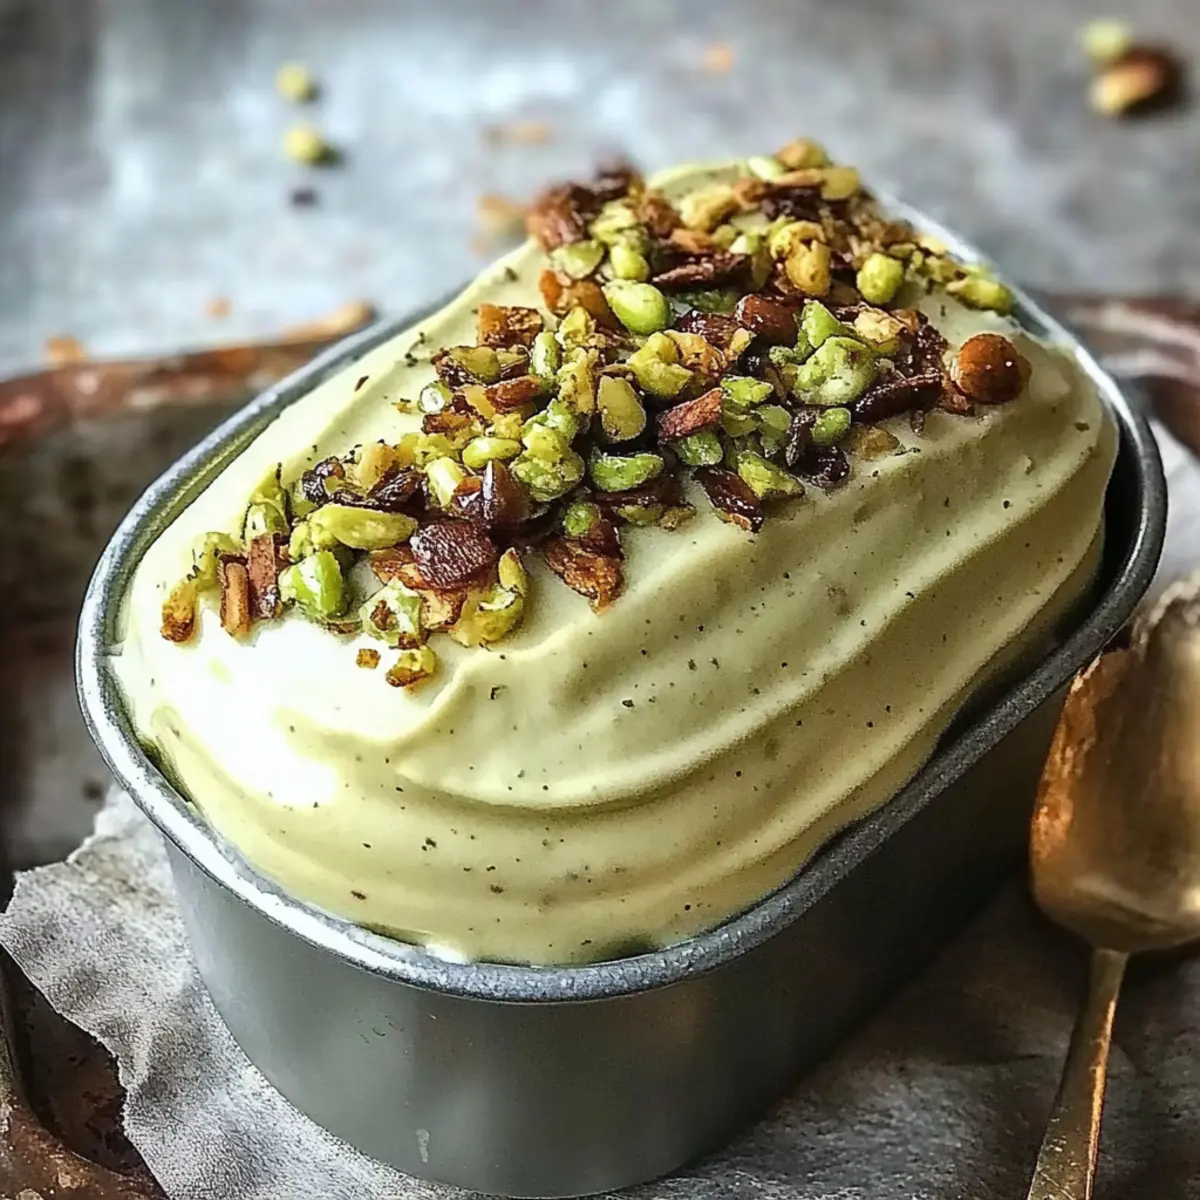
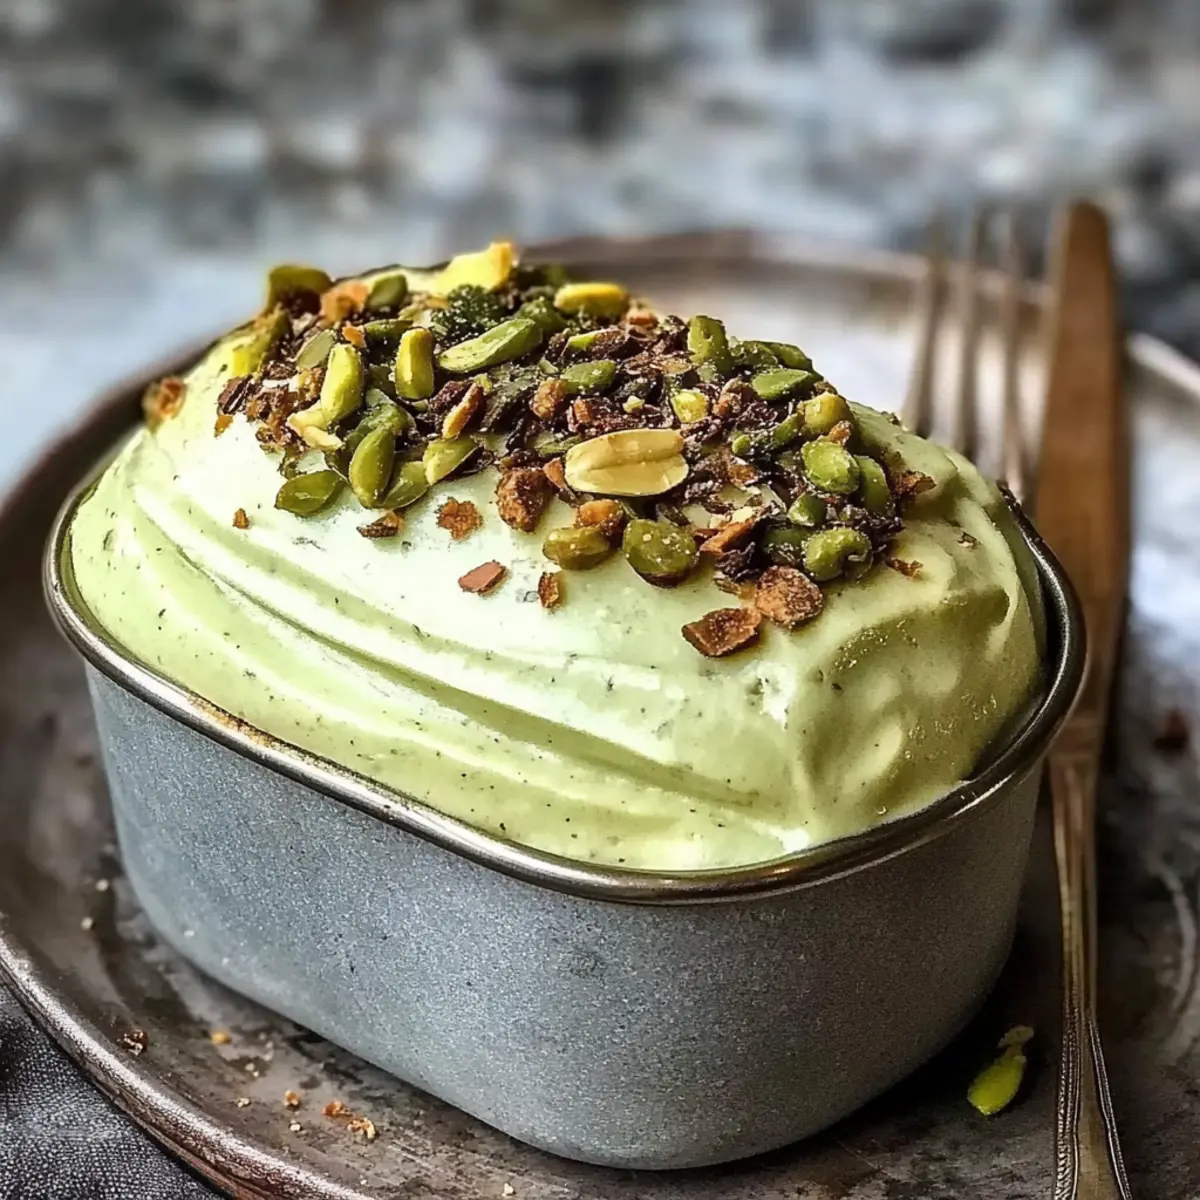
- Crushed pistachios – not just for garnish; they add a nutty crunch that makes the Pistachio Tiramisu truly special.
- Coffee liqueur (optional) – adds depth and richness; feel free to skip if you prefer a non-alcoholic version!
Step‑by‑Step Instructions for Pistachio Tiramisu
Step 1: Prepare the Cream Mixture
In a mixing bowl, combine 1 cup of mascarpone cheese, 1 ½ cups of heavy cream, 2 tablespoons of sugar, and 1 teaspoon of vanilla extract. Using an electric mixer, whisk these ingredients on medium-high speed for about 3–5 minutes until the mixture is smooth and fluffy, forming soft peaks. This creamy base will be the heart of your Pistachio Tiramisu.
Step 2: Soak the Ladyfingers
Pour 1 cup of cooled brewed coffee into a shallow dish, adding coffee liqueur if desired for an extra kick. Quickly dip each ladyfinger cookie into the coffee, turning them over to ensure they are well-soaked but not soggy—about 2 seconds per side is ideal. This step infuses your dessert with rich flavor while keeping the texture just right.
Step 3: Layer the Soaked Ladyfingers
In a serving dish, arrange half of the soaked ladyfingers in an even layer at the bottom. Ensure they cover the base completely for a solid foundation. You want them to absorb enough coffee flavor without falling apart as you layer further. This step is essential for creating the signature texture in your Pistachio Tiramisu.
Step 4: Add the Cream Layer
Spread half of the whipped mascarpone mixture over the layer of ladyfingers, smoothing it into an even layer with a spatula. This luscious cream will envelop the ladyfingers, giving your Pistachio Tiramisu its signature richness. Make sure to reach the edges of the dish for a beautiful presentation.
Step 5: Repeat the Layering Process
Repeat the previous two steps by placing another layer of soaked ladyfingers on top of the mascarpone mixture. Once again, carefully spread the remaining cream mixture over this new layer of ladyfingers, creating a delightful two-layer dessert. The repetition of layers ensures every bite of your Pistachio Tiramisu is decadent and flavorful.
Step 6: Garnish with Pistachios
Generously sprinkle ½ cup of crushed pistachios over the top of the final cream layer. This not only adds a beautiful color contrast but also enhances the nutty flavor that makes this Pistachio Tiramisu truly special. Use a nice even layer of pistachios for a visually appealing presentation.
Step 7: Chill for Flavor Development
Cover the assembled Pistachio Tiramisu with plastic wrap or a lid and place it in the refrigerator for at least 4–6 hours, preferably overnight. Chilling helps the flavors meld beautifully, enhancing the overall taste and allowing the dessert to set properly. Patience is key for achieving that perfect slice!
What to Serve with Pistachio Tiramisu
As you prepare to impress your guests with this exquisite dessert, consider these delectable additions to complete your meal.
- Classic Italian Espresso: The bold, rich flavor of espresso enhances the coffee notes in the tiramisu, creating a harmonious after-dinner experience.
- Fruit Compote: A sweet-tart fruit compote, like raspberry or berry, offers a refreshing contrast that balances the creamy tiramisu beautifully.
- Chocolate-Covered Almonds: Their crunch and nutty flavor echo the pistachios, making them a delightful nibble alongside the creamy dessert.
- Vanilla Gelato: A scoop of smooth vanilla gelato adds a luxurious creaminess, while its subtle sweetness perfectly complements the tiramisu.
- Pistachio Biscotti: Dipping biscotti in coffee or enjoying it on the side provides extra texture and flavor that echoes the dessert's main ingredients.
- Sparkling Wine: A glass of light, bubbly Prosecco adds a festive touch and the effervescence helps cleanse the palate between bites.
- Citrus Salad: A refreshing mix of oranges and grapefruit drizzled with honey brings brightness and balances the richness of the tiramisu perfectly.
- Chocolate Mousse: For the chocolate lovers, a light and airy mousse creates an indulgent experience that pairs well with the pistachio's nuttiness.
Make Ahead Options
These Pistachio Tiramisu layers are perfect for busy home cooks looking to save time! You can prepare the entire dessert up to 24 hours in advance, allowing the flavors to develop beautifully overnight. To do this, simply follow the recipe to layer the soaked ladyfingers and mascarpone mixture before garnishing with crushed pistachios. Cover the dish tightly with plastic wrap to maintain quality and freshness. When you're ready to serve, just sprinkle on the pistachios and enjoy your delectable creation that tastes just as delicious as if made fresh! With these make-ahead tips, you'll impress your guests without the last-minute rush!
Pistachio Tiramisu Variations & Substitutions
Feel free to experiment with this delightful dessert by adding your own personal twist or making thoughtful substitutions!
- Nut-Free: Use sunflower seed butter instead of mascarpone for a creamy alternative with a nutty flavor.
- Dairy-Free: Swap mascarpone and heavy cream for coconut cream for a deliciously tropical version.
- Decaf Delight: Substitute regular brewed coffee with decaffeinated coffee to enjoy this dessert any time of day without the jitters.
- Flavor Boost: Add a tablespoon of almond extract to the cream mixture for an extra layer of flavor that pairs beautifully with pistachios.
- Chocolate Lover’s: Drizzle melted dark chocolate over the layers for a rich, decadent experience; it adds a new depth to each bite.
- Fruity Twist: Layer in fresh raspberries or strawberries between the ladyfingers to introduce a refreshing and vibrant contrast to the creamy tiramisu.
- Spicy Kick: Incorporate a pinch of cinnamon or nutmeg into the cream mixture for a warm spice that rounds out the flavors beautifully.
- Gluten-Free: Replace ladyfinger cookies with gluten-free cookies or a sponge cake to accommodate those with dietary restrictions.
By making these thoughtful variations, you can customize your Pistachio Tiramisu to suit every palate. Don't hesitate to get creative and make it your own!
How to Store and Freeze Pistachio Tiramisu
Fridge: Store any leftover Pistachio Tiramisu in the refrigerator, covered tightly with plastic wrap or a lid, for up to 3 days. This keeps the dessert fresh and retains its creamy texture.
Freezer: If needed, you can freeze your Tiramisu for up to 2 months. Slice it beforehand and wrap each piece in plastic wrap, then place in an airtight container. Thaw in the fridge before serving.
Reheating: This dessert is best served chilled, so there's no need to reheat. Simply remove from the fridge or freezer, allow it to sit at room temperature for about 10 minutes, and enjoy!
Expert Tips for Pistachio Tiramisu
-
Soaking Time: Dip ladyfingers quickly in coffee to prevent sogginess. If soaked too long, they'll lose their structure in the Pistachio Tiramisu.
-
Chill Overnight: Letting your dessert chill overnight enhances the flavors and texture, ensuring a more delightful experience when served.
-
Pistachio Freshness: Use freshly crushed pistachios for garnish to maintain their crunch. Store them in an airtight container if using later.
-
Serve Chilled: This dessert is best enjoyed chilled. Allow it to sit out for a few minutes before serving for easier slicing.
-
Optional Liqueur: If using coffee liqueur, balance the flavors carefully—too much can overpower the dessert. Adjust based on your taste preference.

Pistachio Tiramisu Recipe FAQs
How do I select the right mascarpone cheese?
Absolutely! When selecting mascarpone cheese, look for a product with a smooth and creamy texture. It should be thick but spreadable, without any lumps. Check the expiration date to ensure freshness, as using high-quality mascarpone will make a delightful difference in your Pistachio Tiramisu.
How long can I store leftover Pistachio Tiramisu?
You can store any leftovers in the refrigerator for up to 3 days. Just cover the dish tightly with plastic wrap or a lid to keep it fresh. If you notice any dark spots or off-smells, it's best to discard it to ensure your dessert retains its delicious quality!
Can I freeze Pistachio Tiramisu, and how should I do it?
Very much so! You can freeze your Pistachio Tiramisu for up to 2 months. First, slice the dessert into portions, then wrap each slice in plastic wrap tightly. Next, place the wrapped slices in an airtight container or freezer bag. When you're ready to enjoy, simply move the desired amount to the fridge to thaw overnight, and it'll be ready to serve chilled.
What should I do if my tiramisu is too watery or runny?
If your Pistachio Tiramisu turns out watery, it could be due to over-soaked ladyfingers or too much liquid in the cream mix. To troubleshoot, next time, dip the ladyfingers quickly—no more than 2 seconds per side! Additionally, make sure you’re whipping the cream mixture to stiff peaks so it holds its shape better. Don't worry; practice makes perfect!
Is this recipe suitable for those with nut allergies?
If someone has nut allergies, it's important to avoid pistachios in the recipe. You can substitute with crushed cookies or omit nuts altogether for a different texture. Just make sure to double-check the labels on any ingredients used (like ladyfingers) to ensure they are nut-free. Always prioritize safety—everyone deserves to enjoy dessert!
Decadent Pistachio Tiramisu to Elevate Your Dessert Game
Ingredients
Equipment
Method
- In a mixing bowl, combine mascarpone cheese, heavy cream, sugar, and vanilla extract. Whisk on medium-high speed for 3–5 minutes until smooth and fluffy.
- Pour cooled brewed coffee into a shallow dish and add coffee liqueur if desired. Quickly dip each ladyfinger into the coffee, turning to soak, about 2 seconds per side.
- Arrange half of the soaked ladyfingers in an even layer in a serving dish to cover the base completely.
- Spread half of the whipped mascarpone mixture over the ladyfingers, smoothing it evenly with a spatula.
- Repeat by placing another layer of soaked ladyfingers on top, followed by the remaining cream mixture, creating a two-layer dessert.
- Sprinkle crushed pistachios over the final cream layer for garnish.
- Cover with plastic wrap and refrigerate for at least 4–6 hours or overnight for best flavor development.


Leave a Reply