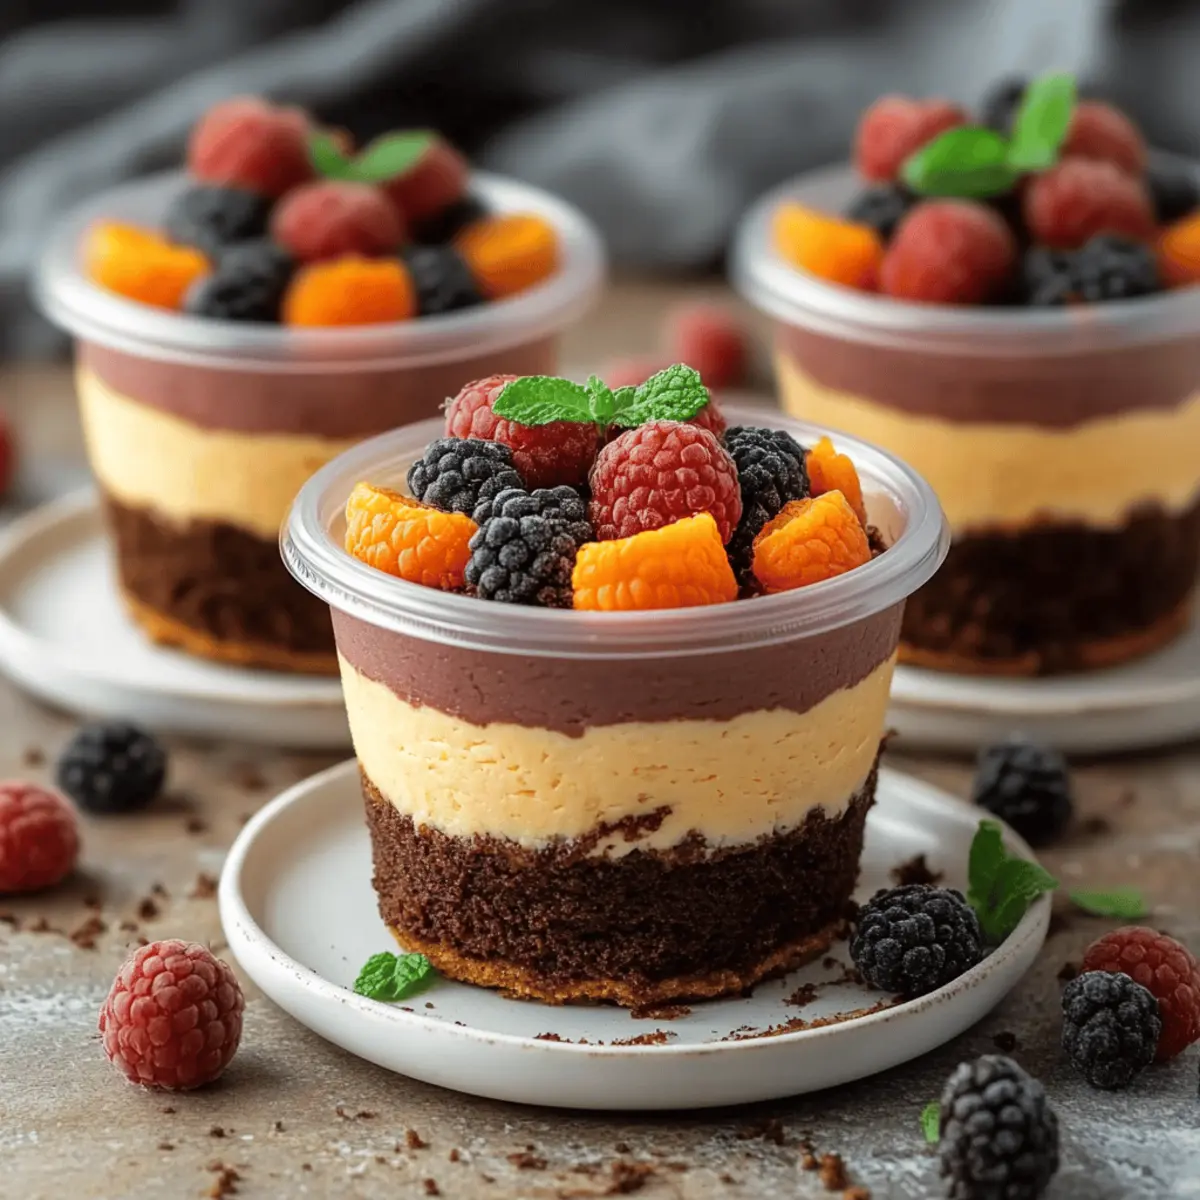
As I stood at the counter surrounded by a sea of fall decorations, a wave of nostalgia swept over me. Halloween was fast approaching, and I couldn't resist creating a fun and spooky treat that brings out the inner child in everyone—Pumpkin Patch Dirt Cups! This whimsical dessert is a fantastic way to celebrate the season with friends and family. With just a quick 15 minutes of prep time, you’ll be serving up an irresistible layered delight that’s as fun to make as it is to eat. Not only do these cups look festive, but they’re perfect for little hands to enjoy while being a crowd-pleaser for adults, too. So, are you ready to dive into this delicious pumpkin patch adventure that’s sure to add some sweetness to your autumn gatherings?
Why Are Pumpkin Patch Dirt Cups So Fun?
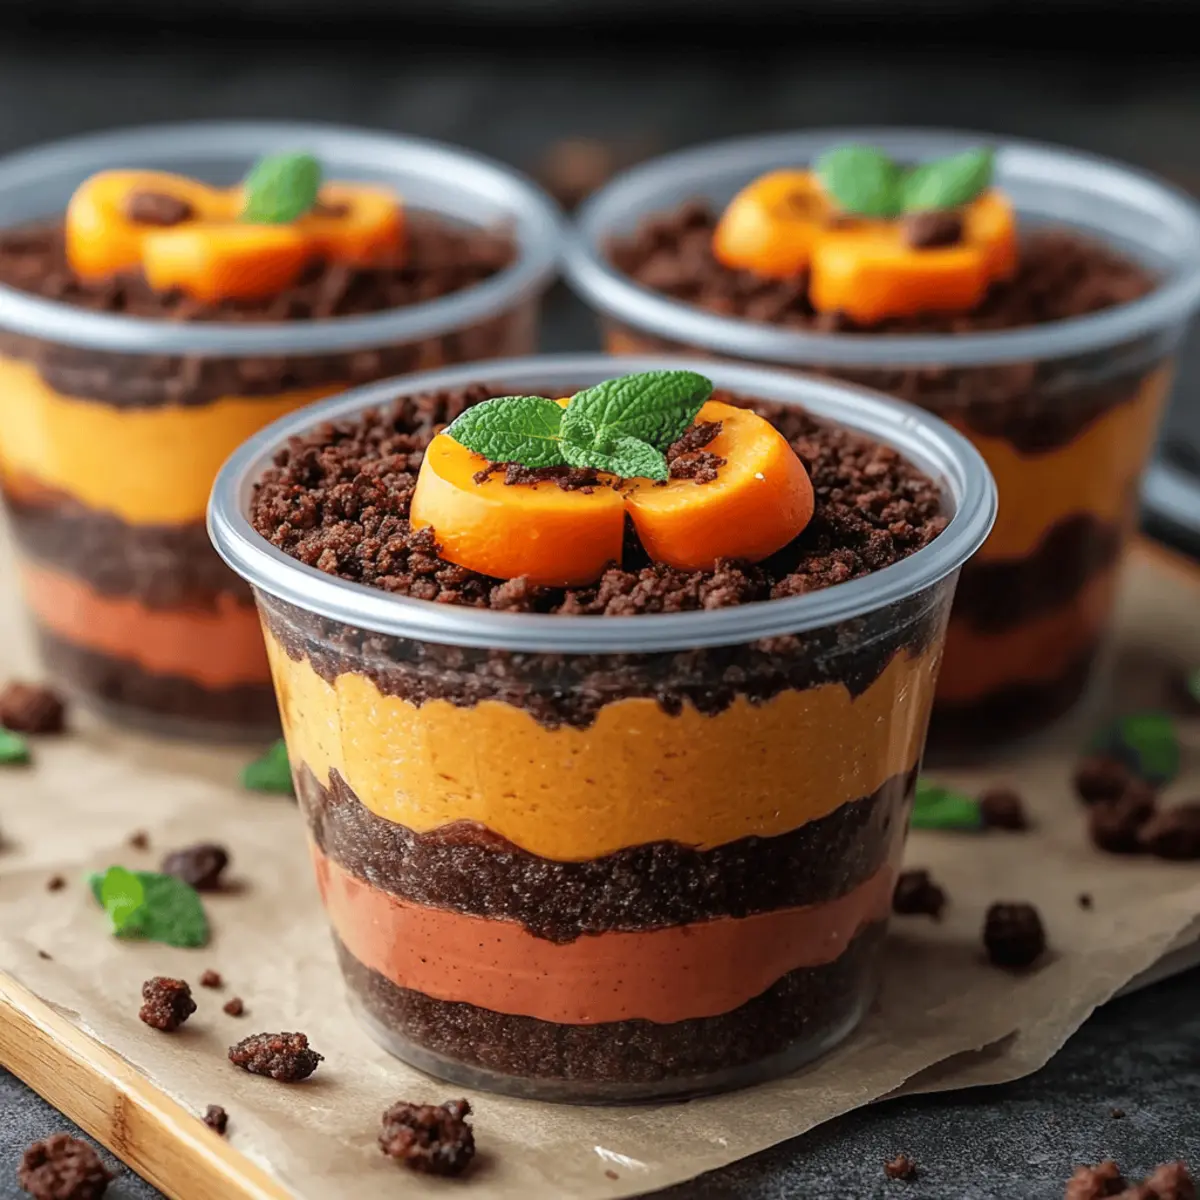
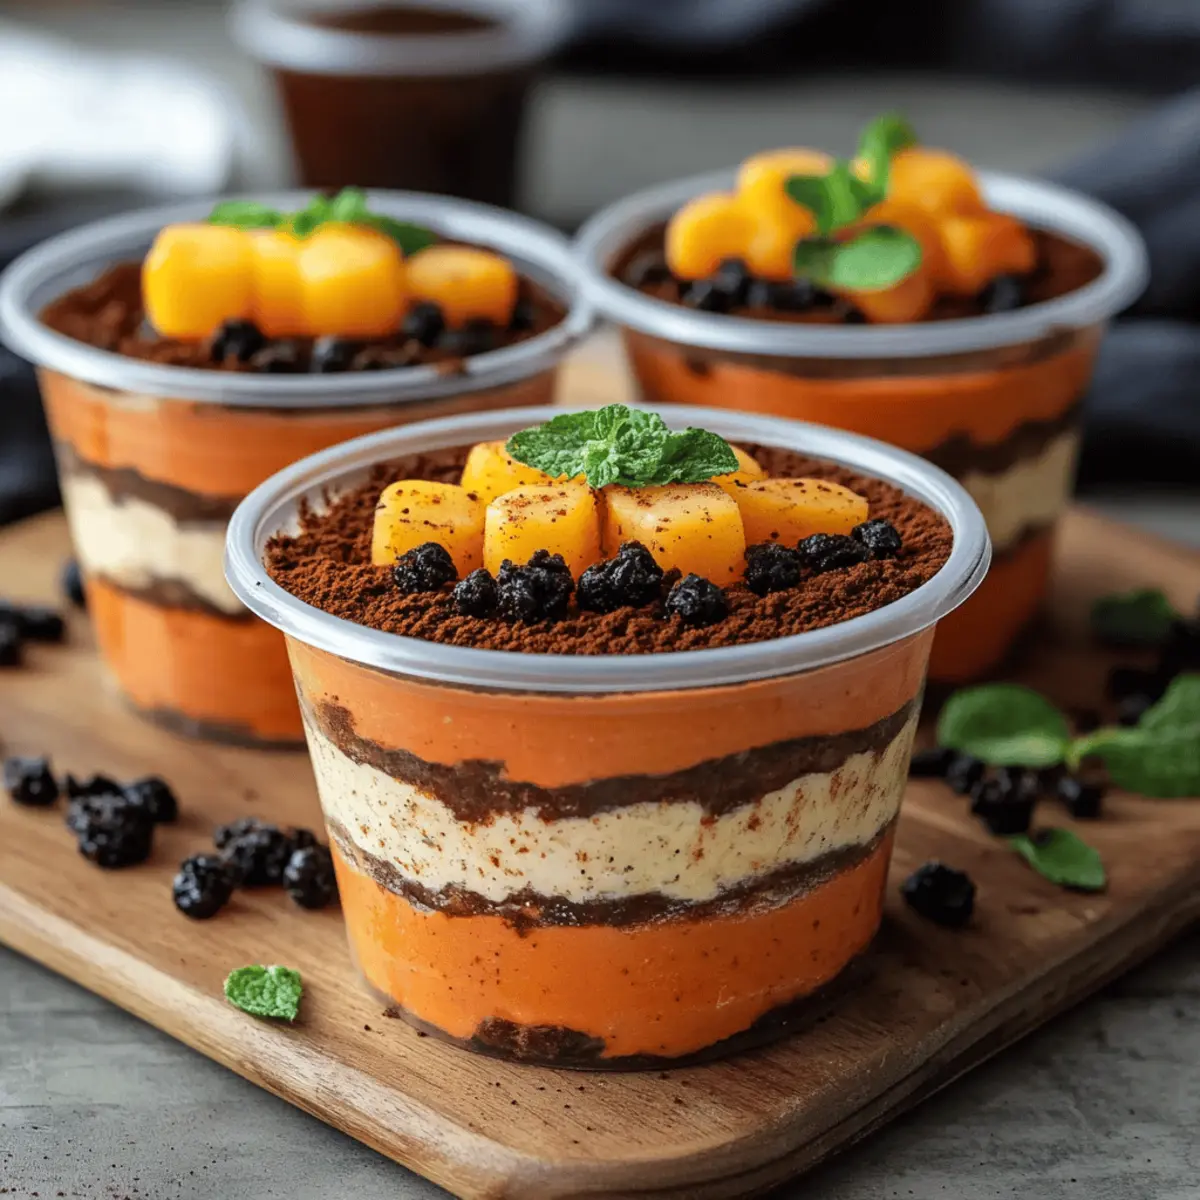
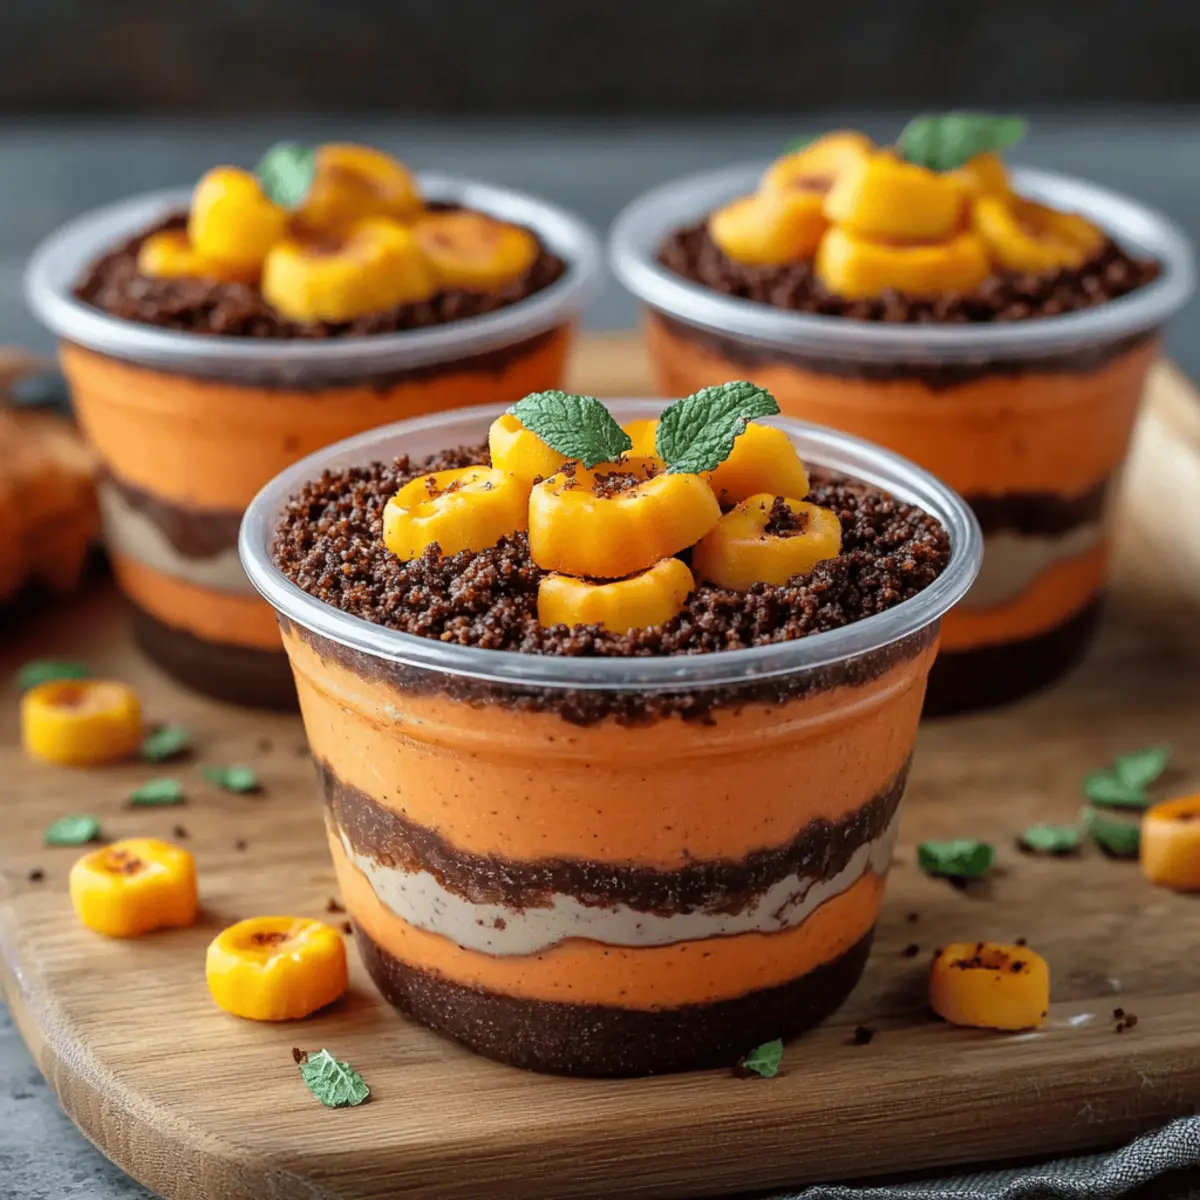
Nostalgic and playful, these charming dessert cups spark joy in both kids and adults alike. Easy to make, requiring just 15 minutes of prep, they fit perfectly into your busy schedule. Visually stunning, the layers of chocolate pudding, crushed Oreos, and colorful candy pumpkins create a festive display for any gathering. Whether you're hosting a Halloween party or enjoying a cozy family night, these treats are sure to be a hit. For more festive ideas, check out our fall dessert collection for inspiration!
Pumpkin Patch Dirt Cups Ingredients
• Ready to create this delightful treat? Here’s what you’ll need!
For the Pudding Mixture
- Chocolate pudding mix – This is the flavorful base that gives the cups their rich, chocolatey taste.
- Milk – Combine with the pudding mix for that creamy texture; any milk works well!
- Whipped cream – Lightens the pudding mixture and adds a fluffy finish to the cups.
For the Layers
- Oreos (crushed) – These add a crunchy element resembling dirt, perfect for a fun Halloween vibe!
For the Decorations
- Candy pumpkins – These give your Pumpkin Patch Dirt Cups a festive touch and visual appeal.
- Gummy worms (optional) – Add these for a creepy-crawly detail that delights kids and adults alike.
With these ingredients, you'll be well on your way to whipping up a batch of delightful Pumpkin Patch Dirt Cups that will steal the show at your next gathering!
Step‑by‑Step Instructions for Pumpkin Patch Dirt Cups
Step 1: Prepare the Pudding Mixture
In a mixing bowl, combine the chocolate pudding mix with 2 cups of milk. Whisk the mixture vigorously for about 2 minutes until smooth and well-blended, ensuring there are no lumps. Let the pudding sit for about 5 minutes to thicken, turning it into a luscious filling for your Pumpkin Patch Dirt Cups.
Step 2: Fold in Whipped Cream
Once the pudding has thickened, gently fold in 1 cup of whipped cream using a spatula. This step adds a light, airy texture to the pudding. Carefully mix until just combined, taking care not to deflate the whipped cream. The result should be a smooth and creamy mixture that will create a delightful layer in your dirt cups.
Step 3: Layer the Cups
Grab clear plastic cups or dessert glasses to showcase your Pumpkin Patch Dirt Cups. Start by spooning a layer of the creamy pudding mixture into each cup, filling them about a third full. Next, add a generous layer of crushed Oreos on top, mimicking the look of dirt. Repeat these layers until the cups are filled, finishing with a layer of crushed Oreos.
Step 4: Add Final Touches
Top each filled cup with a dollop of remaining whipped cream. This adds an extra swirl of creaminess and visual appeal. Then, for a festive touch, place candy pumpkins on top of the whipped cream, and if you like, add a few gummy worms for an extra playful detail. Your Pumpkin Patch Dirt Cups should now look delightfully spooky and inviting!
Step 5: Chill Before Serving
To let the flavors meld beautifully, refrigerate the cups for at least 30 minutes. This chilling time allows the pudding to set further and enhances the overall taste. When you're ready to serve, simply take the cups out of the fridge, and they will be a refreshing treat that everyone will love.
Storage Tips for Pumpkin Patch Dirt Cups
Fridge: Leftover Pumpkin Patch Dirt Cups can be stored in the refrigerator for up to 2 days. Cover them tightly with plastic wrap to maintain freshness and prevent any odors from permeating the dessert.
Freezer: If you want to store them for longer, consider freezing the pudding mixture before layering with Oreos. The pudding can be frozen for up to 1 month, but it's best to assemble the cups fresh for optimal texture.
Reheating: These delightful cups are best served cold, so no reheating is necessary. Just pull them out of the fridge, and they're ready to enjoy right away!
Assembly: If you're assembling drinks for a large gathering, keep the decorated cups in the fridge without the candy pumpkins or gummy worms. Add these fun toppings right before serving to keep them fresh and appealing.
What to Serve with Pumpkin Patch Dirt Cups
Elevate your dessert experience with delightful pairings that complement the whimsical flavors of these charming treats.
-
Spiced Cider: This warm, aromatic drink brings the cozy essence of fall, perfectly balancing the sweetness of the dirt cups.
-
Savory Pumpkin Soup: Rich and creamy, this soup adds a contrasting savory note that harmonizes beautifully with the sweet layers of the dessert.
-
Cheese and Veggie Platter: A colorful array of crisp veggies and savory cheeses offers a crunchy textures and complements the rich dessert nicely.
-
Chocolate Chip Cookies: Indulge in more chocolate with these classic bites; their chewy texture pairs wonderfully with the smooth pudding.
-
Kindred Spirits Hot Cocoa: Infuse your gathering with warmth by serving this velvety hot cocoa, the perfect cozy partner to the treats.
-
Caramel Apples: These festive favorites add a crunchy, fruity element to the spread, making for a delightful flavor contrast with your Pumpkin Patch Dirt Cups.
-
Ginger Snap Cookies: Their spiced crunch echoes the fall theme, enhancing the overall experience with a delightful zing.
-
Fruit Salad: A refreshing mix of seasonal fruits offers a light and vibrant balance, perfectly contrasting with the rich, creamy dessert.
-
Vanilla Ice Cream: A scoop of this velvety goodness adds a delightful coldness to the dessert experience, marrying beautifully with the chocolate layers.
-
Autumn Berry Spritzer: A refreshing, fizzy drink made with sparkling water and berries adds brightness to the table, delightful against the sweet delight of the cups.
Make Ahead Options
These Pumpkin Patch Dirt Cups are perfect for meal prep, making them a delightful treat you can whip up ahead of time! You can prepare the pudding mixture and layer it in the cups up to 24 hours in advance—just store them covered in the refrigerator to keep everything nice and fresh. To maintain the quality and prevent sogginess, add the whipped cream and decorations (candy pumpkins and gummy worms) just before serving. When you’re ready to impress your guests, simply retrieve the cups from the fridge and add the finishing touches for a spooky and delicious dessert that’s just as sweet hours later!
Expert Tips for Pumpkin Patch Dirt Cups
-
Quality Pudding Mix: Use a high-quality chocolate pudding mix for the richest flavor; it enhances the overall taste of your Pumpkin Patch Dirt Cups.
-
Perfect Whipped Cream: When folding in whipped cream, do it gently to maintain its fluffy texture. This ensures your pudding remains light and airy.
-
Layering Technique: Layering the pudding and Oreos carefully prevents them from mixing together, creating visually appealing layers in your dessert cups.
-
Chilling Time Matters: Don’t skip the chilling step! Refrigerating for at least 30 minutes helps the flavors meld and gives the cups a more delightful texture.
-
Fun Decorations: Get creative with decorations! Use different candy shapes or themed sprinkles to make your Pumpkin Patch Dirt Cups uniquely yours.
Pumpkin Patch Dirt Cups Variations
Feel free to get creative with these fun twists on Pumpkin Patch Dirt Cups to suit your taste and dietary needs!
-
Vegan: Use almond or coconut milk instead of regular milk, and swap dairy whipped cream for coconut whipped cream for a delicious plant-based version.
-
Gluten-Free: Replace Oreos with gluten-free chocolate cookies or crushed gluten-free graham crackers to keep this treat safe for gluten-sensitive friends.
-
Extra Creamy: For a richer flavor, blend in a package of cream cheese with the pudding mixture, which adds a delightful tang and creamy texture.
-
Spicy Kick: Add a pinch of cayenne pepper or cinnamon to the chocolate pudding to create a surprising depth of flavor that'll thrill those who like a little heat.
-
Nutty Texture: Incorporate crushed nuts, such as pecans or walnuts, between the layers for a satisfying crunch that complements the sweet pudding and cookies.
-
Fruit Add-ins: Layer in some fresh banana slices or diced strawberries for a fruity twist that adds natural sweetness and a pop of color.
-
Chocolate Lovers: Replace half of the chocolate pudding mix with a scoop of chocolate hazelnut spread for an even more decadent dessert that chocolate lovers will adore.
-
Seasonal Shift: For a fall flair, stir in some pumpkin puree and pumpkin spice into the pudding mix, transforming your cups into a cozy seasonal delight.
Experimenting with these variations can create a custom dessert experience while keeping the playful spirit of your Pumpkin Patch Dirt Cups alive! If you’re still in the mood for more creative ideas, don’t forget to browse our fall dessert collection for additional treats that will enchant your guests.
Pumpkin Patch Dirt Cups Recipe FAQs
How do I choose the right chocolate pudding mix?
Absolutely! For the best flavor, opt for a high-quality chocolate pudding mix. Look for brands that have rich cocoa content, as they give your Pumpkin Patch Dirt Cups a more decadent taste. If you're feeling adventurous, try a mix that contains dark chocolate for an extra luxurious twist.
How should I store leftover Pumpkin Patch Dirt Cups?
Leftover Pumpkin Patch Dirt Cups can be kept in the refrigerator for up to 2 days. Make sure to cover them tightly with plastic wrap to lock in freshness and prevent any fridge odors from sneaking in. I always recommend enjoying them within a couple of days for the best taste!
Can I freeze the pudding mixture for Pumpkin Patch Dirt Cups?
Definitely! If you want to store the pudding mixture, you can freeze it for up to 1 month. To freeze, prepare the pudding as directed but stop before assembling the cups. Transfer the pudding into an airtight container or freezer bag, removing as much air as possible. When you're ready to use it, simply thaw in the fridge overnight, then layer with Oreos and toppings.
What if my pudding isn't thickening?
Very! If your pudding doesn't thicken after whisking, it might need a bit more time to set. After mixing, let it sit for about 5-10 minutes. If it’s still runny, check the box for any specific instructions about chilling times or cooking temperatures if you're using a cooked pudding mix.
Are Pumpkin Patch Dirt Cups safe for pets?
Great question! While the ingredients are delightful for human consumption, they may not be safe for pets. Chocolate and certain candies can be harmful to dogs and cats, so it's best to keep these treats out of their reach. If you’re looking for pet-friendly desserts, consider making a separate treat with safe ingredients like plain pumpkin puree and oats!
What if someone has a nut allergy?
Absolutely! The Pumpkin Patch Dirt Cups recipe is naturally nut-free since it relies on simple ingredients. However, always check the labels on your pudding mix and Oreos to ensure they are produced in a nut-free facility. There are many delicious options that cater to various dietary needs, so feel free to substitute as necessary!
Delightful Pumpkin Patch Dirt Cups for Fun Fall Treats
Ingredients
Equipment
Method
- In a mixing bowl, combine the chocolate pudding mix with 2 cups of milk. Whisk the mixture vigorously for about 2 minutes until smooth and well-blended. Let the pudding sit for about 5 minutes to thicken.
- Once the pudding has thickened, gently fold in 1 cup of whipped cream using a spatula until just combined.
- Layer the cups starting with pudding, fill a third full, then add a layer of crushed Oreos. Repeat these layers until cups are filled, finishing with a layer of crushed Oreos.
- Top each filled cup with a dollop of remaining whipped cream and place candy pumpkins and gummy worms on top.
- Refrigerate the cups for at least 30 minutes before serving to let flavors meld.


Leave a Reply