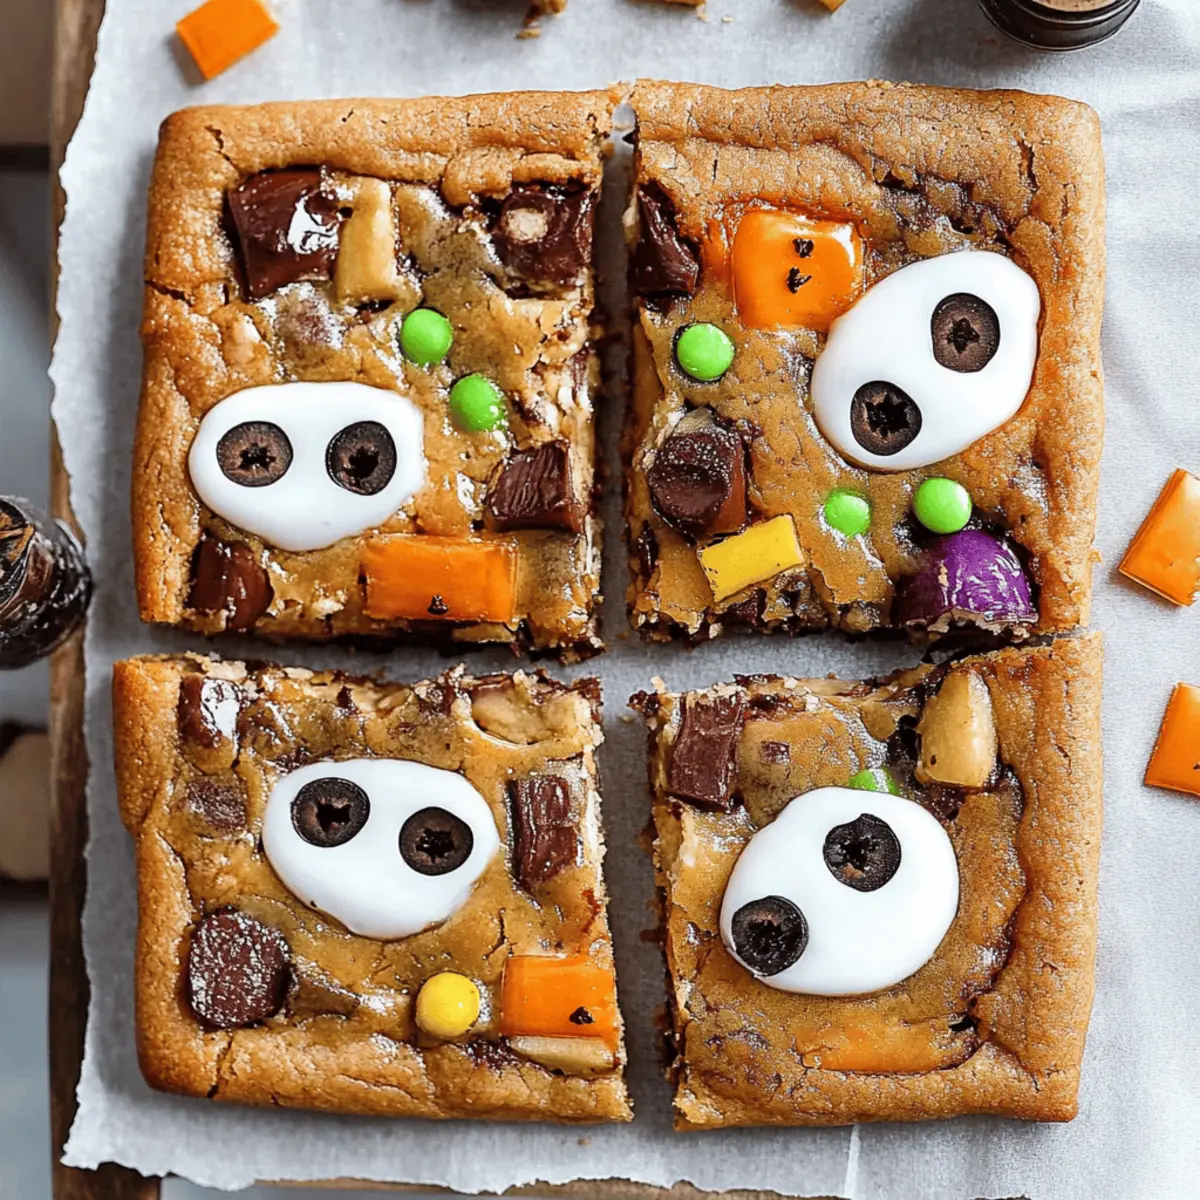
As I dug through my pantry, searching for a way to revive the spirit of Halloween, I stumbled upon a treasure trove of leftover candy. It sparked a sweet idea that transformed into the delightful Halloween Candy Cookie Bars I've been perfecting ever since. This easy recipe brings together the nostalgic joy of candy and the comforting texture of homemade cookie bars—a treat that’s perfect for gatherings or a cozy night in. Not only are these bars a crowd-pleaser, combining a variety of flavors and textures, but they’re also a quick fix for those post-Halloween candy blues. The best part? You can customize them with whatever treats you have on hand. Ready to fill your kitchen with the aroma of baked goodness? Let’s dive in!
Why Are Halloween Candy Cookie Bars a Must-Try?
Nostalgic Delight: These bars take your leftover Halloween candy and transform it into a chewy, sweet treat that’s bound to ignite joyful memories!
Easy Preparation: No complicated steps here—whip them up in just over half an hour with basic ingredients you likely already have at home.
Customizable Fun: Mix and match your favorite candies, making each batch uniquely yours; whether it's Snickers, gummy bears, or caramel, the possibilities are endless!
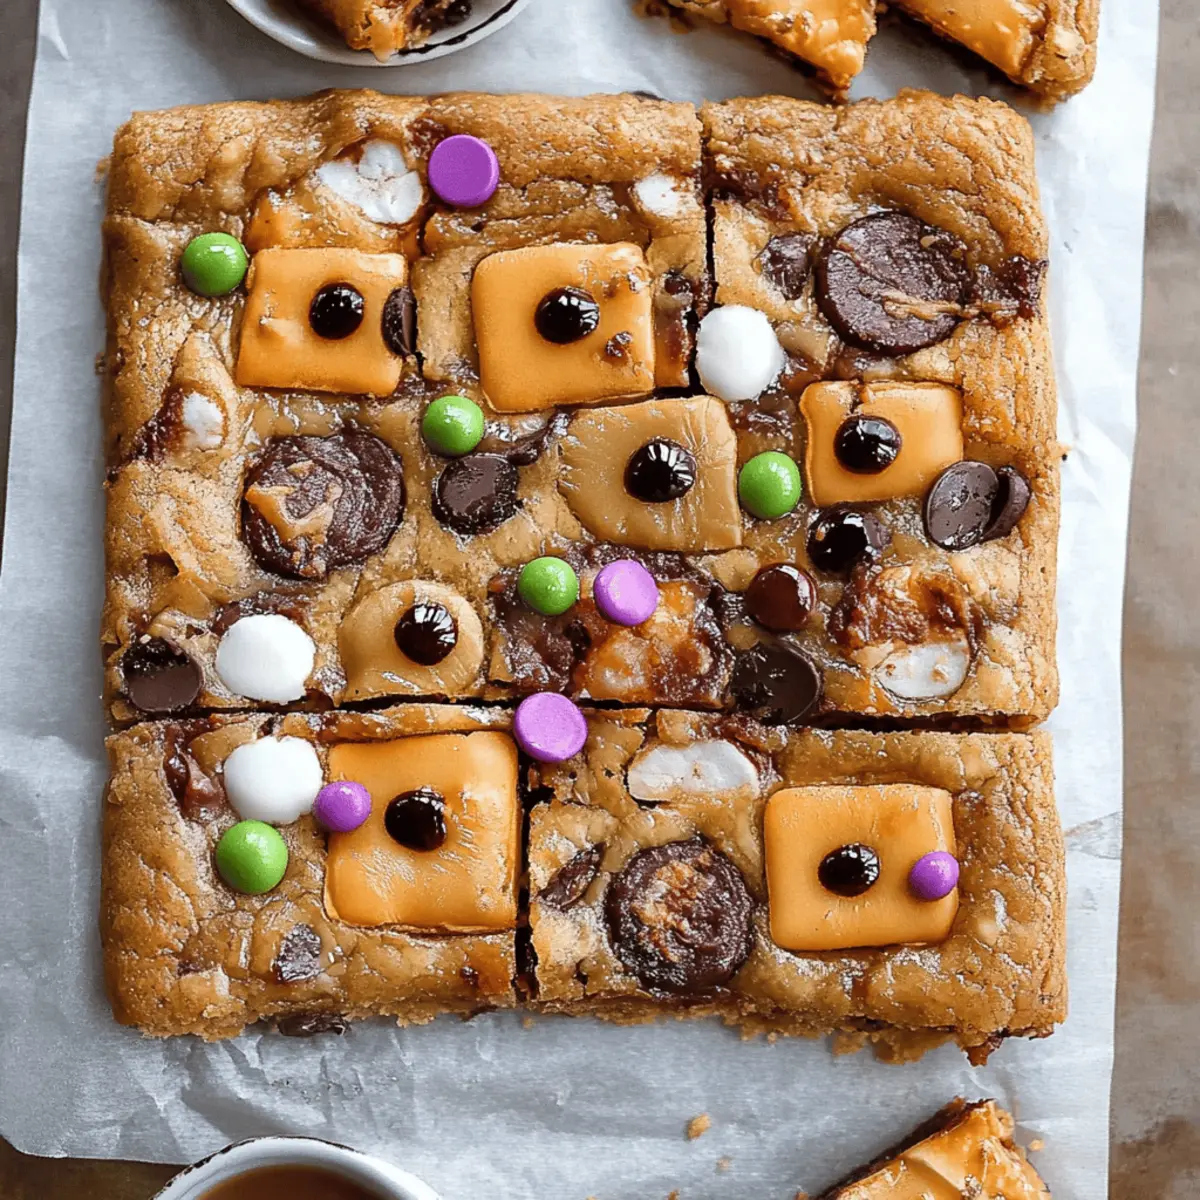
Crowd-Pleasing Texture: The combination of gooey chocolate, crispy candies, and soft cookie base creates an irresistible bite that everyone will love.
Perfect for Any Occasion: Whether it’s a cozy family night or a festive gathering, these Halloween Candy Cookie Bars are sure to impress and satisfy.
With just a few simple steps, you can create a magical treat that's perfect for indulging or sharing. So, roll up your sleeves and enjoy, and if you're looking for more creative ways to use up that candy stash, check out our guide on creative leftover Halloween candy ideas.
Halloween Candy Cookie Bars Ingredients
Ready to whip up a batch of these delightful bars? Here’s everything you need!
For the Cookie Base
- Unbleached all-purpose flour – 2¼ cups helps achieve a chewy texture that holds everything together.
- Baking soda – 1 teaspoon acts as a leavening agent, giving the bars a nice rise.
- Kosher salt – ¾ teaspoon balances the sweetness perfectly and enhances flavors.
- Unsalted butter – ¾ cup at room temperature creates a rich and creamy base for the batter.
- Dark brown sugar – ¾ cup adds a deep, caramel-like flavor that complements the candies.
- Granulated sugar – ¾ cup contributes to that sweet cookie goodness we all love.
- Large eggs – 2 eggs give structure and moisture, helping the bars set beautifully.
- Real vanilla extract – 1½ teaspoons infuses a warm and inviting aroma that elevates the bars.
For the Candy Mix-Ins
- Reese's Pieces – ½ cup brings that delightful peanut butter-chocolate combo into every bite!
- Chocolate M&M's – ½ cup adds colorful fun and a classic chocolatey flavor.
- Leftover Halloween candy – Various types make these bars truly unique and guilt-free—use whatever you have on hand!
For the Finishing Touch
- Candy eyes – Sprinkle these on top for a festive and fun look that adds the final touch to your Halloween Candy Cookie Bars!
Step‑by‑Step Instructions for Halloween Candy Cookie Bars
Step 1: Preheat the Oven
Begin by preheating your oven to 350℉ (or 180℃). This temperature is perfect for baking your Halloween Candy Cookie Bars to a golden perfection. While the oven warms up, gather your baking equipment, including a 9x13x2 inch baking pan, parchment paper, and nonstick spray for easy removal later.
Step 2: Prepare the Baking Pan
Line your prepared baking pan with parchment paper, letting it overhang on the sides for easy lifting later. Lightly spray the parchment with nonstick spray. This step ensures that your glorious Halloween Candy Cookie Bars release effortlessly after baking, giving them that perfect look.
Step 3: Mix Dry Ingredients
In a medium bowl, whisk together 2¼ cups of unbleached all-purpose flour, 1 teaspoon of baking soda, and ¾ teaspoon of kosher salt. Stir until the ingredients are well blended, creating a dry mixture that will help achieve the ideal texture for your cookies. Set this bowl aside as you move on to the next stage.
Step 4: Cream the Butter and Sugars
In the bowl of a stand mixer, combine ¾ cup of room temperature unsalted butter with ¾ cup of dark brown sugar and ¾ cup of granulated sugar. Mix on medium speed until the mixture turns creamy and light, about 2-3 minutes. This step is crucial for building a rich base that will support the yummy candies in your Halloween Candy Cookie Bars.
Step 5: Add Eggs and Vanilla
Next, add the two large eggs one at a time to the creamy mixture, mixing well after each addition. Once both eggs are incorporated, pour in 1½ teaspoons of real vanilla extract. Scrape down the sides and bottom of the bowl to ensure everything combines perfectly, creating a luscious batter ready for the flour.
Step 6: Incorporate the Dry Ingredients
With the mixer on low speed, add half of your flour mixture to the wet ingredients, mixing until just incorporated. Then, add the rest of the flour and mix again until a soft dough forms. Be sure to scrape down the sides as needed to combine all ingredients well, resulting in a delicious base for your Halloween Candy Cookie Bars.
Step 7: Fold in the Candies
Utilizing a rubber spatula, gently fold in ½ cup of Reese's Pieces and ½ cup of chocolate M&M's into the dough. Mix until the candy is evenly distributed throughout. Feel free to add any leftover Halloween candy you’d like to include, making the treat even more special and personal!
Step 8: Transfer and Press the Dough
Transfer the dough into your prepared baking pan, spreading it out evenly. Using lightly greased fingers or another sheet of parchment paper, press the dough into an even layer, making sure it fills all corners of the pan. This step helps to create a uniform thickness that ensures even baking for your Halloween Candy Cookie Bars.
Step 9: Bake the Cookie Bars
Place the pan on the middle rack of your preheated oven and bake for 18 to 20 minutes, rotating the pan halfway through for even heating. Keep an eye on the bars; they should be golden on the edges and slightly soft in the center when done. A toothpick inserted in the center should come out with a few moist crumbs.
Step 10: Prepare the Candy Topping
While the bars are baking, unwrap and chop your leftover Halloween candy into smaller pieces. This step adds a fun mix of textures and flavors on top of the bars after baking. Be sure to have them ready for when the cookies come out of the oven.
Step 11: Add the Candy Toppings
Once your Halloween Candy Cookie Bars are done baking, remove them from the oven and immediately press the chopped candy pieces into the top while they are still warm. This will help the candies stick and create a deliciously colorful surface, adding a festive touch to your cookies.
Step 12: Cool and Slice
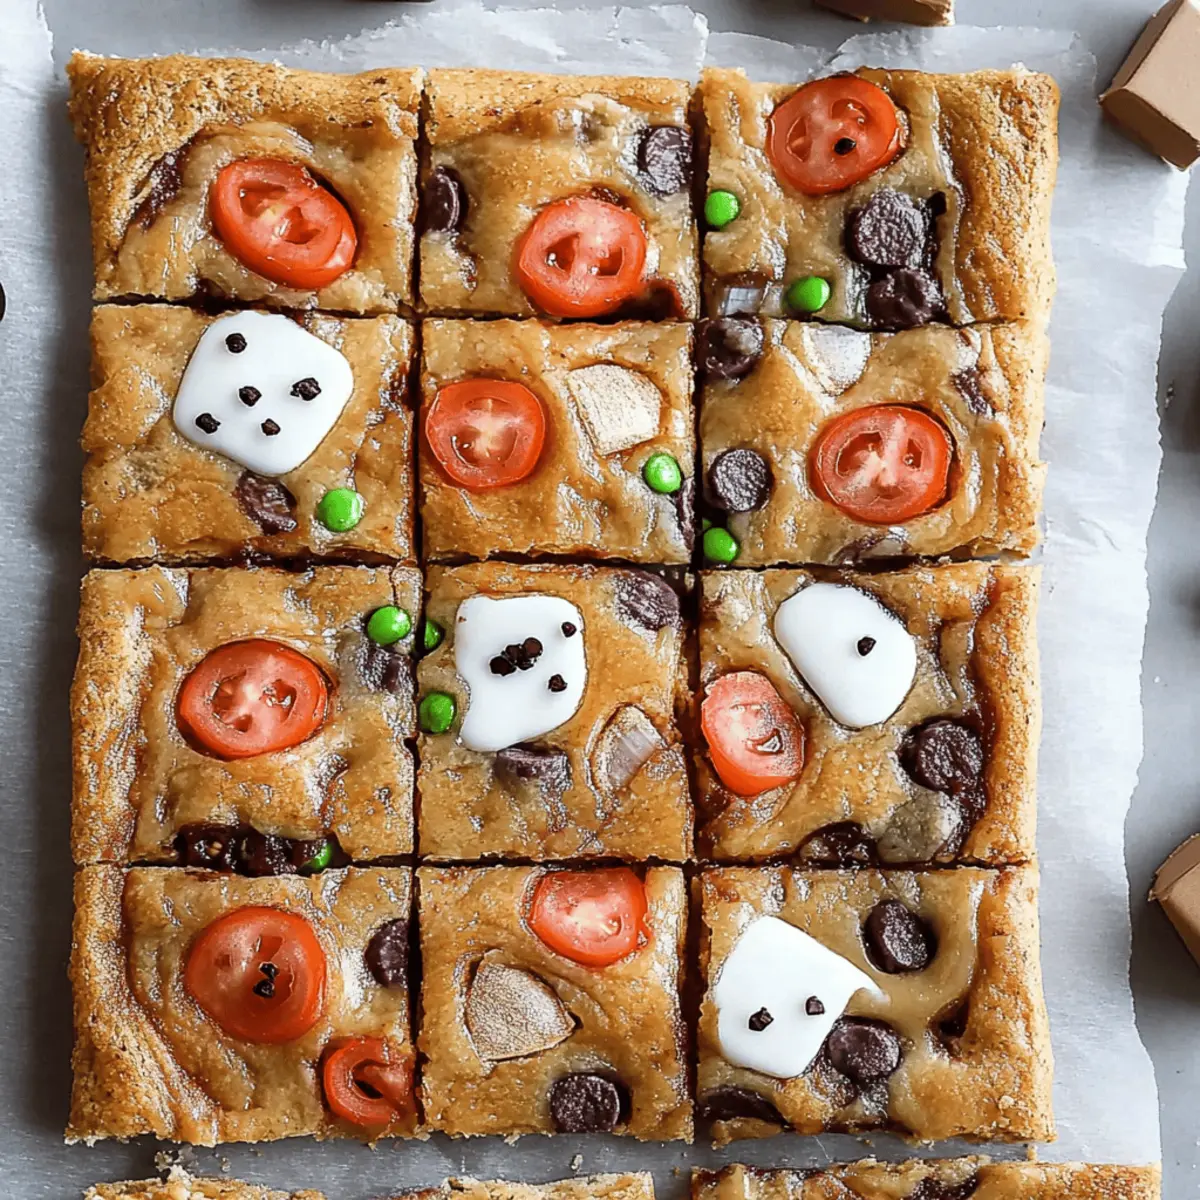
Allow the cookie bars to cool completely in the pan before lifting them out using the parchment paper overhang. Once cooled, slice into squares and serve! The delightful combination of chocolatey goodness and crunchy candy in these Halloween Candy Cookie Bars is bound to impress everyone you share them with.
Halloween Candy Cookie Bars Variations
Feel free to let your creativity shine by customizing these bars to suit your taste and dietary needs!
-
Gluten-Free: Substitute the all-purpose flour with a 1:1 gluten-free flour blend for deliciously chewy bars everyone can enjoy.
-
Nut-Free: Use sunflower seed butter instead of regular butter to cater to nut allergies while still savoring rich flavors.
-
Vegan: Swap out eggs and butter for flax eggs and coconut oil, plus ensure your candies are vegan-friendly to keep it plant-based!
-
Extra Chocolatey: Add in ½ cup of chocolate chips along with the candies for an explosion of chocolate goodness in every bite.
-
Spicy Kick: Mix in a pinch of cinnamon or cayenne pepper for a surprising warm spice that contrasts beautifully with the sweetness.
-
Stuffed Delight: Create a fun surprise by adding a layer of caramel or marshmallow fluff in the middle before baking, giving chewy deliciousness.
-
Fruit Twist: Incorporate dried fruits like cranberries or cherries for a fruity burst that enhances the flavor profile while balancing the sweetness.
-
Festive Themes: Change up the toppings based on the holidays! Use themed candies for Christmas or Valentine's Day to make these bars special year-round.
No matter how you choose to customize, these Halloween Candy Cookie Bars will always be a hit! And if you're curious to explore more sweet treats, why not check out our guide on creative leftover Halloween candy ideas? You might find the perfect match for your next baking adventure!
Make Ahead Options
These Halloween Candy Cookie Bars are perfect for busy home cooks looking to simplify their meal planning! You can prepare the dough up to 24 hours in advance—just mix all the ingredients except the candy, then cover and refrigerate. This keeps the dough fresh and flavors well-blended. If you're feeling extra organized, you can also chop the leftover Halloween candy in advance and store it in an airtight container for up to 3 days. When you're ready to bake, simply bring the dough to room temperature, fold in the candy, and follow the baking instructions as usual. You'll have warm, delicious bars ready to share with minimal effort!
How to Store and Freeze Halloween Candy Cookie Bars
Room Temperature: Store the bars in an airtight container for up to 3 days on the counter to maintain their freshness and delightful taste.
Fridge: For longer storage, keep them in the fridge for up to a week. Just ensure they are in an airtight container to prevent them from drying out.
Freezer: Freeze the cookie bars for up to 3 months. Cut them into squares and wrap each piece individually in plastic wrap before placing them in a freezer-safe bag.
Reheating: When ready to enjoy, thaw at room temperature or microwave for 10-15 seconds to bring back their chewy texture. These tips will help keep your Halloween Candy Cookie Bars delicious!
Expert Tips for Halloween Candy Cookie Bars
Don’t Rush the Creaming: Ensure you cream the butter and sugars sufficiently; this creates air pockets that give your bars a light texture.
Measure Accurately: Use a kitchen scale or measuring cups to ensure you’re adding the right amount of flour and sugar to avoid dense bars.
Chop Candy Evenly: When preparing leftover Halloween candy, chop it into similar-sized pieces for even distribution and a better bite in every square.
Check for Doneness: Start checking your bars at 18 minutes; they should be golden brown on the edges and slightly soft in the middle to ensure perfect Halloween Candy Cookie Bars.
Cool Completely: Allow the bars to cool completely before cutting to ensure clean squares and prevent them from falling apart.
What to Serve with Halloween Candy Cookie Bars?
Indulging in a slice of Halloween Candy Cookie Bars is a delightful experience, and pairing them with the right treats elevates your dessert game to new heights.
-
Vanilla Ice Cream: The classic choice that adds a creamy, cool contrast to the sweetness and richness of the cookie bars. A scoop on the side is perfection!
-
Hot Chocolate: Serve a warm mug of cocoa topped with marshmallows. The cozy drink pairs beautifully with the chewy texture of the bars for an inviting dessert.
-
Fresh Fruit Salad: A bright mix of seasonal fruits balances the sweetness of the bars and adds a refreshing crunch. Think apples, pears, and grapes for added juiciness!
-
Caramel Sauce Drizzle: Pour a warm, luscious caramel over your cookie bars for an extra layer of sweetness and a decadent finish.
-
Pumpkin Spice Latte: The flavors of fall marry perfectly with the candy bars, offering a warm, spiced drink that complements the sweet treats wonderfully.
-
Candy Corn Milkshake: Embrace the Halloween spirit! A playful milkshake topped with whipped cream can make your dessert table fun and festive.
-
Chocolate Milk: A nostalgic pairing that brings out the chocolate flavors in your cookie bars. Kids and adults alike will love this classic combo!
-
Gummy Worms: These quirky, fun candies can either serve as a garnishing touch on the bars or be enjoyed alongside them for a playful treat pairing.
-
Cinnamon Sugar Popping Corn: A crunchy, sweet snack to munch on while you savor your cookie bars, adding a delightful textural contrast to the experience.
Delight your taste buds by mixing and matching these pairings, and watch your family and friends enjoy every last bite!
Halloween Candy Cookie Bars Recipe FAQs
How do I choose the best leftover Halloween candy for these cookie bars?
Absolutely! When selecting your leftover Halloween candy, look for pieces that will melt beautifully, like chocolate bars, peanut butter cups, or chewy candies. Avoid overly sticky or hard candies, as they can alter the texture of your bars. Cut any larger pieces into smaller chunks for even distribution.
What is the best way to store Halloween Candy Cookie Bars?
To keep your bars fresh, store them in an airtight container at room temperature for up to 3 days. If you’d like them to last longer, you can refrigerate them in the same container for up to a week. Just remember to separate layers with parchment paper to prevent sticking!
Can I freeze Halloween Candy Cookie Bars?
Yes, absolutely! To freeze the cookie bars, cut them into squares and wrap each piece individually in plastic wrap. Place the wrapped pieces in a freezer-safe bag or container. They can be frozen for up to 3 months. When you're ready to enjoy, simply thaw them at room temperature or microwave them for 10-15 seconds for the best texture.
What should I do if my cookie bars are too dry?
If your bars turn out dry, it could be due to overmixing or baking them too long. To prevent this, always check for doneness at the lower end of the baking time (18 minutes) and ensure your butter is adequately creamed—creating a light, airy texture. If they do turn out dry, serving them with a scoop of ice cream or a drizzle of chocolate sauce can help enhance their moisture!
Are these Halloween Candy Cookie Bars suitable for my pets?
No, it's best to keep these bars away from pets, as ingredients like chocolate are toxic to dogs and other animals. If you can't resist the temptation to share a treat, consider making a separate dog-safe batch using ingredients like peanut butter and oats as an alternative!
Can I make these bars gluten-free?
Very! For a gluten-free version of Halloween Candy Cookie Bars, substitute all-purpose flour with a gluten-free flour blend. Make sure that all candy mixes you use are also gluten-free, as some candies contain gluten. Follow the other steps as usual, and your gluten-free bars will be just as delightful!

Delicious Halloween Candy Cookie Bars for Cozy Nights
Ingredients
Equipment
Method
- Preheat your oven to 350℉ (or 180℃).
- Line your prepared baking pan with parchment paper, letting it overhang for easy lifting. Lightly spray with nonstick spray.
- In a medium bowl, whisk together flour, baking soda, and kosher salt.
- In the bowl of a stand mixer, combine unsalted butter, dark brown sugar, and granulated sugar; mix until creamy and light.
- Add eggs one at a time, mixing well after each. Pour in vanilla extract and scrape the bowl.
- On low speed, incorporate the dry ingredients until a soft dough forms.
- Fold in Reese's Pieces and chocolate M&M's.
- Transfer and spread the dough into your prepared baking pan, pressing evenly.
- Bake for 18 to 20 minutes, until golden, rotating halfway through.
- While baking, chop leftover Halloween candy into smaller pieces.
- Once baked, press the chopped candy pieces into the top of the cookie bars while still warm.
- Cool completely in the pan, then slice into squares and serve.


Leave a Reply