As the sun dips below the horizon and shadows elongate, I find myself drawn to the kitchen, excited by a whimsical idea—Vampire Bread. This playful recipe transforms ordinary ingredients into an enchanting loaf that dazzles both the eye and the palate. The allure of this bread doesn’t just stop at its striking swirls; it’s surprisingly quick to whip up with just 5 minutes of prep time, making it perfect for a last-minute gathering or an inventive twist to your regular baking. Plus, it’s a fantastic conversation starter, sure to leave your guests intrigued and delighted. Ready to uncover how to create this spook-tacular treat? Let’s dive into the irresistible world of baking that brings a touch of magic to your table!
Why Is Vampire Bread So Special?
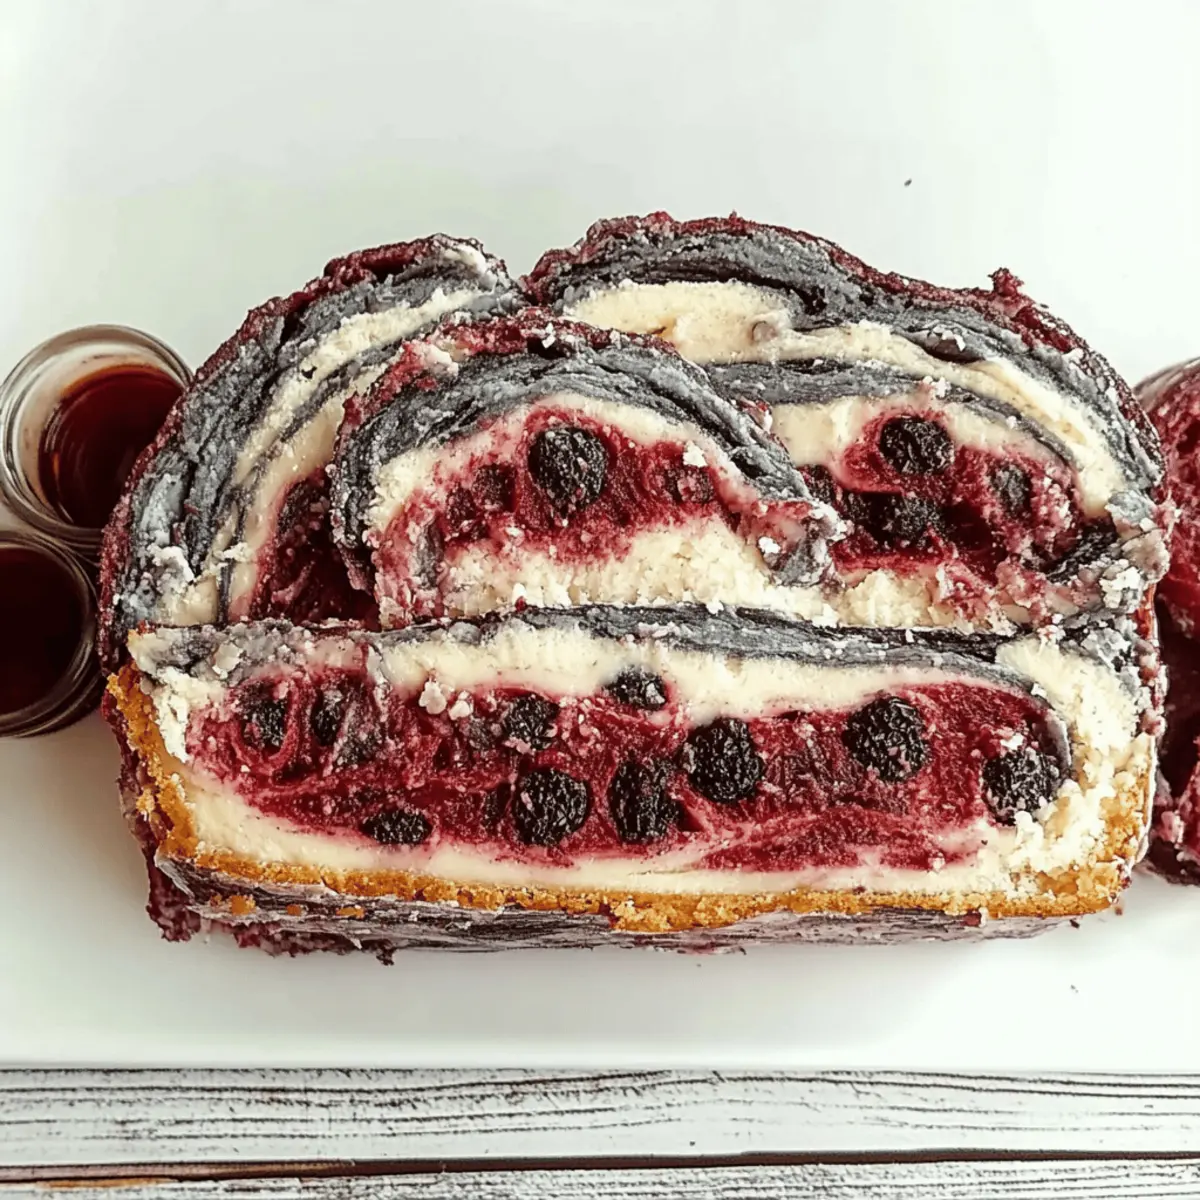
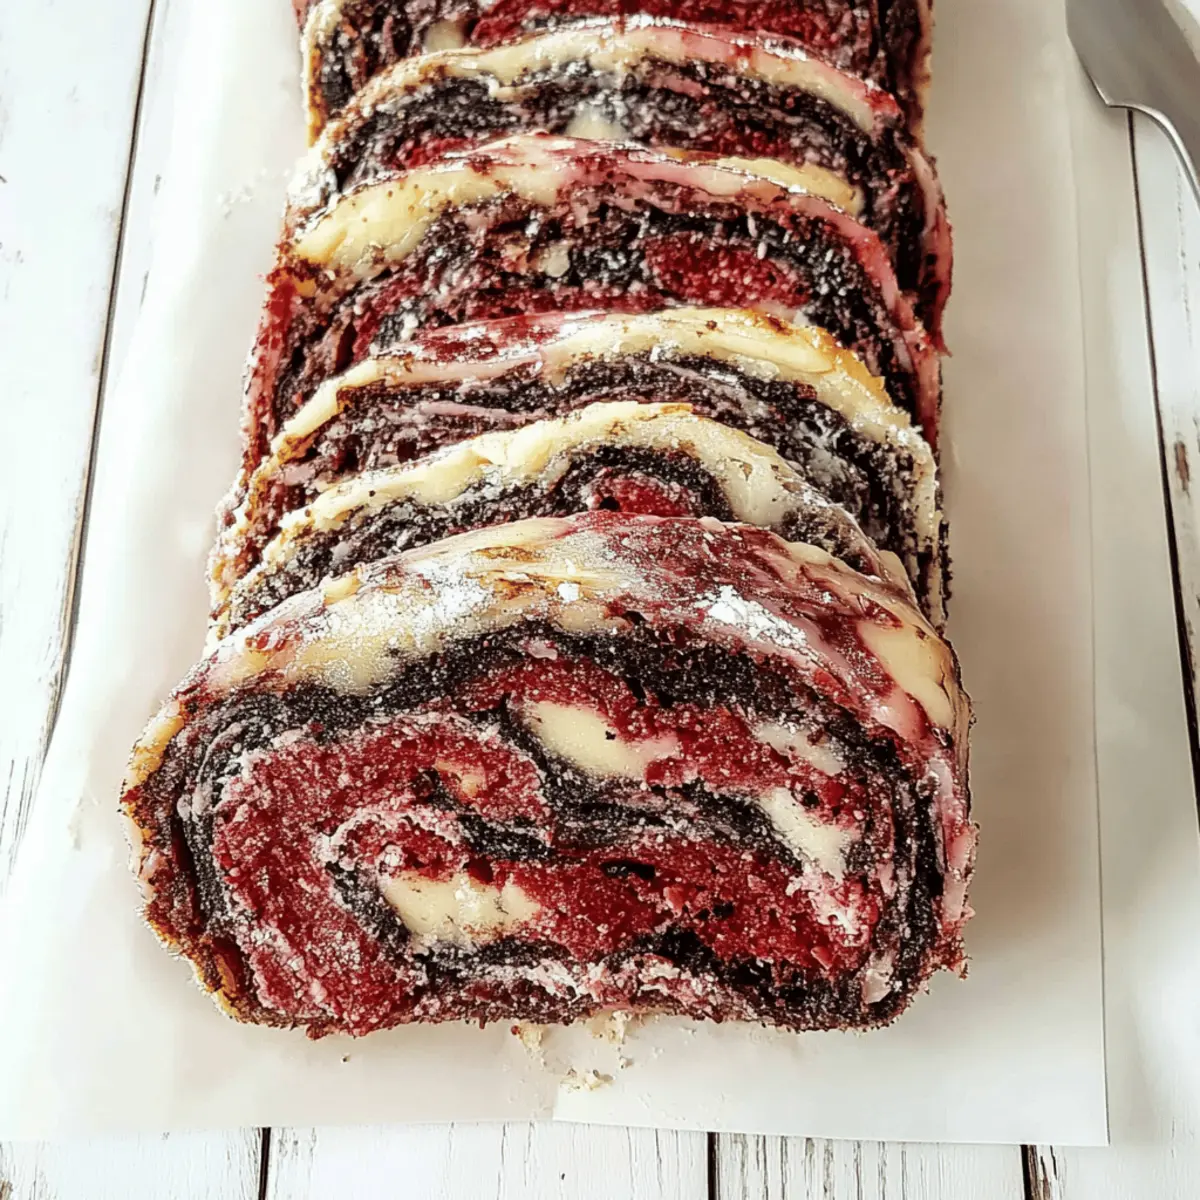
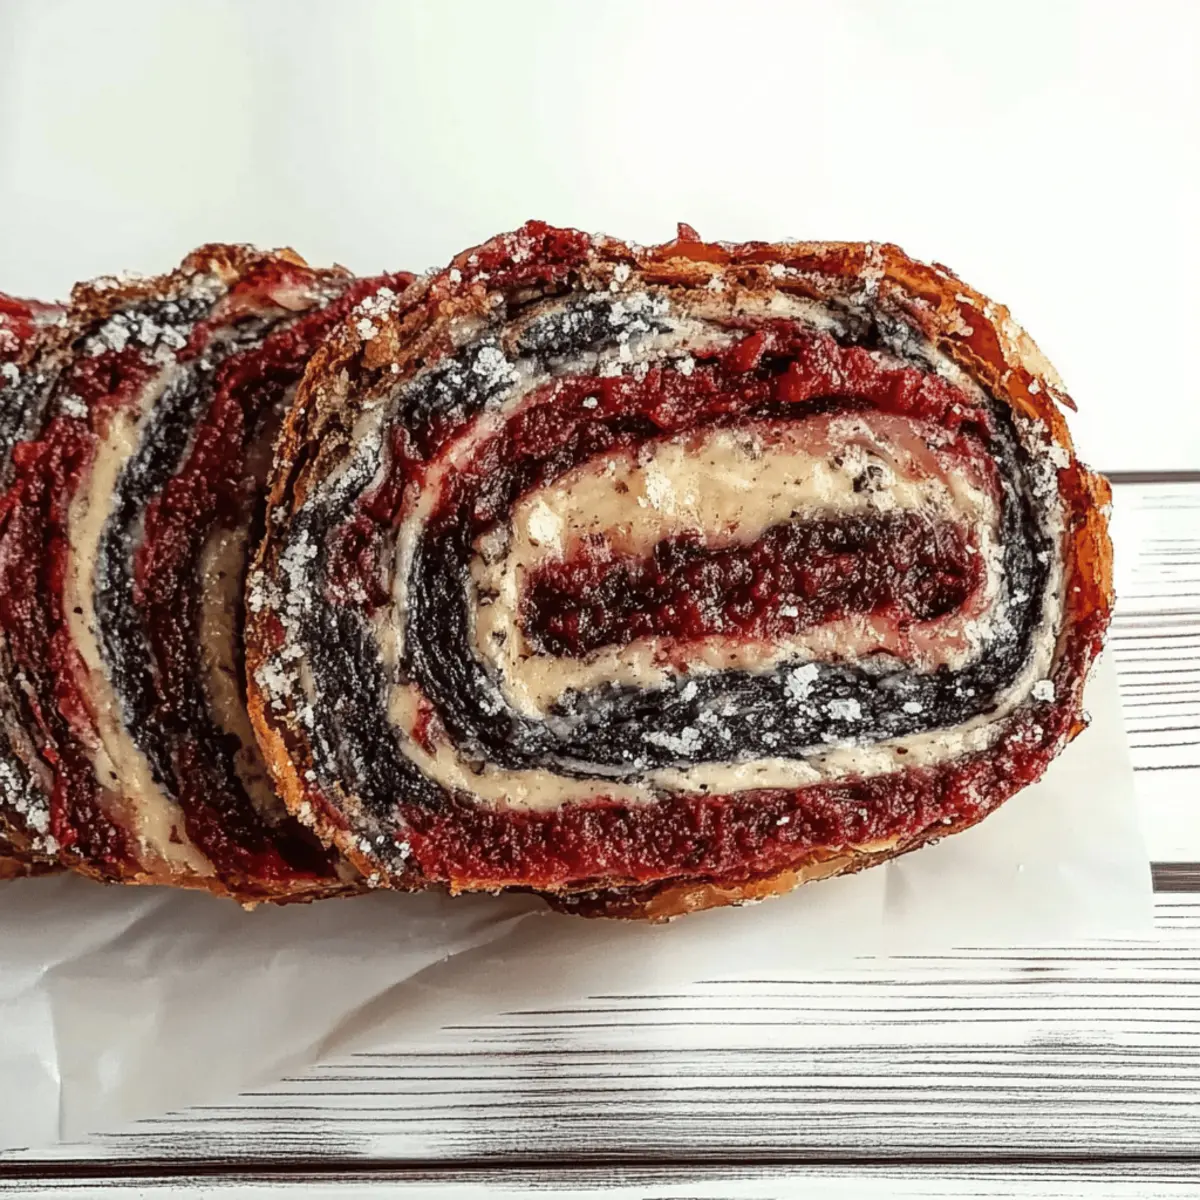
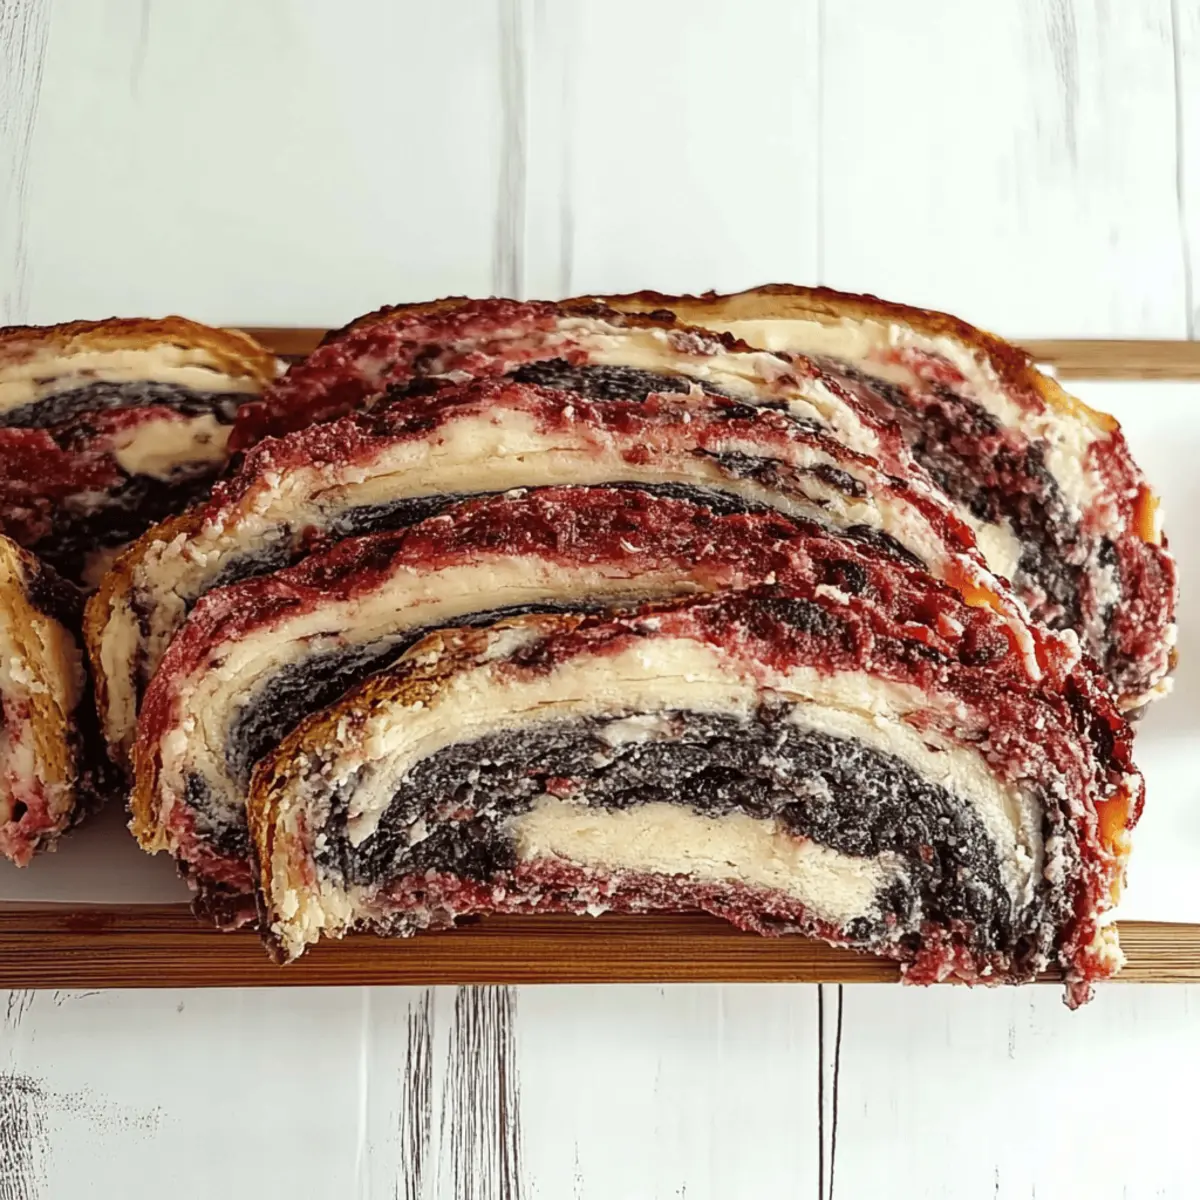
Visual Delight: The swirled color pattern makes each loaf a stunning centerpiece.
Quick Prep: With just 5 minutes, you can get started on this enchanting treat.
Unique Flavor: The intriguing combination of ingredients gives it a distinct taste that sets it apart from regular bread.
Versatile Uses: Perfect for toasting or for spooky-themed gatherings, this bread is ideal for any occasion. Dive into this delightful baking adventure and elevate your home-cooked meals with this unforgettable loaf!
Vampire Bread Ingredients
• Get ready to create an enchanting loaf!
For the Dough
- All-purpose flour – This versatile staple provides the perfect base for your loaf.
- Warm water – Activates the yeast, ensuring your bread rises beautifully.
- Sugar – Adds a hint of sweetness that balances the savory flavors.
- Salt – Enhances the overall taste and helps to control fermentation.
- Yeast – The magic ingredient for a fluffy, airy texture in your Vampire Bread.
For the Color Swirls
- Beet juice/powder – Gives the bread its spooky, blood-red color, and a nutrient boost.
- Activated charcoal – Adds a dramatic dark hue to your loaf, creating unforgettable visual layers.
Optional Add-ins
- Garlic powder – Infuse your dough with a subtle savory flavor, perfect for those who love a hint of spice.
- Herbs de Provence – Elevates the flavor profile with fragrant notes that pair beautifully with the bread’s unique colors.
Get ready to create a loaf that's not only a feast for the eyes but also a delightful addition to your table, making every bite of your Vampire Bread truly special!
Step‑by‑Step Instructions for Vampire Bread
Step 1: Prepare the Dough
In a large mixing bowl, combine all-purpose flour, warm water, sugar, salt, and yeast. Use a wooden spoon to mix until a shaggy dough forms. Knead for about 5 minutes on a lightly floured surface until smooth and elastic. Your dough should feel slightly sticky but hold its shape well, giving you the perfect base for your enchanting Vampire Bread.
Step 2: Create the Color Swirls
Divide the dough into two equal portions. To one portion, add beet juice or powder, mixing until fully incorporated for vibrant red hues. In the second portion, mix in activated charcoal for that dramatic dark color. Ensure both doughs are well combined, creating a striking visual contrast that will dazzle when baked.
Step 3: Shape the Loaf
On a clean surface, flatten each colored dough separately, then layer them on top of each other. Roll the layered dough tightly into a log shape, pinching the seams to seal in the colors. Gently shape the log into a loaf form and place it in a greased loaf pan. This will help achieve those beautiful swirls in your final Vampire Bread.
Step 4: Let It Rise
Cover the loaf with a damp kitchen towel and let it rise in a warm place for about 2 hours. The dough should double in size, appearing soft and puffy. This step is crucial for achieving the perfect airy texture. You’ll know it’s ready when you can gently poke it, and the dough springs back slowly.
Step 5: Preheat and Bake
Preheat your oven to 375°F (190°C). Once the dough has risen, uncover it and transfer the loaf to the preheated oven. Bake for 30 minutes or until the loaf is golden brown on the top and sounds hollow when tapped. Your kitchen will fill with a delightful aroma, a sure sign that your Vampire Bread is nearing completion!
Step 6: Cool and Serve
After baking, remove the loaf from the oven and allow it to cool in the pan for about 10 minutes. Then transfer it to a wire rack to cool completely. Once cooled, slice into the bread to reveal the captivating swirls. Your Vampire Bread is ready to be enjoyed as a unique treat, perfect for sharing at gatherings or enhancing your own meals!
How to Store and Freeze Vampire Bread
Room Temperature: Keep your Vampire Bread wrapped in plastic wrap or in an airtight container for up to 3 days to maintain its freshness.
Fridge: If you want to extend its shelf life, store the bread in the fridge for about a week, wrapped well to prevent drying out.
Freezer: For longer storage, wrap the Vampire Bread tightly in foil or freezer-safe plastic wrap, and freeze for up to 3 months. Thaw overnight in the fridge before enjoying.
Reheating: To enjoy your Vampire Bread warm, simply slice and toast it or place it in a preheated oven at 350°F (175°C) for about 10 minutes after thawing.
What to Serve with Vampire Bread?
As you slice into this striking loaf, imagine the delightful pairings that will elevate your dining experience.
-
Garlic Herb Butter: This rich, aromatic spread adds a savory kick, perfect for slathering on warm slices.
-
Creamy Tomato Soup: A classic pairing that’s both comforting and satisfying, balancing the unique flavors of Vampire Bread.
-
Fresh Arugula Salad: The peppery greens bring a crisp freshness that complements the richness of the bread. Toss with a light vinaigrette for added zing.
-
Cheese Platter: An assortment of cheeses—think sharp cheddar or creamy brie—provides a perfect contrast to the bread's texture and flavors.
A homemade cheese board can be a creative presentation, inviting your guests to explore different bites alongside their bread.
-
Spicy Dipping Sauce: Add a little heat with a zesty dipping sauce, such as sriracha aioli, to enhance every flavorful bite.
-
Sparkling Cider: A refreshing beverage to wash down the Vampire Bread and celebrate the spooky occasion with fizz and fun.
-
Chocolate Mousse: Finish the meal on a sweet note with a rich, velvety dessert that contrasts nicely with the bread's savory elements.
Each of these pairings not only enhances the unique profile of your Vampire Bread but also adds layers of texture and flavor that will delight your taste buds. Enjoy crafting a full meal!
Vampire Bread Variations to Try
Feel free to make this enchanting loaf uniquely yours with these fun twists and replacements!
-
Dairy-Free: Substitute any milk with almond or oat milk for a lactose-free delight. The nutty flavor complements the spooky aesthetic beautifully.
-
Gluten-Free: Use a gluten-free all-purpose flour blend to allow everyone to enjoy this festive treat. Just be sure to check that your blend includes xanthan gum for the right texture.
-
Herb-Infused: Throw in parsley or rosemary to amp up the flavor. This addition brings an earthy aroma that will elevate your baking experience.
-
Sweetened Swirls: Instead of beet juice, use cranberry juice for a sweeter, slightly tart taste. This twist can surprise your guests and adds joy to your bread!
-
Nutty Texture: Add chopped walnuts or pecans to the dough for a satisfying crunch. The nutty notes offer a delightful contrast to the soft, airy texture.
-
Spicy Kick: Incorporate red pepper flakes into your dough for a fiery version of Vampire Bread. The surprising heat will tickle your taste buds and awaken your senses.
-
Bold Color: Experiment with spinach or purple cabbage for a vibrant green or purple variety. These natural color additives give the bread even more visual flair without straying from its delicious roots.
-
Wild Yeast: Try using a sourdough starter in place of traditional yeast for a tangy flavor profile. This method requires a bit of patience but the resulting depth of flavor is well worth the wait.
Whether you prefer classic flavors or want to spice things up, these variations ensure that your Vampire Bread becomes a cherished recipe for years to come! You can also check out other unique ideas to pair with this loaf, like a herbed olive oil dip or try to make it even more adventurous by adding flavors reminiscent of a wild mushroom bread. Happy baking!
Make Ahead Options
These delightful Vampire Bread loaves are perfect for busy weeknights and meal prep enthusiasts! You can mix the dough and form the loaf up to 24 hours in advance, but make sure to refrigerate it covered to prevent it from over-proofing. If you prefer, create the color swirls and shape the loaf up to 3 days ahead—just wrap it tightly in plastic wrap after shaping and place it in the fridge. When you're ready to bake, simply allow the loaf to come to room temperature for about 30 minutes, preheat your oven, and bake as directed. This method keeps your Vampire Bread just as delicious while saving precious time when you need it most!
Tips for the Best Vampire Bread
- Color Consistency: Ensure even mixing of the beet juice and activated charcoal to achieve vibrant, defined swirls in your Vampire Bread. Skipping this step can lead to a muddled appearance.
- Dough Texture: Knead the dough until smooth and elastic; if it feels too dry or too sticky, adjust with a little water or flour for the perfect consistency.
- Rising Time: Don't rush the rising process! Allowing the dough to properly double in size is key to a light and airy loaf, so be patient.
- Baking Temperature: Preheat your oven thoroughly before baking to ensure an even rise and proper cooking. An unheated oven can lead to a dense final product.
- Cooling Before Slicing: Let the Vampire Bread cool completely before slicing to maintain its structure and prevent a gummy texture. Enjoy the mystique!
Vampire Bread Recipe FAQs
How do I select the best ingredients for Vampire Bread?
Absolutely! For the best results, choose all-purpose flour that feels fresh and has no lumps for that perfect dough texture. When picking beet juice, opt for 100% beet juice, avoiding those with added sugars or preservatives. Look for activated charcoal specifically made for culinary use—this ensures safety and the best color for your spooky swirls!
How should I store my Vampire Bread to keep it fresh?
I recommend wrapping your Vampire Bread tightly in plastic wrap or placing it in an airtight container at room temperature for up to 3 days. If you want to keep it longer, store it in the refrigerator where it can last about a week. Just be sure to wrap it well to avoid that dried-out texture!
Can I freeze Vampire Bread? How do I do it?
Yes, you can definitely freeze your Vampire Bread! For best results, make sure it's completely cooled, then wrap it tightly in foil or freezer-safe plastic wrap. It’ll stay good for up to 3 months. When you’re ready to enjoy it, thaw the bread overnight in the fridge. For a quick refresh, pop it in a preheated oven at 350°F (175°C) for about 10 minutes to restore its warm, fresh-baked flavor!
What do I do if my bread isn't rising properly?
Very good question! If your Vampire Bread isn't rising, it could be due to old or inactive yeast. Always check the expiration date on your yeast packet, and remember to use warm water—not hot—to activate it (110°F is perfect!). If the dough hasn't doubled after 2 hours, try moving it to a warmer spot, or even place it in the oven with just the light on for extra warmth.
Are there any dietary considerations for Vampire Bread?
Definitely! If you have any allergies, particularly to gluten or yeast, you can try using gluten-free all-purpose flour and a gluten-free yeast alternative. Additionally, the optional add-ins like garlic powder should be avoided for those with garlic allergies. This enchanting recipe is usually suitable for vegetarians and can be vegan-friendly if you ensure all ingredients meet those dietary needs. Always double-check the labels for any additives!
Decadent Vampire Bread: A Spooky Twist on Homemade Loaf
Ingredients
Equipment
Method
- In a large mixing bowl, combine all-purpose flour, warm water, sugar, salt, and yeast. Use a wooden spoon to mix until a shaggy dough forms.
- Knead for about 5 minutes on a lightly floured surface until smooth and elastic.
- Divide the dough into two equal portions. To one portion, add beet juice or powder, mixing until fully incorporated.
- In the second portion, mix in activated charcoal for that dramatic dark color.
- On a clean surface, flatten each colored dough separately, then layer them on top of each other.
- Roll the layered dough tightly into a log shape, pinching the seams to seal in the colors. Place it in a greased loaf pan.
- Cover the loaf with a damp kitchen towel and let it rise in a warm place for about 2 hours.
- Preheat your oven to 375°F (190°C). Bake the loaf for 30 minutes or until golden brown.
- Remove the loaf from the oven and let it cool for about 10 minutes, then transfer to a wire rack.
- Slice into the bread to reveal the captivating swirls.


Leave a Reply