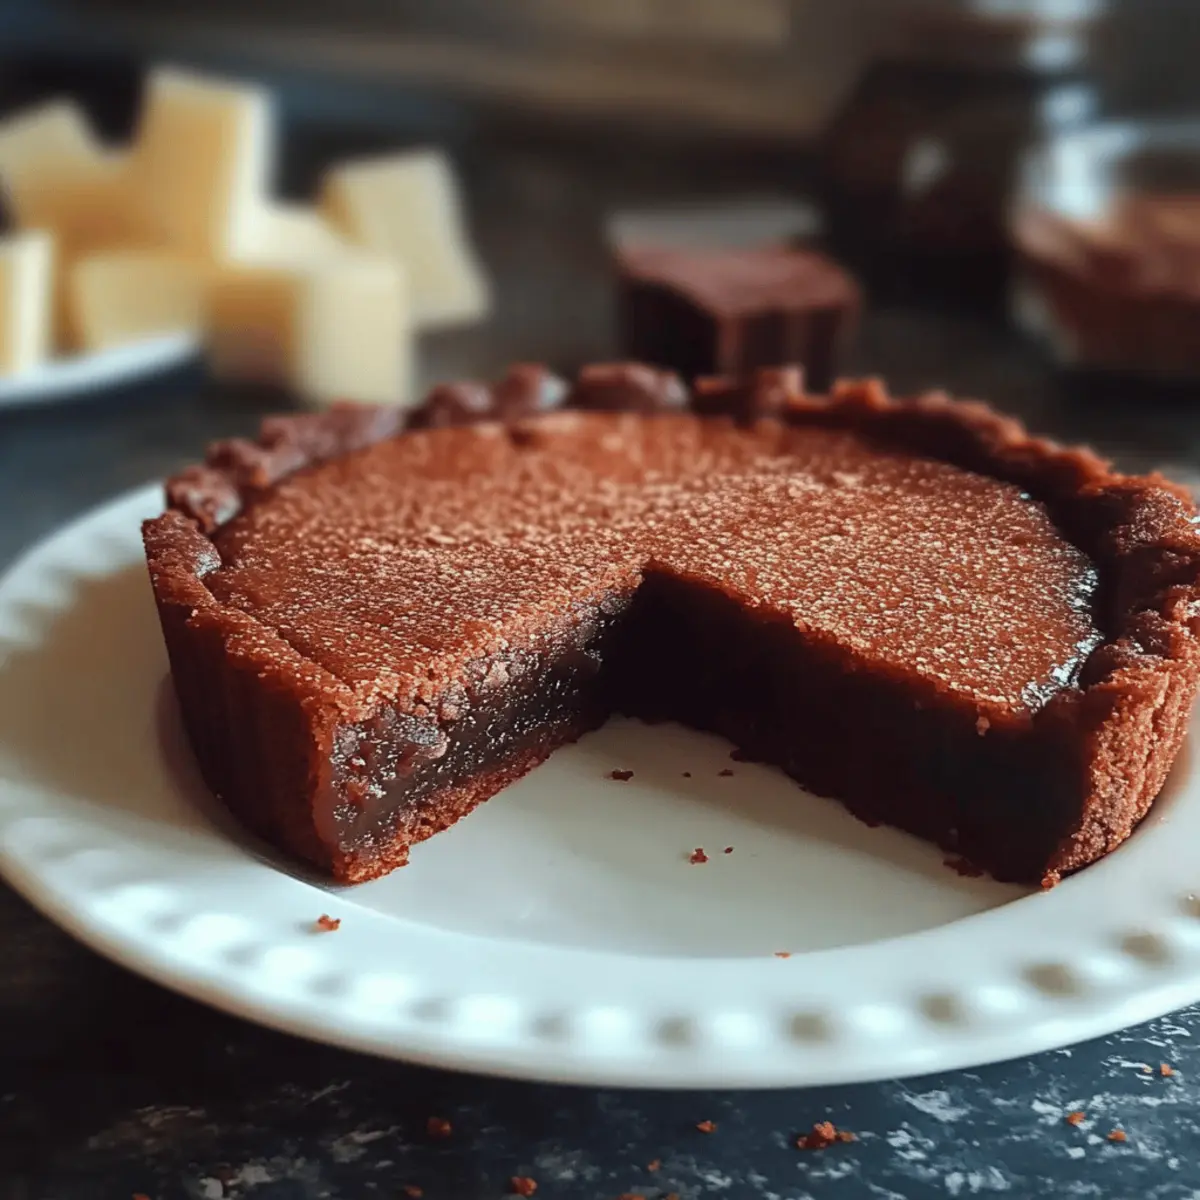
One evening, while sifting through old family recipes, I stumbled upon a handwritten note for the Italian Chocolate Tart, or Crostata al Cioccolato. Instantly, the rich, comforting scent of freshly baked pastry filled my mind, and I knew I had to recreate it. This tart is a true masterpiece—an elegant dessert that pairs buttery cocoa crust with a silky chocolate filling, perfect for impressing guests or simply indulging yourself. The magic of this Italian Chocolate Tart lies in its quick prep time and its ability to be made ahead, making dessert feel effortless. Get ready to elevate your dessert game and treat your taste buds; trust me, everyone will want a slice! Curious about how easy it is to whip up this delightful treat? Let me share the details!
Why is this tart so irresistible?
Decadent, this Italian Chocolate Tart is a chocolate lover's dream come true! Simple to make, with just a few ingredients needed, you'll find yourself effortlessly crafting this show-stopper. Gorgeous presentation makes it perfect for gatherings, and the silky chocolate filling is pure bliss. Impressive flavors that transport you straight to Italy will leave your guests craving more. Plus, you can easily prepare it ahead of time—a win for any busy chef! If you love chocolate, don’t miss out on checking out our other delectable desserts!
Italian Chocolate Tart Ingredients
• Ready to whip up this delightful Italian Chocolate Tart? Here’s what you’ll need!
For the Tart Crust
- 200 g flour – This provides the base texture for a flaky, delicious crust.
- 100 g granulated sugar – Sweetens the crust and complements the cocoa.
- 40 g cocoa powder – Adds that rich chocolate flavor we love in this tart.
- ¼ teaspoon salt – Balances the sweetness and enhances the flavors.
- 120 g cold butter – Keeps the crust buttery and flaky, so don’t skip the chill!
- 1 egg – Binds the ingredients together for a perfect dough.
- 1 egg yolk – Extra richness to make the crust even more delightful.
For the Chocolate Filling
- 400 ml milk – Creates a creamy consistency that unites the filling beautifully.
- 4 egg yolks – Adds richness and helps thicken the filling.
- 80 g granulated sugar – Sweetens the filling to balance the dark chocolate.
- 40 g flour – Aids in thickening the mixture for that luscious texture.
- 200 g dark chocolate – The star of the show, giving the filling its heavenly chocolaty goodness.
Now you’re all set to create this indulgent Italian Chocolate Tart that will impress everyone around your table!
Step‑by‑Step Instructions for Italian Chocolate Tart
Step 1: Prepare the Tart Crust
In a mixing bowl, whisk together 200 g flour, 100 g granulated sugar, 40 g cocoa powder, and ¼ teaspoon salt until well combined. Then, cut in 120 g of cold butter using a pastry cutter or your fingers until the mixture resembles coarse crumbs. This step is crucial for achieving that flaky, delicious crust.
Step 2: Form the Dough
Next, add 1 egg and 1 egg yolk to the crumbly mixture, mixing until a cohesive dough forms. If necessary, use your hands to bring the dough together gently, ensuring not to overwork it. Once the dough is uniform, wrap it in plastic wrap and refrigerate for at least 30 minutes to firm up.
Step 3: Roll Out the Dough
After chilling, preheat your oven to 180°C (350°F). Dust a clean, floured surface with flour and roll out the chilled dough to roughly ⅛-inch thick, ensuring it fits a 9-inch tart pan. Aim for a nice circle that will easily cover the bottom and sides of the pan for your Italian Chocolate Tart.
Step 4: Fit the Dough into the Pan
Carefully transfer the rolled-out dough into the prepared tart pan, pressing it evenly into the edges. Trim any excess dough from the edges for a neat finish. To prevent bubbling during baking, prick the bottom evenly with a fork, ensuring a beautiful, level base for your tart.
Step 5: Bake the Crust
Place the tart shell in the preheated oven and bake for 15 minutes or until slightly firm. Keep an eye on it to ensure it does not overbake; it should appear dry but not browned. Once done, remove the tart shell and allow it to cool completely on a wire rack as you prepare the filling.
Step 6: Prepare the Chocolate Filling
In a saucepan, heat 400 ml of milk over medium heat until it’s steaming but not boiling. While the milk warms, whisk together 4 egg yolks, 80 g granulated sugar, and 40 g flour in a separate bowl until smooth. This mixture will thicken beautifully when combined with the hot milk.
Step 7: Combine Mixtures Slowly
Gradually pour the hot milk into the egg yolk mixture, whisking constantly to avoid curdling. This slow incorporation is crucial for a silky filling. Once combined, return the mixture to the saucepan and cook over medium heat, stirring continuously until it thickens and coats the back of a spoon—about 5-7 minutes.
Step 8: Melt the Dark Chocolate
Remove the thickened filling from heat and immediately stir in 200 g of dark chocolate until it is completely melted and the mixture is smooth. This addition is what gives the Italian Chocolate Tart its rich, indulgent flavor, bringing all your hard work to life.
Step 9: Fill the Tart Shell
Pour the luscious chocolate filling into the cooled tart shell, using a spatula to spread it evenly. This way, you ensure each slice will have the same decadent experience. Let the tart cool at room temperature for a few minutes before transferring it to the refrigerator.
Step 10: Chill Before Serving
Refrigerate your Italian Chocolate Tart for at least 30 minutes to set the filling. This chilling time allows the flavors to meld beautifully while firming up the filling. Once ready, consider garnishing with chocolate shavings or nuts for an extra touch before slicing into this delightful dessert.

Italian Chocolate Tart Variations
Feel free to get creative and customize your Italian Chocolate Tart with these fun variations that will delight your taste buds!
-
Gluten-Free: Substitute all-purpose flour with a gluten-free flour blend for a deliciously inclusive dessert. You won’t miss the wheat one bit!
-
Nutty Crust: Add 50 g of ground almonds to the crust mixture for an extra nutty flavor and a delightful texture that elevates the tart.
-
Mint Infusion: Stir in 1 teaspoon of peppermint extract into the chocolate filling for a refreshing and festive twist. Perfect for holiday gatherings!
-
Spicy Kick: Incorporate a pinch of cayenne pepper or chili powder into the chocolate filling. The subtle heat will surprise and enchant your guests, creating a bold flavor contrast.
-
Citrus Zest: Add zest from one orange or lemon to the filling for a bright, cheerful flavor that pairs beautifully with the rich chocolate. It's like a sunny day on your plate!
-
Decadent Ganache Topping: Elevate your tart by pouring a layer of warm chocolate ganache over the top. Simply heat cream and pour over chocolate until melted for that silky finish.
-
Fruit Surprise: Top each slice with fresh raspberries or strawberries to add a burst of color and sweetness. Their tartness perfectly balances the rich chocolate.
-
Coffee Infusion: For the coffee lovers, dissolve 1 tablespoon of instant espresso powder in the hot milk before adding it to the egg mixture. This will transform the filling into a mocha delight!
By incorporating these variations, you can transform your Italian Chocolate Tart into something uniquely yours. Enjoy experimenting, and don't forget to share your creations with family and friends! And if you’re looking for more delicious ideas, check out our other delightful desserts!
How to Store and Freeze Italian Chocolate Tart
Fridge: Store leftover slices of Italian Chocolate Tart in an airtight container in the fridge for up to 3 days. This keeps the tart fresh and allows the flavors to develop further.
Freezer: You can freeze the tart if you have leftovers. Wrap individual slices tightly with plastic wrap and then place them in a freezer-safe container. They can last for up to 2 months.
Thawing: To enjoy your frozen tart, simply transfer it to the fridge overnight to thaw. For a quicker option, let it sit at room temperature for about 1 hour before serving.
Reheating: If desired, you can gently warm individual slices in the microwave for about 10-15 seconds, just enough to soften the chocolate filling while keeping the crust nice and flaky.
Expert Tips for Italian Chocolate Tart
Chill the Dough: Ensure your dough is well-chilled before rolling it out. This prevents it from shrinking while baking, keeping your tart perfectly shaped.
Avoid Overmixing: When combining the crust ingredients, mix until just combined to maintain a flaky texture. Overmixing could result in a tough crust for your Italian Chocolate Tart.
Thickening Consistency: When cooking the filling, stir continuously until it thickens enough to coat the back of a spoon. This ensures a silky-smooth tat that won't be runny.
Use Quality Chocolate: For the best flavor, opt for high-quality dark chocolate in your filling. It makes a lot of difference in taste, elevating your tart to delightful heights.
Serve Chilled: Remember to chill the tart for at least 30 minutes before serving. This improves flavor melding and creates a beautiful presentation when slicing.
Make Ahead Options
These delightful Italian Chocolate Tarts are perfect for meal prep enthusiasts! You can prepare the tart crust up to 24 hours in advance. Simply follow the steps to make the dough, wrap it tightly in plastic wrap, and refrigerate. The chocolate filling can also be made ahead and stored in the refrigerator for up to 3 days—just ensure it’s covered to maintain its creamy texture. When it’s time to serve, simply fill the tart shell with the chilled chocolate filling and refrigerate it for about 30 minutes to set. This way, you’ll have a luscious dessert ready to impress with minimal effort, just as delicious as if it were freshly made!
What to Serve with Italian Chocolate Tart
Enhance your dessert experience with delightful pairings that complement this luxurious tart beautifully.
-
Fresh Berries: A medley of vibrant berries adds a refreshing contrast to the rich chocolate, enhancing the overall flavor profile. Their natural acidity balances the sweetness of the tart wonderfully.
-
Whipped Cream: Light, fluffy whipped cream brings a delightful creaminess that pairs perfectly with the tart's dense filling. It's a simple yet elegant touch that amplifies indulgence.
-
Hazelnut Praline: The nutty crunch of hazelnut praline plays well with the smooth texture of the chocolate, adding an extra layer of flavor and a satisfying crunch in each bite.
-
Espresso or Coffee: A warm cup of espresso or coffee accentuates the chocolate's richness while providing a flavorful contrast. It's the perfect ending to your delightful dessert.
-
Vanilla Ice Cream: Creamy vanilla ice cream provides a luscious companion that melts beautifully into the tart, creating an extra-cooling contrast for those who savor something special.
-
Chocolate Ganache Drizzle: Elevate your tart with a silky chocolate ganache drizzle that brings another dimension of chocolate heaven. It makes each slice even more decadent and eye-catching.
-
Mint Leaves: A sprinkle of fresh mint leaves can uplift the dessert’s presentation while offering a refreshing flavor contrast that cleanses the palate after rich bites.
-
Sweet Dessert Wine: A glass of sweet dessert wine pairs harmoniously, enhancing the chocolate's depth and providing a luxurious end to your meal.
-
Caramel Sauce: Drizzling warm caramel sauce on the slice introduces a delicious contrast of flavors, enriching the overall taste. It’s an alluring way to elevate your indulgence!
Italian Chocolate Tart Recipe FAQs
How do I know if my ingredients are fresh enough?
Absolutely! For the best results, ensure your flour is free from lumps and the cocoa powder smells rich and chocolaty. Fresh eggs should have a firm yolk and clear whites. The butter should be firm and cold, while granulated sugar remains dry and free of clumps. If you're using dark chocolate, check for a shiny surface without any white spots, which can indicate age.
How should I store leftover Italian Chocolate Tart?
Very simply! Once your Italian Chocolate Tart is made, slice any leftovers and store them in an airtight container in the refrigerator for up to 3 days. This will keep the tart fresh and enhance the flavors as the ingredients settle!
Can I freeze Italian Chocolate Tart, and how?
Yes, you can freeze it! First, let the tart cool completely, then wrap individual slices tightly in plastic wrap. Place them in a freezer-safe container or a resealable bag. Your tart can be stored for up to 2 months. For serving, just transfer a slice to the refrigerator overnight to thaw, or let it sit at room temperature for about an hour.
What if my tart crust shrinks during baking?
Don't worry; it happens to the best of us! If your crust shrinks, it may be due to not chilling the dough long enough. Make sure to refrigerate the dough for at least 30 minutes before rolling it out. Also, avoid overworking the dough, as this can cause it to become tough and shrink during baking.
Is the Italian Chocolate Tart suitable for people with allergies?
Definitely! However, keep in mind that this recipe contains common allergens such as eggs and dairy. For a gluten-free alternative, you could substitute the regular flour with an all-purpose gluten-free blend. Always check the labels for potential cross-contamination if you’re serving someone with severe allergies.
How long does the filling take to thicken?
Great question! When cooking the filling, stir continuously over medium heat until it thickens and coats the back of a spoon—approximately 5-7 minutes. It’s pivotal to keep whisking to prevent any lumps and ensure a silky-smooth filling for your delicious Italian Chocolate Tart!
Decadent Italian Chocolate Tart: A Slice of Heaven
Ingredients
Equipment
Method
- In a mixing bowl, whisk together the flour, granulated sugar, cocoa powder, and salt until well combined.
- Cut in the cold butter until the mixture resembles coarse crumbs.
- Add the egg and egg yolk, mixing until a cohesive dough forms, then refrigerate for at least 30 minutes.
- Preheat your oven to 180°C (350°F), then roll out the chilled dough to roughly ⅛-inch thick.
- Transfer the rolled-out dough into the prepared tart pan, pressing it into the edges and trimming excess.
- Bake the tart shell for 15 minutes or until slightly firm, then allow it to cool on a wire rack.
- In a saucepan, heat the milk over medium heat until steaming.
- Whisk together the egg yolks, granulated sugar, and flour in a separate bowl until smooth.
- Gradually pour the hot milk into the egg yolk mixture, whisking constantly to avoid curdling.
- Return the mixture to the saucepan and cook over medium heat, stirring continuously until it thickens.
- Remove from heat, stir in the dark chocolate until completely melted.
- Pour the filling into the cooled tart shell and let cool before refrigerating for at least 30 minutes.
- Serve chilled, optionally garnished with chocolate shavings or nuts.


Leave a Reply