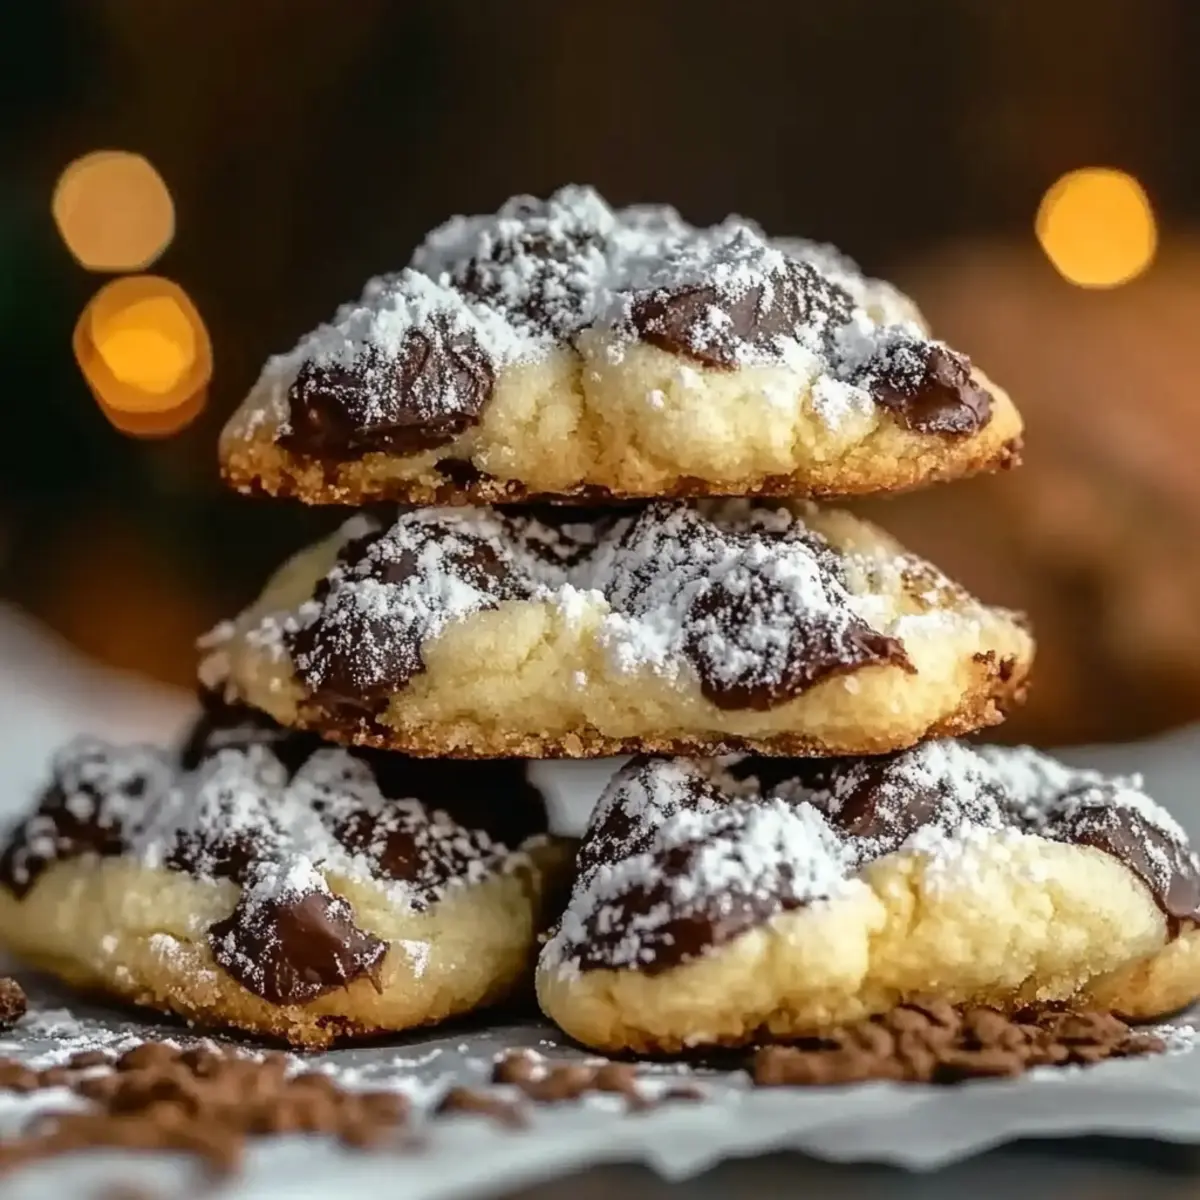
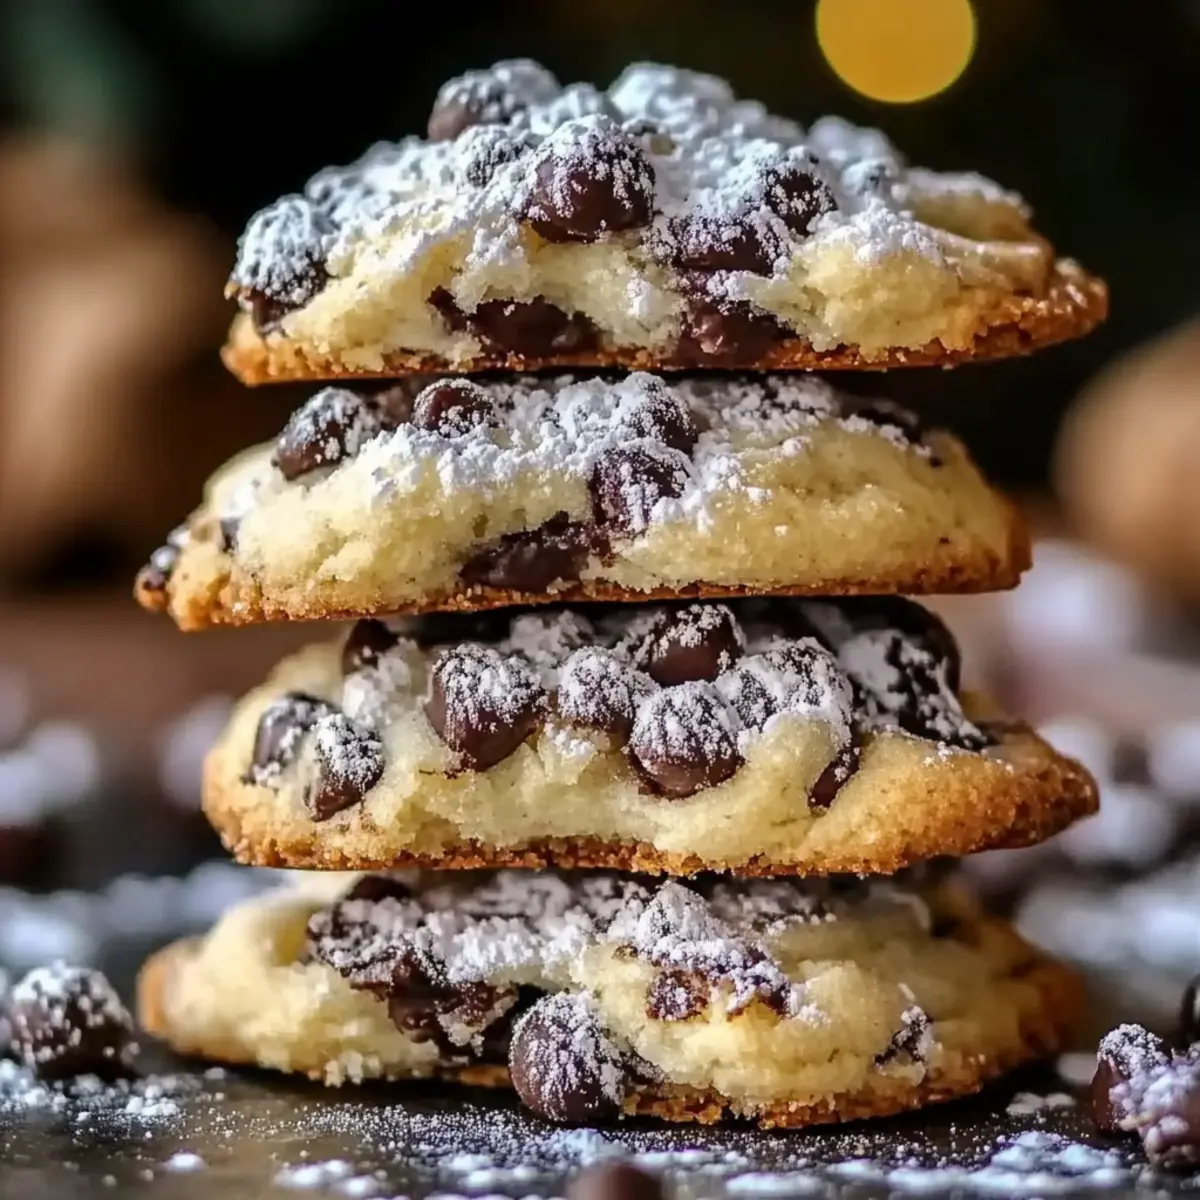
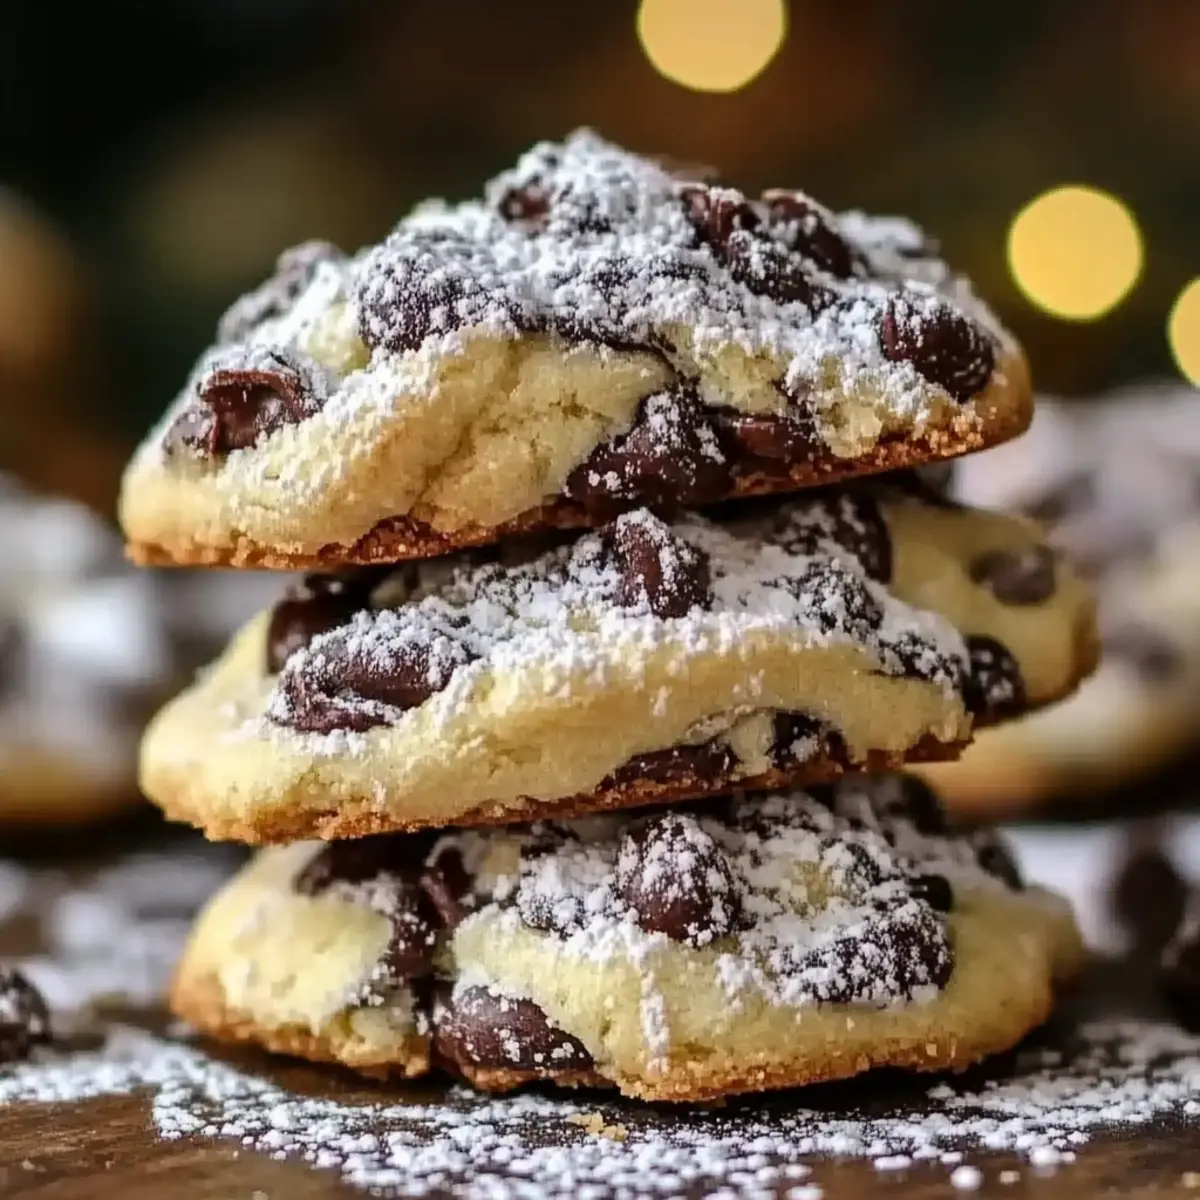
As I stood in my kitchen, the faint aroma of sweet baking began to envelop the room, instantly bringing back memories of family gatherings. Today, I’m excited to share my delightful Cannoli Cookies, a perfect blend of soft texture and rich flavors that pay homage to the classic Italian dessert. These cookies not only come together in just 15 minutes of prep time but also make for a fantastic crowd-pleaser. With their creamy ricotta filling and a zesty lemon twist, they deliver an irresistible charm that elevates any occasion. Whether served warm alongside a cup of coffee or stored for later indulgence, these treats promise to bring a joyful touch to your baking repertoire. Curious about how to make these scrumptious Cannoli Cookies? Let’s dive in!
Why are Cannoli Cookies a Must-Try?
Versatile Delight: These cookies seamlessly combine the classic cannoli flavor with the convenience of a cookie, making them perfect for any occasion.
Irresistible Flavor: With rich ricotta cheese and a splash of lemon zest, each bite bursts with creamy goodness and brightness.
Quick to Make: In just 15 minutes of prep, you can whip up a batch that bakes to perfection in under 15 minutes!
Perfect for Sharing: These Cannoli Cookies are truly crowd-pleasers; they’ll disappear quickly at parties or family gatherings.
Easy Storage: If there are leftovers (which is rare!), they can last up to a week. Check out our tips on freezing dough for even more convenience, just like with these tasty Zucchini Oatmeal Cookies!
Cannoli Cookies Ingredients
Curious what makes these Cannoli Cookies irresistible?
For the Dough
• All-purpose flour – provides the structure and texture for the cookies.
• Baking powder – helps the cookies rise and become fluffy.
• Baking soda – ensures a little magic in the browning process.
• Salt – enhances the sweetness and balances flavors.
• Unsalted butter – keeps the cookies tender and adds richness.
• Granulated sugar – sweetens the dough and creates a nice crust.
• Large egg – binds the ingredients together, contributing moisture.
• Vanilla extract – infuses a warm, sweet base flavor into the dough.
• Almond extract – adds a delightful nutty twist that complements the ricotta.
For the Filling
• Ricotta cheese – creates a creamy texture that pays homage to traditional cannoli.
• Mini chocolate chips – provide little bursts of sweetness that make each bite fun.
• Zest of 1 lemon – brightens the cookies with a citrusy zing, balancing the creaminess.
Embrace the joy of homemade baking—these Cannoli Cookies are bound to become a family favorite!
Step‑by‑Step Instructions for Cannoli Cookies
Step 1: Prepare the Oven and Baking Sheet
Preheat your oven to 350°F (175°C) and line a baking sheet with parchment paper. This will prevent the Cannoli Cookies from sticking and ensure they bake evenly. As the oven warms up, you can gather your ingredients and equipment, setting the stage for a delightful baking experience.
Step 2: Combine Dry Ingredients
In a medium bowl, whisk together the all-purpose flour, baking powder, baking soda, and salt until well-blended. This step is crucial as it helps evenly distribute the leavening agents throughout the flour, ensuring your Cannoli Cookies rise beautifully. Once mixed, set this bowl aside to focus on the wet ingredients next.
Step 3: Cream the Butter and Sugar
In a large mixing bowl, cream the softened unsalted butter and granulated sugar together using an electric mixer until the mixture is light and fluffy, about 3-4 minutes. This process incorporates air into the batter, which contributes to the tender texture of your Cannoli Cookies. Once you achieve a pale consistency, it’s time to add the egg and extracts.
Step 4: Add Egg and Flavorings
Beat in the large egg, vanilla extract, and almond extract into the butter mixture until everything is well-combined and smooth. The egg will add moisture while binding the ingredients together, and the extracts will infuse the dough with delightful flavors. Take a moment to relish the fragrant aroma as it combines.
Step 5: Incorporate Ricotta Cheese
Stir in the ricotta cheese until the mixture is smooth and creamy. This key ingredient is what makes these Cannoli Cookies truly special, offering a rich and unique texture. Make sure to mix well so that the ricotta is fully integrated, creating a luscious base for your cookie dough.
Step 6: Mix in Dry Ingredients
Gradually add the flour mixture into your wet ingredients, stirring gently until just combined. Be careful not to overmix, as this can lead to denser cookies. You want a soft dough that will hold its shape while baking, with a few visible streaks of flour remaining.
Step 7: Fold in Chocolate Chips and Lemon Zest
Now, fold in the mini chocolate chips and lemon zest, distributing them evenly throughout the dough. The chocolate chips will add delightful bursts of sweetness, while the lemon zest will brighten each bite with its zesty aroma. This blend creates a delicious contrast that enhances your Cannoli Cookies.
Step 8: Scoop Dough onto Baking Sheet
Using a tablespoon or cookie scoop, place rounded dollops of dough onto the prepared baking sheet, spacing them about 2 inches apart. This spacing allows the Cannoli Cookies to spread while baking. Aim for uniform sizes for consistent baking and a beautiful presentation.
Step 9: Bake to Perfection
Bake the cookies in your preheated oven for 12-15 minutes or until the edges are golden brown. The centers may appear slightly soft, but they will firm up as they cool. Keep an eye on them to prevent overbaking, as you want a soft yet crisp exterior.
Step 10: Cool and Transfer
Once baked, allow the Cannoli Cookies to cool on the baking sheet for 5 minutes. This resting time helps them set and makes transferring easier. Afterward, gently move them to wire racks to cool completely, letting their flavors develop even further before indulging.

Cannoli Cookies Variations & Substitutions
Feel free to customize these delightful Cannoli Cookies and make them your own with these tasty twists!
-
Gluten-Free: Swap all-purpose flour with a 1:1 gluten-free flour blend for a delicious gluten-free version.
-
Dairy-Free: Use a dairy-free butter alternative and swap ricotta with a dairy-free cream cheese or coconut cream for a creamy texture without the dairy.
-
Nutty Twist: Incorporate ½ cup of finely chopped nuts, such as pistachios or walnuts, to add an extra crunch and bold flavor.
-
Fruity Flavor: Blend in some dried berries like cranberries or cherries; their tartness will beautifully complement the sweetness of the cookies.
-
Spiced Delight: Add 1 teaspoon of cinnamon or nutmeg to the dry ingredients for a warm spice that brings out the flavors of the cookie.
-
Chocolate Lovers: Replace mini chocolate chips with dark chocolate chunks for a richer chocolate experience in every bite.
-
Citrus Surprise: Mix in 1 tablespoon of orange zest in addition to or instead of the lemon zest for a refreshing citrus twist.
-
Heat it Up: If you like a bit of spice, add a pinch of cayenne pepper or sprinkle in some chili flakes for a surprising kick that pairs well with the sweetness!
With these simple swaps and exciting variations, your Cannoli Cookies can cater to all tastes and dietary preferences! And if you’re looking for more delicious recipes, don’t miss these delightful Lemon Ricotta Cookies that also celebrate citrus zest.
What to Serve with Cannoli Cookies
Indulging in Cannoli Cookies opens the door to a world of delightful pairing possibilities, perfect for crafting a wholesome meal.
-
Rich Gelato: The creaminess of gelato complements the soft texture and sweetness of the cookies, creating a mouth-watering dessert experience.
-
Espresso: The bold, robust flavors of espresso balance the sweetness of Cannoli Cookies, making them a classic pairing that elevates your coffee break.
-
Fresh Berries: Juicy strawberries or raspberries add a refreshing, tart note that cuts through the richness, creating a harmonious balance.
-
Whipped Cream: A dollop of lightly sweetened whipped cream enhances the cookies’ delightful flavors and adds a light, airy texture.
-
Zesty Lemonade: Serve with a chilled glass of lemonade for a refreshing, tangy contrast that plays beautifully against the cookies' creamy richness.
-
Chocolate Fondue: Pairing with warm chocolate fondue allows for a fun dipping experience, where each bite becomes a delightful adventure.
-
Hazelnut Coffee: The nutty flavors in hazelnut coffee deepen the taste experience, perfectly complementing the almond notes in Cannoli Cookies.
-
Italian Pastry Wine: A sweet, bubbly wine like Moscato adds a sophisticated touch that pairs deliciously with the cookies’ rich flavors.
How to Store and Freeze Cannoli Cookies
Room Temperature: Store Cannoli Cookies in an airtight container at room temperature for up to 7 days. This keeps them soft and ready for snacking!
Fridge: If you prefer them chilled, store the cookies in a sealed container in the fridge. They’ll be good for up to 1 week, and the cold enhances the flavors.
Freezer: For longer storage, freeze the cookie dough scoops on a baking sheet until solid, then transfer to a freezer bag. They can be stored for up to 3 months. Bake straight from the freezer—just add a couple of extra minutes to the baking time.
Reheating: To enjoy warm Cannoli Cookies, gently reheat them in the microwave for about 10 seconds or in the oven at 250°F (120°C) for 5 minutes.
Expert Tips for Cannoli Cookies
-
Measure Carefully: Use the spoon-and-level method for flour to avoid dense cookies. Too much flour can make the Cannoli Cookies dry and crumbly.
-
Room Temperature Ingredients: Ensure your butter and egg are at room temperature. This helps create a smooth, well-blended dough that rises beautifully during baking.
-
Don’t Overmix: When incorporating the flour, mix until just combined to maintain the light texture. Overmixing can lead to tougher Cannoli Cookies.
-
Chill Dough (Optional): If your dough feels too soft, chilling it for 30 minutes can make it easier to scoop and shape, resulting in perfectly round cookies.
-
Watch the Baking Time: Ovens vary, so start checking for doneness at the 12-minute mark. You want golden edges and a soft center in your Cannoli Cookies.
-
Flavor Variations: Experiment with different extracts like orange or use different chips like white chocolate for a unique twist on these delicious Cannoli Cookies.
Make Ahead Options
These Cannoli Cookies are a fantastic choice for meal prep! You can prepare the cookie dough up to 24 hours in advance and refrigerate it in an airtight container. This step not only saves you time on busy weeknights but also allows the flavors to meld beautifully. When you’re ready to bake, scoop the chilled dough onto a baking sheet and bake as directed. Additionally, you can freeze the unbaked cookie dough balls for up to 3 months; just freeze them initially on a baking sheet before transferring them to a freezer bag. Bake directly from frozen, adding a couple of minutes to the baking time, and enjoy these delightful Cannoli Cookies just as fresh as if you made them on the spot!
Cannoli Cookies Recipe FAQs
What should I look for when selecting ricotta cheese?
When choosing ricotta cheese, opt for fresh, full-fat versions for the best flavor and creaminess. Check the packaging for a recent expiration date, and give the container a gentle shake; it should feel thick, not watery. Avoid brands with added preservatives or excessive sugar, which may alter the taste of your Cannoli Cookies.
How should I store Cannoli Cookies once they are baked?
Store your Cannoli Cookies in an airtight container at room temperature for up to 7 days. If you prefer them chilled, a sealed container in the fridge will work beautifully for another week. Just make sure to keep them away from any strong odors!
Can I freeze the dough for Cannoli Cookies?
Absolutely! To freeze the dough, scoop rounded tablespoon-sized portions onto a baking sheet lined with parchment paper. Freeze until solid, then transfer them to a freezer bag or airtight container. This way, you can store the dough for up to 3 months. When you’re ready to bake, simply preheat the oven and add a couple of extra minutes to the baking time!
What should I do if my Cannoli Cookies come out too dry?
If your Cannoli Cookies turn out dry, it’s often due to over-measuring the flour or overbaking. Make sure to use the spoon-and-level method for measuring flour to avoid excess. Also, keeping an eye on the cookies and removing them when they’re just turning golden can help achieve a soft texture. If ever in doubt, a drizzle of glaze or a light sprinkle of powdered sugar can add moisture and sweetness!
Are there any allergy considerations for Cannoli Cookies?
Certainly! This recipe contains common allergens such as dairy (due to ricotta cheese and butter), eggs, and gluten. If making for someone with allergies, consider using dairy-free ricotta alternatives, flax eggs instead of chicken eggs, and gluten-free flour blends. Always double-check labels for hidden allergens, especially in chocolate chips!
Can I use different flavorings or add-ins for the Cannoli Cookies?
Very! Feel free to change up the flavor profile by using different extracts like hazelnut or orange instead of almond. You can also incorporate other mix-ins such as toasted nuts or dried fruit. Just remember to balance the flavors so that each bite still reflects the essence of the Cannoli Cookies you love!
Deliciously Soft Cannoli Cookies You’ll Crave Again and Again
Ingredients
Equipment
Method
- Preheat your oven to 350°F (175°C) and line a baking sheet with parchment paper.
- In a medium bowl, whisk together the all-purpose flour, baking powder, baking soda, and salt.
- In a large mixing bowl, cream the softened unsalted butter and granulated sugar together using an electric mixer until light and fluffy.
- Beat in the large egg, vanilla extract, and almond extract into the butter mixture until smooth.
- Stir in the ricotta cheese until smooth and creamy.
- Gradually add the flour mixture into the wet ingredients, stirring gently until just combined.
- Fold in the mini chocolate chips and lemon zest.
- Using a tablespoon or cookie scoop, place rounded dollops of dough onto the prepared baking sheet.
- Bake for 12-15 minutes or until the edges are golden brown.
- Allow the cookies to cool on the baking sheet for 5 minutes before transferring them to wire racks to cool completely.


Leave a Reply