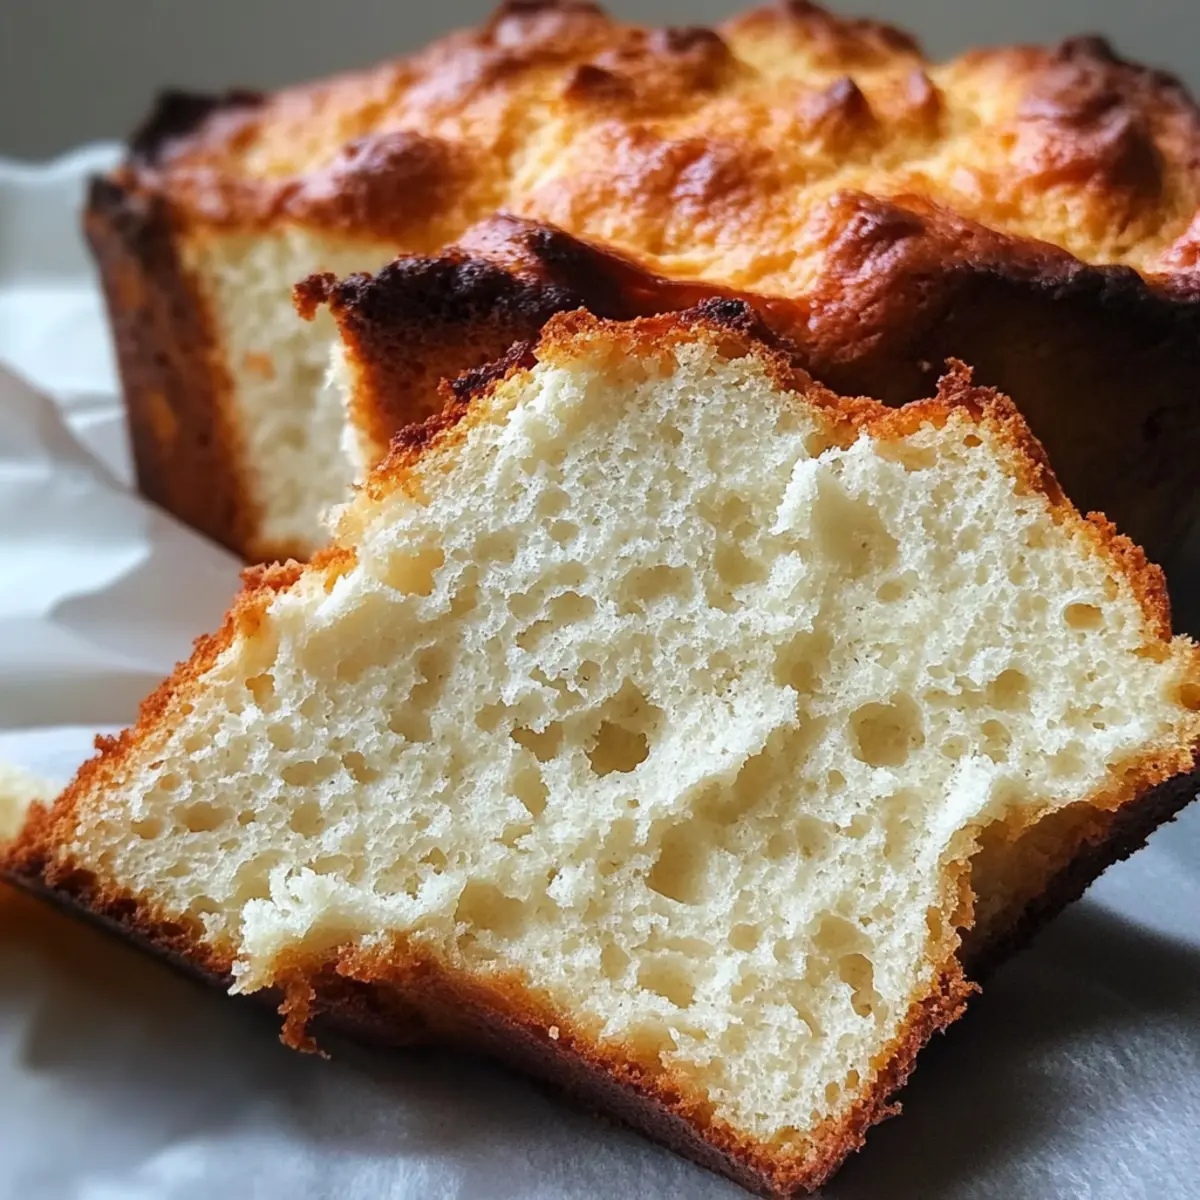
The aroma wafting from my kitchen was unmistakable—warm and comforting, almost like a hug from an old friend. That’s how I felt the first time I baked this Yogurt Bread Gluten-Free Zero Carb Option, a delightful twist on traditional bread that doesn’t compromise on texture or taste. Made primarily with wholesome Greek yogurt and nut flours, it's not only quick to whip up but also a fantastic low-carb alternative that even non-gluten-free folks will adore. Whether you're slathering it with creamy butter or pairing it with a vibrant soup, this bread opens the door to endless culinary possibilities. Just wait until you try it—what delicious toppings will you choose to showcase your freshly baked loaf?
Why is this Yogurt Bread a game changer?
Deliciously Unique: This gluten-free yogurt bread combines the tanginess of yogurt with the nutty flavors of almond and coconut flours, creating a distinct taste that elevates your bread game.
Zero Carb Option: With the ability to adapt this recipe to a zero-carb version, you can enjoy wholesome bread without the guilt.
Easy to Make: Whipping up this bread requires only a few simple steps, making it perfect for busy chefs looking for homemade goodness.
Crowd-Pleasing Appeal: Serve it plain, with toppings of your choice, or alongside your favorite soups and salads—this versatile loaf is sure to impress everyone at the table!
Time-Saving: With a total prep and bake time of just over two hours, you can enjoy fresh bread without spending all day in the kitchen. If you're looking for more creative recipes, don't miss our guide on Healthy Baking Substitutions.
Yogurt Bread Gluten-Free Zero Carb Option Ingredients
For the Wet Ingredients
• Full-Fat Greek Yogurt – Provides moisture and a creamy texture, key for this yogurt bread.
• Eggs – Essential for structure and binding the ingredients together. Room temperature eggs work best!
• Olive Oil or Melted Butter – Adds richness; use olive oil for a lighter option or butter for a richer flavor.
For the Dry Ingredients
• Almond Flour – The base flour that gives your bread a nutty flavor, contributing to its gluten-free identity.
• Coconut Flour – A small amount enhances the texture; remember, it absorbs moisture like a sponge!
• Ground Psyllium Husk – A must for binding and keeping the bread from crumbling; use the powder form for best results.
• Gluten-Free Baking Powder – Ensures your bread rises beautifully without the gluten; choose aluminum-free for a healthier option.
• Baking Soda – Helps the bread lift, working in tandem with other leavening agents.
• Fine Sea Salt – Enhances the flavor profile, making every bite delicious.
For Sweetening (optional)
• Sweetener of Choice – Use erythritol, allulose, or monk fruit if you prefer a touch of sweetness without the carbs; adjust to your taste!
For Adjusting Consistency
• Water or Unsweetened Almond Milk – Add slowly to achieve your desired batter thickness; important for the zero-carb option!
Step‑by‑Step Instructions for Yogurt Bread Gluten-Free Zero Carb Option
Step 1: Prepare the pan
Preheat your oven to 350°F (175°C) with the conventional setting. While the oven warms, grease an 8.5 x 4.5 inch or 9 x 5 inch loaf pan with olive oil or melted butter. For easy removal of your finished Yogurt Bread Gluten-Free Zero Carb Option, line the pan with parchment paper strips, allowing for overhang.
Step 2: Mix the wet ingredients
In a medium mixing bowl, whisk together 1 cup of full-fat Greek yogurt, 4 large room-temperature eggs, and 2 tablespoons of olive oil or melted butter until fully combined and smooth. If you want to enhance the flavor, add a splash of apple cider vinegar or lemon juice, stirring until well mixed.
Step 3: Combine the dry ingredients
In a large bowl, whisk together 1 cup of fine almond flour, ⅓ cup of coconut flour, 3 tablespoons of ground psyllium husk, 2 teaspoons of gluten-free baking powder, 1½ teaspoons of baking soda, 1½ teaspoons of fine sea salt, and the optional sweetener. This will break up any clumps and ensure even distribution for your delicious bread.
Step 4: Bring the batter together
Pour the smooth wet mixture into the bowl containing the dry ingredients. Using a spatula, gently stir until they are just combined. Within 30–60 seconds, you'll notice the psyllium thickening the batter; aim for a thick, spreadable dough that will shape your Yogurt Bread Gluten-Free Zero Carb Option beautifully.
Step 5: Adjust for the zero-carb option
For those choosing a zero-carb twist, if you've opted for defatted almond flour and extra psyllium, it's important to achieve the right consistency. Gradually add water or unsweetened almond milk, one tablespoon at a time, until the batter reaches a thick yet smooth texture. If the mixture feels too stiff, incorporate an additional egg for moisture.
Step 6: Add flavorings (optional)
If desired, now is the time to fold in fresh herbs, garlic powder, shredded cheese, or seeds to enhance the flavor. Be gentle while mixing to avoid overworking the batter, which could affect the texture of your finished Yogurt Bread Gluten-Free Zero Carb Option.
Step 7: Fill the pan
Spoon the batter into your prepared loaf pan, pressing it firmly into the corners and smoothing the top with your spatula. To create an appealing shape, mound the batter slightly in the center. If you wish, sprinkle additional seeds or cheese on top for an extra touch.
Step 8: Bake the bread
Place the filled pan on the middle rack of your preheated oven and bake for 40–50 minutes. Start checking around the 35-minute mark; the top should appear golden and springy to the touch. If you notice it browning too quickly, lightly tent the loaf with foil to prevent burning.
Step 9: Cool the loaf properly
Once baked, let the pan sit on a cooling rack for 15–20 minutes. After this initial cooling period, carefully lift the bread out using the parchment paper handles. Allow the loaf to cool completely on the rack for 1–2 hours before slicing; this step prevents gumminess and ensures beautifully clean cuts.
Step 10: Slice and serve
When your Yogurt Bread Gluten-Free Zero Carb Option has cooled, use a sharp serrated knife to slice it into your preferred thickness. Serve it plain, or get creative with toppings like creamy butter, smashed avocado, or pair it with your favorite soups and salads for a delightful meal.
Step 11: Storage
After cooling, store any leftover slices in an airtight container in the refrigerator for 5–6 days. If you’d like to savor your bread longer, freeze individual slices wrapped tightly for 2–3 months. Reheat frozen slices right from the freezer using a toaster or oven for best results.
Make Ahead Options
Preparing this Yogurt Bread Gluten-Free Zero Carb Option in advance saves you time and helps keep meal prep stress-free! You can mix the wet (yogurt, eggs, and olive oil) and dry ingredients (flours, psyllium, baking powder, and salt) separately, refrigerating each component for up to 24 hours. When you’re ready to bake, simply combine the two mixtures, adjust the consistency if needed, and fold in any additional flavorings. For optimal taste and freshness, bake the bread right before serving or store leftovers in an airtight container in the fridge for 5-6 days. Remember, letting it cool completely before slicing will help maintain its delightful texture!
Tips for the Best Yogurt Bread
• Room Temperature Eggs: Always use room temperature eggs; they incorporate better into the batter, ensuring a fluffier Yogurt Bread Gluten-Free Zero Carb Option.
• Don’t Overmix: Gently combine wet and dry ingredients to avoid a dense texture; overmixing can lead to a gummy loaf.
• Proper Cooling: Allow the bread to cool completely before slicing to prevent gumminess; cut too early, and you’ll end up with undesirable results!
• Moisture Adjustment: Add water or almond milk gradually to achieve the right consistency; too much liquid will make the bread overly wet.
• Experiment with Flavor: Feel free to add herbs, seeds, or cheese for a flavor boost—just remember to fold them in gently to maintain the bread's texture.
What to Serve With Yogurt Bread Gluten-Free Zero Carb Option
When you’ve just pulled a warm loaf from the oven, the possibilities for a delicious meal are boundless.
-
Creamy Avocado Spread: A simple mash of ripe avocados adds creaminess and healthy fats that beautifully complement the bread's texture.
-
Rich Tomato Soup: The tangy sweetness of fresh tomato soup creates a warm and comforting pairing that turns lunch into a delightful experience.
-
Garlic Butter Sautéed Spinach: The earthy flavors and vibrant color of this side dish elevate your meal, providing a healthy counterpoint to the bread.
-
Greek Salad: Crisp cucumbers, juicy tomatoes, and briny olives offer a refreshing crunch that contrasts well with the soft texture of the yogurt bread.
-
Herbed Cheese Spread: A spread made with cream cheese, herbs, and spices creates a decadent flavor that’s gorgeous on a slice of warm bread.
-
Lemon Zest Tea: A bright cup of lemon-infused tea perfectly balances the richness of the bread while imprinting a refreshing note that lingers.
This yogurt bread isn’t just a feast on its own—it pairs beautifully with an array of flavors to create a satisfying, well-rounded meal. What combination will you choose?
Yogurt Bread Gluten-Free Zero Carb Option Variations
Feel free to customize this delightful bread recipe with these inviting variations!
-
Herb-Infused: Add 2 tablespoons of your favorite fresh herbs like rosemary or thyme for a fragrant touch.
Experimentation is the heart of cooking—let your palate guide you to create a uniquely flavorful loaf! -
Spicy Kick: Incorporate 1 teaspoon of red pepper flakes or diced jalapeños for a nice heat that warms every bite.
A zesty twist can turn a humble bread into a vibrant star of your meal. -
Cheese Lover's Delight: Fold in ½ cup of shredded cheese such as cheddar or feta for a rich, cheesy flavor.
The melted goodness is sure to be a hit with anyone who loves savory indulgence! -
Sweet Surprise: Enhance the flavor with ¼ cup of dried fruit, like cranberries or raisins, for a hint of natural sweetness.
This uplifting twist can brighten your bread, making it perfect for breakfast or a sweet snack. -
Nutty Texture: Sprinkle ¼ cup of chopped nuts, such as walnuts or pecans, into the batter for crunch and depth.
The contrast of soft bread with crunchy bits will enhance your breakfast experience delightfully! -
Coconut Bliss: Substitute half the almond flour with shredded coconut for a tropical flair.
This adds a lovely moisture to the bread, rounding out its texture beautifully. -
Garlic Lovers Unite: Add 1-2 teaspoons of garlic powder or 2 minced cloves of fresh garlic for an aromatic touch.
Garlic-infused bread can turn ordinary meals into flavorful feasts, inviting around the dinner table!
For more exciting ideas and creative swaps in your baking, check out our helpful guide on Healthy Baking Substitutions and discover how to make every meal special.
Storage Tips for Yogurt Bread Gluten-Free Zero Carb Option
Room Temperature: Store leftover slices covered at room temperature for up to 1 day, but to maintain freshness, it's best kept in the fridge.
Fridge: Place cooled slices in an airtight container or wrap them tightly in plastic wrap in the fridge for up to 5–6 days. This keeps your Yogurt Bread Gluten-Free Zero Carb Option moist and tasty.
Freezer: For longer storage, individually wrap slices in foil or plastic wrap and freeze for 2–3 months. This allows you to enjoy fresh bread whenever cravings strike!
Reheating: When ready to enjoy, simply reheat frozen slices directly in a toaster or oven until warmed through for that freshly baked experience.
Yogurt Bread Gluten-Free Zero Carb Option Recipe FAQs
What yogurt is best for this recipe?
I recommend using full-fat Greek yogurt for the best texture and moisture. Look for unsweetened, plain varieties, as they provide that creamy goodness without added sugars. If you can’t find Greek yogurt, strained plain yogurt can work as an excellent substitute!
How should I store leftover yogurt bread?
Once your Yogurt Bread Gluten-Free Zero Carb Option is cooled, store slices in an airtight container in the fridge for up to 5–6 days. If you’d like to keep it longer, wrap pieces individually and freeze them for 2–3 months. This way, you can always enjoy a fresh slice whenever the craving strikes!
Can I freeze this yogurt bread?
Absolutely! To freeze your Yogurt Bread Gluten-Free Zero Carb Option, slice the bread once it's completely cool. Wrap each slice tightly in plastic wrap or foil and place them in a zip-top freezer bag. When you're ready to eat, simply pop a slice straight from the freezer into a toaster or preheated oven until warm and delightful.
What if my batter is too thick?
If you find your batter is too thick while preparing the Yogurt Bread Gluten-Free Zero Carb Option, don’t worry! Gradually mix in 1–2 tablespoons of water or unsweetened almond milk, stirring just until the desired consistency is achieved. If it still feels too stiff after that, you can add an extra egg to loosen it up—just be cautious not to overmix!
Is this bread suitable for people with nut allergies?
Unfortunately, this Yogurt Bread recipe contains almond flour, which may not be suitable for those with nut allergies. You could explore alternatives like sunflower seed flour or a gluten-free flour blend, keeping in mind that the texture and flavor may vary slightly. Always consult with a healthcare professional for dietary restrictions.
Gluten-Free Yogurt Bread: Zero Carb & Deliciously Easy!
Ingredients
Equipment
Method
- Preheat your oven to 350°F (175°C) and grease a loaf pan with olive oil or melted butter. Line with parchment paper for easy removal.
- In a medium bowl, whisk together Greek yogurt, eggs, and olive oil or melted butter until smooth.
- In a large bowl, whisk together almond flour, coconut flour, psyllium husk, baking powder, baking soda, sea salt, and optional sweetener.
- Pour the wet mixture into the dry ingredients and stir until just combined. The batter should be thick and spreadable.
- For a zero-carb option, gradually add water or almond milk until you reach the desired consistency.
- Optional: Fold in herbs, garlic powder, cheese, or seeds to enhance flavor without overmixing.
- Spoon the batter into the prepared loaf pan, pressing it firmly and mounding slightly in the center.
- Bake for 40-50 minutes until golden and springy. Tent with foil if browning too quickly.
- Allow to cool in the pan for 15-20 minutes, then lift using the parchment paper and cool completely on a rack.
- Slice once fully cooled, serving plain or with your favorite toppings.
- Store leftovers in an airtight container in the fridge for 5-6 days, or freeze individually for 2-3 months.


Leave a Reply